The Complete LXD Tutorial
This guide discusses everything about LXD. We will see how to install LXD and create and manage containers.
What is LXD?
When talking about containers, most of the attention has been on Docker and Kubernetes. However, an older container model, the Linux Container Project (LXC), is still helpful, especially its LXD tool set.
Virtualization can be achieved using a hypervisor or a container.
Hypervisors like Oracle VM offer a layer of abstraction, allowing the guest virtual machine to have isolated access to the host system hardware and resources. Hence, hypervisors require more space and drain the host system resources to run a virtual machine.
In contrast, Linux containers share the host OS kernel, meaning containers do not waste the host’s resources and memory. Therefore, you can have many containers running on one server and the speed and performance for contains are unmatched. To create and manage these containers, you need a container model, such as LXD.
LXD offers container support by simulating a virtual version of the host OS. That way, the container can run without affecting the host’s resources.
Working with LXD Containers
This guide will elaborate on creating a Linux container on Ubuntu using LXD. We will have two sections, installation, and creating the container.
1. Installing LXD
To install LXD, we must first update the apt repository.

Once the apt repository is updated, we can install LXD as a snap package. You can install the latest stable release or specify the LXD version that you want to install
or
$ snap install lxd –channel=latest/stable
This example installs the latest stable release. The snap package will download the package.

Once the download completes, LXD will get installed and display a message confirming that the installation was successful.

With LXD installed, you can manage the LXD server by adding the user to the LXD group. That way, you will not need to be root to manage LXD containers. The command below adds the current user to the LXD group.
Suppose the user is already added, you will get a message confirming the user is already a member of the LXD group.

If you want to add another user to this group, use the syntax below.
Note that the LXD group membership will apply at the next login. You can start a new sh session for it to get applied. Alternatively, you can run the newgrp command, which achieves the same as creating a new ssh session.
Next, we need to confirm the LXD group membership using the id command to ascertain the member we added reflects in the group. The example below confirms the current user for our example was successfully added to the LXD group.

With that, we can create and manage our LXD containers.
2. Creating and Managing Containers
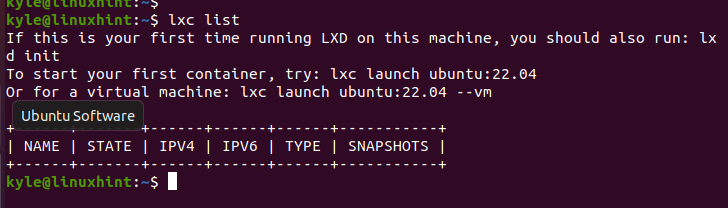
The first thing is to check if there are existing LXD containers on your server. For that, use the list option. Although we are querying the LXD containers, you will note that we are using lxc because LXD is a toolset for the LXC project designed to handle the LXC API.
In this case, we have a fresh LXD install and you will note in the output that we do not have any containers created. Suppose we had a container, it would be listed in the table below alongside its details.
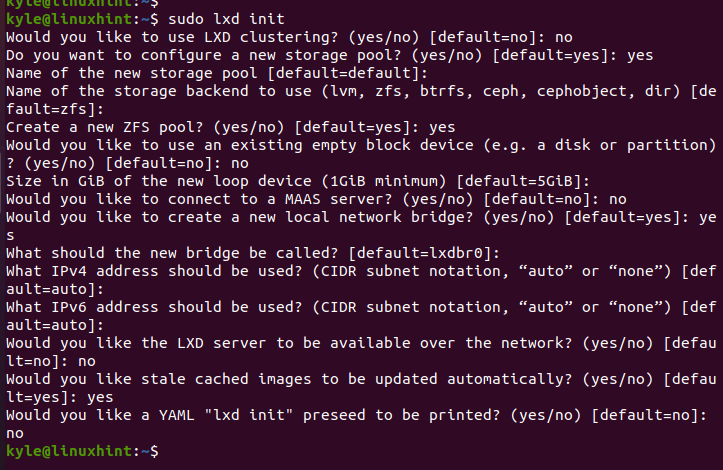
The first step is to initialize the LXC environment using the init option.
This way, LXC will automatically set up the environment by prompting you with different questions to aid in the setup process. If you are unsure how to respond, I recommend pressing the enter key to use the default options. They will work fine. Alternatively, you can configure the setup and choose the options for this tutorial, as in the image below.
Once the LXC environment is set up, you are ready to create your first container.
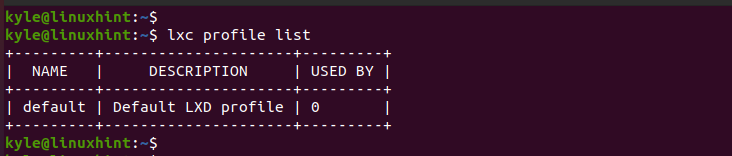
Besides, you can verify various information about the LXD containers. For instance, you can check the available profiles by listing them.
The name for the profile is the one specified when initializing the LXC environment. If you go with the default naming, your profile list will appear like the one below.
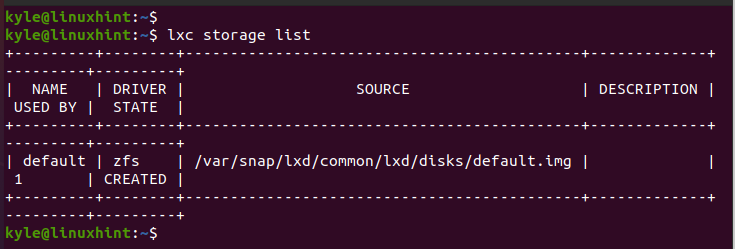
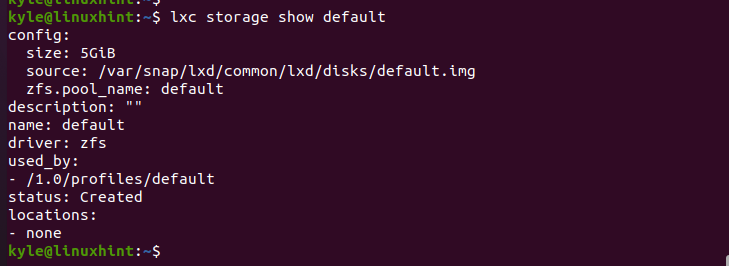
To check the storage information, use the command below.
When you have multiple profiles, you can specify the name of the profile that you want to retrieve its storage information using the show option followed by the profile’s name. For our case, our profile is named default and we can extract its details with the command below.
You will get storage information, such as the size, the name of the created pool, etc.
The good news is that LXD supports creating containers for different Linux distributions. All that is needed is downloading the image for the distro you want, then installing it. The available images you can download are in the LXC’s repository.
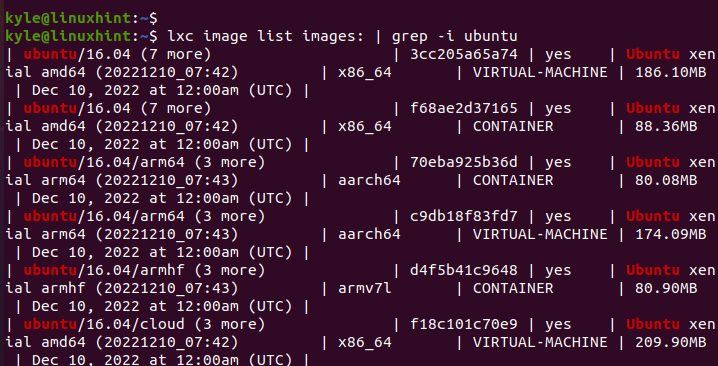
The repository contains different versions of each distro, so you can select which version and architecture work best for your case. Use the below command to list all the available images for all the distros.
Suppose you want to list the images for a specific distro, use the grep command to filter the distro’s name and version, if necessary. Here, we are filtering the images for Ubuntu.

You will note in the output below that we are getting different versions and architectures for the Ubuntu images. You can create a container for any of the listed images.
For this tutorial, let us quickly create a container for Alpine/3.14. Alpine is small and you can run the command below to create a container for it. Depending on your goal, you are free to use any distro for your case.
When creating the container, you must specify the container’s name. So, replace linuxhint1 with the name to use for your container. You will get a message confirming the container has been created and started.

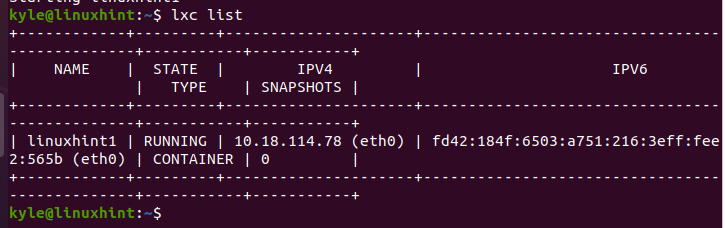
Let us verify that our Alpine container is created by listing the available containers using the list command.
In this output, we can see the container created and its state is currently running, meaning the container is active, and we can use it. The created container is also assigned an IPV4 and IPV6. Creating the container depends on your internet speed and the size of the distro you are creating a container for.
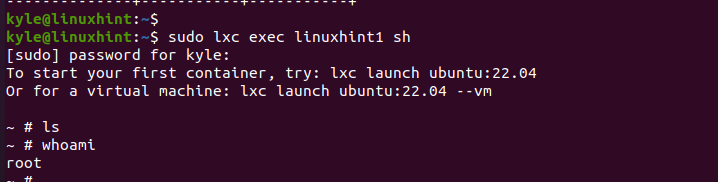
To use the created container, we can access it in a non-login root session by utilizing the exec command. For Alpine, we will use the sh interpreter. For CentOS or Ubuntu, the /bin/bash would work better.
So, access the created container by specifying its name as shown.
Enter the password for the host system to authorize access to the container. Note that we are now in the container as the root user and can execute any command as root.
When you want to close the session, type exit and press enter. Note that exiting a container session does not stop the session. It still runs in the background.

You can add a virtual network interface to containers by specifying their name. Let us first list the available network interface for our system with the command below.
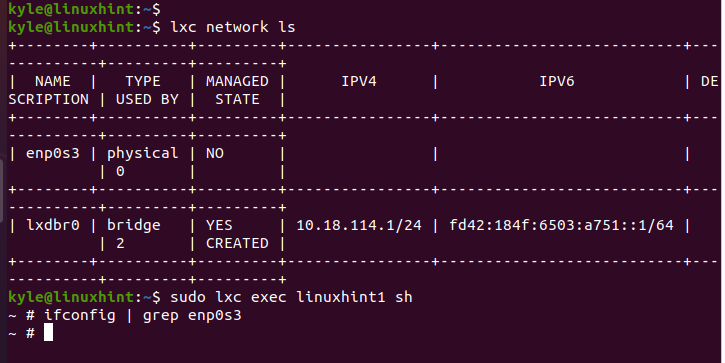
Suppose we wanted to add a new virtual interface for the enp0s3 for our container, we could achieve that by attaching the interface as follows.

Once you have added the network interface, open a new sh session and check if your new virtual interface will reflect.
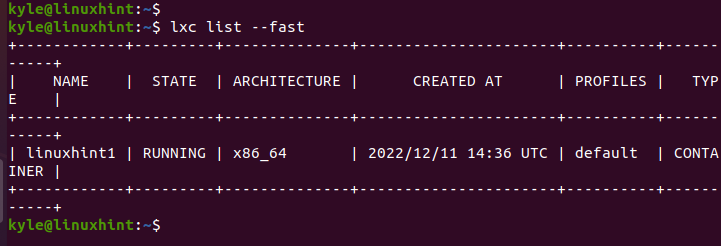
With LXD, you can also check the status and instances of your container to see whether it’s running or stopped. For that, use the list –fast command.
In the output below, we can see that our linuxhint1 container is running in the STATE column. Suppose we had multiple containers. All the instances would have their states and other details in the table below.
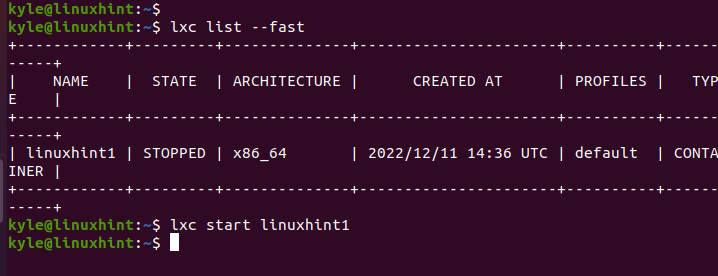
You can start, stop, or restart your container anytime. To stop the container, use the stop keyword followed by the container you want to stop.

Suppose we check the current state of our container. We will note that it is stopped. In that case, we can start it with the command below.
If we have problems with the container, we can quickly restart it with the restart command.

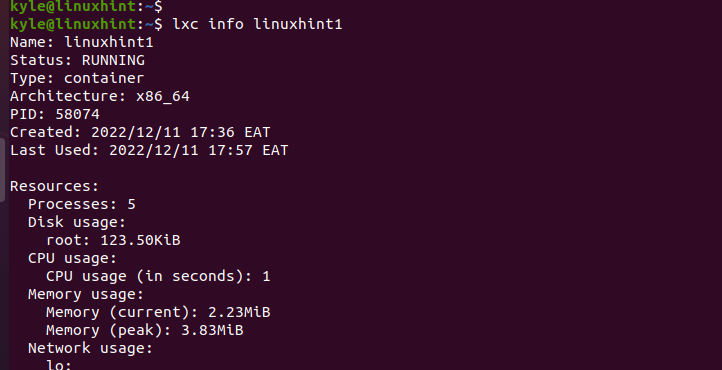
When working with containers, you can display the information of the LXD servers using the info command. If you do not specify the container name, the output will display the information for all the available containers. However, we can specify the container we want to extract its information.
The information retrieved contains all the details of the container, such as the container’s name, its status, the type, PID, and the resources the container is using. This information is crucial in managing your container.
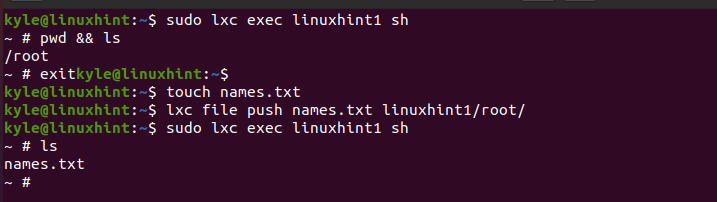
Still, LXD supports sharing of files to and from a container. It could be you want to push a given file you created to make it accessible from the container or pull a file from the container to the host system. In that case, use the push or pull keywords followed by the path to the file.
In the first example, we are exiting the container and creating a file named names.txt on the host system. Next, we push the created file to the container. Still, we are logging into the container and confirming that our file got pushed successfully.
Here’s the syntax to push a file from a host to a container.
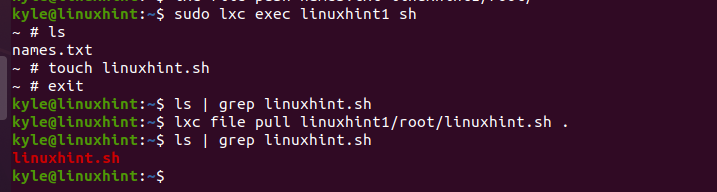
Similarly, the example below creates a script on the container. We then pull the created script from the container to the host system in the current directory. The last command lists the contents of the current directory on the host to confirm that we pulled the file successfully.
The last thing is to know how to delete the created container when it’s no longer necessary. First, you must stop the running container.

Once stopped, delete it using the command below.

This is all about creating and managing containers using LXD. If you get stuck working with LXD, open the help page to see which command you can use for a given purpose. Besides, you can view the help page for a specific command.

Conclusion
LXD is a container model that offers a REST API to support managing LXC containers. You can install LXD as a snap package and initialize an LXC environment ideal for creating your LXD containers. This post has offered a hands-on tutorial on everything about LXD. We’ve discussed what LXD means, its installation, creating and managing containers, and how to delete the created container.
Source: linuxhint.com