Terraform Google Cloud Platform
The program known as Terraform has grown in popularity and it’s a tool for easily managing infrastructure as codes because it offers a basic syntax that makes adaptability simple and prevents multi-cloud. Any significant cloud platform can be employed with it.
Terraform can manage on-premises infrastructures utilizing vSphere and Cisco as well as any significant cloud service provider because it is platform-agnostic. Instead of having to create entirely new workflows and skill sets for managing each environment, teams may leverage the same workflows and skill sets that have already been adopted. With this article, we learn the installation and usage of Terraform with the GCP(Google Cloud Platform) with our Linux system.
How to Install Terraform Google Cloud Platform in Ubuntu 20.04
By running the following commands step by step, you can install the terraform GCP without any issues. Before that, we have some prerequisites that the system should be updated and you should have the latest version of Linux.
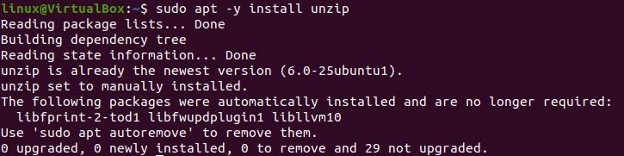
The first command we have implemented is for the extraction of terraform packages. For this, we need an unzipped package. From the following command of apt, the unzip package has been installed:
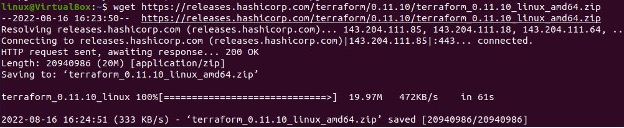
Now, we have downloaded the terraform with the URL which we have specified in the terminal below. Note that, we have to provide the latest version of Terraform modules. We can get the latest version from their official website documentation. We have given the version “0.11.10”.
By default, we have the $Home directory in our UBUNTU 20.04 system and the terraform packages should be unpacked in the currently active directory. The command used below extracts the terraform packages.

To the binary folder, we have moved the terraform by using the following path displayed as the command. Terraform’s binary file must be manually added to the bin file because it lacks a setup file.
![]()
Now, we have accessed Terraform from the Ubuntu prompt without providing its directory by using the command shown below.

After installing Terraform, we must configure the command-line utility to connect with our Google Cloud Platform services. This will enable us to connect to our Google Cloud Platform account and enable Terraform to manage our infrastructure after that.
How to Configure Terraform Google Cloud Platform in Ubuntu 20.04
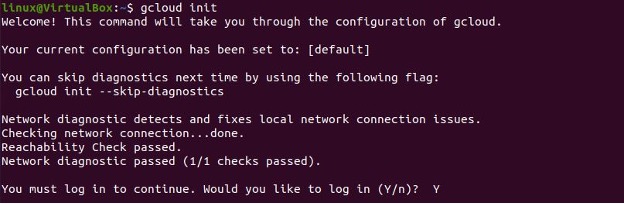
As we have downloaded the cloud SDK in the above section, we now have to configure the SDK environment which is possible by running the following command. Press “Y” to continue.
Then, the URL is generated after pressing “Y” in the prompt. Click on the specified URL. This will take you to the sign-in page where the email and password will be required. You can see that the prompt activates the message of logged in successfully.

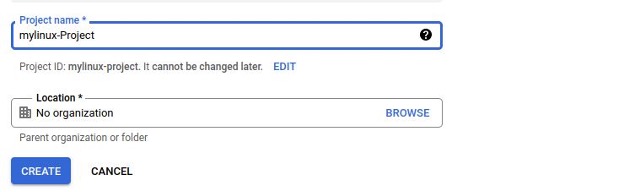
After login in successfully, the google cloud platform dashboard will be opened. We can create a new project by clicking on the “CREATE PROJECT”. We have created the project by filling in the following requirements. After clicking on the “CREATE” option our project will be created.
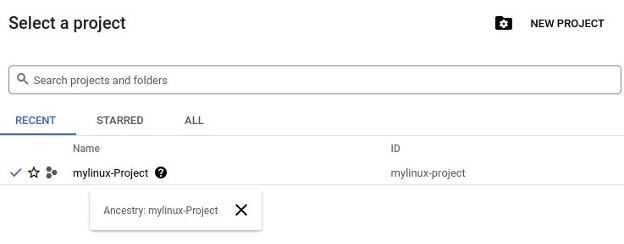
Make sure the project we have chosen has been created so that we can move on to the next step.
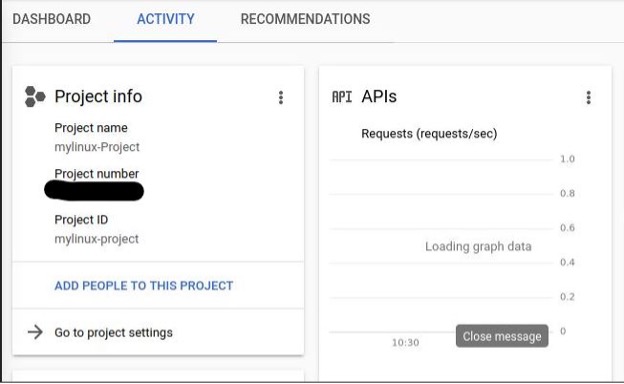
We also need to use the “project ID” for the terraform script. According to the screenshot, it is located under the ‘Project Info’ section.
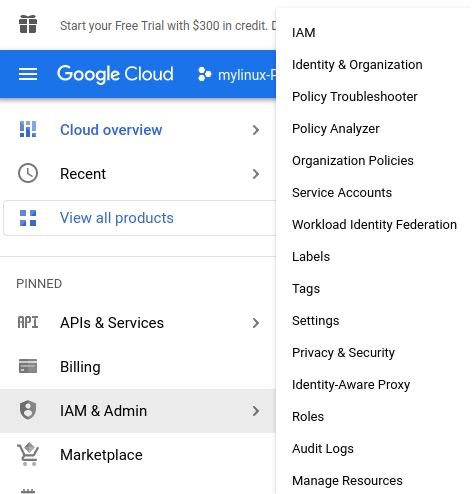
To do this, navigate to the “IAM & Admin” area and click on “Service Accounts”.
The create service account is opened. We have specified the description which is required by them. Then click on the option “CREATE AND CONTINUE”.
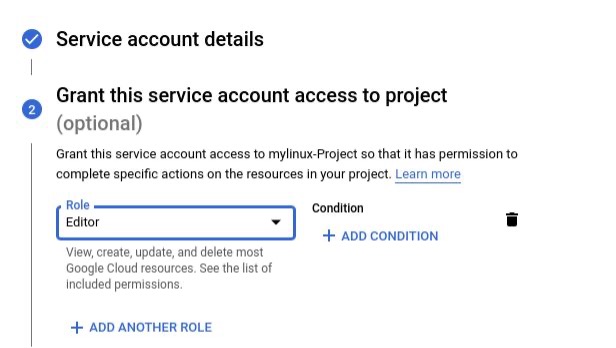
As we have done with our first step of creating service account details. Now, the second step is to grant the service account permission. Here, we have given an editor grant by choosing the “Editor” option. Then, we provided our Gmail address to give the service account access and press the “Done” option.
Next, to verify the configuration created with the help of the Terraform scripts the key is required. The key we have to create is for the above service account and it should be in the JSON format. To create a key, we must click on the three dots shown in the image just below the “Actions”. Then, select the “Manage key” option. The “Manage key page” will be opened and there we have the “Add key” option.

The page “create private key” is opened here and we have to select the “JSON” option for our key type. Upon clicking the “CREATE” button. The key will be generated and downloaded as a JSON file.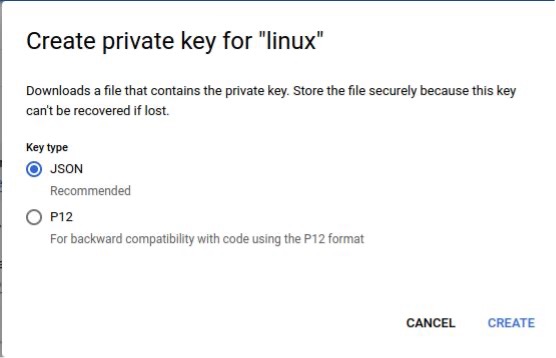
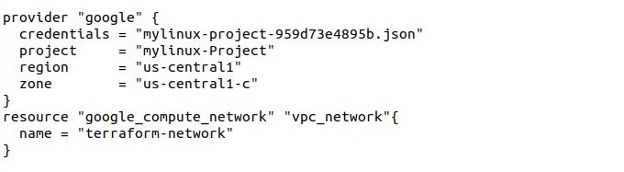
The initial configuration we set to build a network will be done now. We have created the directory as “mylinux-project-gcp” because each terraform has a separate directory.

Then, we specified the following content in our main.tf file. We have included the JSON file name against the “credentials” option. And in the project name, we have set while creating the project.
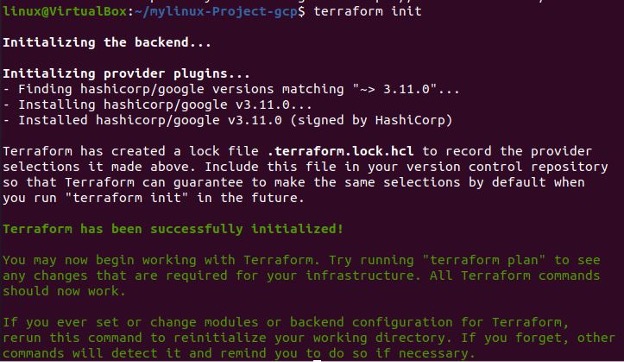
To initialize the specified directory, we have to give the “terraform init” command in the prompt. During this phase, the defined configuration providers are downloaded. We can only run this command in the present directory where our configuration file is located.
Then, for the readability and consistency of the modified configuration for the current directory, we need the terraform fmt command. The terraform fmt will print the file name “main.tf” as it is the only file present in the directory. Here, in our case, we have already formatted the configuration so the file is not printed.
Then, by giving the “terraform validate” command, we have confirmed the configuration is internally compatible. Upon execution of this command, terraform printed a success statement because the example configuration given above is authentic.

Conclusion
Due to its active open source community and straightforward module paradigm, terraform is amazing. Moreover, terraform is a tool for creating, altering, and destroying infrastructure for the Google Cloud Platform (GCP). We have learned the installation of terraform in Ubuntu 20.04. Also, we have implemented the example of the google cloud platform infrastructure in Ubuntu 20.04.
Source: linuxhint.com