SQL Server GRANT
SQL Server Securable and Principal
A securable refers to the resources the SQL Server Database Engine authorization system controls access. An example would be a database table.
A principal refers to any entity that requires access to any SQL Server resource. For example, a user requesting permissions on a table is a principal.
SQL Server Grant Statement
The following shows the syntax of the GRANT command in SQL Server:
ON securable TO principal;
You need to specify the permission you wish to assign to the principal as a comma-separated list.
The ON keyword allows you to specify the securable on which the permissions are applied. Finally, the TO keyword enables you to set the target principal.
For example, creating a user using the CREATE USER statement does not define the permissions for that user. It is, therefore, essential to use the GRANT statement to set the permissions for that user.
Let us take an example.
Create Example Login
Let us start by creating a sample login for illustration purposes. The query is as provided below:
with password=’password’;
The command above should create a user with the username linuxhint and the specified password.
Create Sample Database
We can create a database where the user will reside once we have defined a login. The queries are as shown:
create database resolver;
use resolver;
drop table if exists entries;
create table entries(
id int not null identity(1,
1) primary key,
server_name varchar(50),
server_address varchar(255) not null,
compression_method varchar(100) default ‘none’,
size_on_disk float not null,
size_compressed float,
total_records int not null,
init_date date
);
insert
into
ENTRIES(server_name,
server_address,
compression_method,
size_on_disk,
size_compressed,
total_records,
init_date)
values
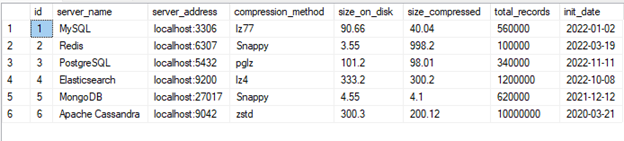
(‘MySQL’,’localhost:3306′,’lz77′,90.66,40.04,560000,’2022-01-02′),
(‘Redis’,’localhost:6307′,’Snappy’,3.55,998.2,100000,’2022-03-19′),
(‘PostgreSQL’,’localhost:5432′,’pglz’,101.2,98.01,340000 ,’2022-11-11′),
(‘Elasticsearch’,’localhost:9200′,’lz4′,333.2,300.2,1200000,’2022-10-08′),
(‘MongoDB’,’localhost:27017′,’Snappy’,4.55,4.10,620000,’2021-12-12′),
(‘Apache Cassandra’,’localhost:9042′,’zstd’,300.3,200.12,10000000,’2020-03-21′);
Create a User for the Login
Once we have created the database and table, we can create a user for the linuxhint login as:
create user linuxhint
for login linuxhint;
Login as the New User
Next, let us log in as the newly created user. The command is as shown:
Once logged in, we can attempt to view the tables by running the select command:
Running the query above should return an error:
The SELECT permission was denied on the object ‘entries’, database ‘resolver’, schema ‘dbo’.
This is because the linuxhint user does not have any permissions on the database, including the SELECT permissions.
Grant Permission to the User
We need to grant the SELECT permissions to allow the user to view the information stored in the tables.
For that, you need to login with the SQL Server administrative account.
Next, run the query as:
Once executed, login as the linuxhint user and use the SELECT statement.
In this case, the command returns the table as the user has SELECT permissions
You can also assign other permission to the user, such as insert and delete as:
in this case, the linuxhint user should have the SELECT, INSERT, and DELETE permissions on the entries table.
Conclusion
In this post, we explored the usage of the GRANT command in SQL Server. The command allows you to assign permissions to a given principal.
Source: linuxhint.com