Spring Dependency Injection
Dependency Injection or IOC is a core concept of the spring framework that helps to manage bean objects in the application. Dependency Injection, or DI as the name suggests, manages the dependent objects and makes our code loosely coupled.
For example, a spring application may build several modules dependent on each other to form a fully functioning application. The dependent objects must provide their instance during runtime else the application may break down. So, as a framework, Spring handles this situation and provides bean objects at runtime.
The IOC (Inversion of Control) does this task, i.e., injects dependencies during bean creation. It is a core container that creates, configures, manages objects, and even manages the whole lifecycle of an object.
Spring DI is mainly categorized as a Constructor-based dependency injection and a Setter-based dependency injection.
In this article, we will first learn about Constructor-based dependency injection and the move to setter-based in the next topic.
Let’s start with a maven-based spring application that contains the following Java and config files.
// Employee.java
It is a simple bean class that contains two properties and setter–getter methods.
import org.springframework.stereotype.Component;
@Component
public class Employee {
private int id;
private String name;
public String getName() {
return name;
}
public void setName(String name) {
this.name = name;
}
public int getId() {
return id;
}
public void setId(int id) {
this.id = id;
}
}
// ProjectManager.java
Here, we created another bean that contains some getter-setter methods, and the important point is to observe the ProjectManager() constructor that acts as a Constructor-based DI. It creates a bean object of the Employee class while loading to the application context.
import org.springframework.stereotype.Component;
@Component
public class ProjectManager {
private Employee employee;
public ProjectManager(Employee employee) {
this.employee = employee;
}
public void setInfo(int id, String name) {
employee.setId(id);
employee.setName(name);
}
public String getInfo() {
return “id = “+employee.getId()+”\nName = “+employee.getName();
}
}
// SpringApp.java
This is the main class that loads springconfig. Here, we used the getBean() method to get an object of ProjectManager class. After that, we set and get values for this object.
import org.springframework.context.annotation.AnnotationConfigApplicationContext;
import com.linuxhint.beans.ProjectManager;
public class SpringApp {
public static void main(String[] args) {
AnnotationConfigApplicationContext ac = new AnnotationConfigApplicationContext(SpringConfig.class);
ProjectManager pm = ac.getBean(ProjectManager.class);
pm.setInfo(102, “Roman”);
String result = pm.getInfo();
System.out.println(result);
ac.close();
}
}
// SpringConfing.java
This is the config class that helps to configure the application. It is important while configuring applications using annotations.
import org.springframework.context.annotation.ComponentScan;
import org.springframework.context.annotation.Configuration;
@Configuration
@ComponentScan(“com.linuxhint.*”)
public class SpringConfig {
}
// pom.xml
This file contains maven dependencies for the spring project.
<modelVersion>4.0.0</modelVersion>
<groupId>com.linuxhint</groupId>
<artifactId>springapp</artifactId>
<version>0.0.1-SNAPSHOT</version>
<name>springapp</name>
<description>a simple spring app</description>
<dependencies>
<dependency>
<groupId>org.springframework</groupId>
<artifactId>spring-core</artifactId>
<version>${spring.version}</version>
</dependency>
<dependency>
<groupId>org.springframework</groupId>
<artifactId>spring-context</artifactId>
<version>${spring.version}</version>
</dependency>
<dependency>
<groupId>javax.annotation</groupId>
<artifactId>javax.annotation-api</artifactId>
<version>1.3.2</version>
</dependency>
</dependencies>
<properties>
<spring.version>5.2.8.RELEASE</spring.version>
</properties>
</project>
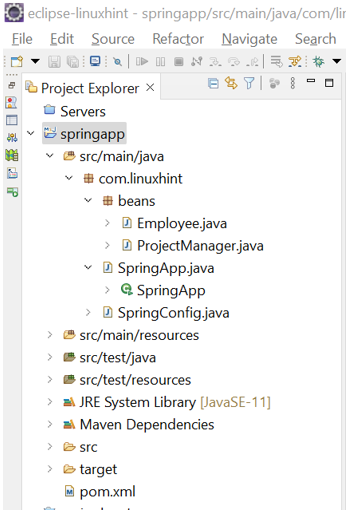
Project Structure
After creating all the files and code, our project structure is shown below:
Run the Application
Now, run the application, and it must show the following output in the console window:
Name = Roman
Configuration Using XML Code
You can do this if you want to configure your application using the XML code. However, XML configuration is old fashion way to do so but is still supported by the spring framework. You have a choice to configure your application either using XML or Java annotations.
In the XML case, we just need to create a file applicationContext.xml and read it into the SpringApp class file. Your applicationContext.xml file must contain the following XML code:
// applicationContext.xml
<beans xmlns="http://www.springframework.org/schema/beans"
xmlns:xsi="http://www.w3.org/2001/XMLSchema-instance"
xmlns:p="http://www.springframework.org/schema/p"
xsi:schemaLocation="http://www.springframework.org/schema/beans
http://www.springframework.org/schema/beans/spring-beans-3.0.xsd">
<bean id="projectManager"
class="com.linuxhint.beans.ProjectManager" />
<bean id="emp" class=" com.linuxhint.beans.Employee">
<constructor-arg>
<ref bean=" projectManager" />
</constructor-arg>
</bean>
</beans>
Here, the <bean> tag is used to specify the bean class, and the id specifies the bean instance. The <constructor-args> tag specifies the constructor dependency and the <ref bean> tag for injecting the object in the constructor.
Conclusion
In this article, we have learned about the constructor-based spring dependency injection. We learned its configuration by using Java annotations and XML both. Since it is a core concept of the Spring framework, you must learn it with the running example that we have explained.
Source: linuxhint.com