[Solved] Windows Modules Installer Worker Windows 10 High CPU
This write-up will provide different ways to fix the “Windows Modules Installer Worker High CPU” problem in Windows 10.
How to Fix the “WMIW” High CPU Problem in Windows 10?
To fix the “WMIW” High CPU problem in Windows 10, try the methods listed below:
- Delete the “SoftwareDistribution” Folder
- Start the Update Troubleshooter
- Run SFC Scan
- Use DISM Tool
- Restart the Windows Update Service
- Turn on the Metered Connection
Method 1: Delete the “SoftwareDistribution” Folder
The “SoftwareDistribution” folder contains the files that might be needed to install the Window Updates. Therefore, delete the “SoftwareDistribution” folder by following the instructions provided.
Step 1: Open Services
Press “Windows+R” to launch the Run utility. Type “services.msc” and press enter:

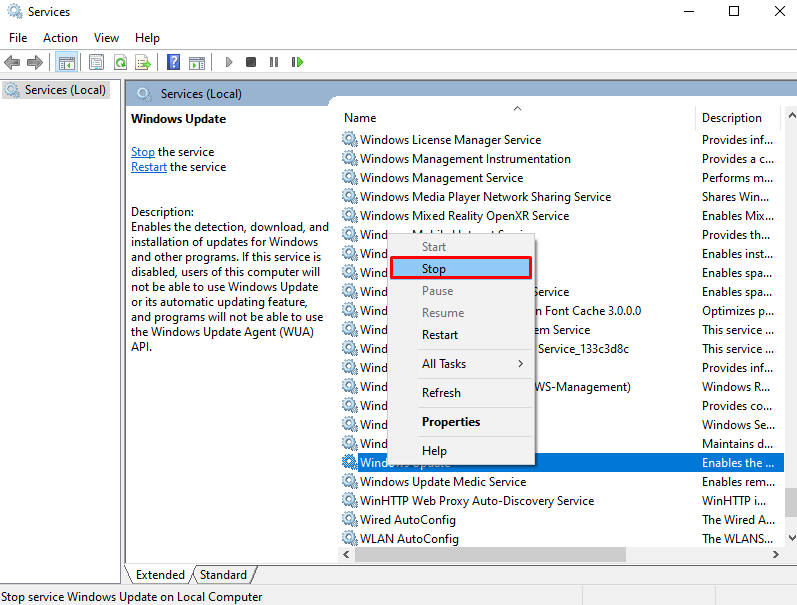
Step 2: Stop the Service
Scroll around to find the “Windows Update” service, right-click it when found and finally hit “Stop”:
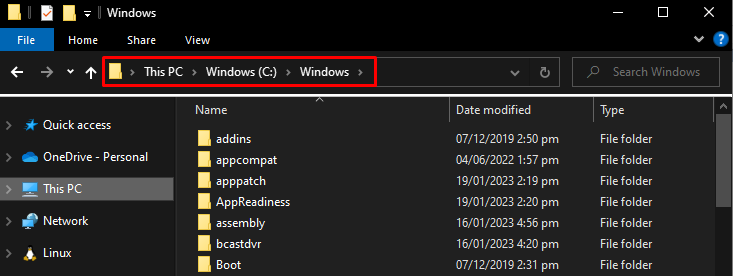
Step 3: Navigate to Windows Folder
Open the “File explorer”, navigate to the “C” drive to switch to the “Windows” folder:
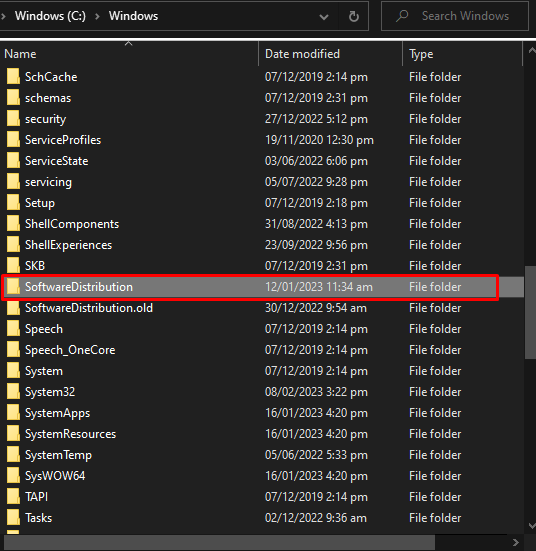
Step 4: Delete “SoftwareDistribution” Folder
Locate the “SoftwareDistribution” folder and delete it when found:
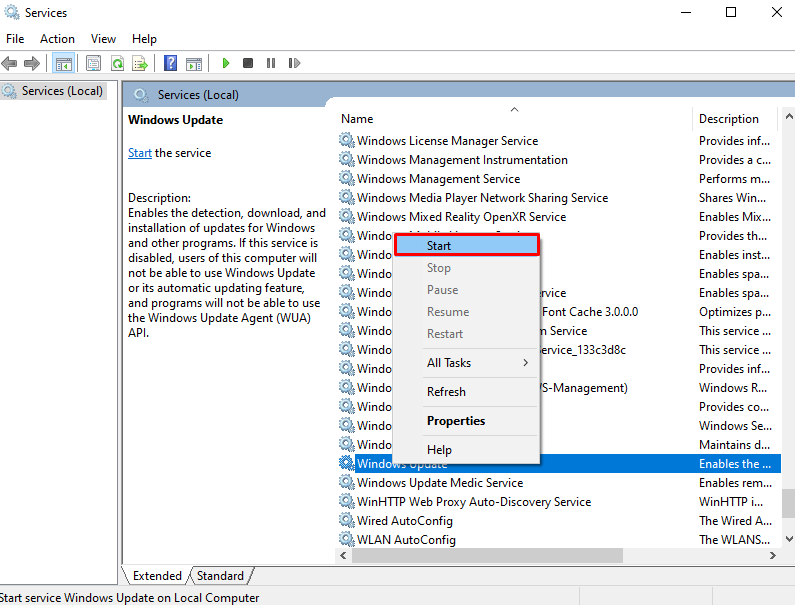
Step 5: Start the Service
Start the “Windows Update” service as shown below:
Method 2: Start the Update Troubleshooter
Windows has a built-in utility to fix basic issues called a troubleshooter. Run the “Windows Update” troubleshooter to solve any problems regarding updating Windows by following the steps below.
Step 1: Go to Settings
Hit “Window+I” to launch the Settings app:

Step 2: Go to “Update & Security”
Scroll down and select “Update & Security” when found:

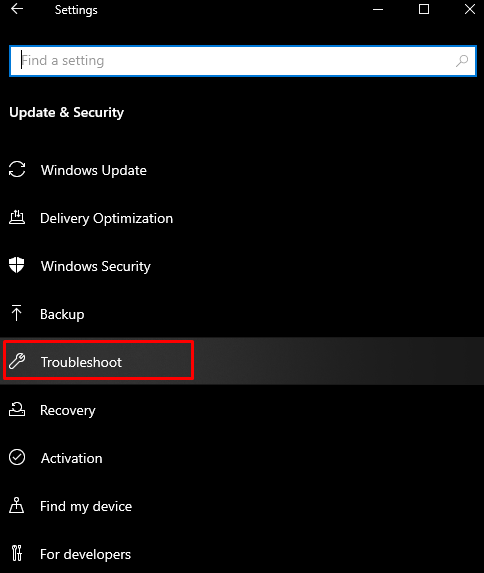
Step 3: Select Troubleshoot
Hit the option highlighted below:
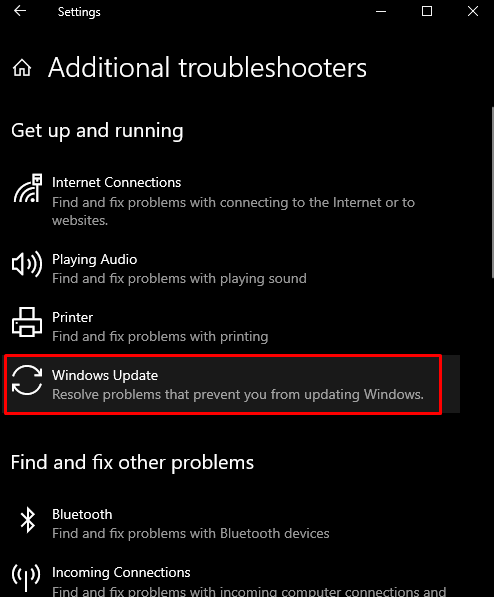
Step 4: See All Troubleshooters
Hit the “Additional Troubleshooters” as shown below:

Step 5: Pick Windows Update
Under the “Get up and running” section, tap “Windows Update”:
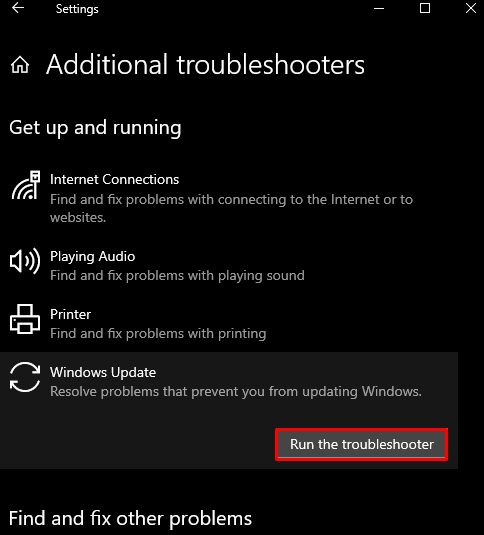
Step 6: Troubleshoot
Now, start troubleshooting by pressing the highlighted button:
Finish the troubleshooting process.
Method 3: Run SFC Scan
System File checker looks for and fixes any corrupted system files. Execute the SFC scan command on a command prompt by going through the steps below.
Step 1: Launch CMD As Admin
Type “cmd” in the search box and hit “CTRL+SHIFT+ENTER” to run as admin:

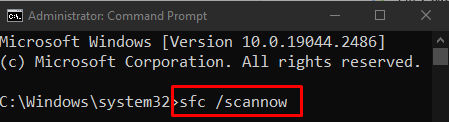
Step 2: Execute “sfc” Command
Write the below-given “system file checker” command in the terminal:
Method 4: Use DISM Tool
DISM is the next step we can take when SFC could not fix the issue. This also looks for corrupted system files and fixes them by replacing the faulty ones.
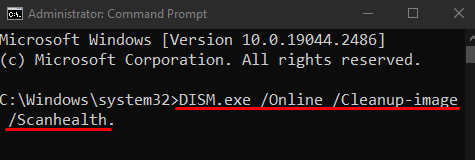
Step 1: Scan Image Health
Enter the “DISM” command given below to look for any corruptions in your system files:
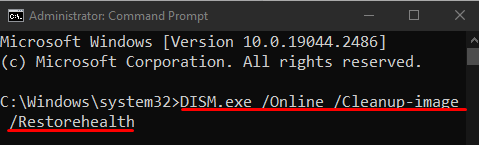
Step 2: Restore System Health
Execute the below-given “DISM” command to attempt to repair the files that are corrupted:
Method 5: Restart the Windows Update Service
The malfunctioning of the “Windows Update” service can cause this issue which can be fixed by simply restarting the service.
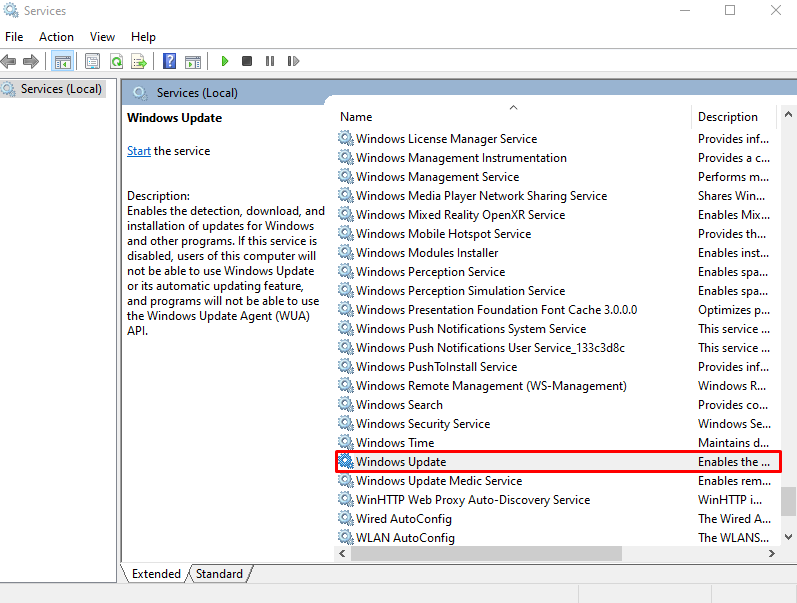
Step 1: Find the Update Service
Open Services and locate the “Windows Update” service:
Step 2: Stop the Service
Right-click the “Windows Update” service and hit “Stop”:

Wait for 10 to 30 seconds.
Step 3: Start the Service
Right-click on the service and hit the “Start” option as highlighted in the image:

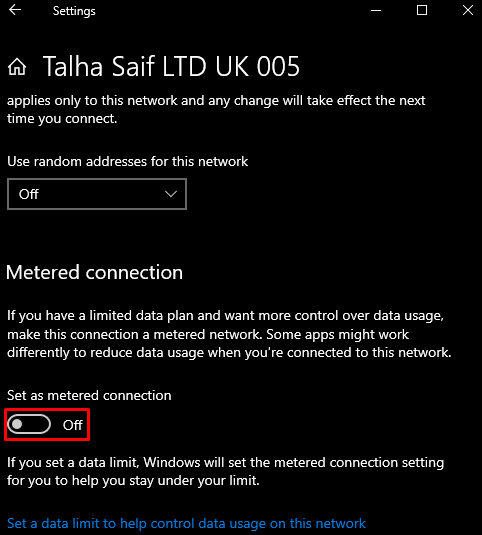
Method 6: Turn on Metered Connection
A “Metered Connection” limits how much data they are allowed to use. Turn on “Metered Connection” by following the below-provided instructions.
Step 1: Click on Network & Internet
Open Settings, scroll down to find “Network & Internet” and hit it when found:

Step 2: Select WiFi
Select the category of the internet:

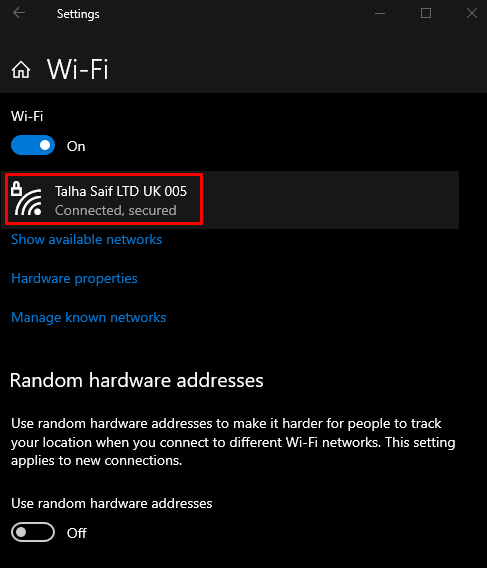
Step 3: Pick Your Network
Pick the WiFi network you are currently connected to:
Step 4: Turn on Metered Connection
Turn on the “Set as metered connection” toggle button:
Now, restart the system, and the CPU usage will get under control.
Conclusion
The “Windows Modules Installer Worker Windows 10 High CPU” problem can be fixed using various methods. These methods include deleting the “SoftwareDistribution” folder, starting the Windows update troubleshooter, running the SFC scan, using the DISM tool, restarting the Windows update service, or turning on the metered connection. This post provided several methods for fixing the discussed high CPU usage issue.
Source: linuxhint.com