[Solved] Autoplay Not Working in Windows 10/8/7
This blog will state the fixes to resolve the “Autoplay Not Working in Windows 10/8/7” error.
How to Fix/Resolve Autoplay Not Working in Windows 10/8/7?
To resolve the “Autoplay Not Working in Windows 10/8/7” issue, consider the following fixes:
- Re-enable AutoPlay in Windows 10.
- Allocate AutoPlay Defaults.
- Registry Fix.
- Run the Shell Hardware Detection Service.
- Update Windows 10.
- Change Notification Settings.
Fix 1: Re-enable AutoPlay in Windows 10
Re-enabling AutoPlay can solve the stated issue as restarting does in the case of Windows.
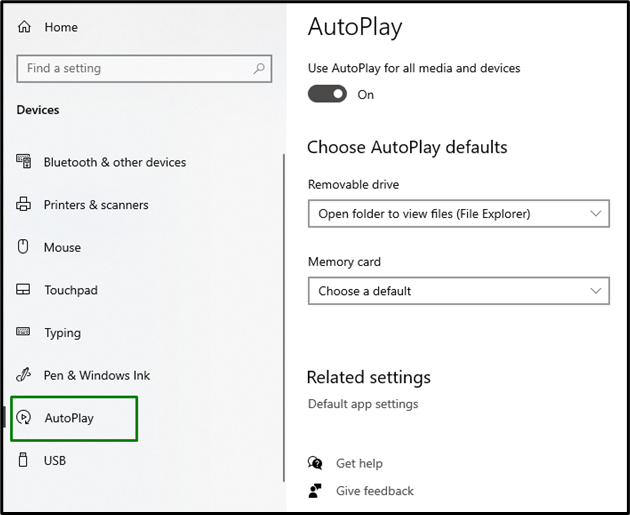
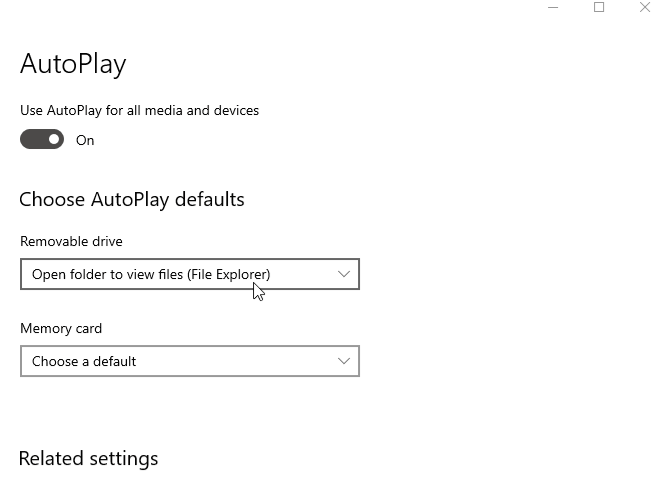
Step 1: Open Autoplay
Open Autoplay by navigating through “Settings->Devices->Autoplay”, as stated:
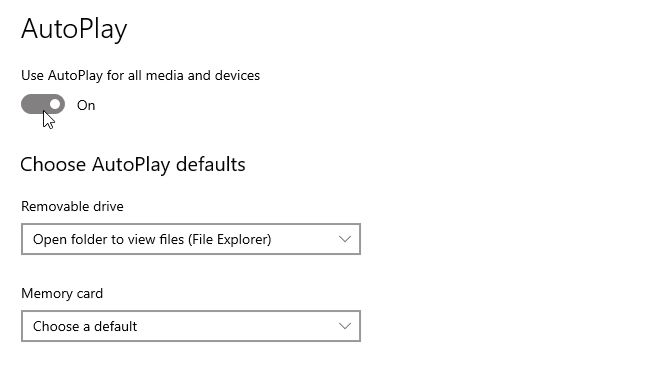
Step 2: Re-enable Autoplay
In the AutoPlay Settings, re-enable it by clicking on the highlighted toggle:
Another alternative to re-enable Autoplay can be via the “Control Panel”. To utilize this approach, consider the below-stated steps.
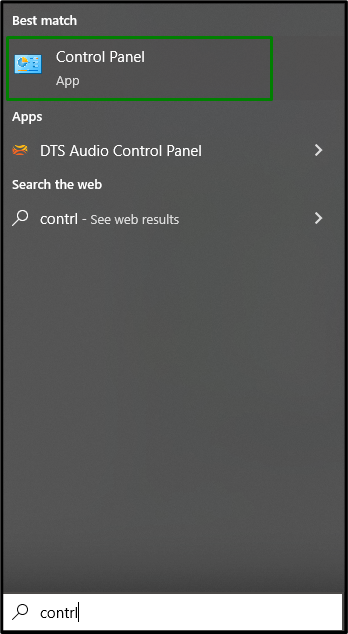
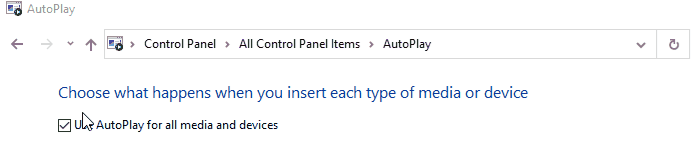
Step 1: Open Control Panel
Open “Control Panel” from the Startup menu:
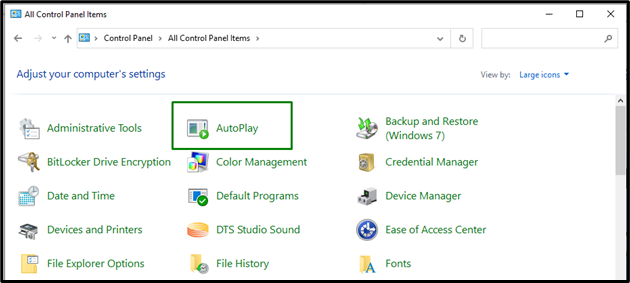
Step 2: Select Autoplay
Navigate to “All Control Panel items” and select “Autoplay” from the pop-up Window:
Step 3: Mark “Use AutoPlay for all media and devices” Checkbox
In the following Window, click the stated checkbox twice to re-enable “AutoPlay”:
Fix 2: Allocate AutoPlay Defaults
Allocating default permissions to Autoplay can also solve the stated query. To do so, navigate to the
“AutoPlay” section in Settings, and change the “Choose AutoPlay defaults” value according to your requirement:
After doing so, see if the stated issue resolves. If not, move on to another fix.
Fix 3: Registry Fix
The “Registry Editor” holds control of the Windows settings for various devices, including AutoPlay. So, setting the value in the registry editor can also solve the stated query.
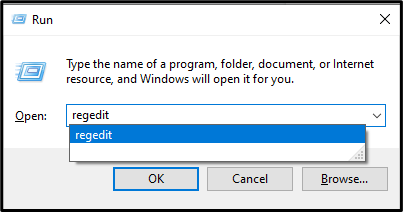
Step 1: Open Registry Editor
Initiate the “Registry Editor” by entering “regedit” in the Run dialogue box:
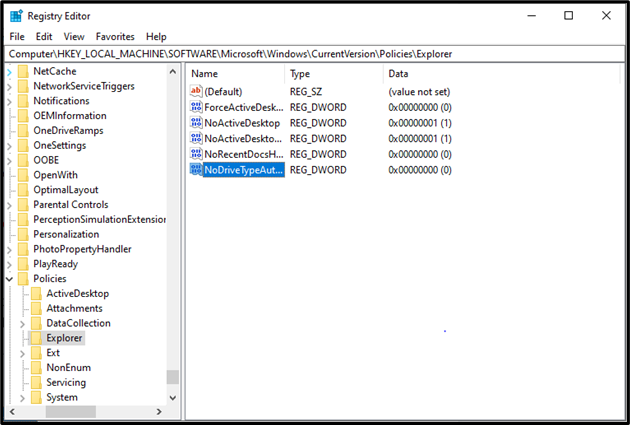
Step 2: Redirect to Path
Now, navigate to the path “HKEY_LOCAL_MACHINE\SOFTWARE\Microsoft\Windows\CurrentVersion\Policies\Explorer”. In the “Explorer” folder, double-click the “NoDriveTypeAutoRun” to change its value. Note that if the stated key is not evident upon opening the destined folder. You have to create one by right-clicking anywhere in the empty area and selecting the “New > DWORD (32-bit)” value:
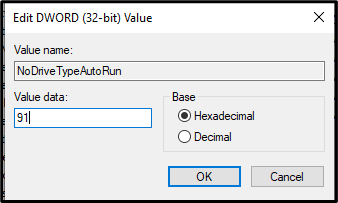
Step 3: Set Value
Now, set its value to “91” in hexadecimal base and hit “OK”:
Fix 4: Run the Shell Hardware Detection Service
Since the “Shell Hardware Detection” service manages Autoplay. So, executing the particular service might solve the issue. To initiate the stated service, consider the below-given steps.
Step 1: Open Services
Enter “services.msc” in the Run dialogue box to open “Services”:

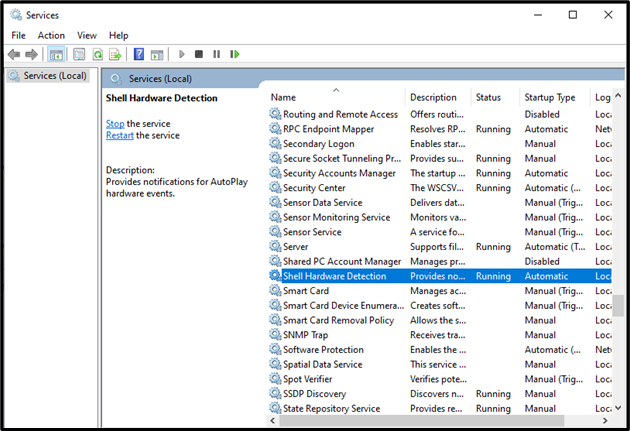
Step 2: Locate Shell Hardware Detection
Search for the stated service. Right-click on it and open “Properties”:
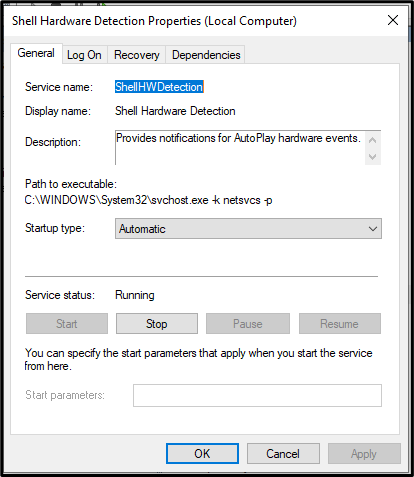
Step 3: Start the Service
Allocate the Startup type of the Service as “Automatic”. Also, click the “Start” button if the service is currently halted. In this case, the service is running, so the “Start” button is blurred:
Fix 5: Update Windows 10
An outdated Windows 10 can also result in the halt of AutoPlay. The Windows can be updated to the latest version by navigating through “Settings > Update & Security”.
Fix 6: Change Notification Settings
There can also be a possibility that AutoPlay is working, but it acts as disabled because of the disabled notifications. To cope up with this issue, consider the below steps.
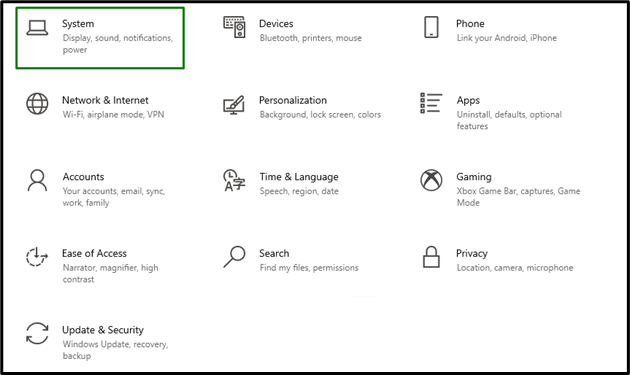
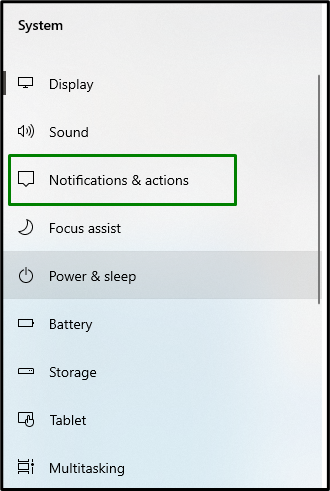
Step 1: Open System
From Settings, select “System”:
Step 2: Navigate to Notifications & Settings
In the “System” pop-up, opt for “Notifications & actions”:
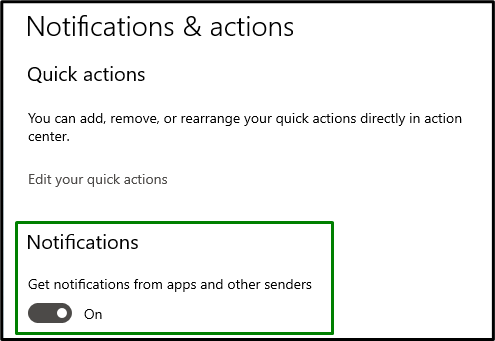
Step 3: Enable Get notifications From apps and other senders
Enable the “Notifications” by toggling it:
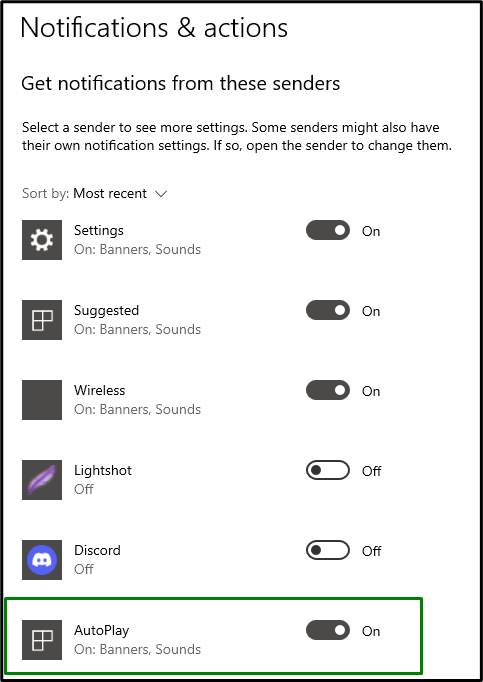
Step 4: Enable AutoPlay Notifications
After doing so, enable the notifications from “AutoPlay” in the highlighted section:
We have discussed the convenient approaches to resolve the “Autoplay not Working in Windows 10/8/7” issue.
Conclusion
To fix the “Autoplay Not Working in Windows 10/8/7” issue, re-enable AutoPlay in Windows 10, allocate the AutoPlay Defaults, fix the Registry, run the Shell Hardware Detection Service, update Windows 10, or change the Notification Settings. This write-up stated the fixes to resolve the malfunctioning of AutoPlay in Windows 10/8/7.
Source: linuxhint.com