Snort Alerts
Previously in LinuxHint, we published articles showing how to get started with Snort and how to create Snort rules.
This document describes Snort alert modes and how to manage them.
All practical examples in this tutorial include screenshots for users to understand them easily.”
Introduction to Snort Alert Modes
Snort alerts are anomalous network traffic and suspicious connections reporting. By default, alerts are stored under the /var/log/snort directory.
There are 7 available alert modes you can specify when executing Snort, which is listed below:
- Fast: When in fast mode, Snort alerts report the timestamp, send an alert message, show the source IP address and port, and the destination IP address and port. This mode is instructed using the -A fast flag.
- Full: Additionally to the information printed in the fast mode, the full mode shows the TTL, packet headers and datagram length, service, ICMP type, window size, ACK and sequence number. The full mode is defined with the -A full flag, but this is the default alerts mode.
- Console: prints fast alerts in the console. This mode is implemented with the -A console flag.
- Cmg: This alerts mode was developed by Snort for testing purposes; it prints a full alert on the console without saving logs. The mode is implemented with the -A cmg flag.
- Unsock: This is useful to export alert reports to other programs through Unix sockets. The unsock mode is implemented using the -A unsock flag.
- Syslog: In syslog (System Logging Protocol) mode, Snort sends alert logs remotely; this mode is implemented by adding the -s flag.
- None: With this mode, Snort does not generate alerts.
This article focuses on fast, full, console and cmg modes, including output analysis.
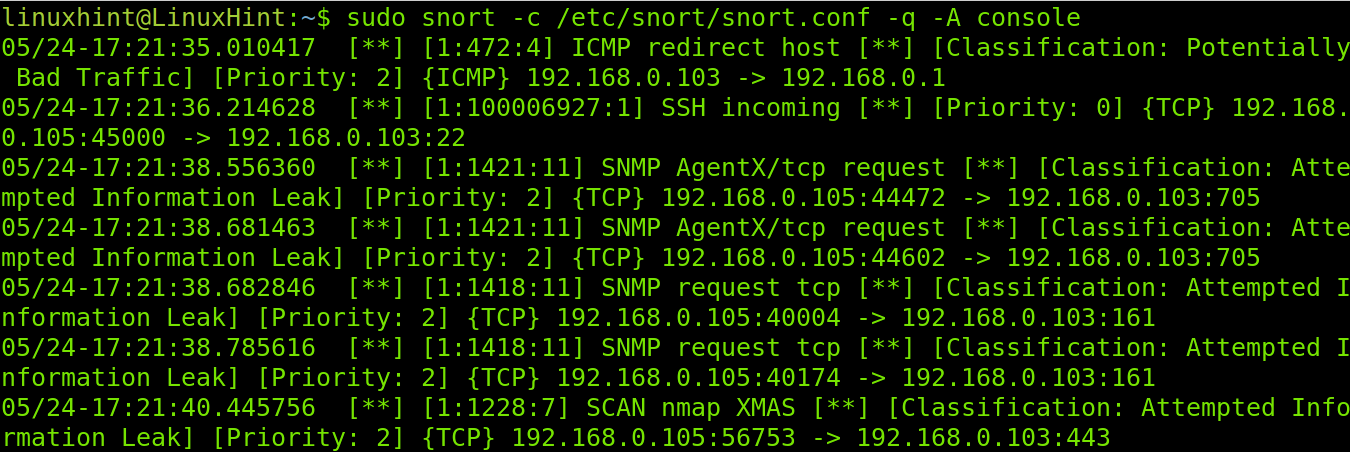
Snort Fast Mode Alerts
The following command executes Snort with fast alerts, where snort calls the program; the -c flag indicates the snort.conf file, -q instructs a quiet reporting (without printing banner and initial information) and -A determines the alert type, in this case, fast.

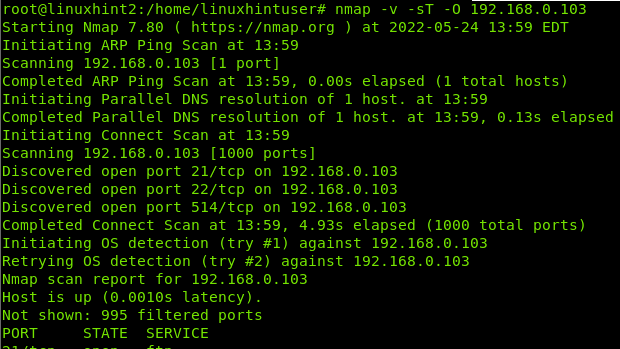
NOTE: For this tutorial, I will launch an aggressive fingerprinting scan using the Xmas technique from a different computer to show how Snort reacts and reports. The Xmas scan command is shown below.
Alerts are stored under /var/log/snort. In the case of fast alerts, the correct log file is /var/log/snort/snort.alert.fast.
Therefore to read the alert, run the following command.

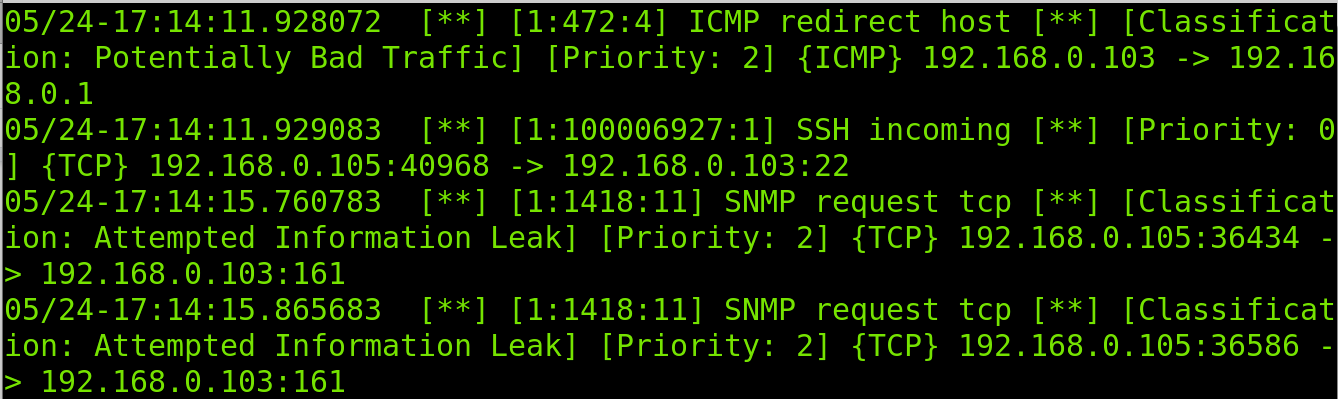
As you can see in the screenshot below, the fast output is pretty simple. First, it detects a suspicious ICMP packet used by Nmap to detect the target. Then it detects incoming traffic to SSH and SNMP protocols used by Nmap to discover open ports.
Reported information includes the incident time and type, source and destination IP addresses, protocol, involved services and priority.
Note: Since the Snort output is too long, I divided it into two screenshots.
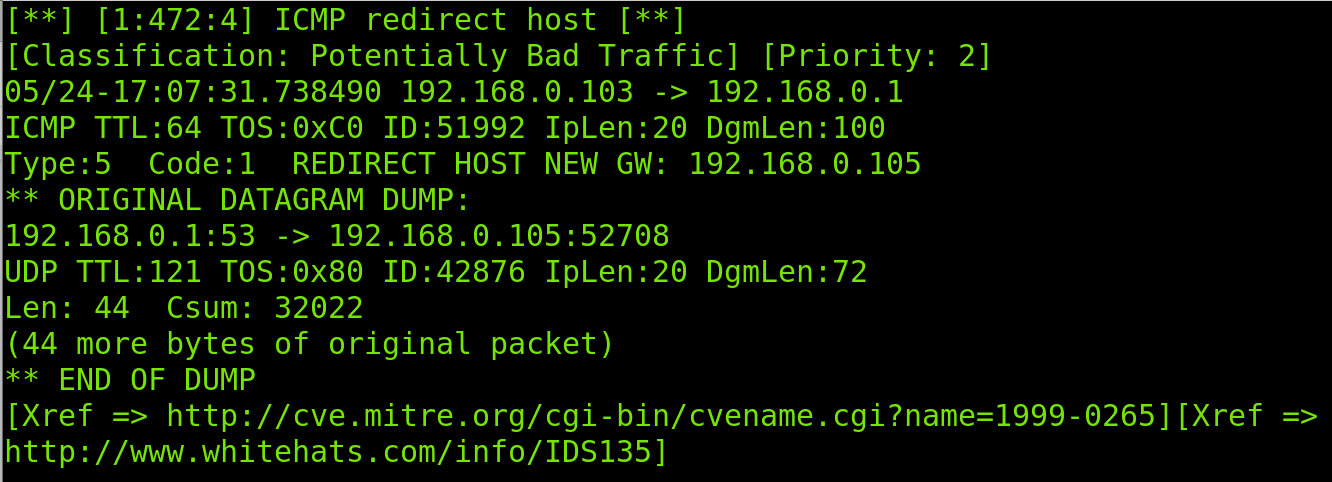
After collecting initial information on the scan characteristics, Snort finally realizes it is a Xmas scan.

As shown above, the fast scan returns the most user-friendly output, keeping simplicity.
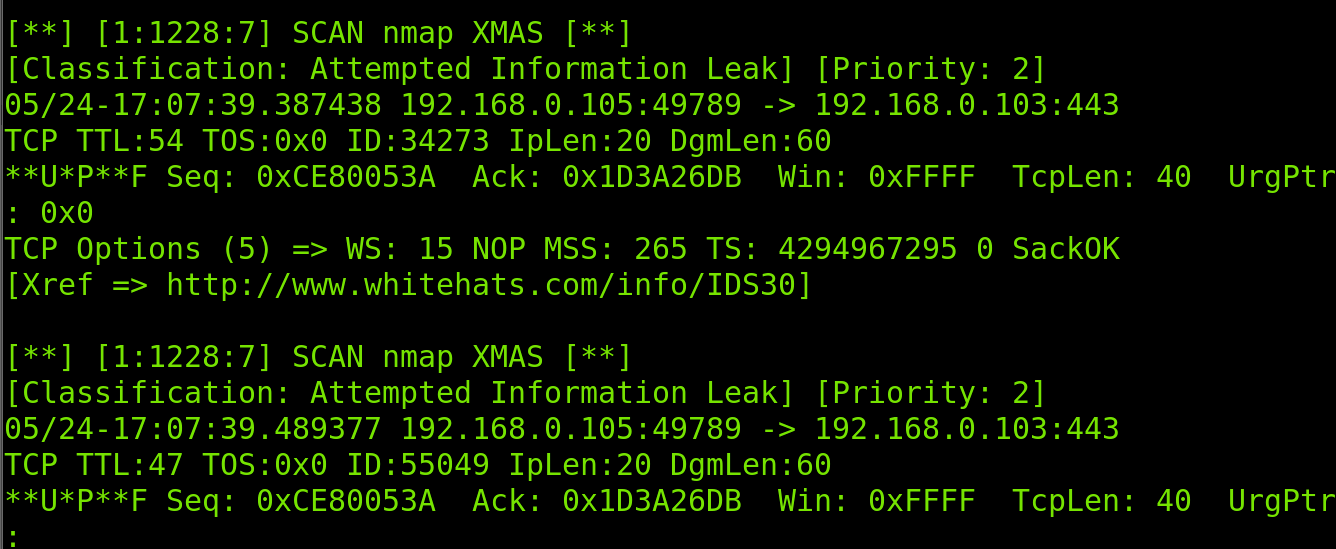
Snort Full Mode Alerts
Evidently, full mode alerts will return the complete output. It is important to clarify that the full mode is the default mode, and the logs file is /var/log/snort/alert. Therefore to read full alerts, run the command less /var/log/snort/alert.
For this example, I will launch Snort with a full alert, and then the same Xmas scan has shown the explained in the previous section of this tutorial.
All used flags are the same as in the previous example; the only difference is the defined full mode.

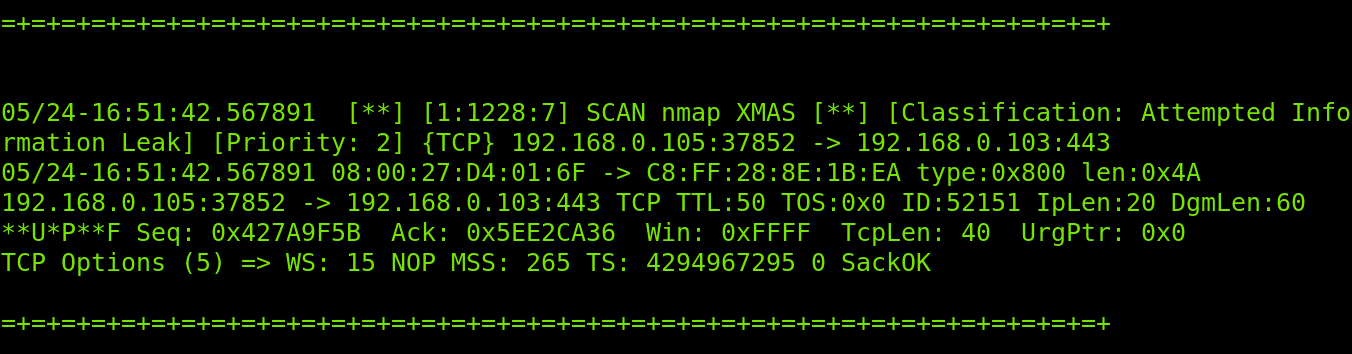
As you can see in the following image, in the ICMP packets detection phase, the full alert output also returns TTL, packet header length (IpLen) and datagram length (DgmLen), including the information printed in the fast scan.
Note: Since the Snort output is too long, In this section, I divided it into three screenshots.
In the screenshot below, you can see the TCP protocol report also shows the sequence number, acknowledgment (Ack), maximum segment size (MSS), timestamp (TS) and window size.
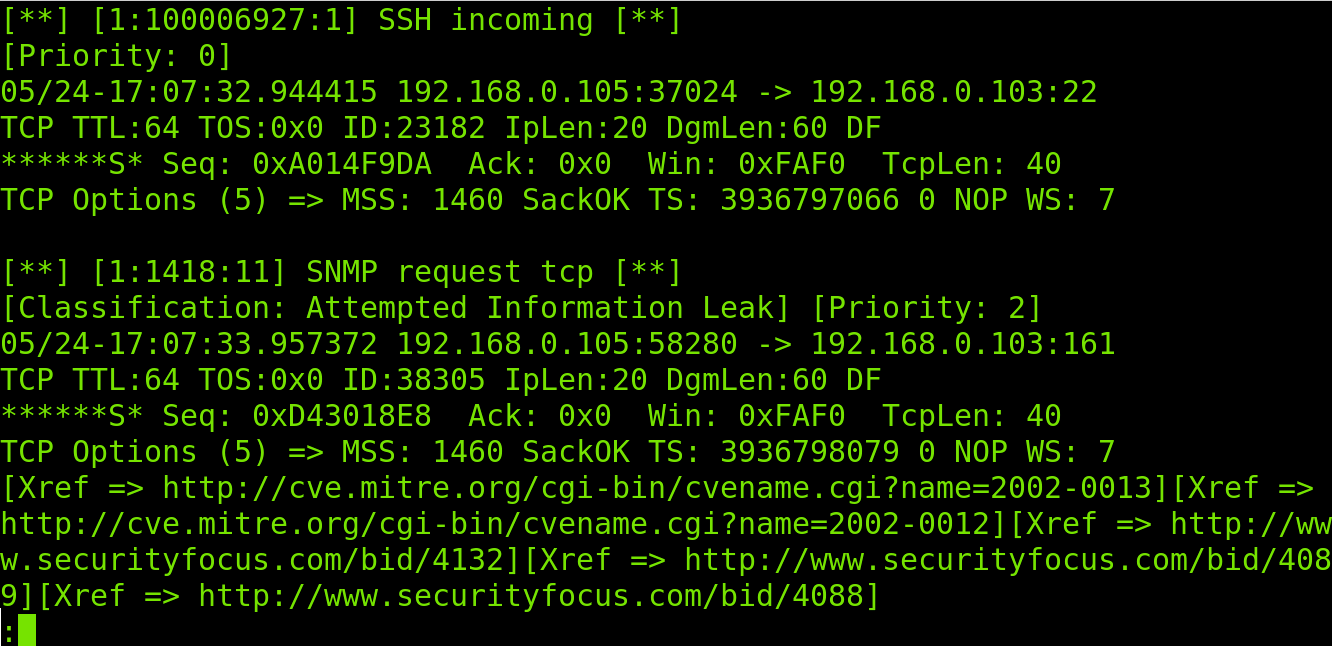
Finally, Snort realizes the traffic belongs to a Xmas scan.
Like the fast scan, Snort will report every incident and the full traffic progress.
Snort Console Mode Alerts
The alerts console mode displays the output in the console where Snort is executed. The syntax is always the same; the only change is the console specification after the -A flag.

As you can see in the screenshot below, the output is shown in the console; you don’t need to read logs when using this mode.
In the image above, you can see the console mode returns a simple output.
Snort Cmg Alert Mode
Snort cmg alerts are for testing purposes only. Cmg outputs are not saved in log files. The information is shown in the console like when using the console mode, but it returns the same information returned when using the full mode.
To run Snort in cmg alert mode, run the command below.
Note: Since the Snort output is too long, In this section, I divided it into three screenshots.
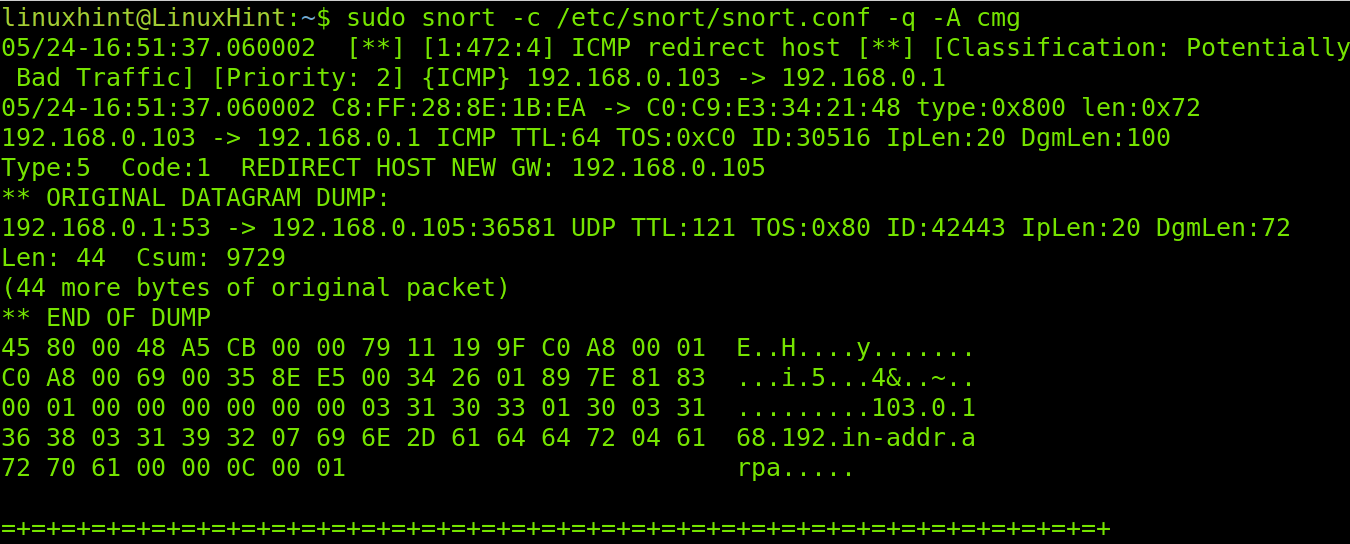
As you will see in the screenshots below, the alerting process is the same as with previous modes.
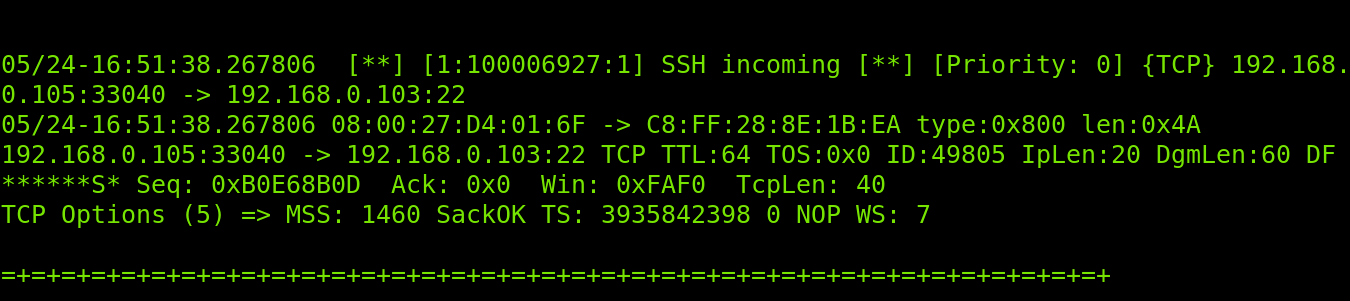
Finally, the Xmas scan is reported, including all information returned in the full mode.
That’s all about the main Snort alert modes. After reading this and the previous tutorial explaining how to configure and create Snort rules mentioned in the introduction of this article, you will be ready to implement Snort. At LinuxHint, we will keep sharing more knowledge on Snort.
Conclusion
Intrusion Detection Systems (IDS) like Snort is an excellent resource to protect networks and systems. As you can see, Snort is very flexible and can be adapted to user needs by just replacing a flag. Its flexibility also was proven in our previous article about custom rules creation and management. The market offers a lot of IDS alternatives like OSSEC, but Snort remains one of the most popular among system administrators. For users who know how protocols work, learning and implementing Snort is a pretty easy task and a nice process to incorporate important knowledge on network security. It is worth mentioning that dealing with Snort is mandatory for every system administrator. Since IDS analyzes network traffic, this can be implemented in networks independently of computer operating systems.
Thank you for reading this document explaining how to execute Snort with different alert modes and how to understand their outputs. Keep following us for more Linux and Snort professional tutorials.
Source: linuxhint.com