Setting up Kali Linux on AWS EC2
Kali Linux is simply the Linux Operating System (OS) distribution. It is understood that most internet usage is at risk of being hacked. To counter this void of digital security, penetration testing has a significant place in vulnerability assessment. Kali Linux has become a huge role in the fight against hackers, as penetration testers mostly use it.
Let’s start with setting up Kali Linux on AWS EC2:
Setting up Kali Linux on AWS EC2
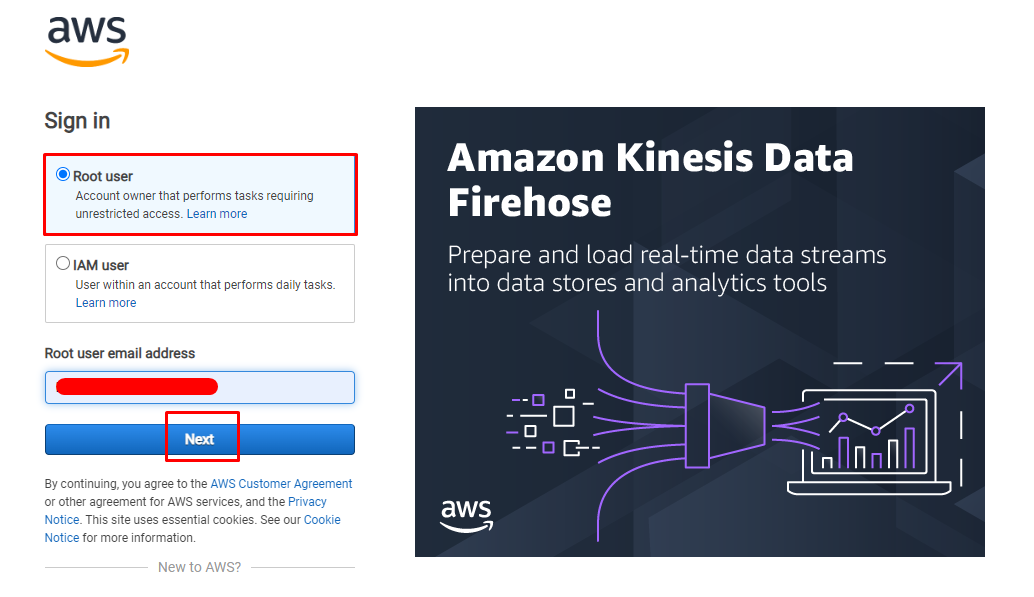
To set up the Kali Linux on AWS EC2 service, sign in to the AWS console by providing the email address of the root user and click on the “Next” button:
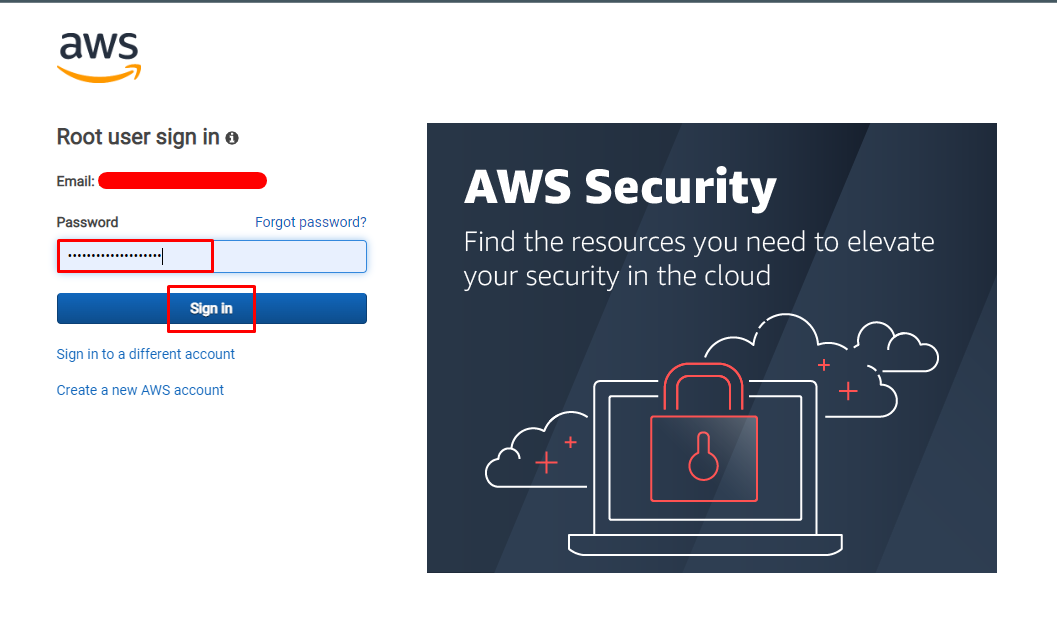
On this page, enter the password and click on the “Sign in” button:
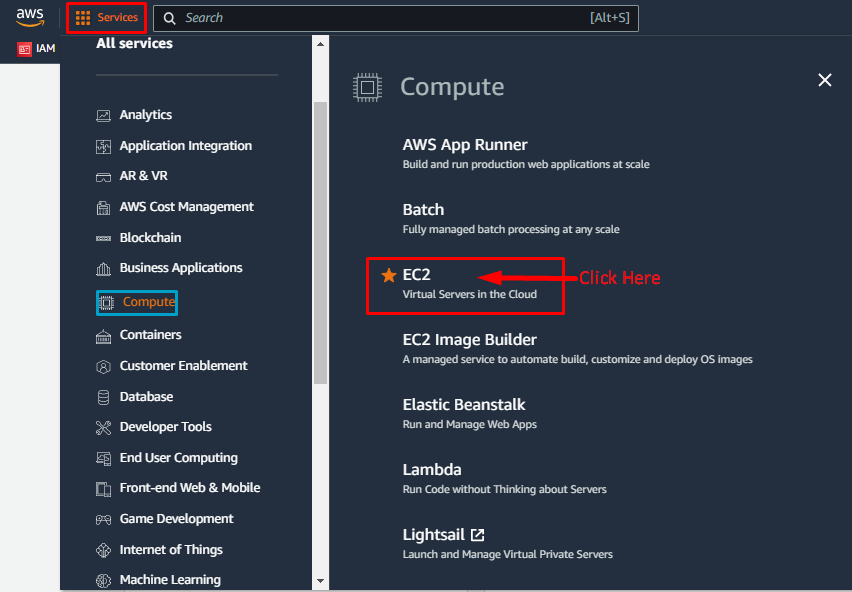
On the AWS Management console, locate the “EC2” service from the “Compute” section in the AWS services list:
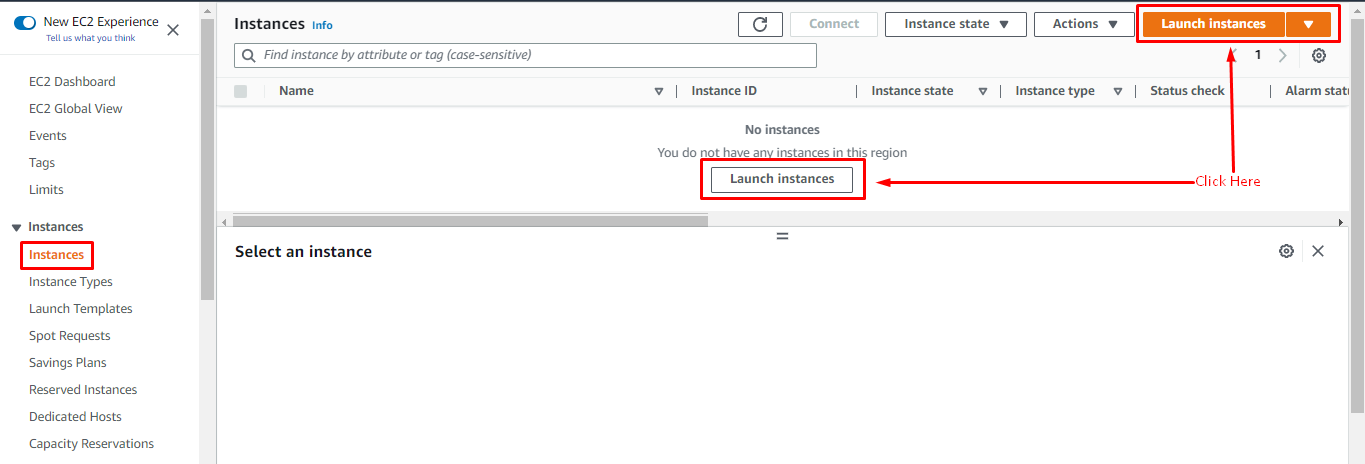
On the EC2 console, click on the “Launch Instances” button from the “Instances” section on the left side panel:
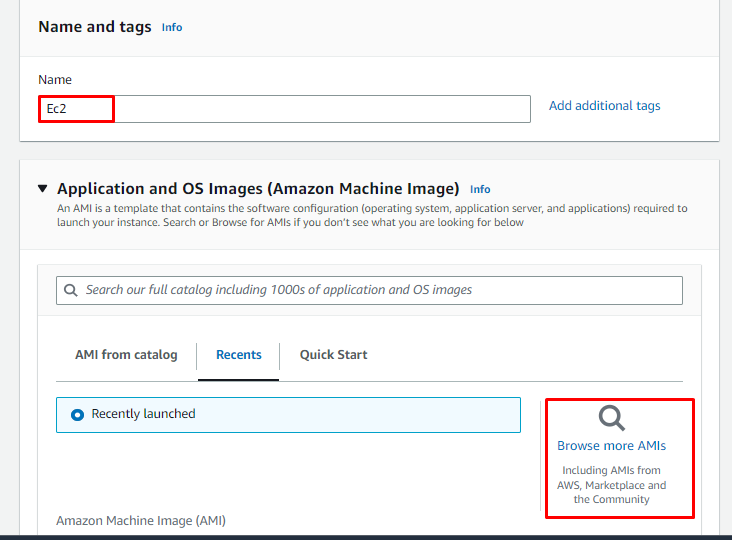
On the instance creation page, type the instance’s name and click on the “Browse more AMIs” link from the Amazon Machine Image section. Amazon provides a huge number of machine images to be selected for the EC2 instance:
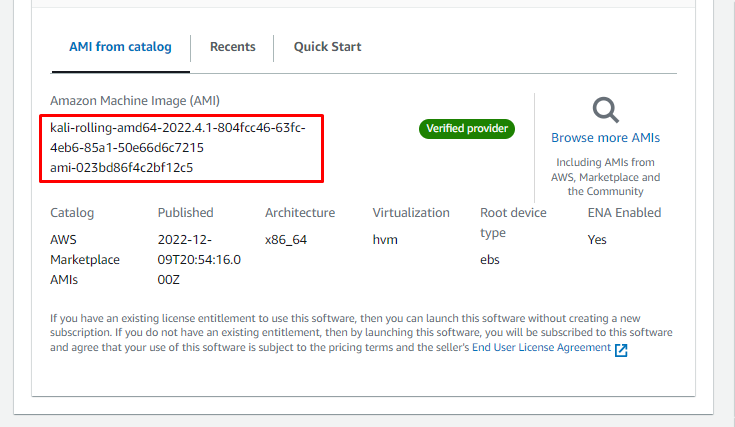
After that, select the “AWS Marketplace AMIs” tab and search for “Kali Linux,” and click on the “Select” button right next to a Kali Linux AMI:

The Kali Linux has been selected as an Amazon Machine Image:
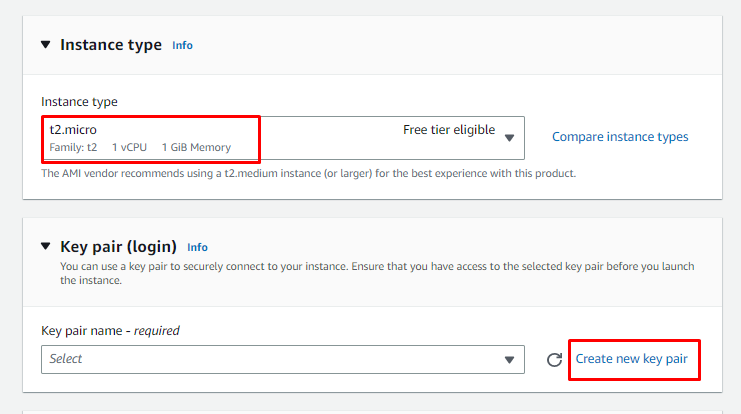
Scroll down the page to select the “t2.micro” as the instance type (or any other according to requirements) and click on the “Create new key pair” link:
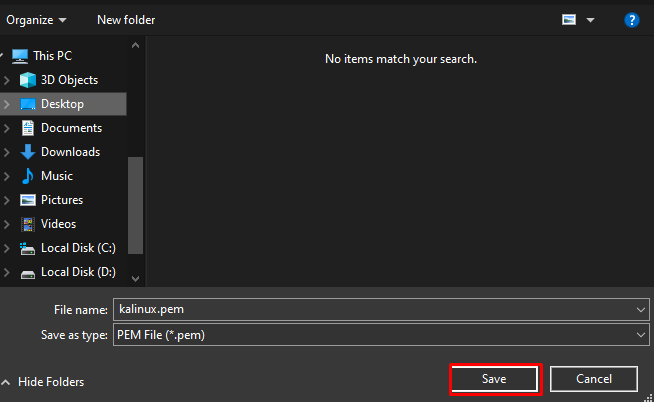
To create a key pair, provide the name of the key pair with the type and format of the key pair file. After that, click on the “Create key pair” button to download the file. This private key pair file will be required for the connection with the EC2 instance:

Provide the path to download the key pair file on the system and click on the “Save” button. Remember the file location, as it will be needed at the time of the EC2 connection:
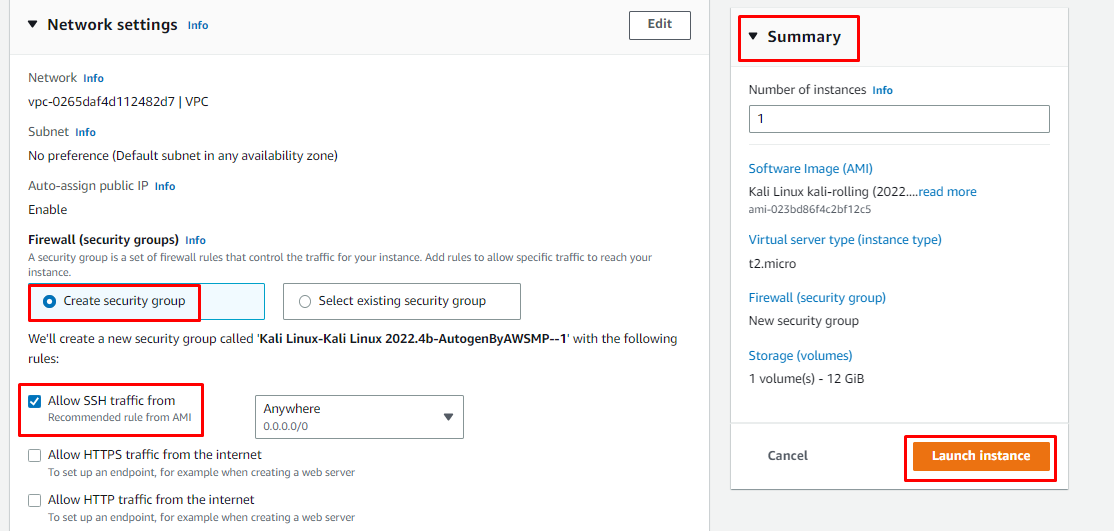
Configure the security group for the EC2 instance and click on the “Launch Instance” button after reviewing the “Summary” of the instance:
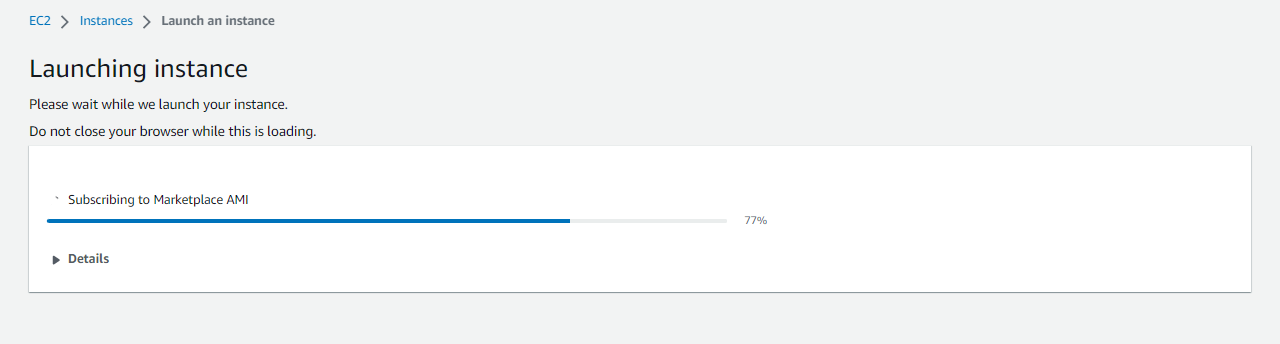
It will take some time to launch the instance:
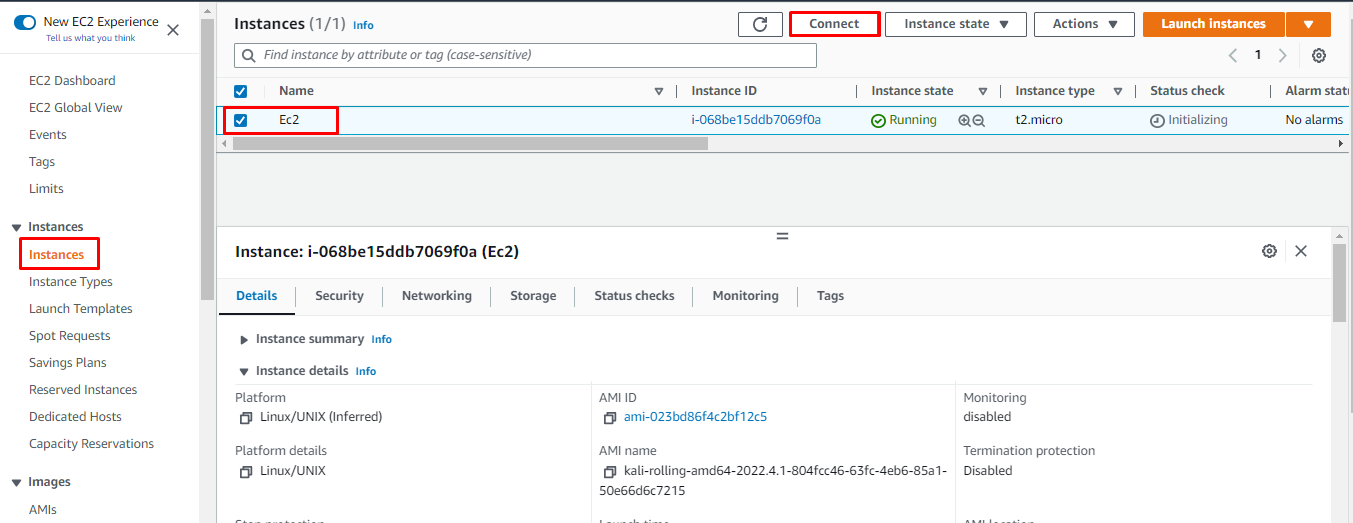
After that, clicking on the “Connect” button will take the user to the next page:
On this page, copy the “Example” command mentioned in the screenshot below from the “SSH client” tab:
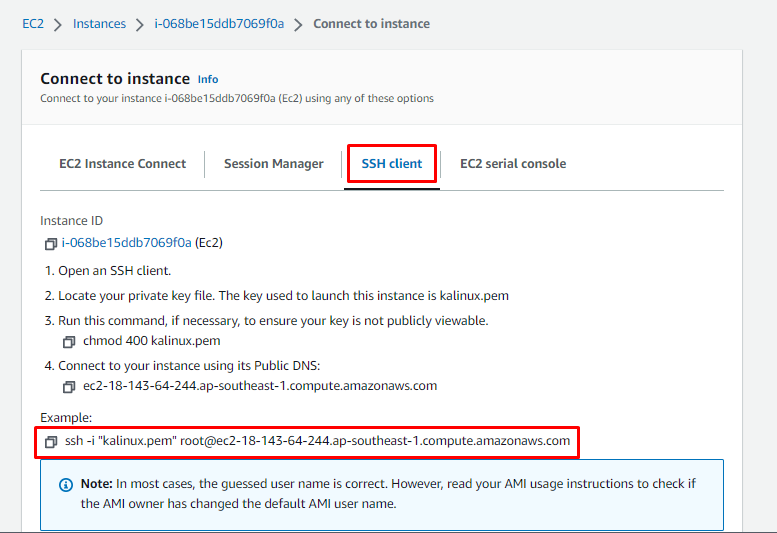
Simply paste the copied command on the PowerShell or Command Prompt and change the “root” keyword to “kali”. Also, change the name of the key pair file with the complete path of the file, then press “Enter” from the keyboard for Kali Linux connection:

After that simply hit the “Enter” key and wait for the SSH connection to be established. Incase you get an error like this:
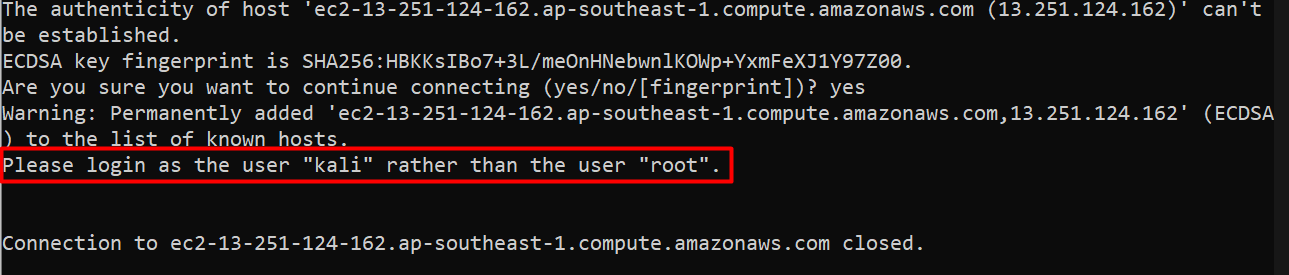
In this, replace the username in the command to “kali” instead of “root” and re-execute the command. You will get the following output when the SSH connection is successful:
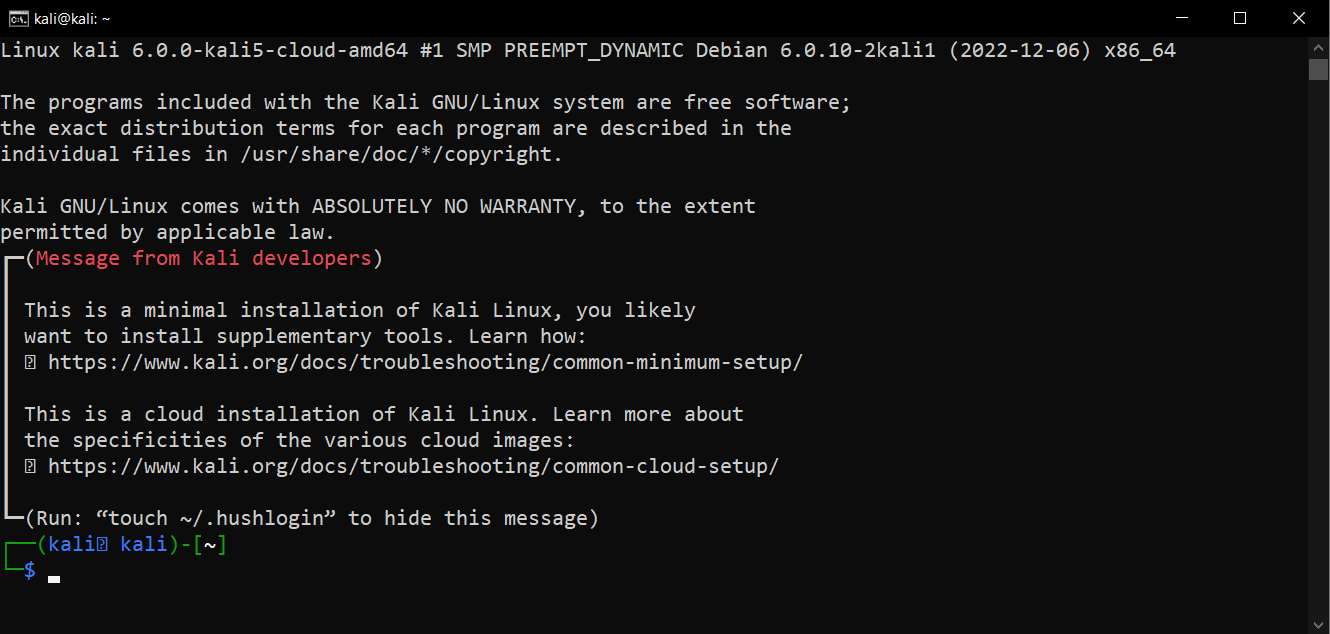
You have successfully set up the Kali Linux on the AWS EC2 instance.
Conclusion
Setting up Kali Linux on AWS can be done using the EC2 service. Simply head into the EC2 instance console and then launch an EC2 instance using Kali Linux as the AMI and create a private key pair file for the connection creation. Once the instance is created, simply head to the connect page to copy the command provided by the platform. Simply paste the command on Windows Terminal to set up the Kali Linux on AWS EC2.
Source: linuxhint.com