Set Ubuntu PC/Laptop Speaker as AirPlay Audio Player
This tutorial shows how to set up Ubuntu Linux as AirPlay receiver, so your PC speaker can play audio streamed from iPhone, iTunes, iOS devices and third-party AirPlay sources.
For Linux, there’s a popular free open-source app called Shairport Sync. It’s a AirPlay and AirPlay 2 audio player forked from the original Shairport (discontinued).
Shairport Sync offers full audio synchronisation. It means that audio is played on the output device at exactly the time specified by the audio source.
NOTE 1: Shairport Sync does not support AirPlay video or photo streaming.
NOTE 2: This tutorial is only tested in Ubuntu 24.04. Though, it should work in all current Ubuntu releases.
Step 1: Find out Your Audio/Speaker Device Name
Before getting started, you need to find out the device name of the sound card and speaker in your Linux computer.
1. First, press Ctrl+Alt+T to open up a terminal window. When it opens, run command:
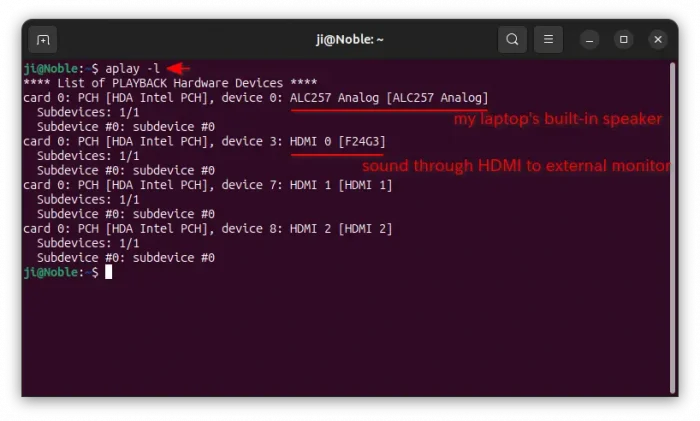
aplay -l
If the command not found, run sudo apt install alsa-utils to install. And, the command will list all the sound cards and digital audio devices.
In my case (see the screenshot below), my laptop has only one sound card HDA Intel PCH, but with 2 speakers, including built-in speaker ALC257 Analog and external monitor’s speaker through HDMI cable named F24G3.
2. Next, run command to list all PCMs, and find out the output device names, according to the speaker names you got in last step.
aplay -L
As the output is a bit too long, you may run the command below instead to filter with speaker name:
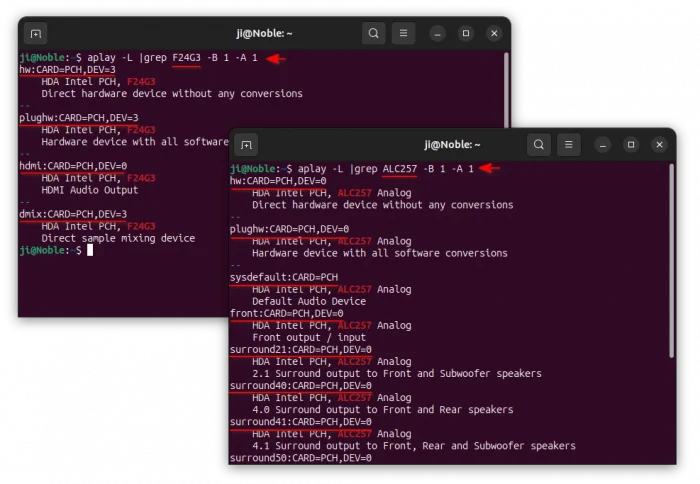
aplay -L |grep F24G3 -B 1 -A 1
Here:
grep F24G3– tell to print lines match the key F24G3. Replace it to yours according to the first command output.-B 1– print 1 line of leading context before matching lines.-A 1– print 1 line of trailing context after matching lines.
As the screenshot above shows, I can use hw:CARD=PCH,DEV=3 for direct access to the F24G3 HDMI speaker, or hw:CARD=PCH,DEV=0 (or hw:0 in short) for direct hardware access to the built-in speaker.
All others (with underlines in screenshots) also work in my tests, but for either software conversions or sample mixing, or other purpose.
Step 2: Install and configure Shairport Sync
The software package is available in system repositories of all current Ubuntu releases, including Ubuntu 20.04, Ubuntu 22.04, Ubuntu 24.04, and Ubuntu 24.10.
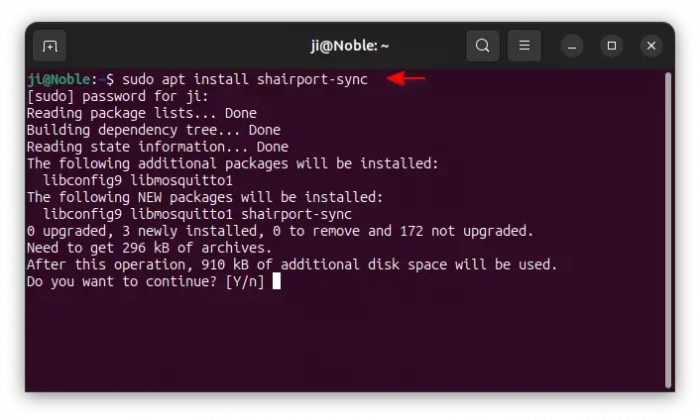
To install it, simply open terminal (Ctrl+Alt+T) and run command:
sudo apt install shairport-sync
Then, edit its configuration file by running command:
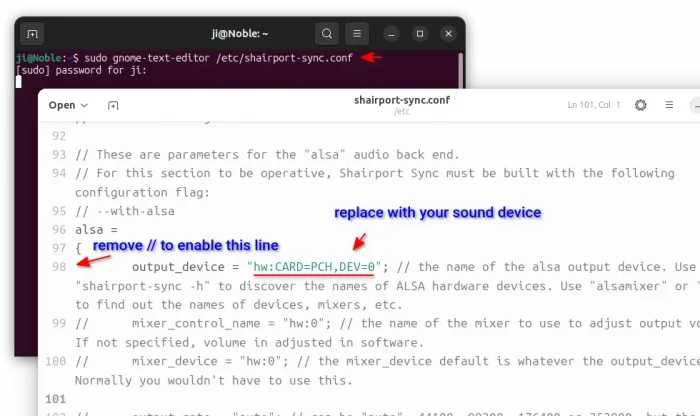
sudo gnome-text-editor /etc/shairport-sync.conf
Replace gnome-text-editor with gedit for 22.04 and earlier, mousepad for XUbuntu XFCE, or nano that works in most desktops.
When file opens, scroll down and find out alsa = section. Then, do:
- Remove // at the beginning of the “output_device” line to enable it.
- Set the “output_device” value according to Step 1. In my case, I can use hw:CARD=PCH,DEV=3 for HDMI speaker or hw:CARD=PCH,DEV=0 for built-in speaker.
- (Optional) For choice, you may enable and configure more rules, such as
mixer_device,output_rate.
When editing done, save file. For nano, press Ctrl+S to save and Ctrl+X to exit.
Step 3: Enable and restart Shairport Sync service to apply
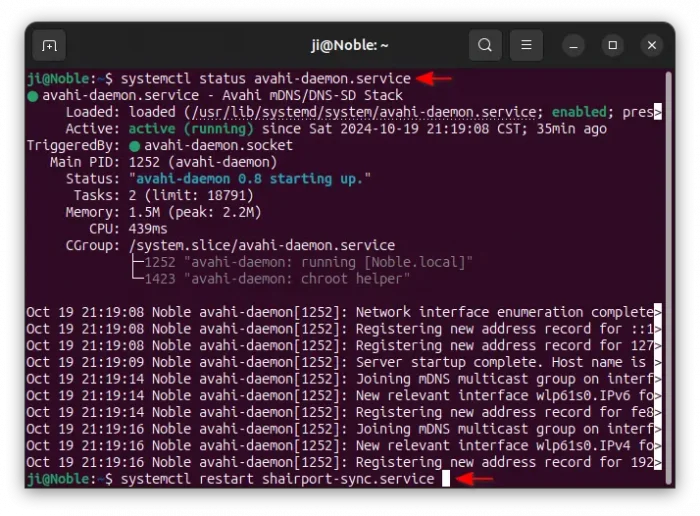
The software requires the avahi-daemon to be running. First, run command to make sure the service is in active running state.
systemctl status avahi-daemon.service
In case it’s not running, run systemctl start avahi-daemon.service to start it.
And, restart the Shairport Sync service to apply change:
sudo systemctl restart shairport-sync.service
For Debian and other Linux, the service may NOT be enabled by default after installed the software package. In the case, run sudo systemctl enable --now shairport-sync.service to enable and start it.
Finally, in your iOS device play some music and select casting to your speaker through AirPlay.
NOTE: there will be about 2 or 2.5 seconds latency specified AirPlay source. And, in my case the sound is very low. Try pressing volume buttons in iOS device to turn sound up/down in case you hear nothing.
Source: UbuntuHandbook

