SeleniumWeb Automation with Python
What Is Web Automation Using Selenium?
Web automation is the process that utilizes a computer program to perform the task automatically without human interference. Web automation can perform various tasks such as clicking the button and link, searching, filling the forms, logging in into the account, and retrieving the text from the web page. There are various web automation software and frameworks such as Selenium, Puppeteer, TestCafer, WebDriverIO, and so on.
Nowadays, web automation tools are used to speed up the task execution of repetitive task automations. Web automation frameworks are very crucial to save time, activate lesser human effort, increase accuracy, and reduce expense.
A very effective web automation tool for testing, data entry, and extraction is the open-source framework which is Selenium. It is very helpful for interacting with web browsers such as Chrome, Firefox, Safari, etc. Selenium framework supports numerous programming languages such as Java, Python, Ruby, and C#.
Selenium WebDriver, Grid, Selenium IDE, and Selenium Remote Control are just a few of the components that make up the Selenium framework. To use the features of other test frameworks like Junit, TestNG, and Maven, Selenium is unified with the other testing tools and the functionality of other test frameworks such as Junit, TestNG, and Maven.
Setup the Development Environment for Selenium Web Automation in Python
Before installing Selenium, we need to create the virtual environment in Python on our machine:
- Download and install Python.
- Download and install PyCharm.
- Configure the interpretation in PyCharm.
- Go to the > Add Interpreter > system Interpreted > and select > Python.exe.
- Make sure that pip is installed.
In the Python environment, we can install the packages using the pip command.
Most of the time, pip is installed when you install Python.
Make sure it goes to the > C: > Program Files > Python(installed version) > Scripts.
Install Selenium
First of all, we need to install Selenium. To do so, open the command prompt and write the following command:
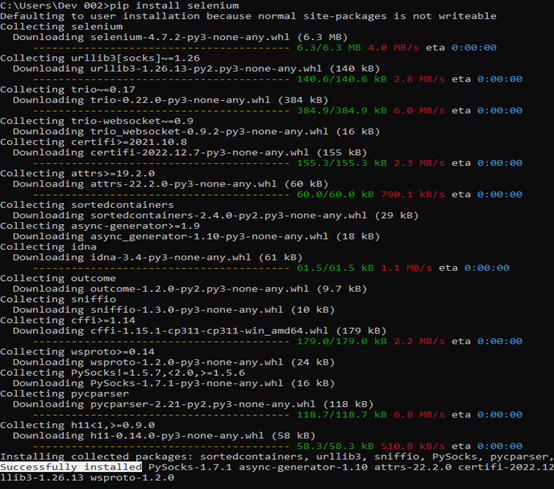
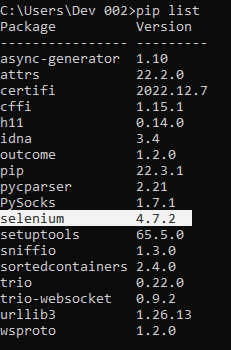
As you can see, pip collects and downloads the Selenium package successfully. Now, check if Selenium is installed successfully using the following command:
Download and Install the WebDriver Manager
In this step, to download the WebDiver manager packages, go to the site https://pypi.org/search/?q=webdriver+manager and search “WebDriver Manager”. Then, you will find the following:
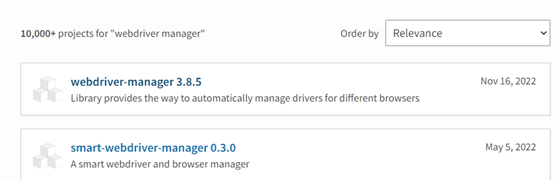
Select the latest version. Based on the provided illustration, the webdriver-manager 3.8.5 is the latest version. Download it.
Now, we go to the command prompt and install the WebDriver manager using the following command:
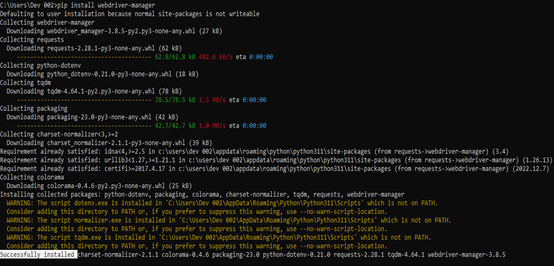
You can see in the previous image that the installation is successful.
Install and Import the WebDriver Manager with Chrome
In this step, we use the Chrome browser for automation testing. The webdriver.Chrome() method is used to create the “driver” object of the Chrome browser.
We use the following given syntax:
driver = webdriver.Chrome(ChromeDriverManager().install())
As you can see in the webDriver, the installation is successfully done.

Example 1: Extract the Title
In this example, we use the basic method to know how to use the Selenium framework with Python to launch a website, maximize the browser, and print the title of the website automatically.
Let us begin!
Launch the WebDrivers
In this step, we use the get() method to navigate the website.
The syntax that we use is as follows:
Maximize the Browser
To maximize the browser window, the following syntax is used:
As we can see in the following illustration, an “automation control test” is opened successfully to maximize the window.

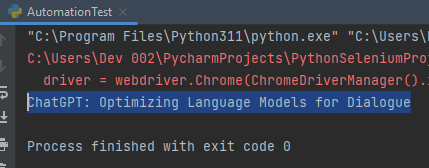
Print the Website Title
In this step, we can see the title of the site that is opened by the automation tool. The title attribute is used to print the title of the website in the console. The syntax is given as follows:
We can see the following output into the console:
Example 2: Automating the Website Search
Selenium in Python provides a searching method that searches through the locators of an element on a website and interacts with it. Some locators are supported by the Selenium framework. These are Id, Class, Name, and Xpath.
In this example, we will learn how to search for the website, bypassing the keyword into the search bar at https://www.python.org/ website.
Let’s start!
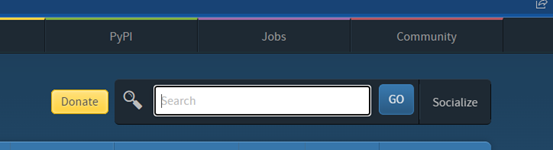
We can see the search bar and the “Go” button in the previous figure. To get the locator of the search bar element, we need to inspect it by right-clicking > Select Inspect on the website. The following figure shows the inspected locator:
![]()
In this example, we select the ID which is “id-search-field” as a unique identifier for the search bar.
We provided the following complete code snippet by which you can refer to for clear understanding:
from selenium import webdriver
from selenium.webdriver.chrome.service import Service
from selenium.webdriver.common.by import By
from webdriver_manager.chrome import ChromeDriverManager
driver = webdriver.Chrome(ChromeDriverManager().install())
driver.get("https://www.python.org/")
time.sleep(2)
search_box = driver.find_element(By.ID, 'id-search-field')
search_box.send_keys('selenium')
search_box.submit()
time.sleep(2)
driver.close()
In the following section, we give a proper explanation of the previous code so you can understand it better.
We execute the previous code in the Chrome browser and search the website by passing the elements automatically through Selenium. Let’s understand the code step by step.
In the first section, we import the required libraries. Install the WebDriver manager and utilize the get() method to open the URL request. After that, create the object of the “driver” Chrome browser. Then, we start the browser and open the web page. After opening, the website takes a delay of two minutes.
In the second section, the find_element_by_id() method is used to identify the search field on the web-page. In the following script, we can observe that we target the element id=”id-search-field”.
This section of the code extracts the ID of the search field.
After that, we pass the “Selenium” keyword to the search field using the .send_key() method. Then, we submit that keyword to search using the .submit() method. The following piece of code is used:
search_box.submit()
The result of the executed code is shown in the following:
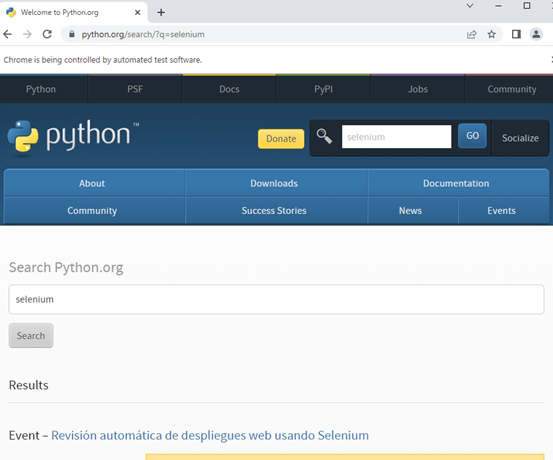
As can be seen in the previous figure, the Selenium keyword is typed into the search box and clicked automatically. We can see the search result of the “Selenium” keyword.
In the final step, after a delay of two minutes, the browser is closed automatically using the following method:
Conclusion
We now understand about the use of Web Automation in Selenium with the Python language. In the first example, we downloaded and installed the Chrome browser. Then, we learned how to open the requested URL and extract the title of the website. In the second example, we learned how to search automatically by passing a keyword. This article conducts the basic tutorial of web automation implementation in Python language.
Source: linuxhint.com