Salesforce Data Loader
Do you know that without writing any components/Apex script, we can do the data manipulation in Salesforce? The answer is Yes! Using Data Loader, we can achieve this. In this guide, we will learn how to install the Data Loader in Windows and how to perform insertion, deletion, and update of the Salesforce data. Lastly, we will also learn how to export the records from the Salesforce object. Let’s see what Data Loader is.
Data Loader
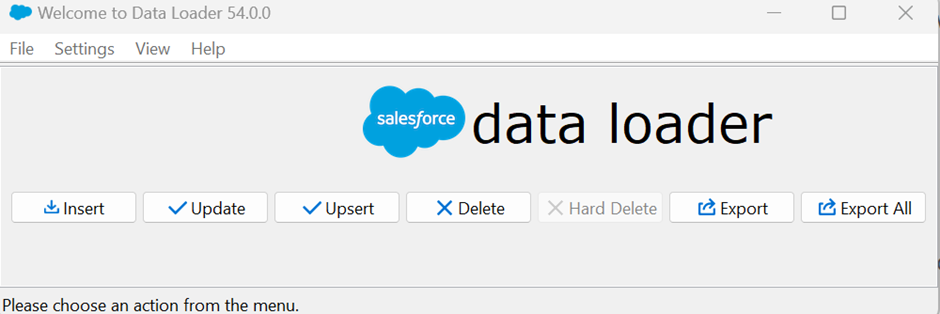
Data Loader is a tool which specifically does the data manipulation operations like insert, upsert, update, and delete. Apart from these four operations, it is also given as an option to export it. If you want to export the data that exists in the recycle bin (deleted data), it provides the “Export All” option. The main advantage of using the Data Loader is the user interaction; a simple, support CSV file; and it easily maps the fields and support for all Salesforce objects (Standard/Custom). We can also say that it is faster than the other loaders like Data Import Wizard.
Installation
1. It is directly available in any Salesforce Developer Org. First, navigate to “Quick Find” and search for “Data Loader”. Then, go to “Downloads”.
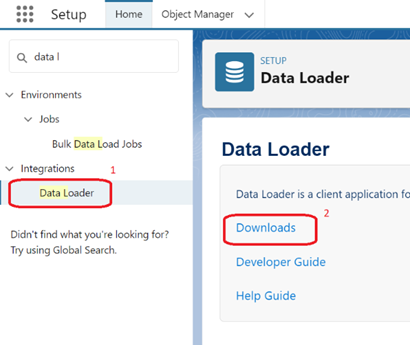
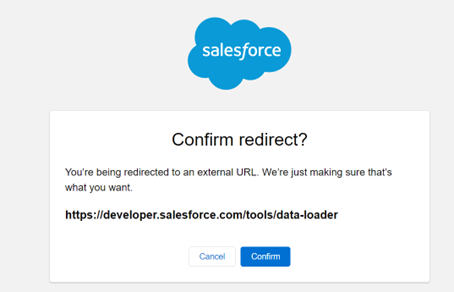
2. Confirm your org by clicking the “Confirm” button.
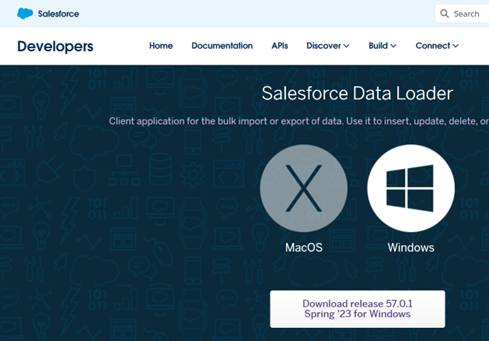
3. Click on “Download”.
4. After a successful download, extract the Data Loader folder and click on “Install”.
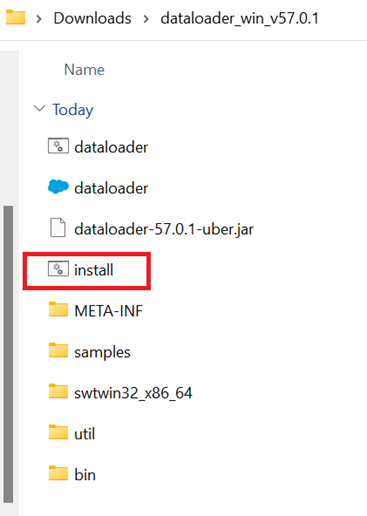
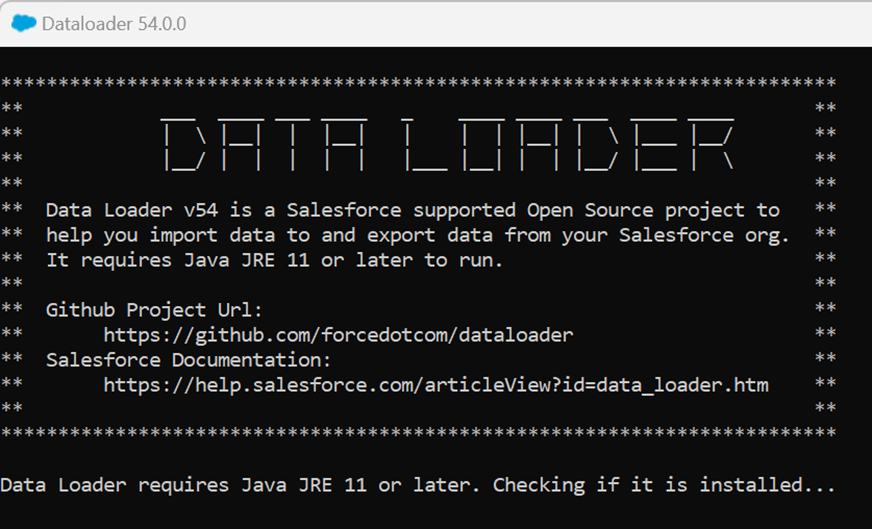
5. After a successful installation, it opens the Data Loader CMD. Make sure that you have the Java JDK already installed in your machine.
Data Loader – UI
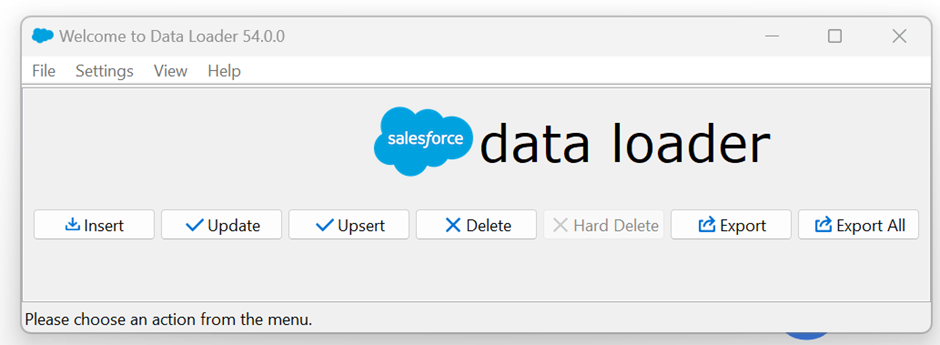
You can see the Data Loader with the following options. Let’s go one by one with an example:
It asks the org to login. You can select between “Sandbox” or “Production”. Here, we use “Production” and give your credentials. Click on “Allow”. Then, click on “Next”.

1. Insert Operation
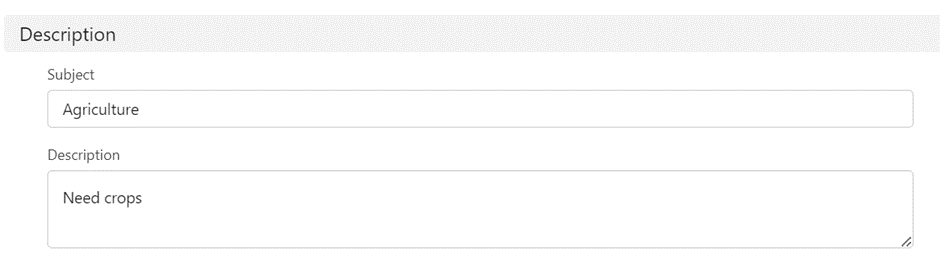
Let’s do the insertion on the WorkOrder object. Let’s have CSV with the following data:
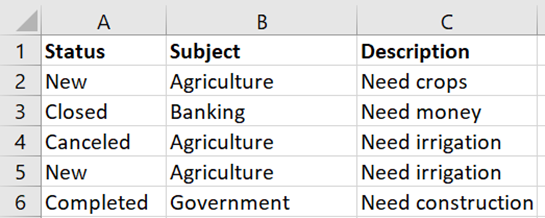
Here, the “status”, “subject”, and “description” are the fields in the WorkOrder object. We insert 5 records into the WorkOrder object with the previous rows.
For example: row is 1, the Status is “New”, the Subject is “Agriculture”, and the Description is “Need crops”.
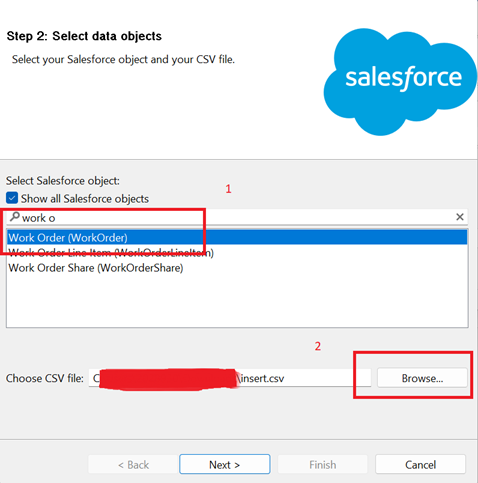
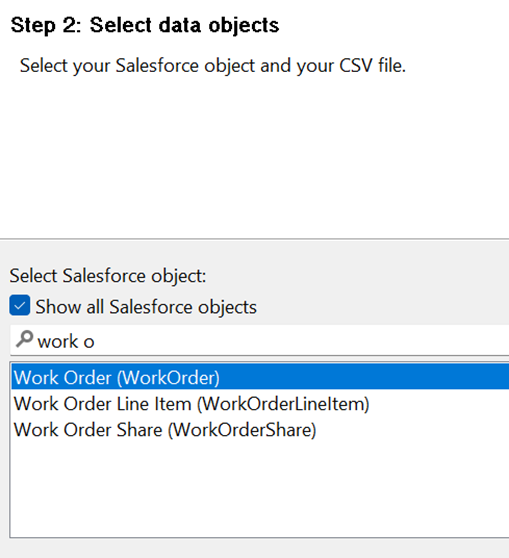
1. After clicking “Insert”, it asks to choose the object and data to be inserted. Select “Show all Salesforce objects”. Search for “Work Order” and select it. Upload your CSV file by clicking on the “Browse” button. Then, go to “Next”.
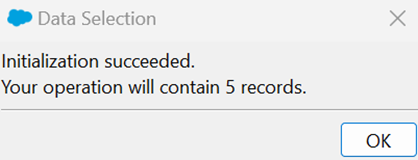
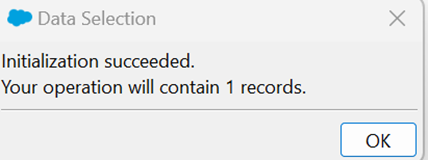
2. It gives confirmation to us regarding how many records to be inserted. Click “OK” to process it.
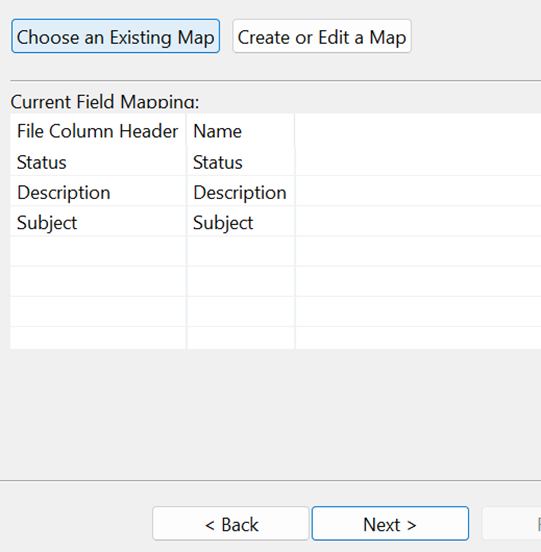
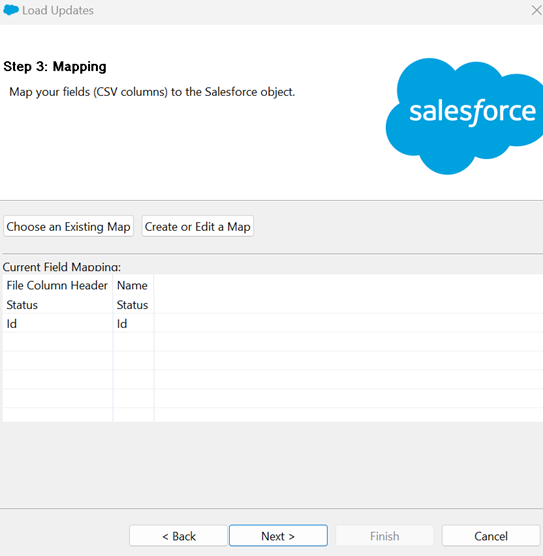
3. Mapping. In this step, we need to map our CSV headers to the “Salesforce Object” fields. Choose “Create or Edit a Map(1)”. Drag the “Names(2)” and place it under our “File Column(3)”.

Make sure you map the following:
- File Column Header – Description to Name – Description
- File Column Header – Status to Name – Status
- File Column Header – Subject to Name – Subject
- Check the mappings and go to “Next”.
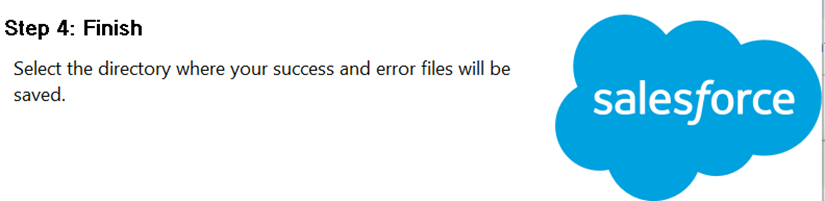
5. Lastly, click “Yes”. It saves the result of the CSV file in the location. You can select the path or leave it as default.

You will receive a confirmation on the same screen. Click “OK”.
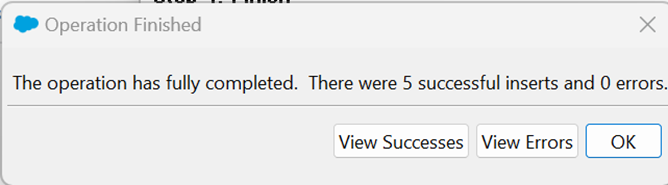
Let’s check whether these five records are inserted in the “Work Order” object or not. Go to the “App Launcher” and select “Work Orders”.
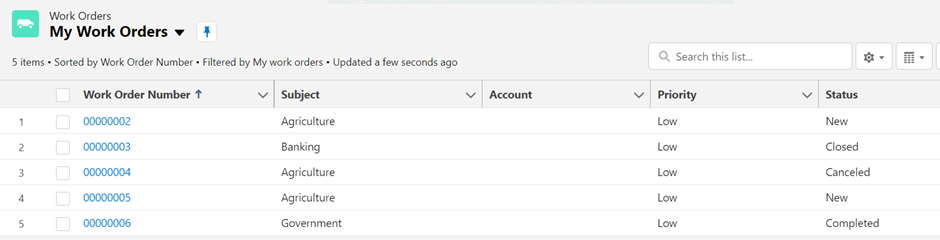
All five records are inserted. Open any record to see its detail.
2. Update Operation
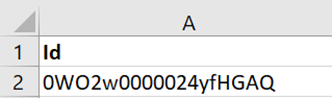
Let’s update a record in the “WorkOrder” object. Let’s have a CSV with the following record:
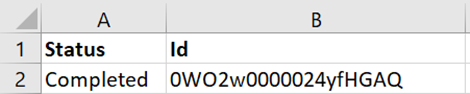
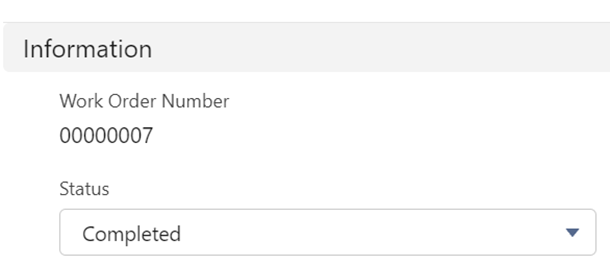
Here, we update status to “Completed” for the specified Record Id. The existing status is “New”.
After the update, it changes to “Completed”.
1. Quickly click on “Update” action from the menu.
2. Select the “Work Order” object and provide the CSV to it.
3. You will receive a confirmation that 1 record is going to update. Click on “OK”.
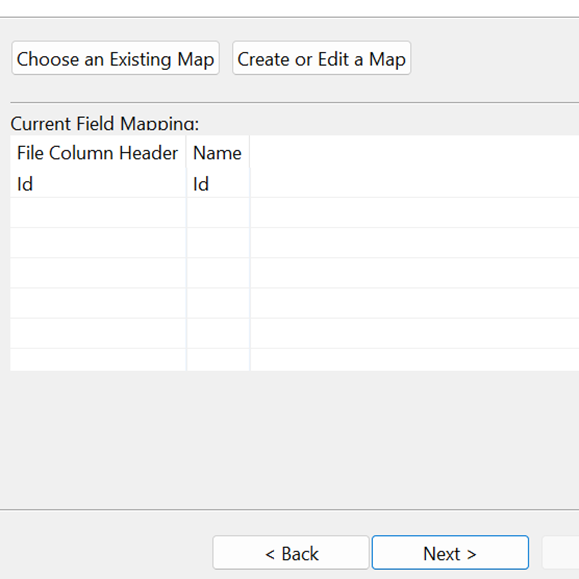
4. Map the “Status” field to “Status” and map the “Id” to “Work Order Id (Id)”. Then, click on “Next”.
5. Wait for the confirmation and click on “OK”.
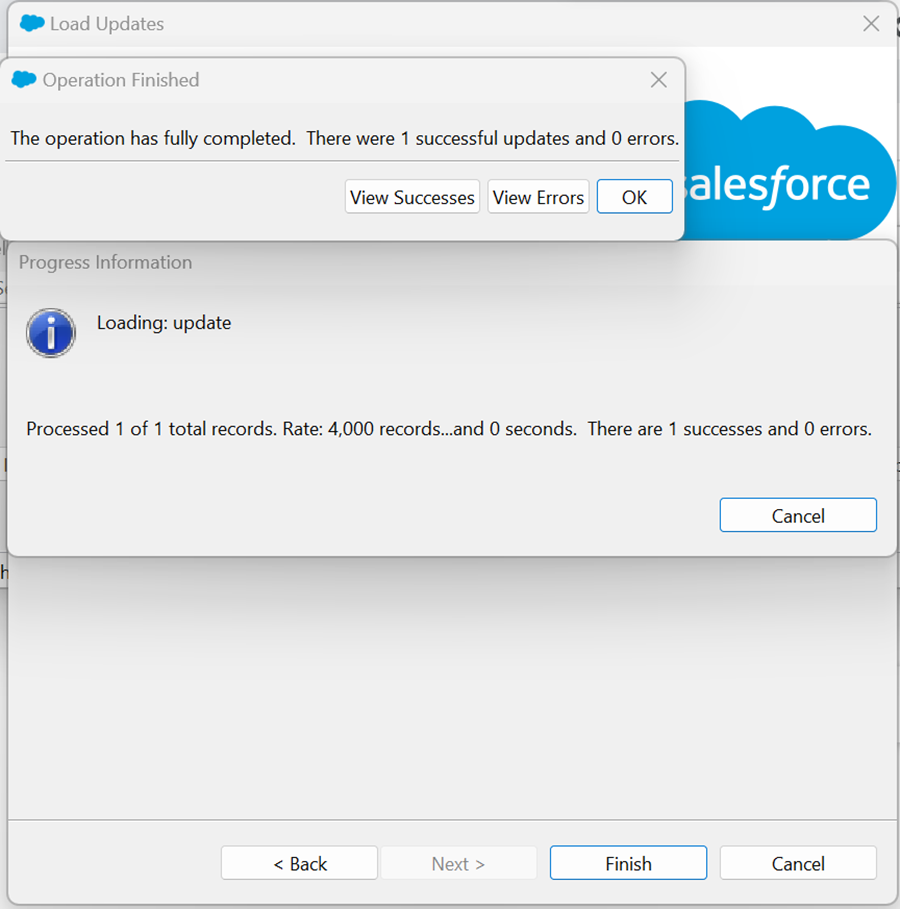
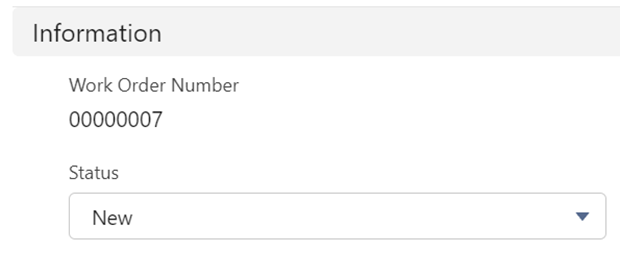
Result:
You can see that the status is changed from “New” to “Completed”.
3. Delete Operation
Let’s delete the following record from the Salesforce “Work Order” object.
- Choose the “Delete” action from the menu and choose the “Work Order” object. Upload the previous CSV file and click on “Next”.
- Map the field and do the remaining steps as discussed in the previous scenarios.
Check whether the deleted record is present in the Recycle Bin or not.
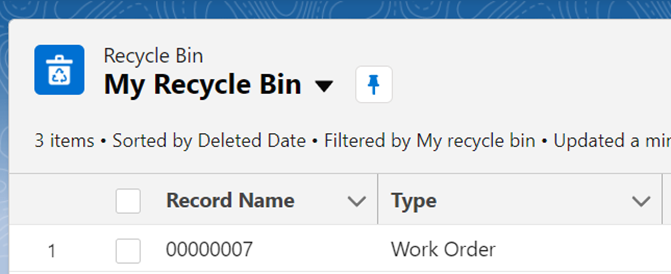
We can see that the record is deleted from the “Work Order” object.
4. Exporting
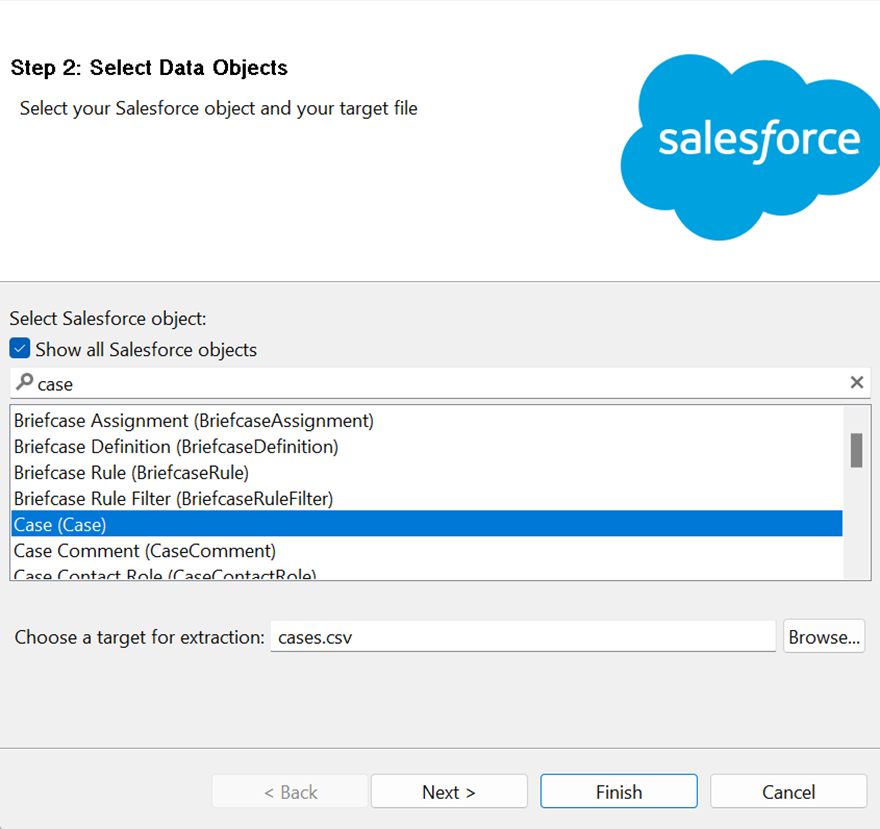
Let’s export the existing records from the “Case” object. Choose “Export” from the “Data Loader” menu.
1. Select the “Case” object. It asks the filename such that the case records are exported with the specified filename.
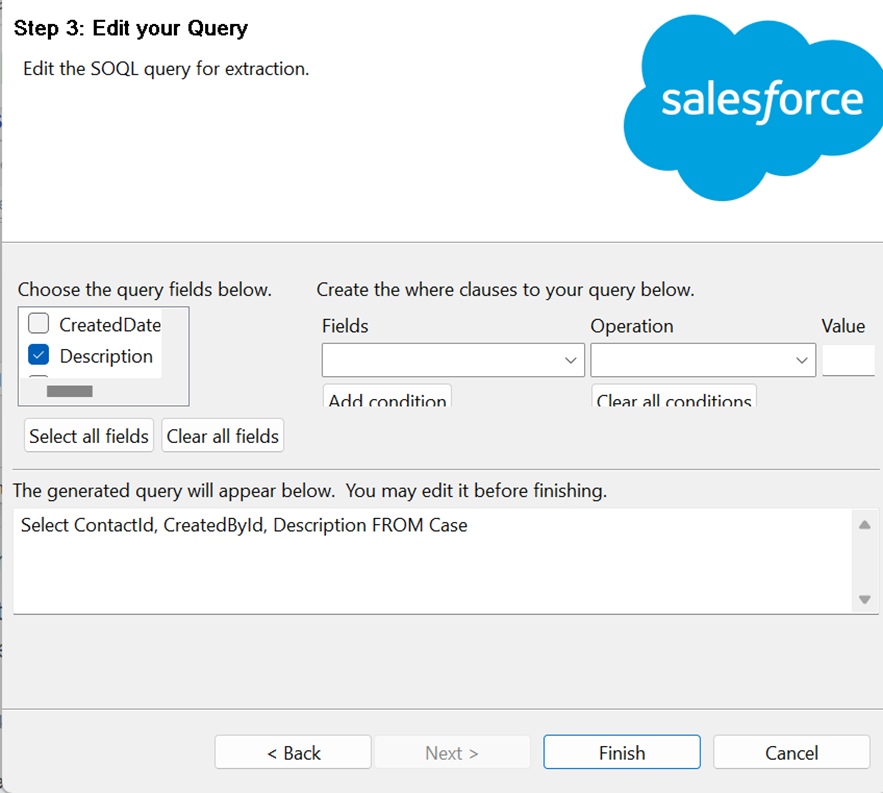
2. In this step, you are asked which fields are to be exported from the “Case” object. Select the check before the field that you want and click on “Finish”. (Here, we selected ContactId, CreatedById, and Description).
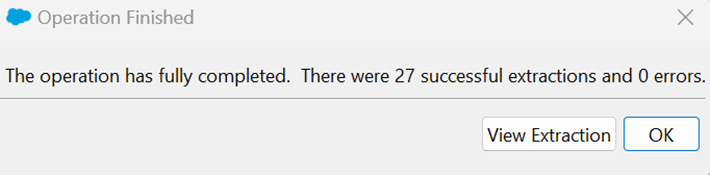
3. You will receive a confirmation message and display how many records are exported. In this scenario, 27 case records are exported. Click on “OK”.
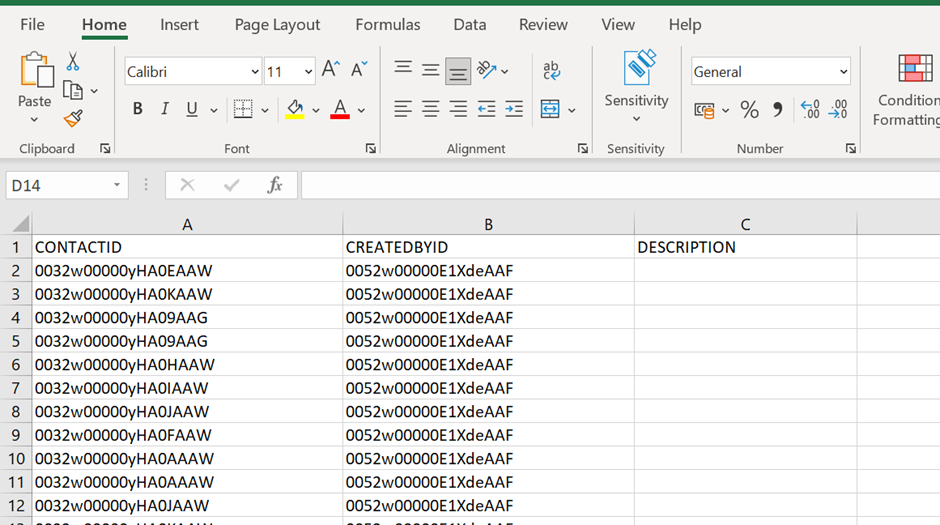
4. It displays the exported case records in the UI. If you want to store it in Excel, click on “Open in external program”.
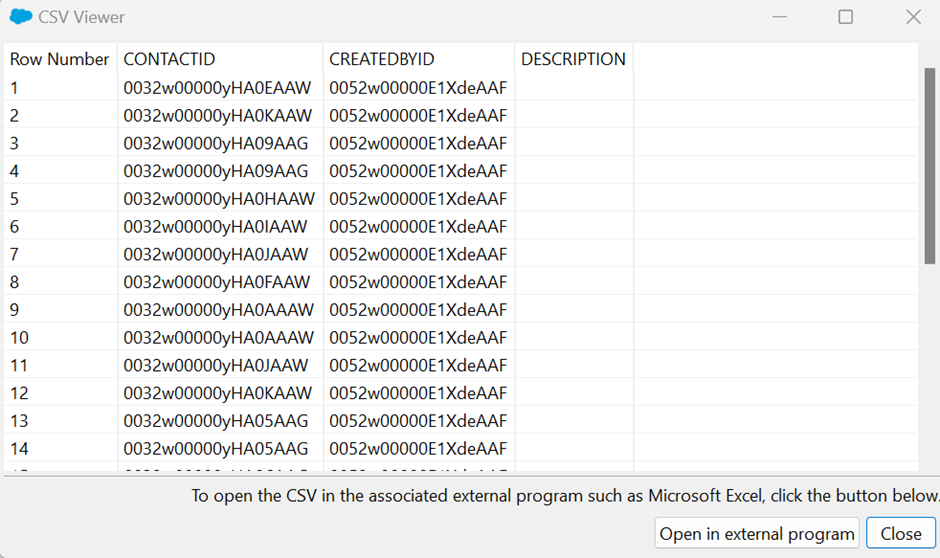
You will see the case records with three fields in Excel.
This way, we can do the data manipulation using the Data Loader.
Conclusion
We learned how to import/export the data using the Data Loader on “Work Order” and “Case” objects with good examples. The key difference between “Export” and “Export All” is that the “Export” returns only the existing records. But “Export All” returns the records that are present in the recycle bin. If you want to delete the records, you can go with the “Delete” action. But these deleted records accumulate in the Recycle Bin. If you need not to accumulate it there, or if you need permanent deletion, you can proceed with “Hard Delete” action.
Source: linuxhint.com