Run PowerShell Script As Administrator
A script is a simple file consisting of sets of instructions or commands to automate and manage system tasks. More specifically, the PowerShell script is saved with the “.ps1” extension and can be directly executed through the path and script file name. Users can easily share the instructions and commands to set up the system or software through a PowerShell script file. Moreover, it can be easily executed using the path and file name in the terminal.
This blog will demonstrate how to execute the script of PowerShell as an administrator.
How to Create PowerShell Script?
If you know how to create a PowerShell script, you can skip this section and move to the next section to run PowerShell Scripts with Administrator privileges.
To create a simple PowerShell Script, go through the provided instructions.
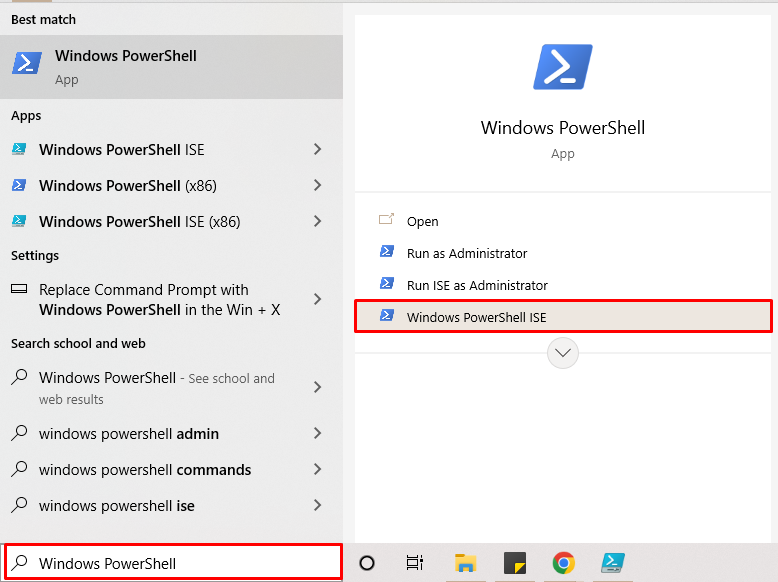
Step 1: Open Windows PowerShell ISE
First, start the Windows PowerShell ISE (Integrated Scripting Environment) from the Windows “Startup” menu:
Step 2: Create Script
Next, type the required commands in the script file. For instance, we have utilized the “Write-Host” command to write and output the information stream:

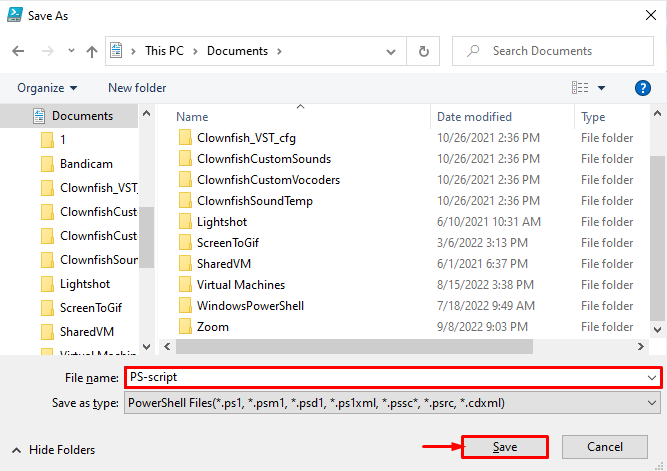
Step 3: Save Script
After that, use “CTRL+S” key to save the file. Upon doing so, the “Save as” Windows will appear on the screen. Select the directory where you want to save the script, then name the script and press the “Save” button:
How to Run the PowerShell Script as an Administrator?
To run the script of PowerShell as Administrator, users must only run Windows PowerShell or Command Prompt with administrative rights.
To run the PowerShell script as administrator, look at the provided instructions.
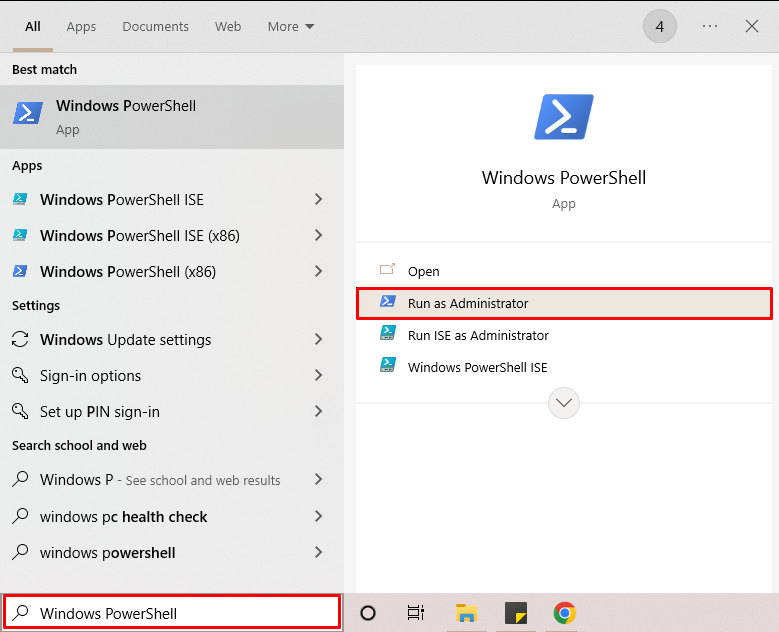
Step 1: Run PowerShell as Administrator
In the Start menu, type “Windows PowerShell” and click on the below-highlighted option to run the PowerShell as Administrator:
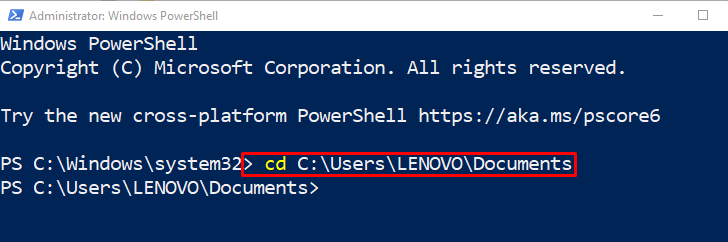
Step 2: Open Script Directory
Move to the directory in which the PowerShell script is placed using the “cd” command:
Step 3: Run PowerShell Script
After that, run the PowerShell script using the “.\<scriptname.ps1>” command:

How to Run PowerShell Script as Administrator Using CMD?
To run the PowerShell Script as Administrator in Command Prompt, users are required to run PowerShell on the Windows Command Prompt terminal. Then, run the “Start-Process powershell -verb runas” command. After that, run the script by providing the path and script name.
Go through the provided procedure to run PowerShell script as administrator.
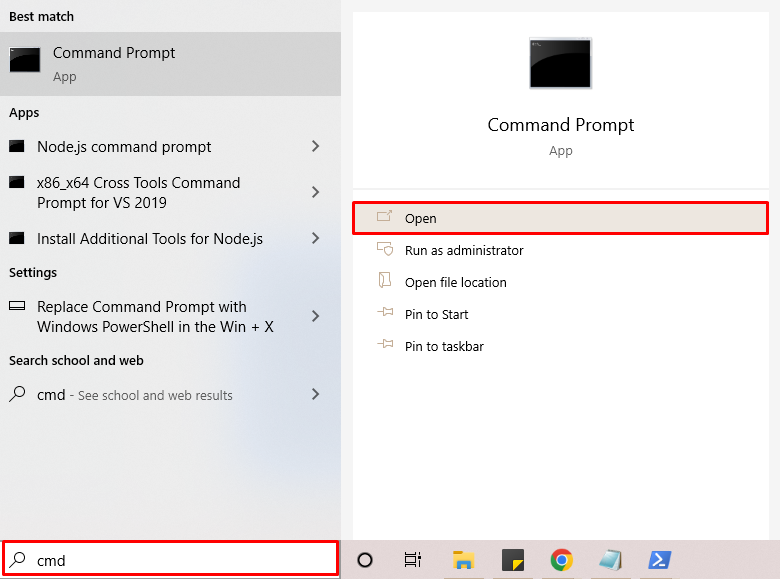
Step 1: Launch Command Prompt
First, launch the Command Prompt from the Windows Start menu:
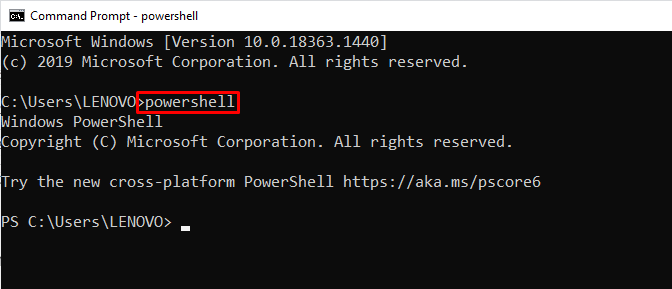
Step 2: Run PowerShell on Command Prompt
After that, execute the “powershell” command to start the PowerShell terminal or shell on Command Prompt:
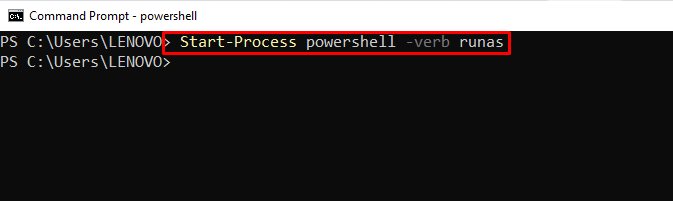
Step 3: Run PowerShell as Administrator
Run the PowerShell as administrator by executing the provided command. This command will open PowerShell Windows with administrator privileges:
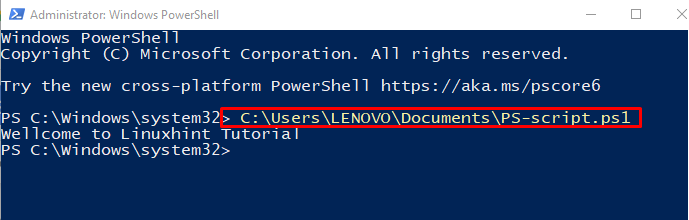
Step 4: Run PowerShell Script
Run the PowerShell script by providing the script path and file name, as shown below:
Alternatively, users can directly run the PowerShell as administrator and execute the script on Command Prompt through the provided command:
We have demonstrated the easiest methods to execute the PowerShell script as an administrative.
Conclusion
To run the PowerShell script as an administrator, users are only required to run the PowerShell terminal with administrative privileges. Then, open the directory where the PowerShell script file is placed through the “cd” command. Next, run the PowerShell script using the “.\<scriptname.ps1” command. This write-up has demonstrated the procedure to execute the script of PowerShell as an administrator.
Source: linuxhint.com