RabbitVCS 0.19 Adds Back Nautilus (GTK4) Support [How to Install]
![]()
Ubuntu 23.04 and Debian 12 excluded rabbitvcs-nautilus package in their repositories, since RabbitVCS 0.18 does not support the GTK4 version of Nautilus file manager.
Now, RabbitVCS 0.19 is released! Which, added back plugin support for the newer versions of Nautilus.
The new release has been submitted into Debian new packages queue. It should also be included in the next Ubuntu 23.10, which will be released in October.
For current Ubuntu 23.04 users who want to use the version control systems from file context menu, or Ubuntu 22.04 and Ubuntu 20.04 who want to update to RabbitVCS 0.19 with bug fixes and improvements, either build it from source code, or follow the steps below to get it from an unofficial PPA.

Install RabbitVCS 0.19 Nautilus Plugin via Ubuntu PPA
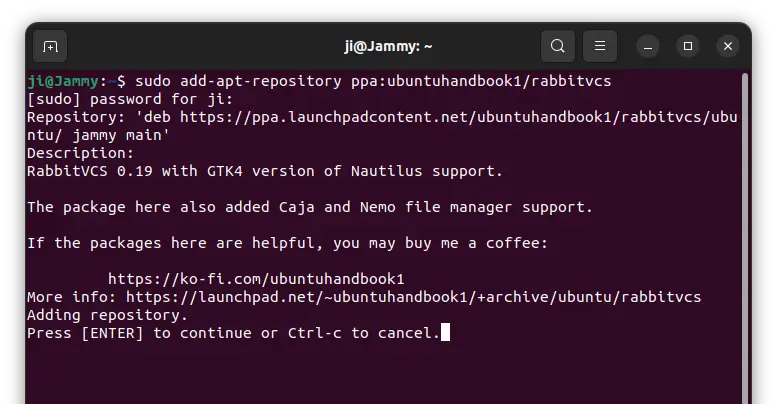
1. Firstly, press Ctrl+Alt+T on keyboard to open a terminal window. When terminal opens, run command to add the Ubuntu PPA.
sudo add-apt-repository ppa:ubuntuhandbook1/rabbitvcs
Type user password (no asterisk feedback) when it asks and hit Enter to continue.
2. The PPA package also include the Nemo plugin. If you’re doing the steps in Linux Mint, you need also run command to manually update the package cache:
sudo apt update
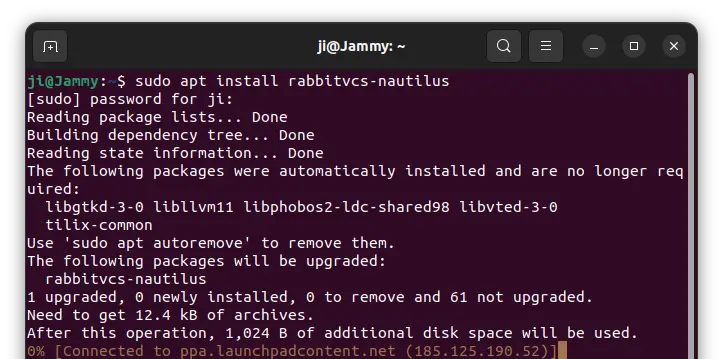
3. Finally, install the RabbitVCS 0.19 with Nautilus integration by running command:
sudo apt install rabbitvcs-nautilus rabbitvcs-core
In the last command, you may replace rabbitvcs-nautilus with rabbitvcs-nemo for Linux Mint Cinnamon, rabbitvcs-caja for MATE, or rabbitvcs-thunar for XFCE desktop.
4. After installed the package, restart your file manager by running command in terminal:
nautilus -q
Or, caja -q, nemo -q depends on your desktop environment.
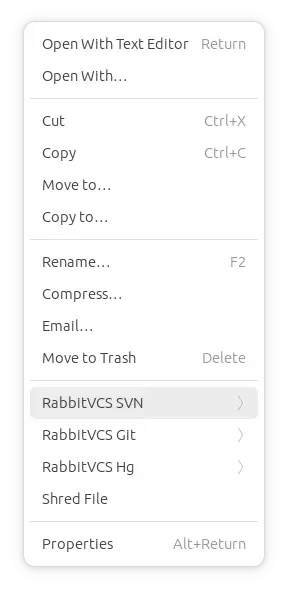
When done, re-open your file manager and right-click on file/folder to see the new context menu option.
NOTE: Don’t know why, the Nemo file manager do NOT show the RabbitVCS context menu in the first time you right-clicking a file/folder.
Uninstall:
You can purge the Ubuntu PPA, which also downgrade the RabbitVCS plugin to the stock version in system repository.
To do so, open terminal and run command:
sudo apt install ppa-purge && sudo ppa-purge ppa:ubuntuhandbook1/rabbitvcs
To complete remove the RabbitVCS context menu, run command:
sudo apt remove --autoremove rabbitvcs-core
Finally, run nautilus -q, caja -q, nemo -q or thunar -q to apply changes.
Source: UbuntuHandbook