Program ESP32 with MicroPython Using VS Code and PyMakr
ESP32 is a microcontroller board with more advanced functionality. To get the full potential of ESP32 we can program it using the MicroPython language. Most of the time ESP32 is programmed with MicroPython using Thonny IDE or uPyCraft IDE however for more advanced projects containing hundreds of thousands of lines and multiple files we use VS Code for ESP32 code writing. VS Code has some advanced features like auto completion and error checking which is lagging in other MicroPython IDEs.
Using VS Code, we can program ESP32 boards with MicroPython with the help of PyMakr extension. Follow all the steps to complete ESP32 installation in VS Code.
Here is the list of content we will be covering:
- Installing VS Code on Windows (Visual Studio Code)
- Installing Node.js on Windows
- Installing PyMakr Extension on VS Code
- Creating a New Project in VS Code Using PyMakr for ESP32
- Uploading Code in ESP32 Using PyMakr Extension in VS Code
Prerequisites
Before we move forward here is the list of programs and extensions, we must have in our PC to start programming ESP32 with MicroPython using VS Code:
-
- VS Code
- Node.js
- PyMakr extension
- MicroPython firmware in ESP32
- ESP32 Board
Note: Make sure MicroPython firmware is flashed inside the ESP32 board. If MicroPython is not flashed, then we cannot program ESP32 using VS Code.
Read this article Flash MicroPython Firmware in ESP32
1: Installing VS Code on Windows (Visual Studio Code)
First step towards installation is to download the VS Code. Now below mentioned steps will guide on VS Code installation.
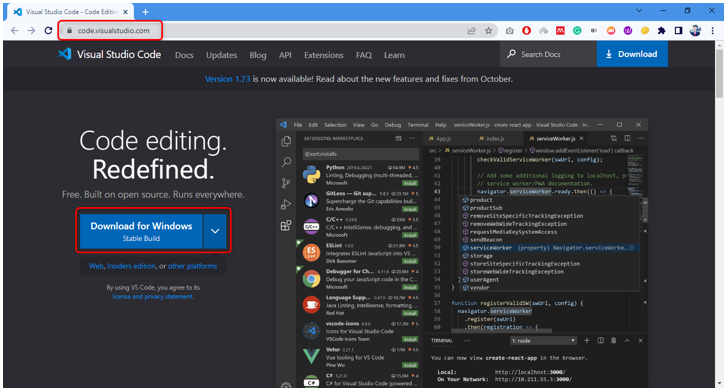
Step 1: Open Visual Studio Code official download page and download the stable build VS Code for windows.
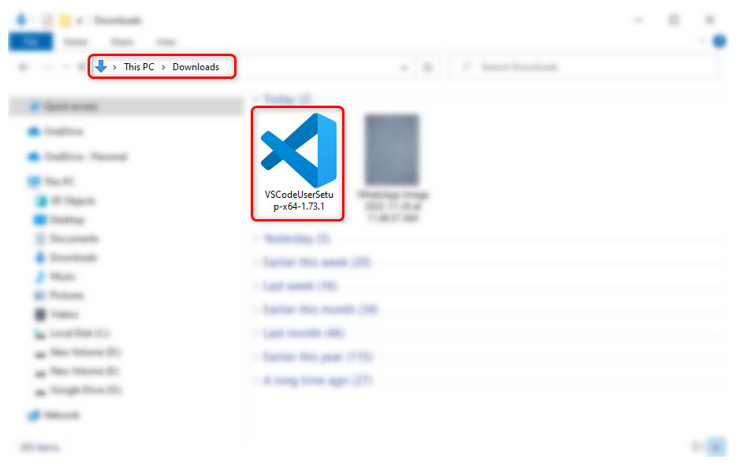
Step 2: In the download directory VS Code exe file is downloaded. Double click to open the installation wizard.
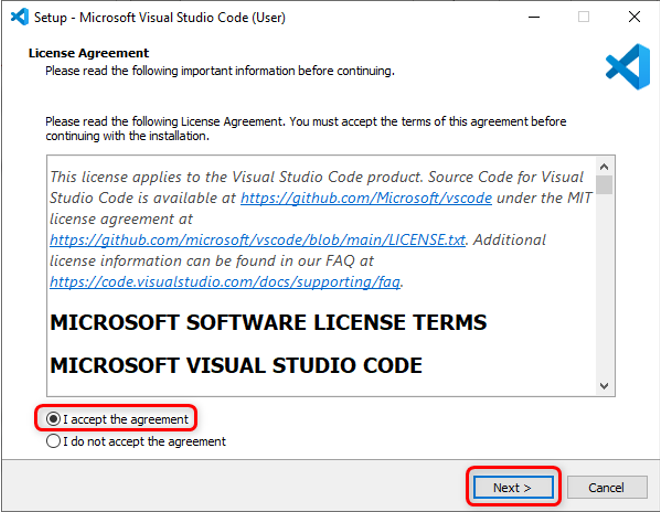
Step 3: Accept the permission and click Next.
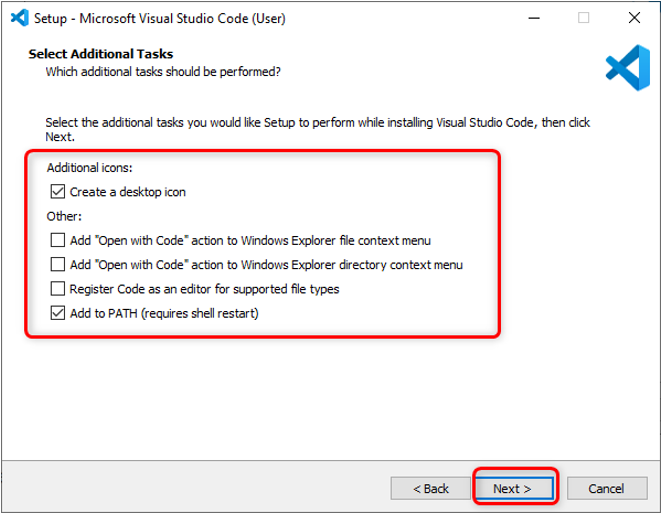
Step 4: Check Add to Path option and click Next.
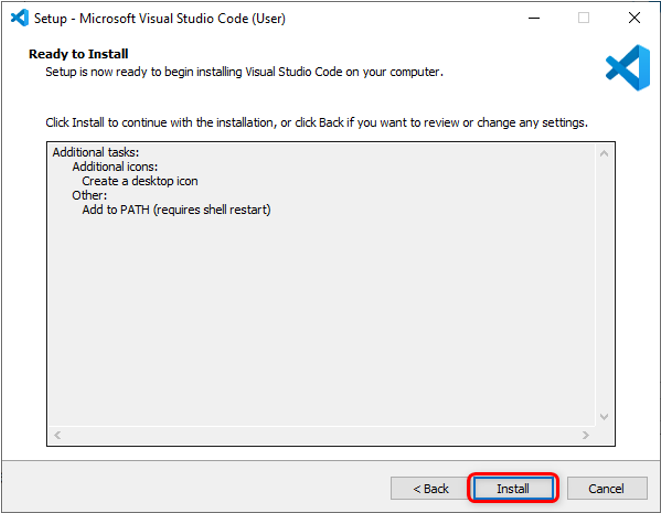
Step 5: Now click Install to begin the installation process of VS Code.
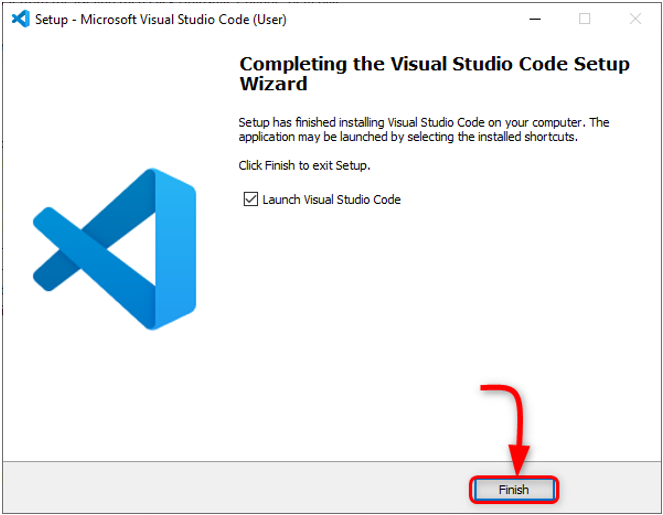
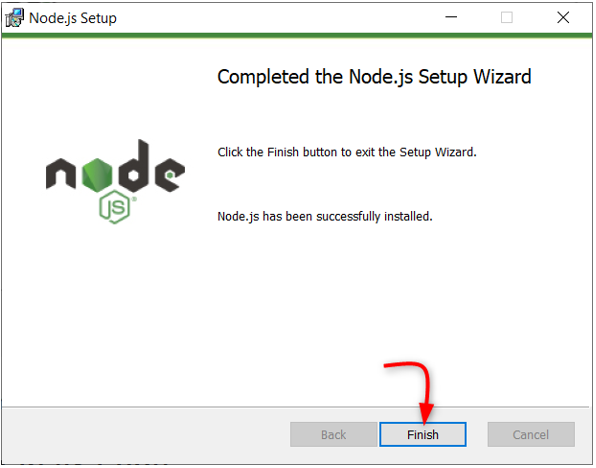
Step 6: Once the installation process is completed click Finish.
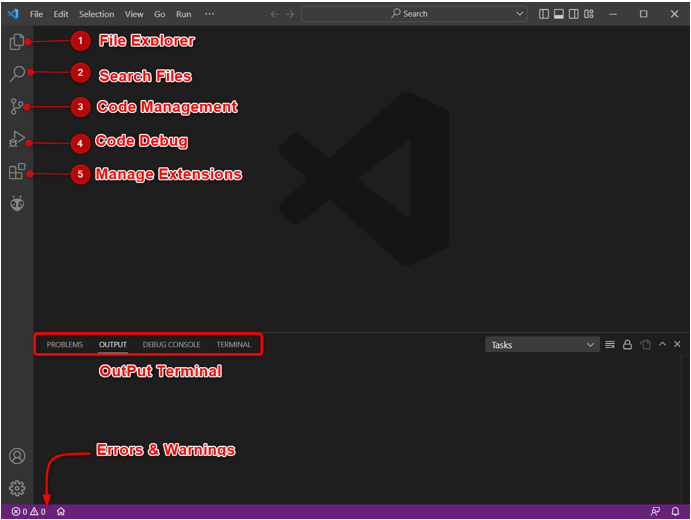
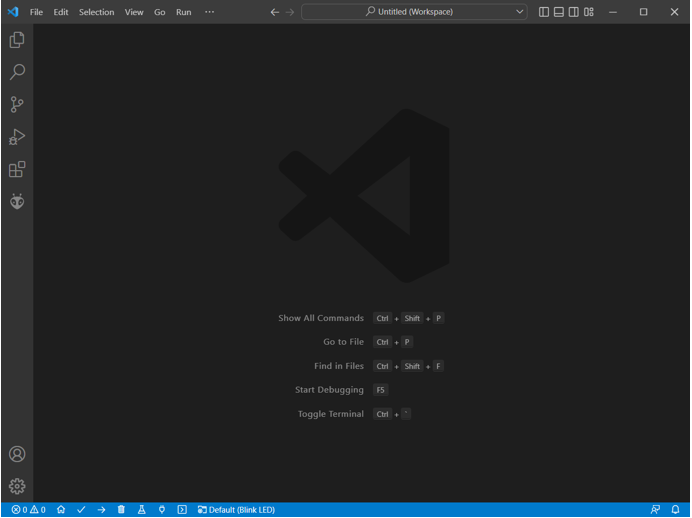
Step 7: Open VS Code. Following window will open showing us the VS Code interface. Move the cursor over any icon it will show the meaning of every icon plus a shortcut to access them easily.
We have successfully installed the VS Code on our PC. Now we will move towards installation of Node.js on the PC.
2: Installing Node.js on Windows
To program an ESP32 board in VS Code Node.js is needed. We need Node.js because the PyMakr extension codebase has been completely written in JS. Using the Node.js PyMakr extension can communicate with ESP32 boards.
Below steps will guide you on Node.js installation.
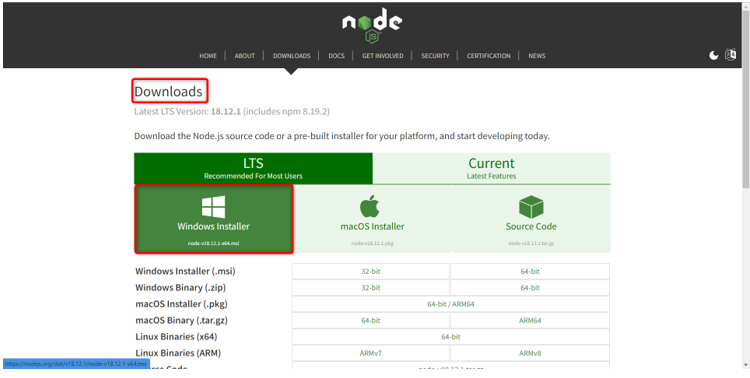
Step 1: Open Node.js download page. Download the latest version available. Either download the LTS or current version.
Step 2: Following files of Node.js will be downloaded. Double click installation file.

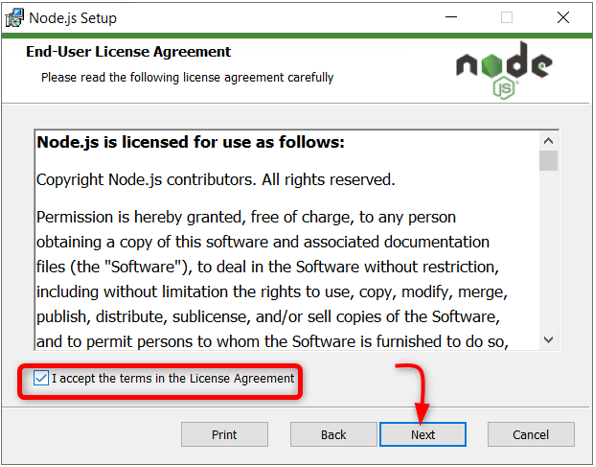
Step 3: Accept the agreement and click Next.
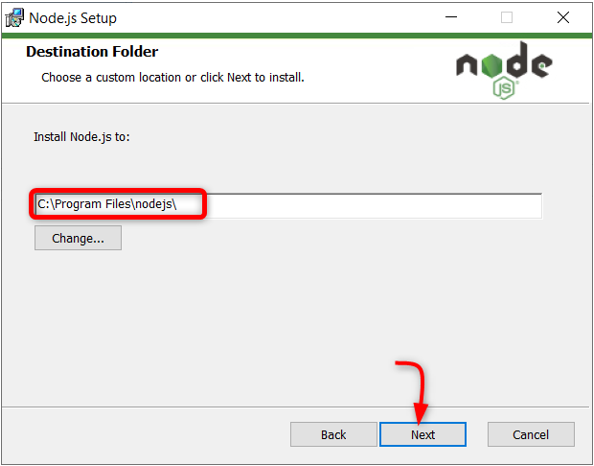
Step 4: Select directory to install and click Next.
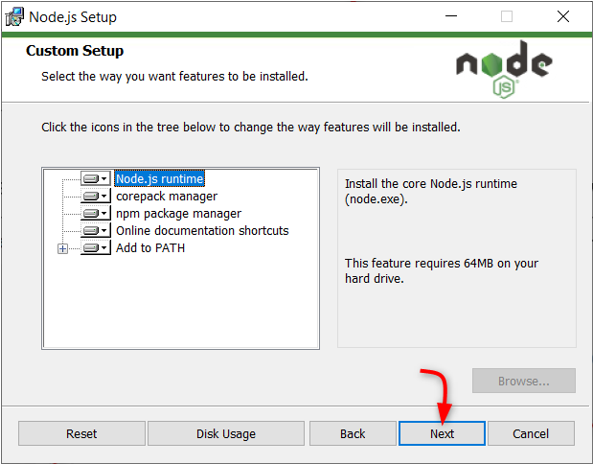
Step 5: Select Node.js runtime and click Next.
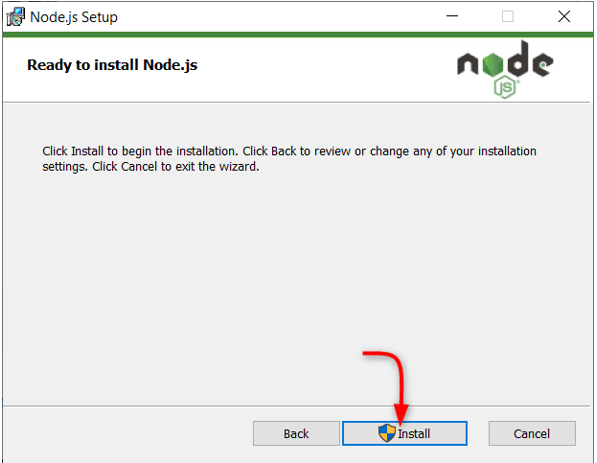
Step 6: Click Install to begin installation.
Step 7: Once the installation is completed. Click Finish to close the window.
As Node.js is ready, open VS Code and install the PyMakr extension for ESP32.
3: Installing PyMakr Extension on VS Code
Next step is to install the PyMakr extension in VS Code. PyMakr is a cross platform and multi framework professional IDE for microcontrollers and embedded systems and designs. Using this extension in VS Code we can easily program MicroPython devices such as ESP32 board. It has a built-in command line REPL. It allows users to sync an entire project in a MicroPython device using just a button.
Follow the steps to setup PyMakr in VS Code:
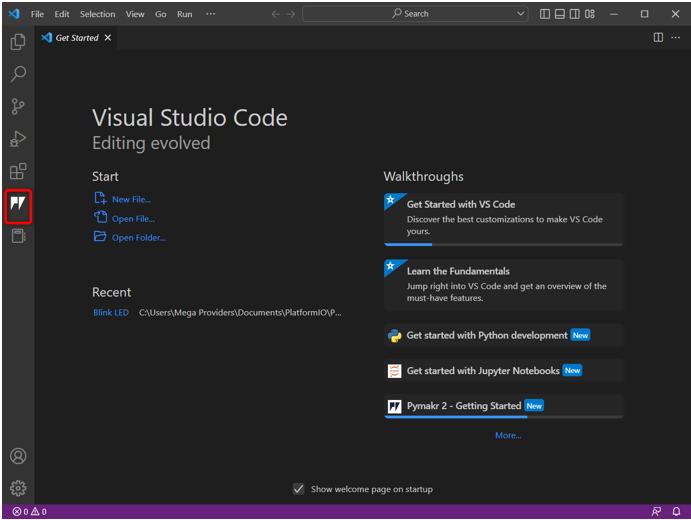
Step 1: Open VS Code. It will open in a new window showing us VS Code interface.
Step 2: Open the extension tab and search for the PyMakr extension in the search bar. Click install to begin installation.

Step 3: PyMakr icon is created on the left sidebar after it is successfully installed. Here we can access all the MicroPython files.
We have successfully installed the PyMakr extension in VS Code. Next, we will create a new project inside the PyMakr extension but before that we need to install the required driver for ESP32 serial communication.
4: Creating a New Project in VS Code Using PyMakr for ESP32
To test PyMakr now we will upload code in ESP32. But before that following are the two prerequisites must be completed:
-
- MicroPython firmware installed in ESP32
- USB serial communication drivers installed
Connect the board with the PC. Make sure the serial drivers for UART communication are installed on the PC. If the drivers for ESP32 are not available PyMakr will be unable to detect the ESP32 board.
For further detailed information read the article How to setup ESP32 drivers in Windows.
Follow the given steps to finish uploading code in ESP32:
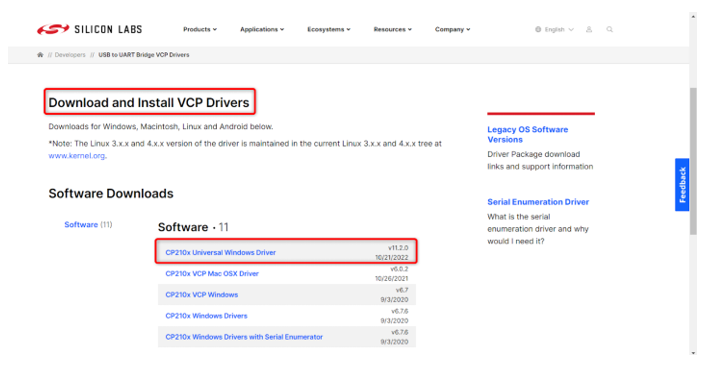
Step 1: Download updated USB-to-UART Bridge VCP Drivers.
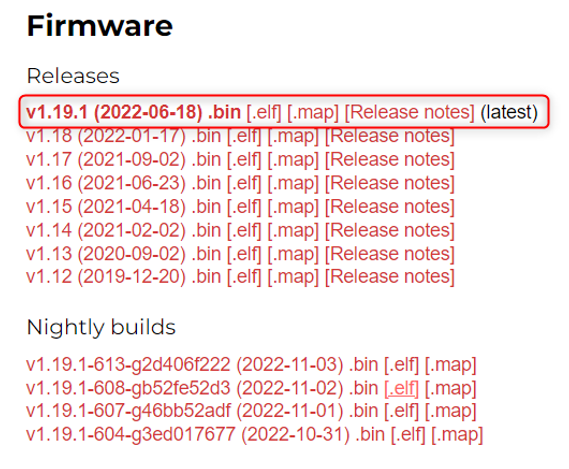
Step 2: Once the drivers are installed, upload the MicroPython firmware in ESP32. Here is an article on How to install MicroPython firmware in ESP32.
To install MicroPython firmware using Thonny IDE click here.
Step 3: Once the drivers for ESP32 and MicroPython firmware are installed, now we are ready to create our first MicroPython project in VS code using PyMakr extension.
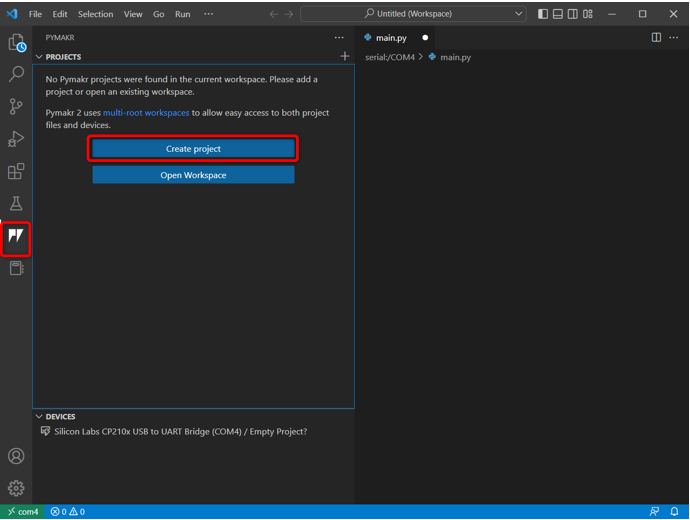
Open VS code, select the PyMakr extension and click Create Project.
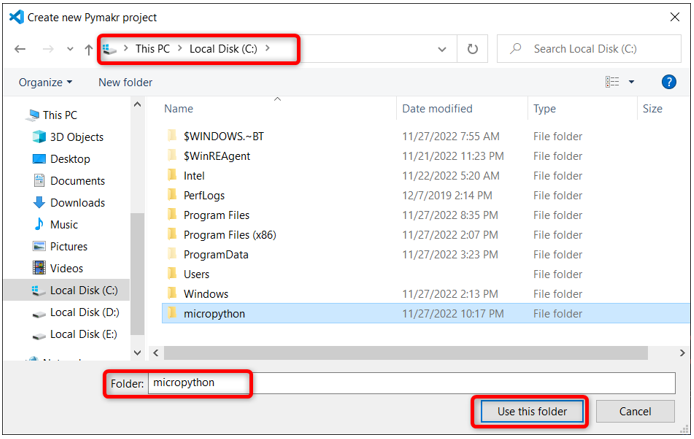
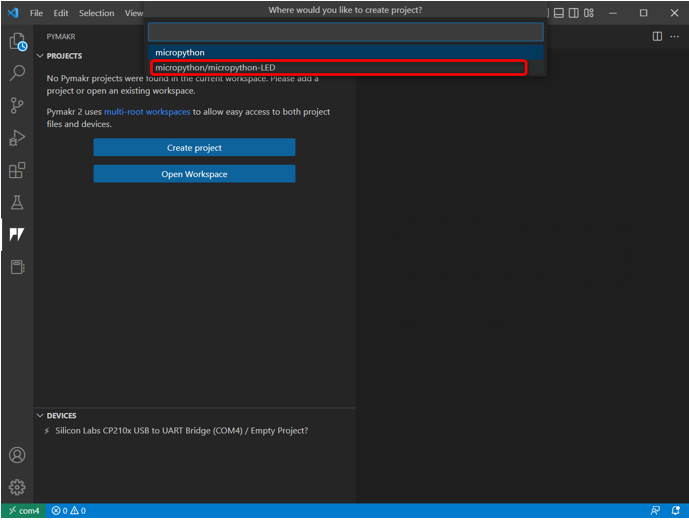
Step 4: Select folder for new MicroPython files. We created a folder micropython.
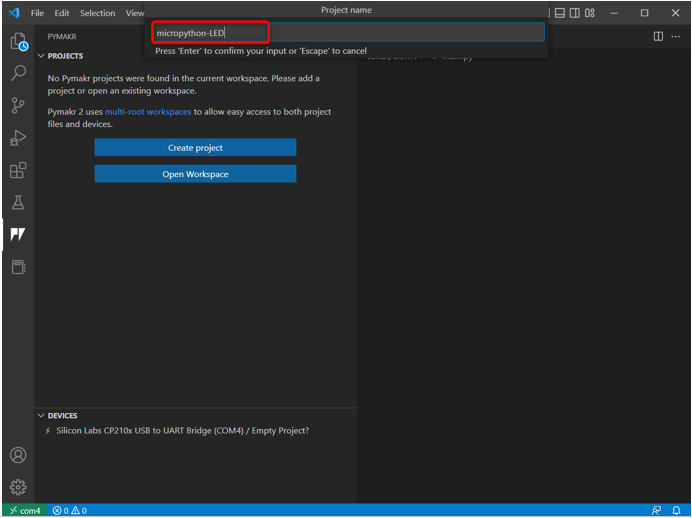
Step 5: VS code will ask for the new file name. Create a new file with any name.
Step 6: Now select the folder name we just created to store the main python files for ESP32.
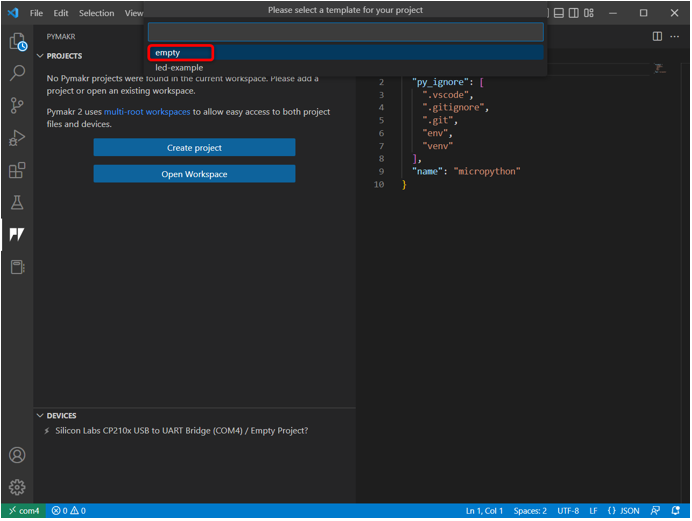
Step 7: VS code will ask for the template of the project either go with the suggested one or select Empty.
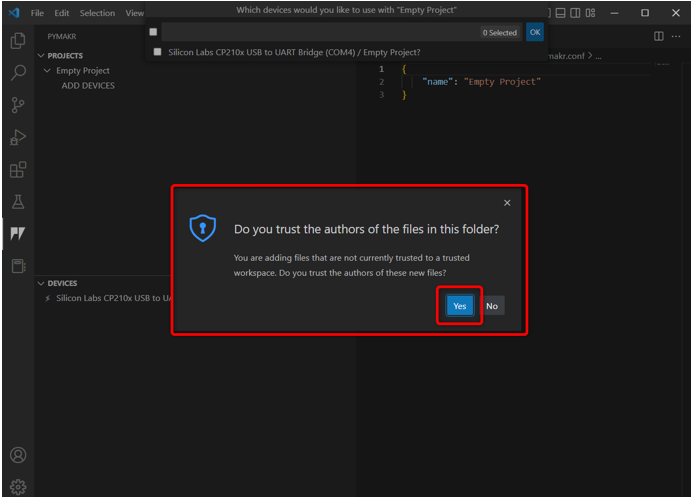
Step 8: Following warning will appear on the window. Click yes to allow VS code to access the folder and create new files.
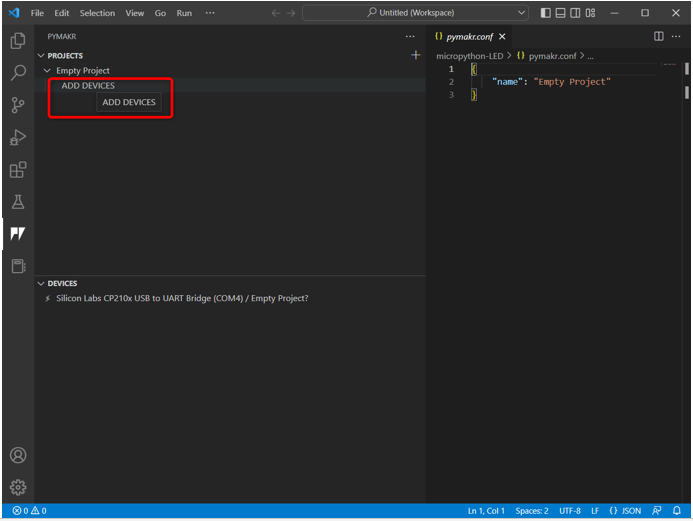
Step 9: Now VS code will ask for the device to be programmed. Select ESP32 board and click OK.
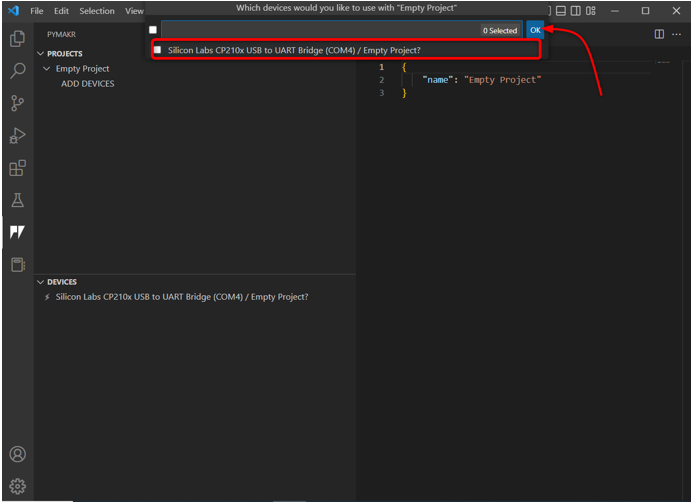
Alternatively, you can also click the Add Device option if the device is not automatically detected by PyMakr.
Step 10: Once the device is selected. Connect the device with PyMakr using the mentioned button.
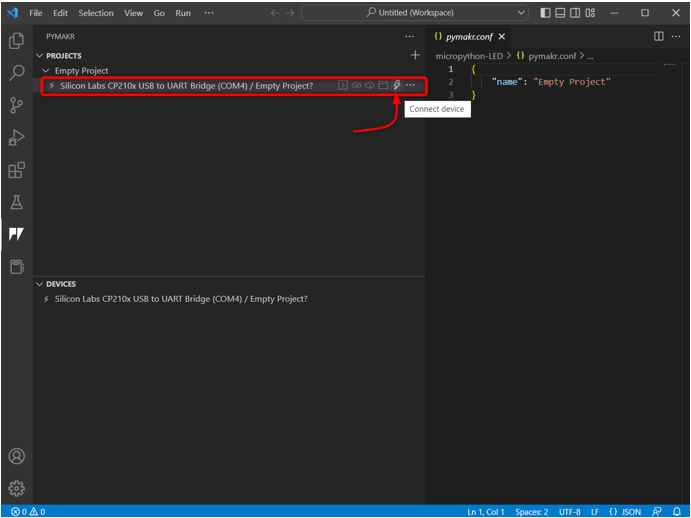
Once the device is connected the following options with the device appear.

These options include:
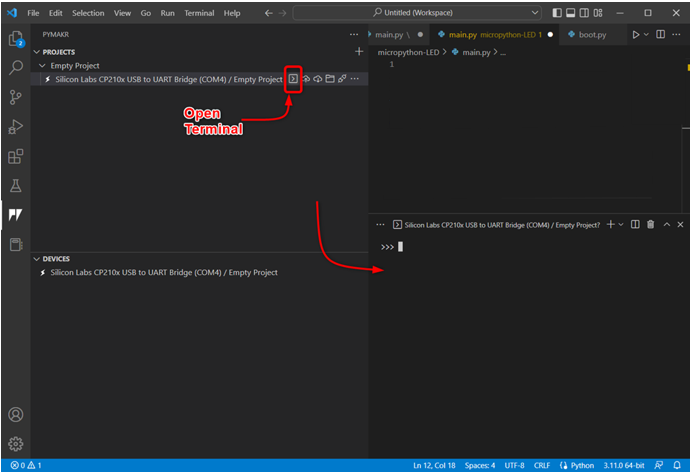
- Open terminal: Open terminal window in VS code.
- Sync project to device: Upload the current program in ESP32 board.
- Download project from device: Download the uploaded program from ESP32 to PyMakr extension.
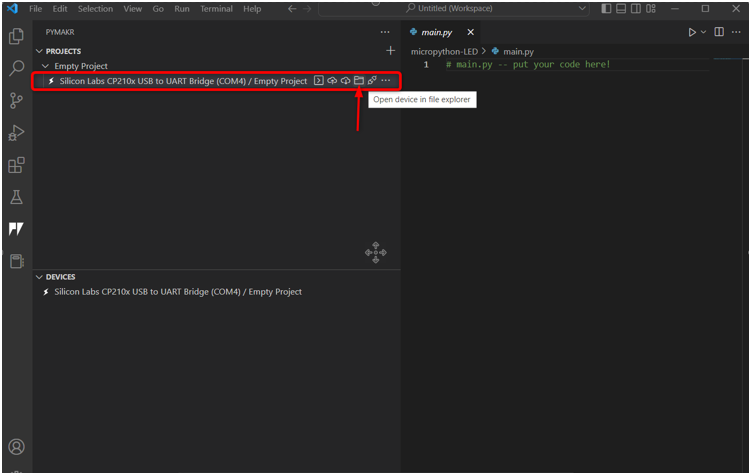
- Open device in file explorer: Opens device files in explorer window of VS code. This will help to know which code is uploaded inside the ESP32 board.
- Disconnect device: Disconnects the device from PyMakr.
We have successfully connected ESP32 with PyMakr extension in VS code. Next step is to verify it using the command terminal.
Step 11: To verify device connection open command terminal.
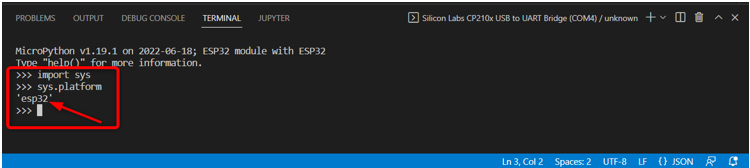
Step 12: Type the following command in the terminal window to get the platform name here we have ESP32. This indicates that the device is connected successfully.
sys.platform
Now ESP32 is connected we will write our first MicroPython code in PyMakr and upload it to the ESP32 board.
5: Uploading Code in ESP32 Using PyMakr Extension in VS Code
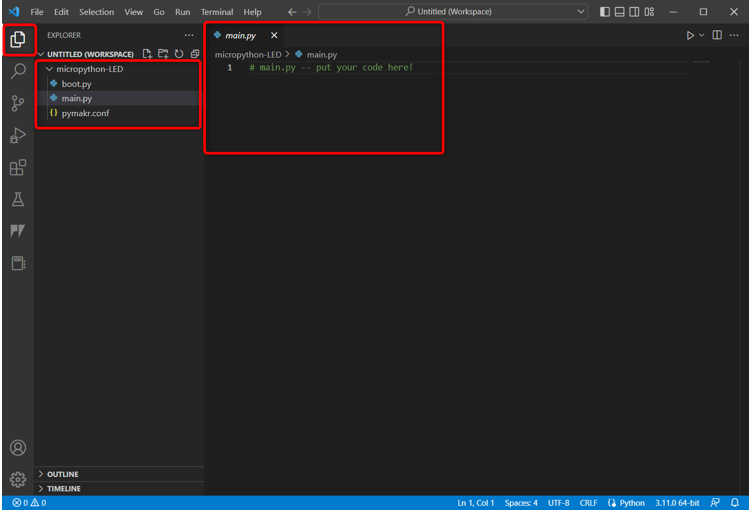
After connecting device and creating a new project following files can be seen in explorer window:
-
- boot.py: Code here is executed every time MCU reboots.
- main.py: This is the main program files. We will write our MicroPython in this file.
- pymakr.conf: This is PyMakr configuration files.
Now follow the steps to write the first MicroPython code and upload it to ESP32.
Step 1: Open the explorer window. Here all files will appear.
Step 2: To check which files are currently uploaded in ESP32 go to PyMakr and select Open device in explorer.
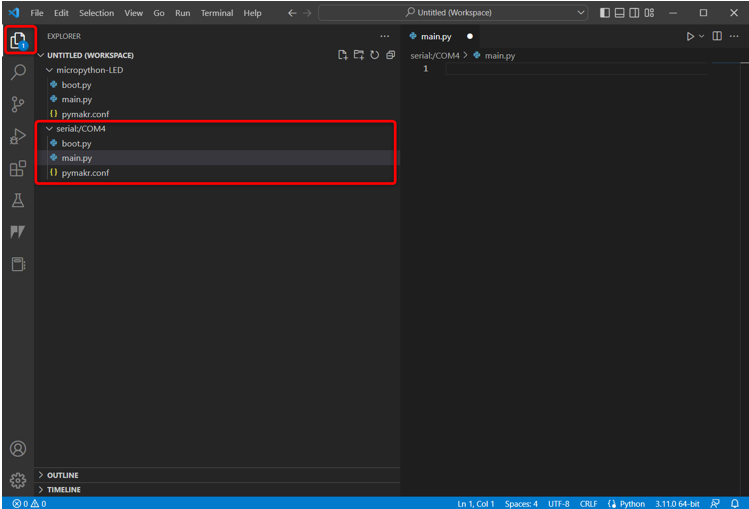
Step 3: Now head backs toward the explorer window of ESP32 here you will see three new files under the Serial/COM4 section. These files are currently uploaded to the ESP32 board.
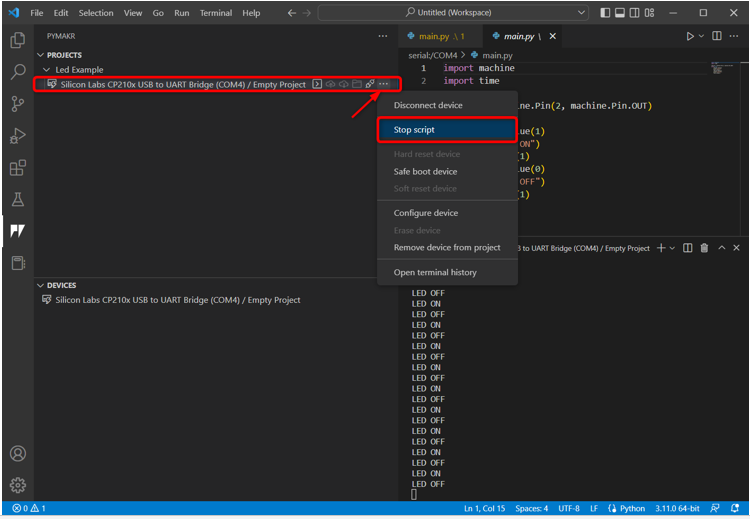
Step 4: Now open the PyMakr device section, select the connected device and click Stop script so we can write and upload code in it.
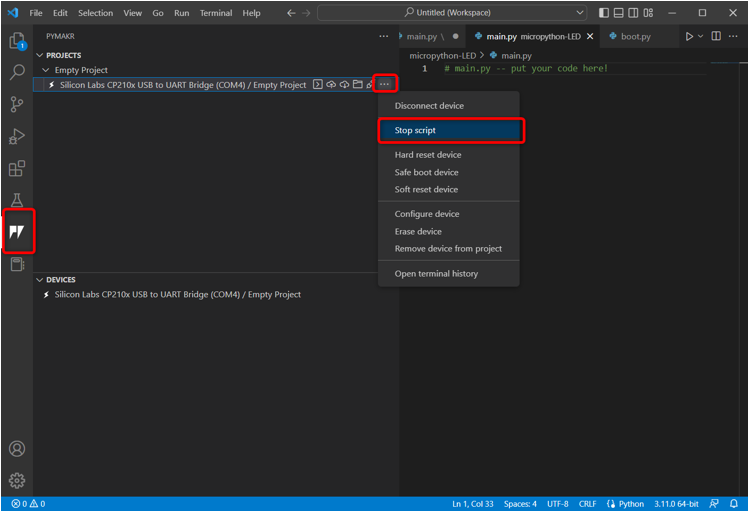
Note: To upload a new script in ESP32 the device current script must be stopped first otherwise we cannot upload new script if the previous script is still running.
Step 5: Now paste the given code in the main.py file of PyMakr extension.

This code will turn on the on-board LED connected at pin 2 and blink it with a delay of 1 sec.
import time
led_pin = machine.Pin(2, machine.Pin.OUT)
while True:
led_pin.value(1)
print("LED ON")
time.sleep(1)
led_pin.value(0)
print("LED OFF")
time.sleep(1)
Step 6: Next step is to sync the current program in the ESP32 board main.py file.
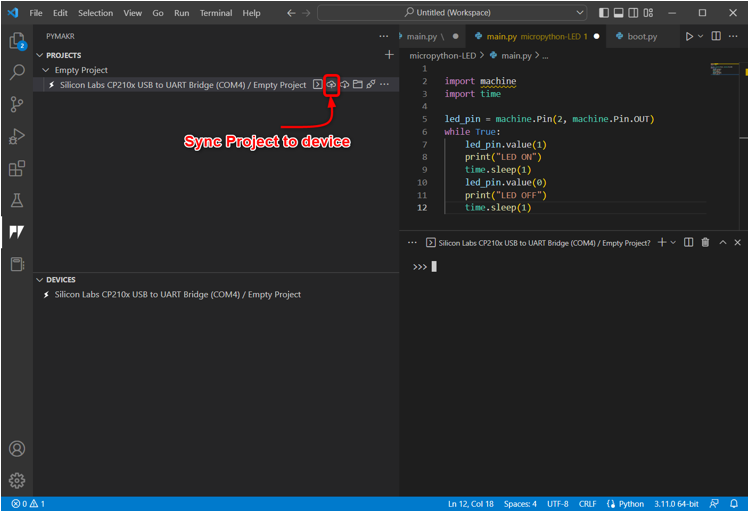
Step 7: Once the PyMakr starts synching the current MicroPython script in ESP32 following message of uploading will appear.

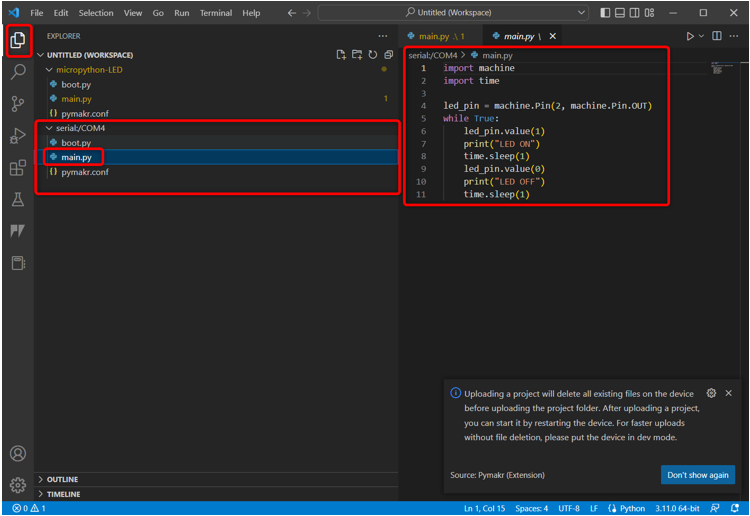
Step 8: To confirm whether the same program is sync into the main.py file of ESP32 board or not. Open the explorer window and select the main.py file under Serial section.
If the program is uploaded the same script will appear here as in the PyMakr main.py file.
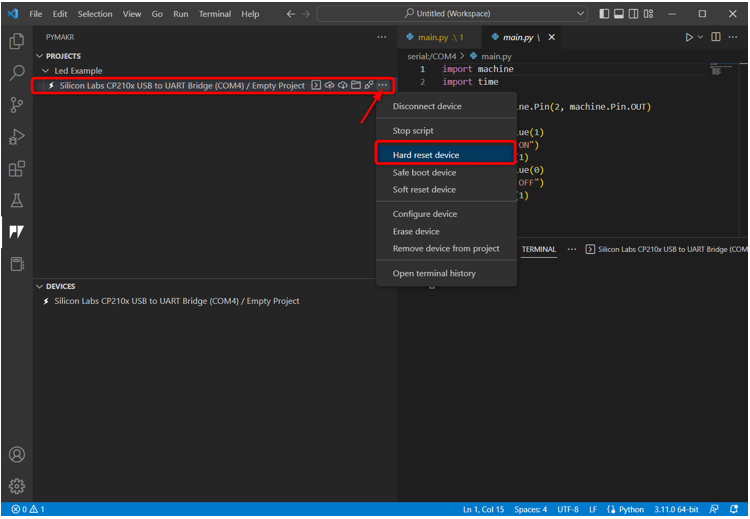
Step 9: Now as we have uploaded our first code in ESP32. To test it open the device section select device and click Hard reset device.
5.1: Output
Output can be seen on the terminal of VS code. LED status is printing every 1 sec.
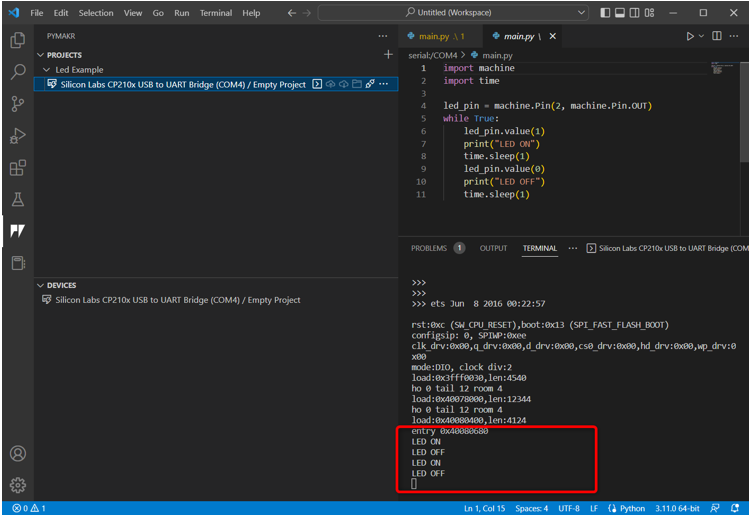
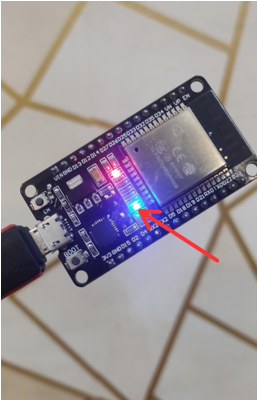
We can see that the built in LED connected to pin 2 of ESP32 starts blinking.
LED turned ON for 1 sec.
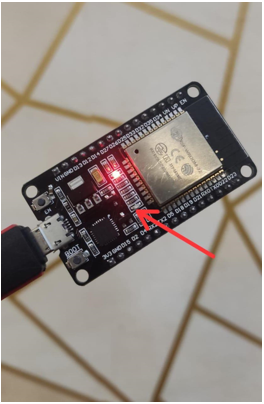
LED turned OFF for 1 sec.
We have successfully programmed ESP32 using VS code.
To stop the current LED program, select the device and click Stop Script.
Here is a quick review to all the steps:
- Create a new project.
- Connect the device.
- Run the terminal and check for the device platform.
- Now stop the script running on the device.
- Open main.py file and write the MicroPython script.
- To upload code on device select sync project to device.
- Once the project is uploaded, hard reset the device in PyMakr.
- Output will appear on Terminal as well on ESP32 board.
- To see the currently uploaded script on ESP32. Select the device and click open in explorer.
Conclusion
VS Code is a very versatile platform for writing advanced level programs. Like other Py boards, ESP32 can also be programmed with MicroPython using the VS Code; we just need to install the PyMakr IDE extension. PyMakr IDE extension is designed to program MicroPython in embedded systems. This guide covers all steps needed to program ESP32 with MicroPython using VS code. For more information read the article.
Source: linuxhint.com