PowerShell methods to check if a file exists | Explained with examples
Method 1: Use the Test-path cmdlet to check the existence of the file
Test-Path cmdlet looks for the path and returns a Boolean value. Test-Path will return true if the path is correct, and if the path is not found then it returns false. The syntax followed by the Test-Path cmdlet is provided below:
Syntax
In the above syntax
- <FilePath>: it refers to the location of the file
- Path: used to specify a path
- <Parameters>: defines the parameters for additional functionality
Example
This program will check the existence of the file using the Test-Path method. It is recommended to provide the absolute path of the file as we did here.

The output is True which means the file exists. It is observed that the “Test-Path” cmdlet has returned true which states that the file exists.
Method 2: Use Get-Item to check the existence of the file
The Get-Item cmdlet of PowerShell is used to get items in the specified location. The syntax of the Get-Item cmdlet is provided below:
Syntax
The syntax elements are described as:
- Get-Item: uses the wildcard character (*) to get everything of the specified item.
- <FilePath>: it refers to the location of the file
Example
This program will also check the existence of the file by using the Get-Item method.
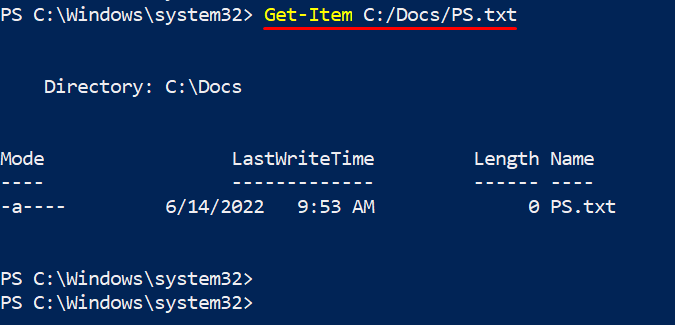
The Get-Item has printed the details of the file which states that the file exists at the specified path.
Method 3: Use the Get-ChildItem cmdlet to check the existence of the file
This method gets the item as well as child items from more than one specified path. If the file exists, it will show the file details and throw an error in case the file is not present.
The syntax of the Get-ChildItem cmdlet is provided below:
Syntax
The syntax elements are explained a:
- Get-ChildItem: gets the content of a folder or registry key
- Path: used to specify a path
- <FilePath>: it refers to the location of the file
Example
This program will check the existence of the file using the Get-Childitem method.
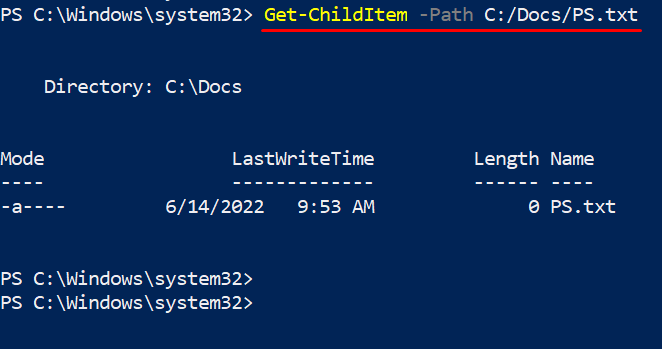
The output shows the file details which means the file exists.
Method 4: Use the System.IO.file method to check the existence of the file
The [System.IO.File]::Exists(File) method also checks the existence of the file. This method provides the result in a Boolean(true/false) value. The following syntax is followed to apply this method:
Syntax
The above syntax will be used to check the existence of a file by specifying the path of the file in the <FilePath> parameter.
Example
Here, the [System.IO.File]::Exists method is exercised to check the file is present at the given path or not.

The output is True which means the file exists.
Congrats! You have learned to check the existence of the file in PowerShell
Conclusion
PowerShell cmdlets such as Get-ChildItem, Get-Item, and Test-Path can be used to check the existence of the file. Moreover, PowerShell also provides a .NET supported method “[System.IO.file]::Exists” to check the existence of a file. In this post, we have demonstrated various possible methods to check the existence of the file. The usage of these three cmdlets as well as the method is explained with the help of examples.
Source: linuxhint.com