Page Layouts in Salesforce
Page Layouts in Salesforce
Basically, the page layout in Salesforce allows us to customize the design, organize the detail, and edit the pages of records. We can add/remove the fields from the page. Also, we can make the fields as read-only, required, etc. which we will discuss one by one in detail.
Let’s navigate to the “Page Layout”. As of now, we organize the fields and other features for the “Campaign” (standard) object. Go to the drop-down and click on “Edit”.

Now, you are in the “Campaign Layout”. You will find all the features and instances here.
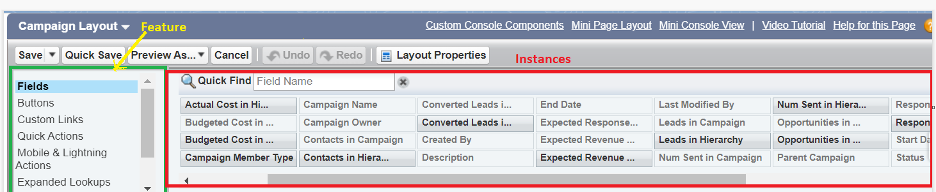
Fields
We can add/remove the field from this feature. Just drag the available fields from here and drop in the “Campaign Information” section. In order to remove the existing fields, drag from this section and drop at the “Fields” instances.
The existing fields are shown in the following:
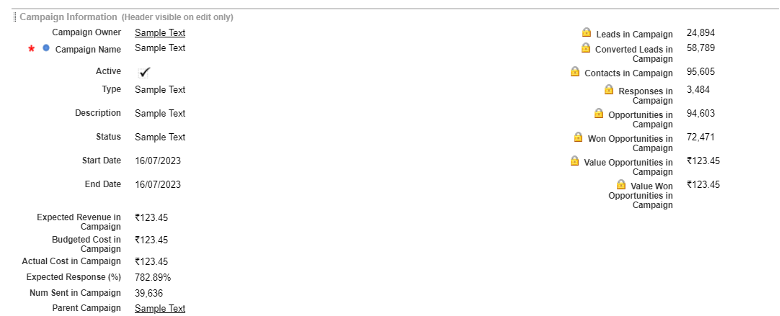
Let’s drop some fields and drag some fields in this section from left to right. Now, this section holds the following fields. Now, you can save your page layout (you will find it on the top-left).
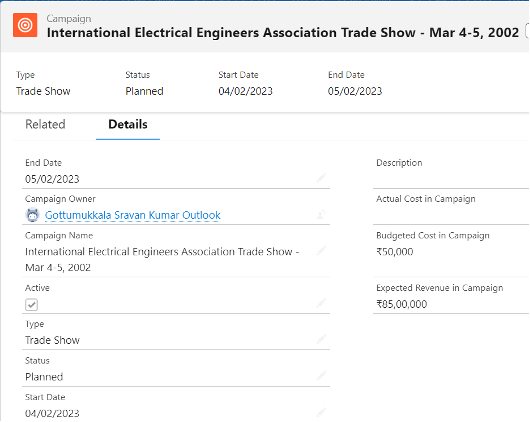
Go to the “Campaigns” tab and open any existing record. The fields are updated under the “Details” tab.
Buttons
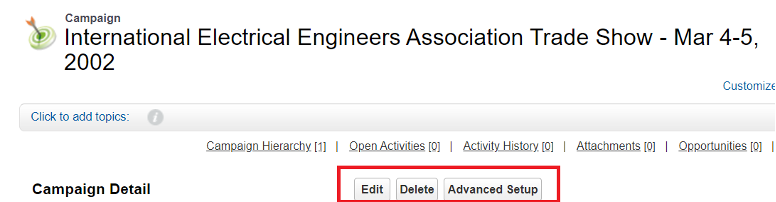
This feature is available for Salesforce Classic. Navigate to “Classic from Lightning”. We can add/remove the standard buttons to the “Record detail” page. Adding the custom buttons are also possible.

As of now, there are three buttons (Edit, Delete, and Advance setup) in the “Campaign Detail” page.
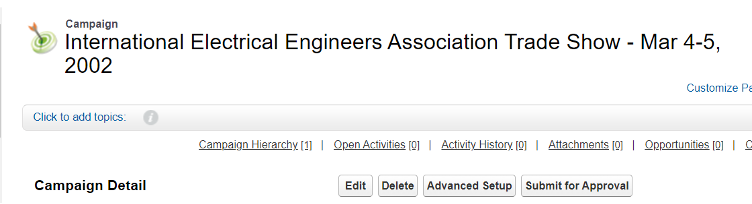
Let’s add a button (Submit for Approval) to the “Campaign Detail” section and save it.

Refresh this page. The “Submit for Approval” button will appear along with three buttons (Edit, Delete, and Advanced setup).
Custom Links
We can add the existing custom links to the page under the “Custom Links” section.
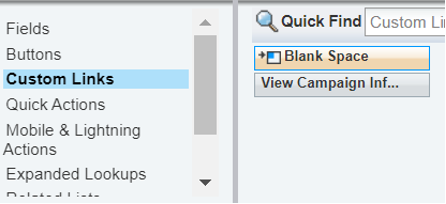
It is not available in the existing page. Let’s add the available custom link.

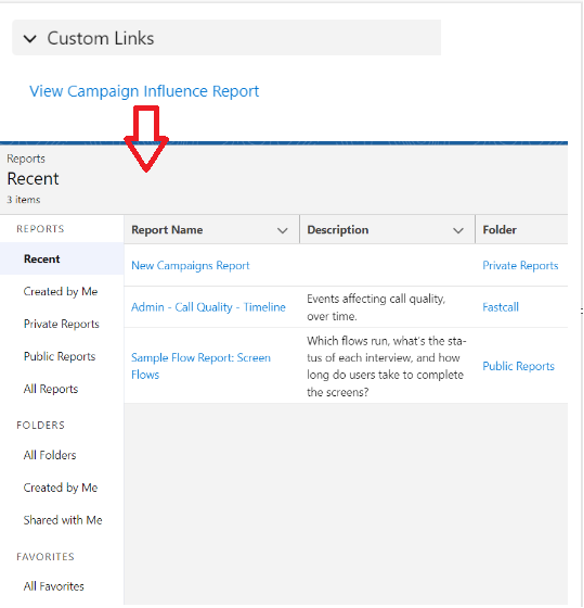
It is added under the record detail page as a section. It is navigated to reports when it is clicked.
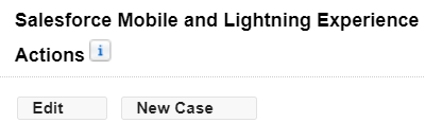
Mobile and Lighting Actions
In some scenarios, you need to perform a quick action in the Salesforce Lightning like editing the existing record, sending an email, approving the record, etc. This feature helps to achieve this.

In the existing page, these three quick actions are available:
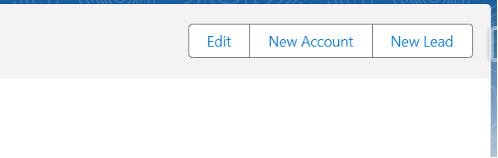
Update the section with these two instance quick actions.
Go to UI and check the updated quick action. Now, you can directly edit the record and create a case.

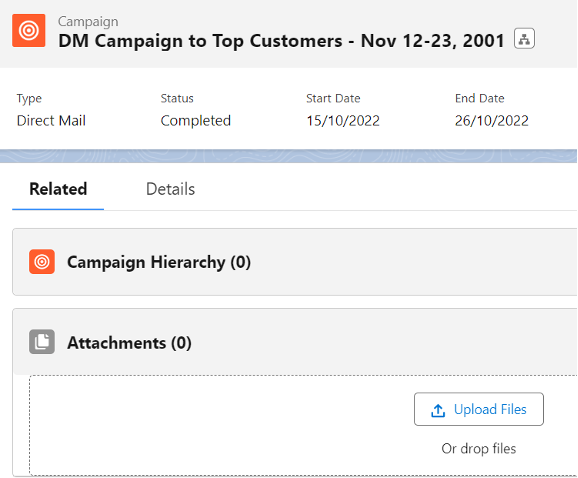
Related Lists
Related lists like attachments and open activities are added to the “Related” tab on the UI. We can also add the related objects with this feature.
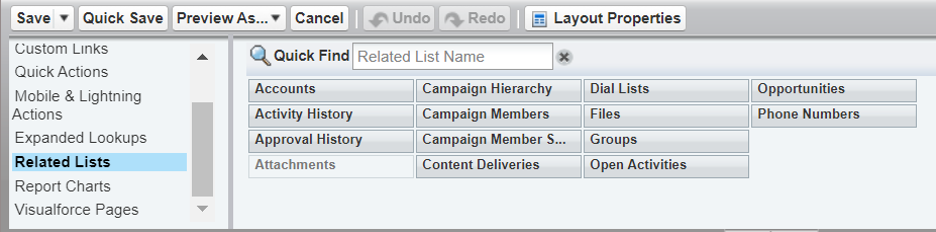
Only the “Attachments” exist in the existing “Related” tab. Let’s add the Campaign Hierarchy and save the page layout by clicking “Yes”.

Now, the Campaign Hierarchy is available under the “Related” tab.
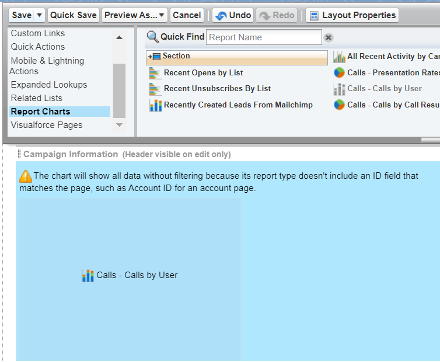
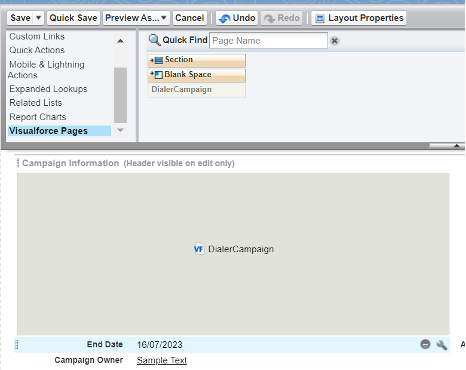
Report Charts and Visualforce Pages
We can create a new section in the “Campaign Information” section and any report. It can also be possible to add the report within the fields. Similarly, the VF page can also be added.
Report:
VisualForce Page:
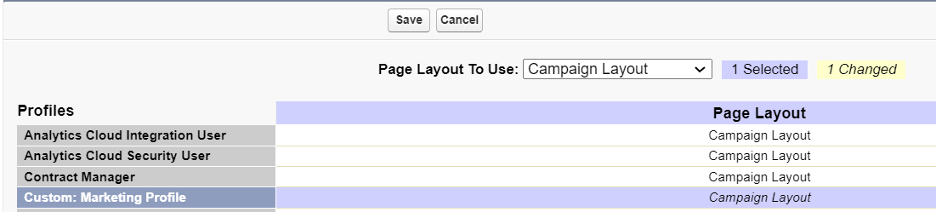
Page Layout Assignment
We can assign the existing page layouts to specific profiles. The “Marketing Page Layout” is assigned only to the Marketing team, the “Sales Page Layout” is assigned only to the Sales team, etc.
Navigate to “Page Layout Assignment” and edit the assignments.

Let’s select the “Marketing Profile” and choose the page layout as “Campaign Layout”. Save it.
Similarly, we create another page layout (let it be “Sales page”) for the Sales team and select the “Sales Profile”. Choose the page layout as “Sales page”. Then, save it.

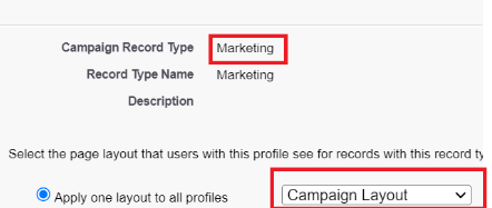
Add a Record Type to the Page Layout
Let’s create three record types on the “Campaign” object. The first record type is “Marketing” and assign the “Campaign Layout” page layout to it. The second record type is “Sales” and assign the “Sales page” layout to it. We assign the “Sales page” for testing.
Go to the “Record Types” and click on “New”.

Specify “Marketing” as the record type label and make it visible to all the profiles. Then, click on “Next”. Choose the page layout as the “Campaign Layout” (apply one layout to all profiles). Then, save it.
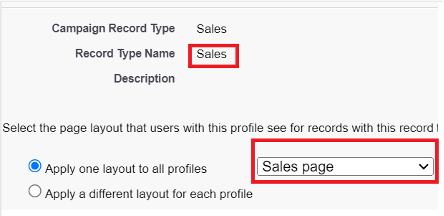
Specify “Sales” as the record type label and make it visible to all the profiles. Then, click on “Next”. Choose the page layout as “Sales page”. Then, save it.
Similarly, create “Testing” as the record type and apply the “Sales page” page layout.
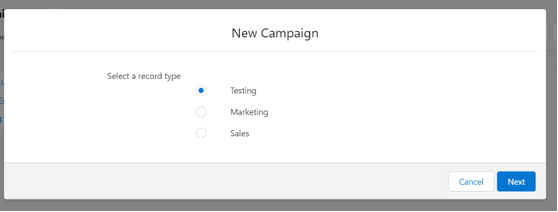
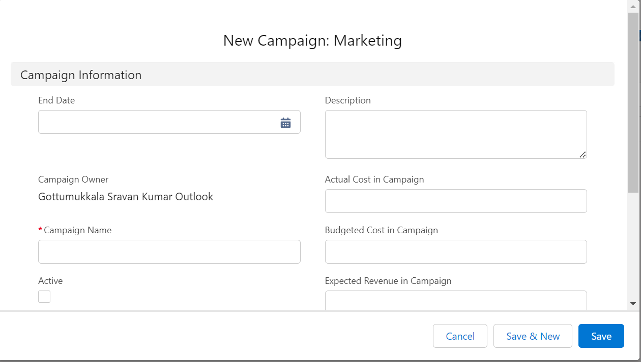
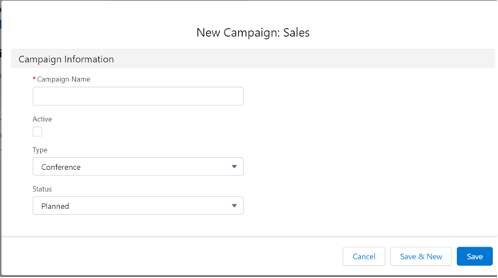
Let’s test by creating a “Campaign” record. First, choose “Marketing” and click on “Next”.
You will be asked to create a “Campaign” record with the following fields:
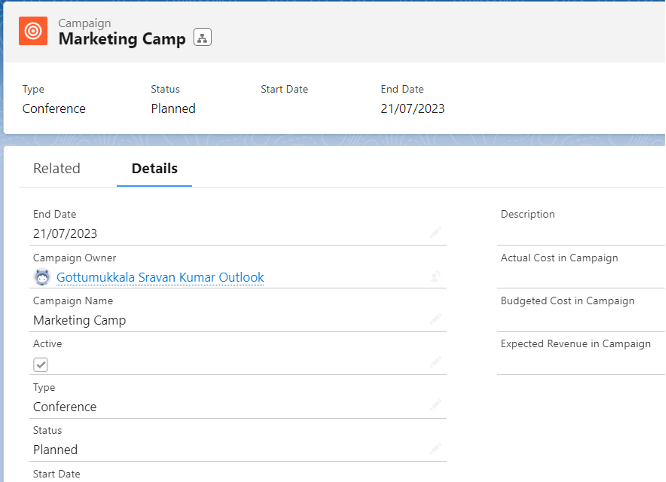
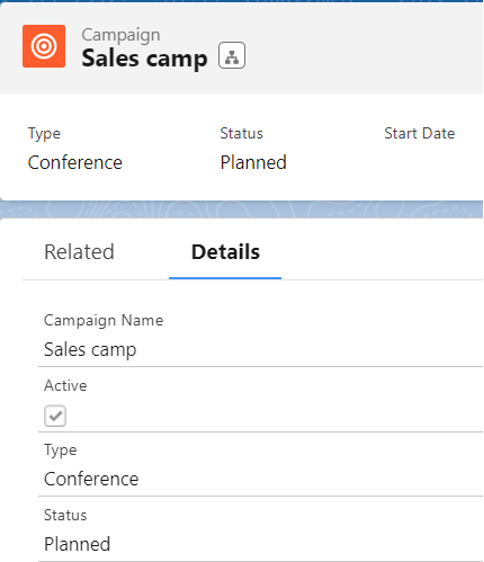
You will see the record if you opt “Sales”.
Conclusion
We discussed about page layouts in Salesforce. First, we learned how to add/remove the fields, buttons, quick actions, reports, and Visualforce pages. After that, we added the specific profiles to the page layouts that we created. Finally, we created the record types (Marketing, Sales, and Testing) and assigned the page layout to each record type. The “Campaign” object is utilized in all scenarios.
Source: linuxhint.com