Nginx Block Geo Location
“Nginx is known to be a lightweight open-source software (Linux). It proves to be a high-performance web server by providing high-performance stability, HTTP capabilities, improved application-based deliveries, and security of the websites with the reduction of the long waiting times for the busiest web pages by acting as load manager/balancer for the websites. In comparison with other lightweight web servers, Nginx offers a tremendous variety of features, and one of these features includes the GeoIP module.
GeoIP module helps to know about the geo-location of the client; sometimes it happens that the organization/websites aren’t interested in providing their services, or they want to keep their information confidential from certain clients coming from specific geo-location, in such situation GeoIP maps the IP address belonging to the clients’ location and blocks it to avoid any visitor from that location.”
In this guide, we’ll learn how we can block any geo-location (IP of a country) in Nginx. Let’s do this by following the step-by-step process given below:
Prerequisites are as Follows
- We’ll be working on Ubuntu 20.04
- Nginx must be installed in the system
- Installation of GeoIP module
Step 01: Update All Repositories Lists
We are always required to update the repository lists before installing any new package in the system. We are employing Ubuntu 20.04 in this Guide, and now we need to update its repositories. This can be done in the terminal window, and to access the terminal window, first, we have to select “activities” from the top right corner of the screen /window. From the drop-down menu of activities, select “search” and then in the search bar, type “terminal” and select it; a terminal window will pop up on the screen. In the terminal window, type the following command:
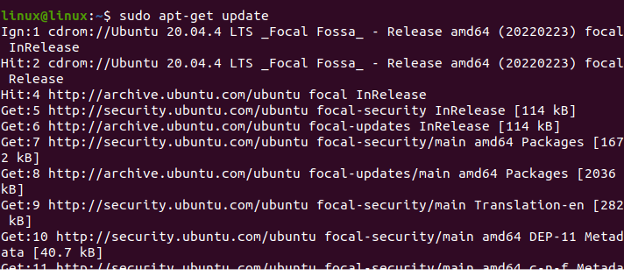
All the repositories are being updated here.
Step 02: Installation of Nginx
Before working on the GeoIP module, we need to first ensure the installment of the Nginx in the system. We’ll install the Nginx from the Ubuntu default packages since Nginx is also part of the Ubuntu default repository. Following is the command to install the Nginx; write this command in the same terminal as shown below:
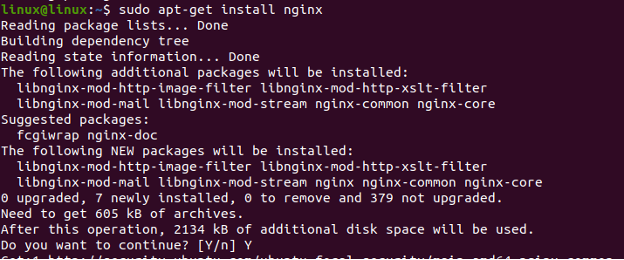
Writing the (y) on the terminal again would continue the process of installation, and then Nginx will be installed in the system. After installation of the package, we need to check whether we have installed the correct package for Nginx or not.
Step 03: Verification
At this point, we have installed the Nginx, but just installation would not serve our purpose since we have to install some other modules alongside the Nginx, and that is the “GeoIP module”. This module works naturally in combination with data that is provided by Maxmind and then finds out the IP or geographical location of the client or a country. Maxmind was famous for using the “dat” format to release their databases back then, but now they have changed their format to the “mmdb” format to support their release of databases. This complies with the Nginx to also update their GeoIP to the “ngx_ttp_GeoIPip2” module. For now, we can use the previously existing GeoIP module since it is still sufficient. To ensure that both the Nginx and GeoIP modules have been correctly installed in the system, use the following given command as shown below:
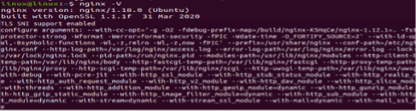
For Nginx, if the output returns the version, then this means that Nginx has been installed correctly, whereas, for the GeoIP module, look up for the “with-http-geoip-module” in the output as the above output is displaying. This means that the GeoIP module is present in the Nginx, and now we can work with it for Nginx block geolocation.
Step 04: Install GeoIP Module Databases
In this step, we are required to build some databases for the geo-locations, including (country and city names, IP addresses, etc.). To do so, there are multiple ways, and we are going to use one of those methods that are easier to use and can install the best and most updated databases for the GeoIP modules. You can achieve this by entering the supplied command in the terminal window as follows:
The databases would now be downloaded.
Step 05: Configuration of Nginx
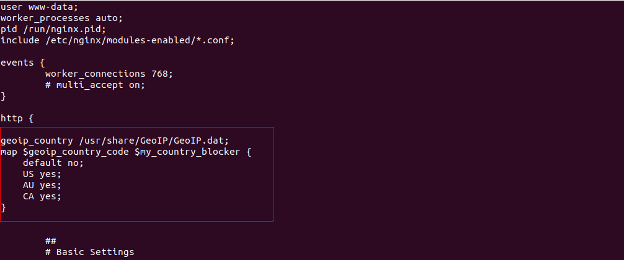
This step includes the configuration of Nginx. Write the following given command (first one) given command in the terminal window; it will then open the nano editor; in the editor, enter the second given code using “ctrl+o” to write and then exit the editor using “ctrl+x”. Remember to write the code exactly as it is. In this step, we are storing the GeoIP databases in the date format, and we’re blocking the access to this website of any visitor other than the countries that are enlisted in the config file, e.g., US, AU, and CA.
![]()
Step 06: Update Website-server
To ensure the working GeoIP blocking, we have to also update the server for that website. To do so, write the following command in the terminal; it would then open the server for the website; here, we have chosen the default website. In the server window, type the following code save and then exit by pressing enter.
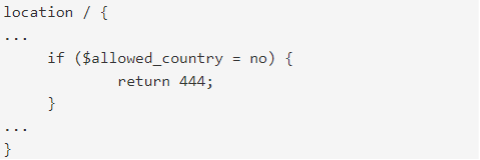
Here it is employed in the relevant file.

This would restrict the access of any country to this default website that does not belong to the list mentioned in Nginx.config; they would see nothing since 444 represents nothing in Nginx.
The following command would let the web-server restart.
![]()
Conclusion
In this guide, we’ve learned how to implement Nginx-block-geolocation. We have discussed what GeoIP is and how it can help us to block visitors/clients that are from certain locations by blocking their IP addresses. We have learned how to install Nginx with its package module “GeoIP”. GeoIP uses Maxmind to enable the release of GeoIP databases in “dat” format and also ensures 99% accuracy in restricting the access of visitors to the websites by mapping their IP address to their country geo-locations. We hope that you guys will be able to grasp the concept of the topic and that you will be able to implement the steps as discussed in the guide.
Source: linuxhint.com