Monitor CPU and GPU Temperature in Raspberry Pi

Heating is one of the most common issues in all the single board computers like Raspberry Pi.
Keeping an eye on the CPU temperature could be one way to determine why your Pi is lagging or acting slow.
I'll be discussing two ways of monitoring the CPU and GPU temperature on a Raspberry Pi running the Raspbian OS:
- Monitor the temperature with an applet on the top panel (for desktop systems with GUI)
- Monitoring the temperature in command line (suitable for all systems)
Let's see them one by one.
Method 1: Monitoring Raspberry Pi CPU and GPU temperature using GUI tool
If you are using your Raspberry Pi as a desktop system with Raspbian OS, you can add a handy applet to the top of your screen. It will show you the current CPU (actually the SoC) temperature.
Here are the steps.
Right click on an empty space on the top panel.

Since most people are concerned with CPU temperature, it is named as CPU Temp even though it shows the temperature of the SoC (that houses both CPU and GPU).
Select CPU Temp and click on Add to right and hit the OK button.
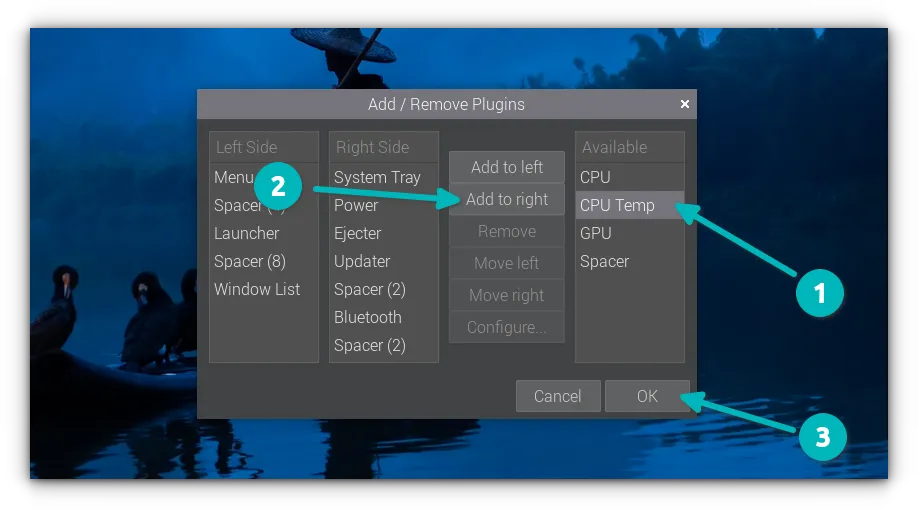
The 'Add to right' means it will be added to the right most corner of the panel. This is where you would want it anyway. CPU and GPU will show the CPU and GPU usage respectively (if you want that as well in the top panel).
Now, you should start seeing the temperature of your processor chip:

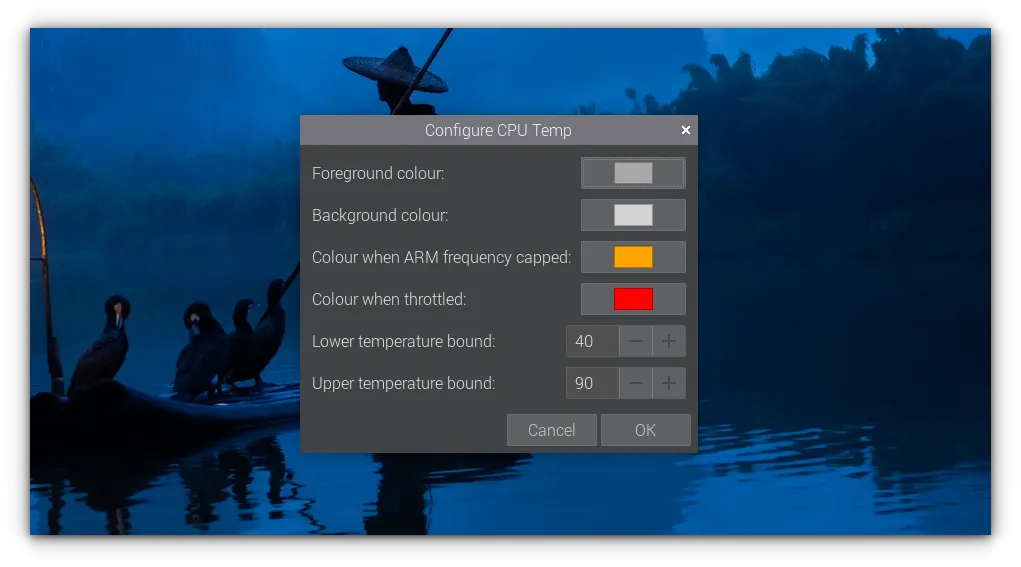
Right click on the applet and you can configure it to some extent.

You can change the colors of the applet or of critical points such as CPU frequency cap or temperature threshold.
Method 2: Monitoring Raspberry Pi GPU and CPU temperature in the command line
Raspberry Pi has a dedicated command line utility, vcgencmd, that shows various aspects of the Broadcom SoC, including its core temperature.
To see the current temperature of the system on chip (that consists of both CPU and GPU), use this command:
vcgencmd measure_tempIt will show an output like:
temp=52.3'CNow, it's a one time command. But if you want to monitor the CPU temperature at a regular interval, you can use the watch command:
Let's say you want to monitor the chip temperature every 2 seconds. Use it in this fashion:
watch -n 2 vcgencmd measure_tempAnd now it you'll see the current temperature value changes at every two seconds:
Every 2.0s: vcgencmd measure_temp  raspberrypi: Mon Jan 29 16:25:27 2024

temp=53.0'C
By the way, if you are seeing your screen filled up with YYYYYY while using the watch command, change the locale and use a UTF-8 one. That happened with me on my new Raspberry Pi 5.
Conclusion
Monitoring your CPU temperature is important in Raspberry Pi. If you find that your Pi is heating up frequently, you may want to invest into a heat sink or cooler of some sort to reduce the SoC temperature.
You may also use other Linux commands like sensors (package lm-sensor has to be installed) for measuring CPU temperature.
Enjoy your Pi and don't hesitate to use the comment section for your questions, suggestions or thank-yous 😄
Source: It's FOSS