Mastering Joplin Notes: 8 Tips and Tweaks

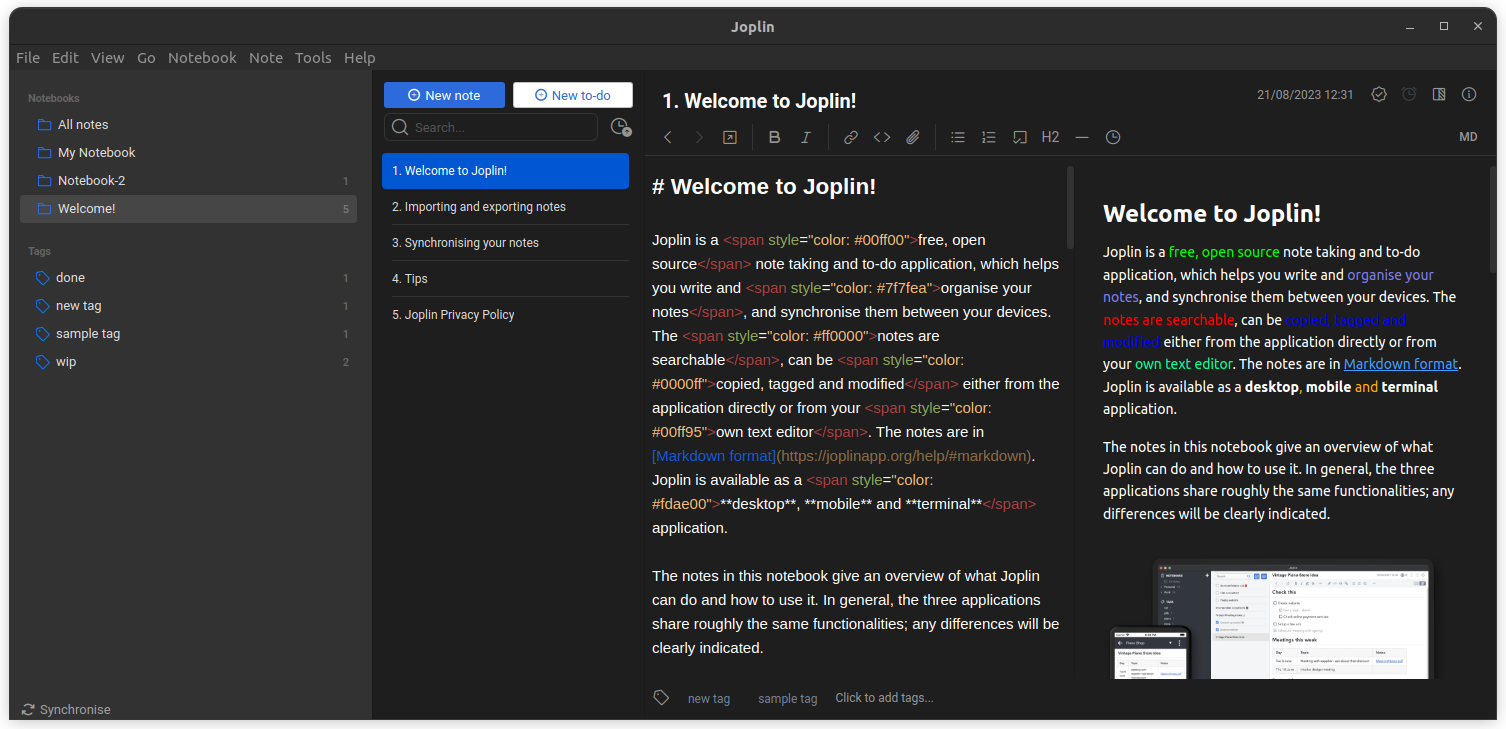
There are a wide variety of note-taking applications available for Linux.
Most of them are basic Markdown-based applications and may not offer end-to-end encryption.
If you want a secure and feature-rich note-taking app, Joplin can help.
You get abilities like:
- Writing in Markdown
- Creating to-do lists
- Encrypting notes
- Creating notebooks and organizing notes
- Saving web pages
- Syncing the notes to your preferred cloud services
However, with the feature-set, for some users, it could be an overwhelming option.
Here, I shall highlight some pointers to make the most out of Joplin Notes easily.
Installing Joplin
Joplin is currently available as an AppImage. You can either install it by downloading the AppImage and running it or via the terminal using the command below (install and configure icons for system menu):
wget -O - https://raw.githubusercontent.com/laurent22/joplin/dev/Joplin_install_and_update.sh | bash
Once done, you can get started with Joplin.
8 Joplin Superpowers to Boost Your Note-Taking Experience
Considering it lets you do numerous things, I point out some of the most useful features here:
Create a Notebook
To create a notebook in Joplin, you can either press the “+” button, or use File > New Notebook.
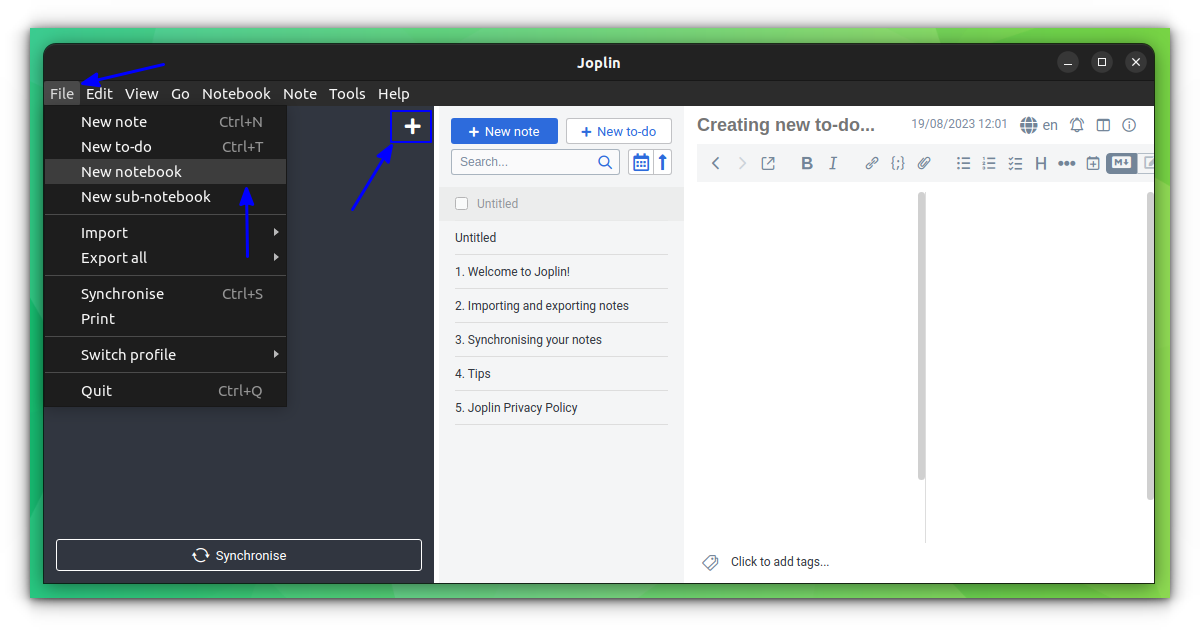
This will open the Notebook wizard. Enter a name and if you want to apply an icon to the notebook, hit the emoji button.
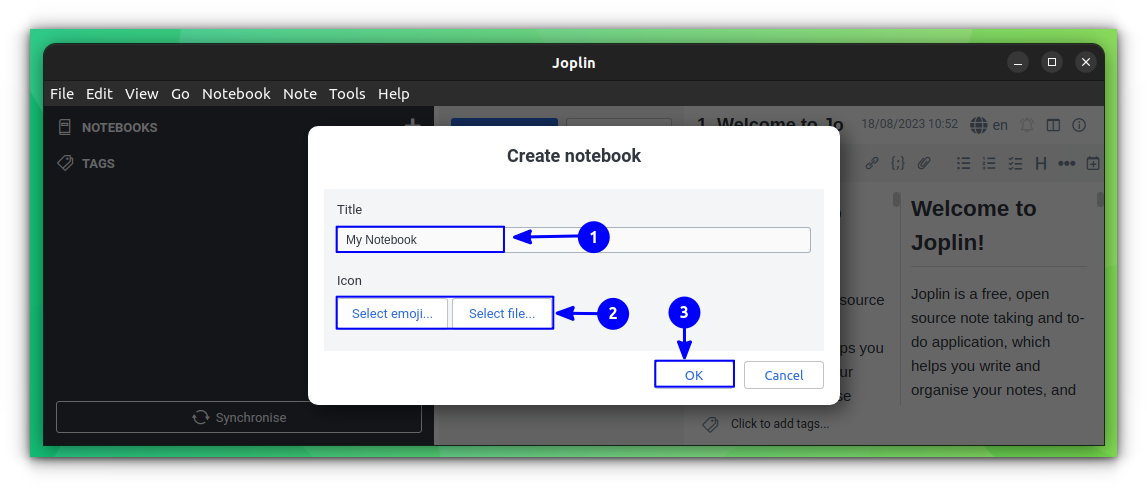
Once selected, press OK to create the Notebook.
Suggested Read 📖
 Ankush Das
Create a Stack of Notebook
If you want a parent notebook, and multi-collection under it, you can utilize the sub-notebook feature. There are several ways to do this:
Navigating through the menu
In this method, first highlight the notebook to which you want to create a sub-notebook. Then go to File > New Sub-Notebook.
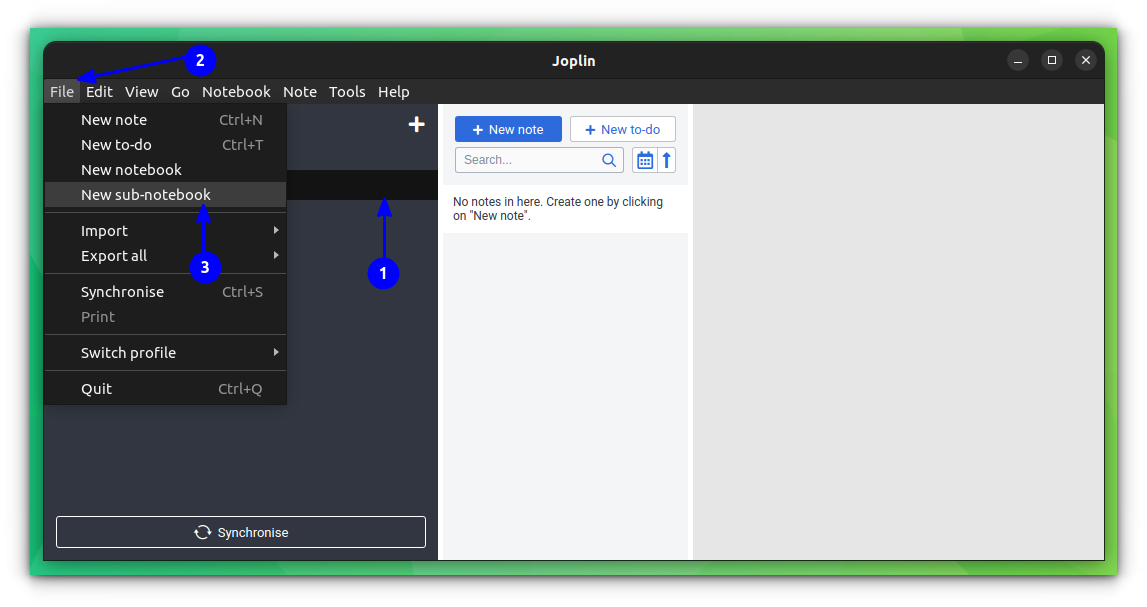
Name it and give icons or emojis if needed.
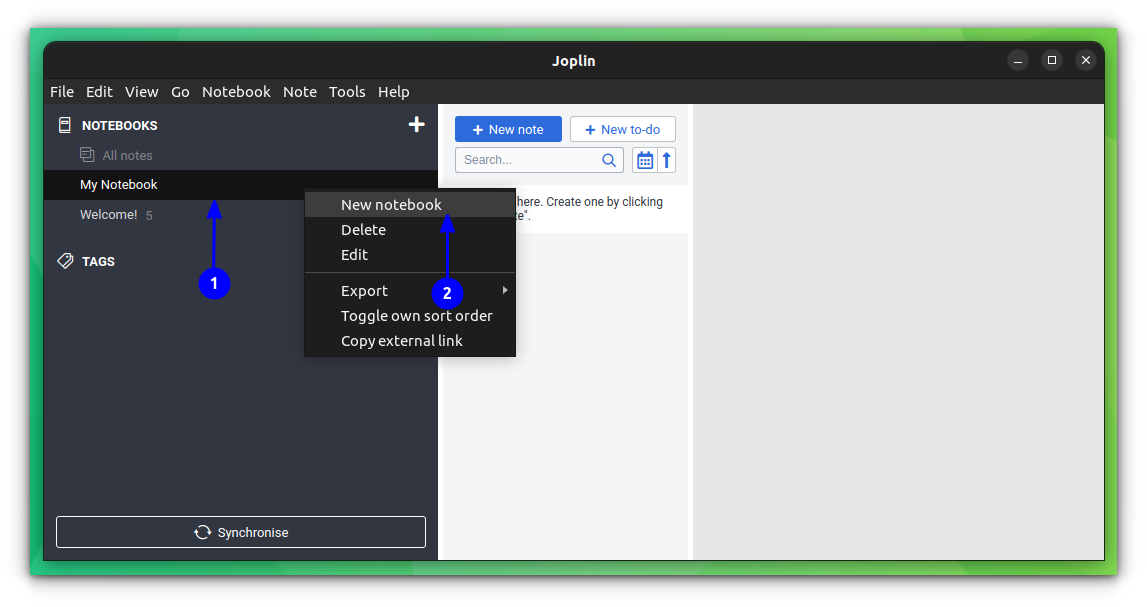
Using the right-click menu
You can right-click on a notebook, and then click on New Sub-notebook to create a sub-notebook for that notebook.
By Drag and Drop
If you have already many notebooks and want to arrange them properly into sections, simply drag and drop a notebook to another to make it a sub-notebook.
Manage the Layout and Appearance
By default, Joplin has a three-column layout. A sidebar with notebooks, another sidebar with a notes list, and then an editor and a preview section. If you require, you can rearrange them, by removing sidebars, toggling editors/preview, etc.
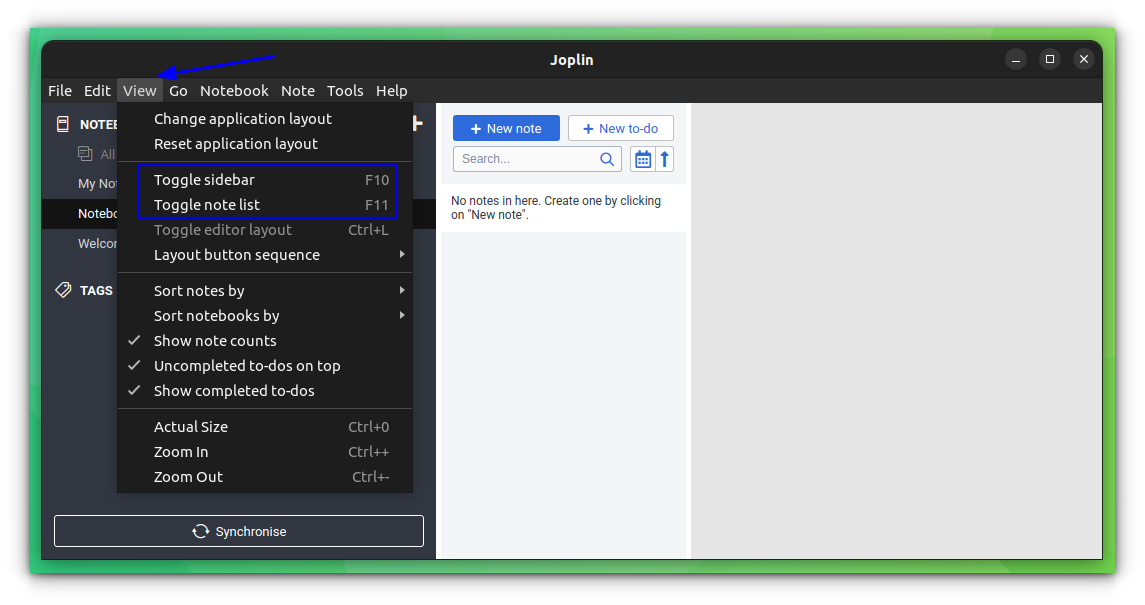
Tweaking the Sidebar
You can hide the sidebar or notes list pane from the main menu, by going to View > Toggle sidebar or Toggle note list.
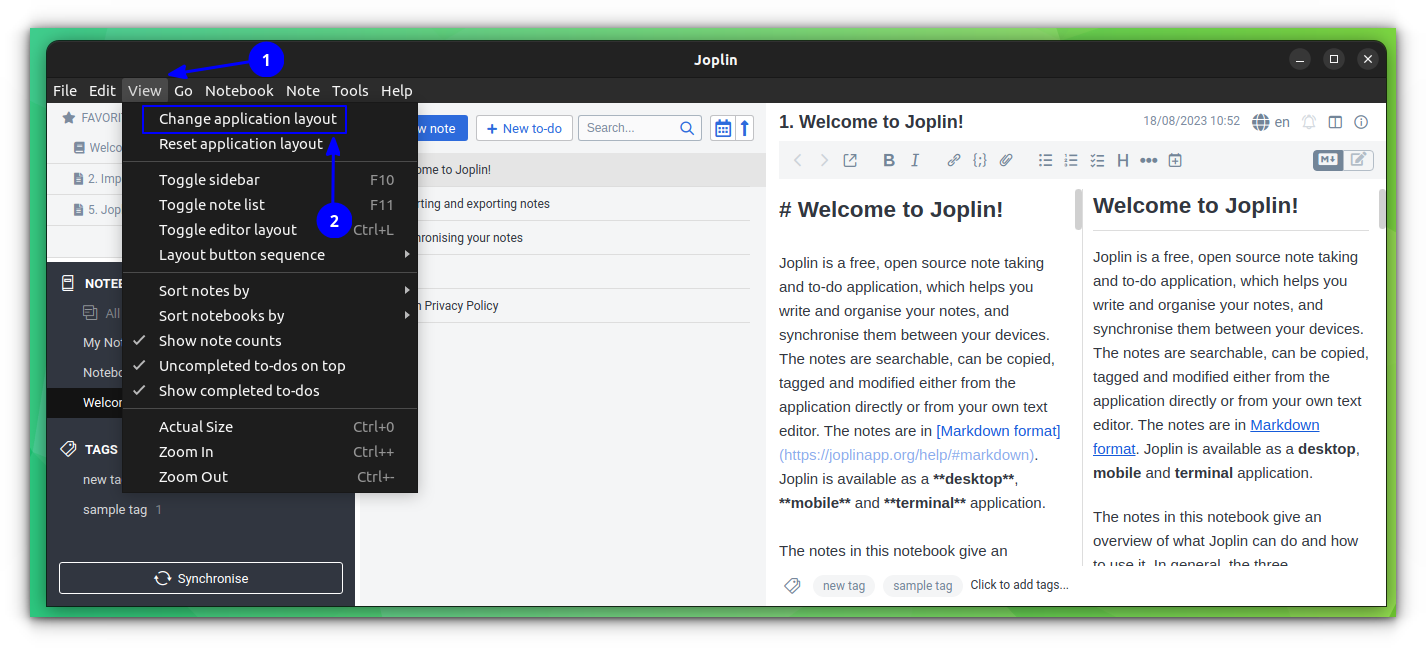
Tweaking the Appearance
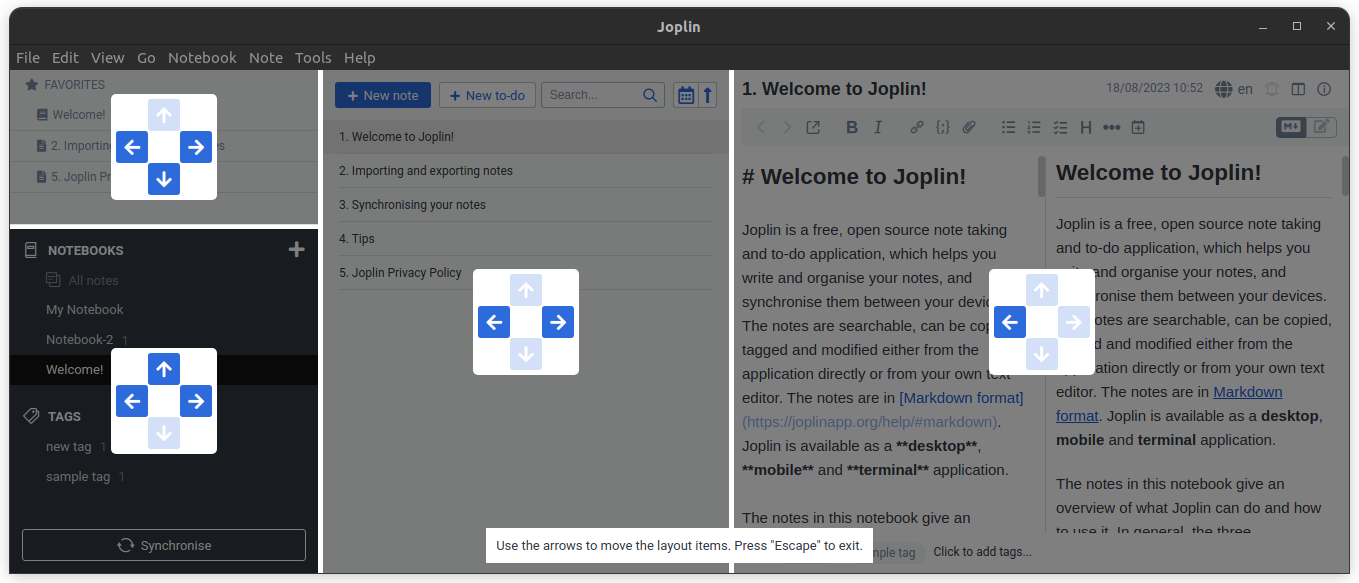
To arrange the appearance, go to View > Change Application Layout.
On the layout editor window, use the arrow button to arrange what should appear where, according to your liking.
Apply Tags to Notes
Tags can be really helpful to retrieve information from a massive list of notes. Joplin can create and add multiple tags to notes effortlessly. First, open a note, that you want to apply the tag. Next, enter the name of the tag you want, on the bottom part of the note.
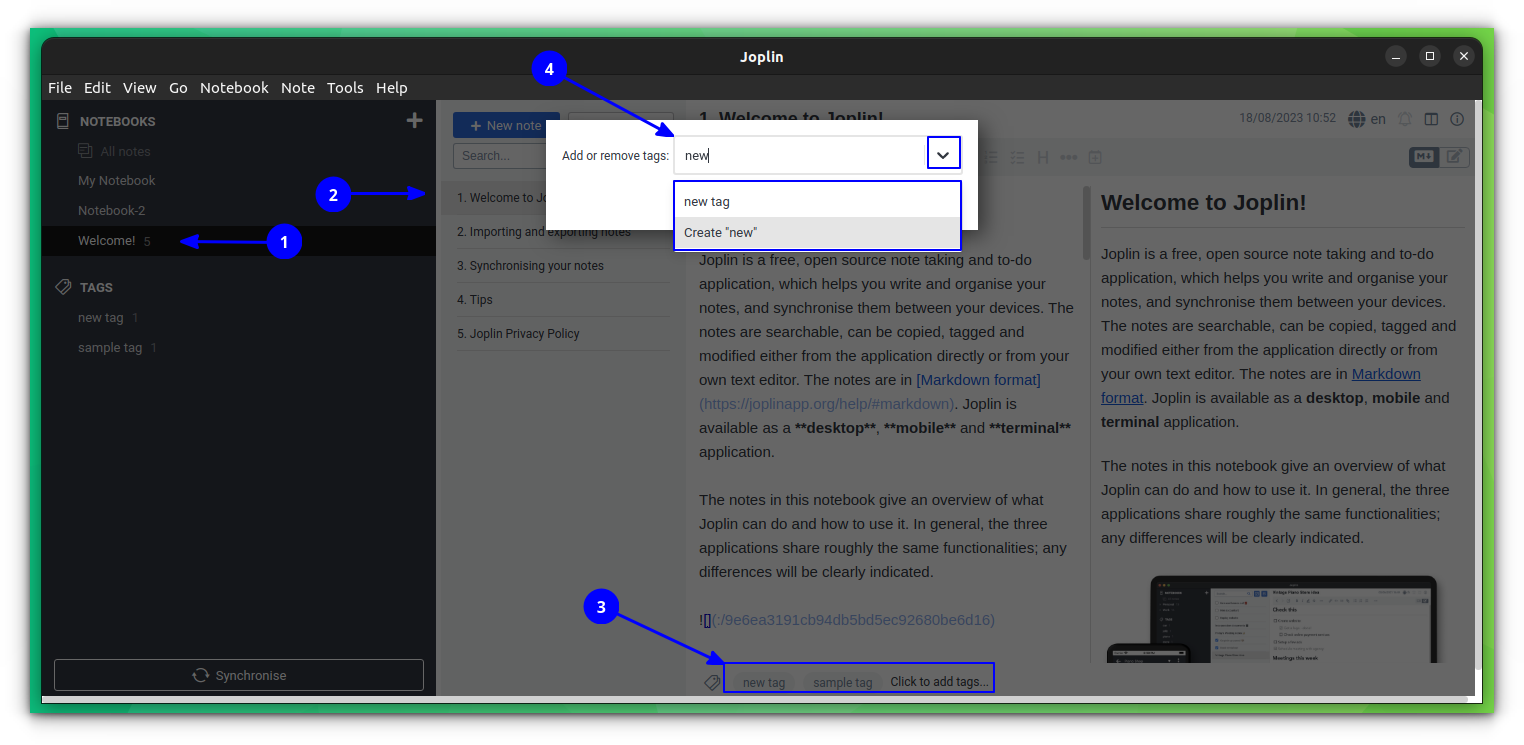
Here, either create a new tag by specifying a new name, or use the drop-down button to access existing tags.
Use Multiple Profiles
Multiple profiles in Joplin allow you to maintain separate instances of the application, each with its set of notes, configurations, and synchronization settings. This can be useful if you want to keep different sets of notes isolated from each other.
To create a new profile, click on File > Switch Profile.
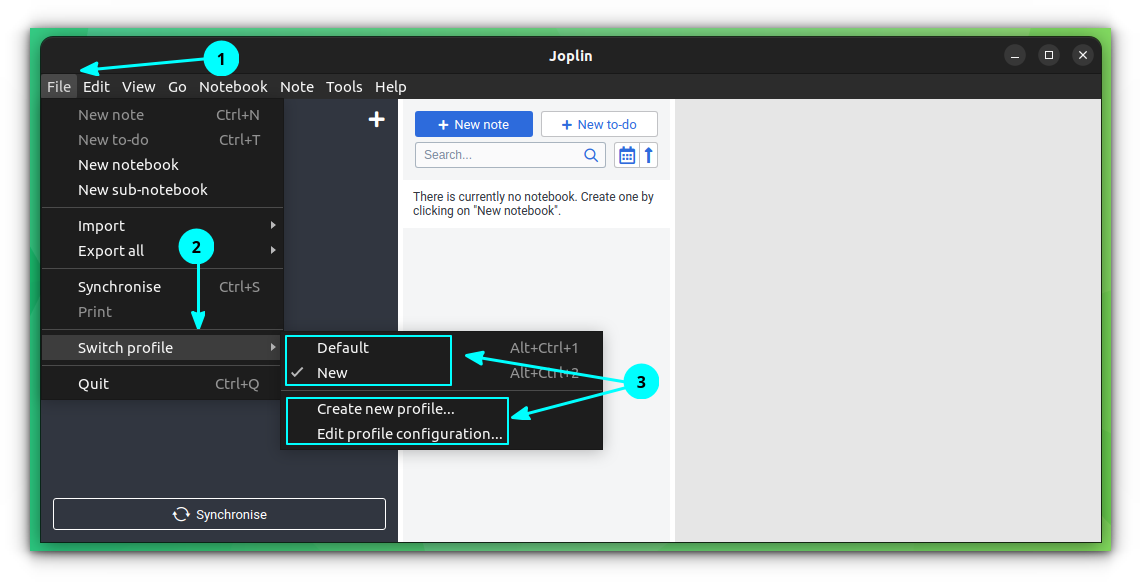
You can create a new profile by using the Create New Profile Button. Enter the name of the profile and hit Create. If you have existing profiles, you can switch between them as well. For each profile switch, you need to restart Joplin.
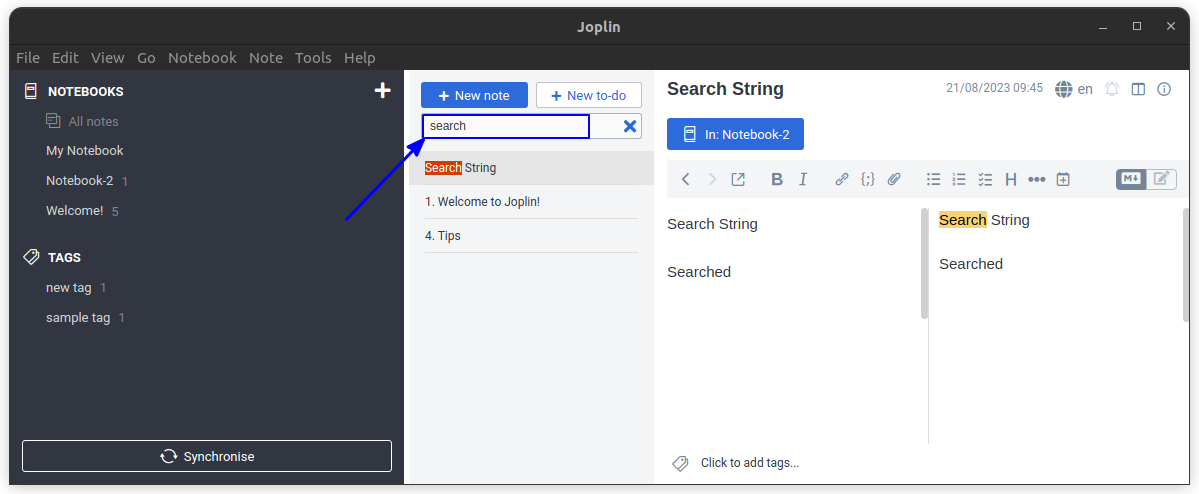
Search Inside Notes
In Joplin, we can either search within notes or search for something among all the notes.
Search Through Everything
Press F6 on your keyboard to access the search box. Then enter the string you want to search for.
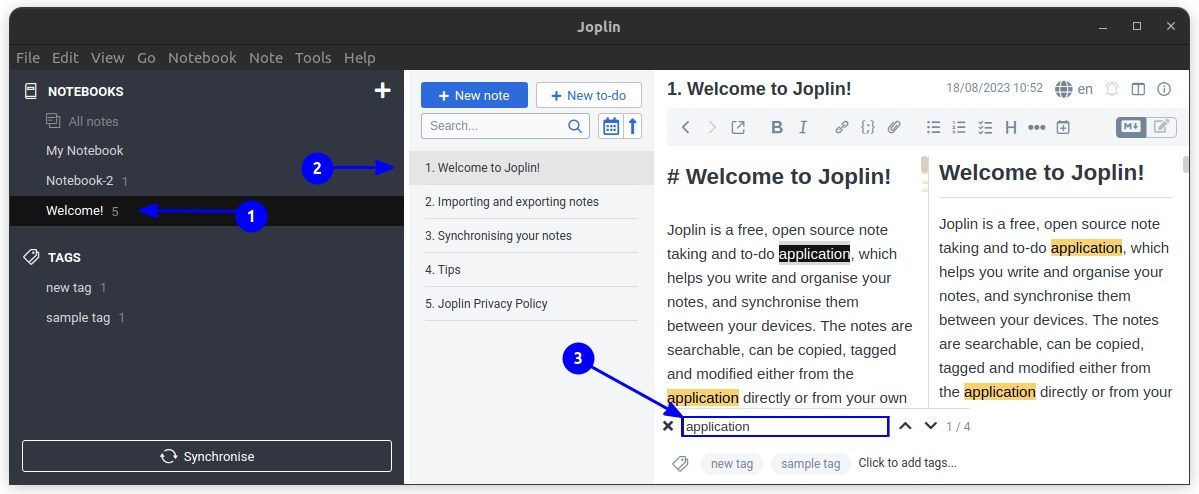
Search Within a particular Note
Press CTRL + F on your keyboard to open a small search box on the bottom of your note. Enter the search string there to search.
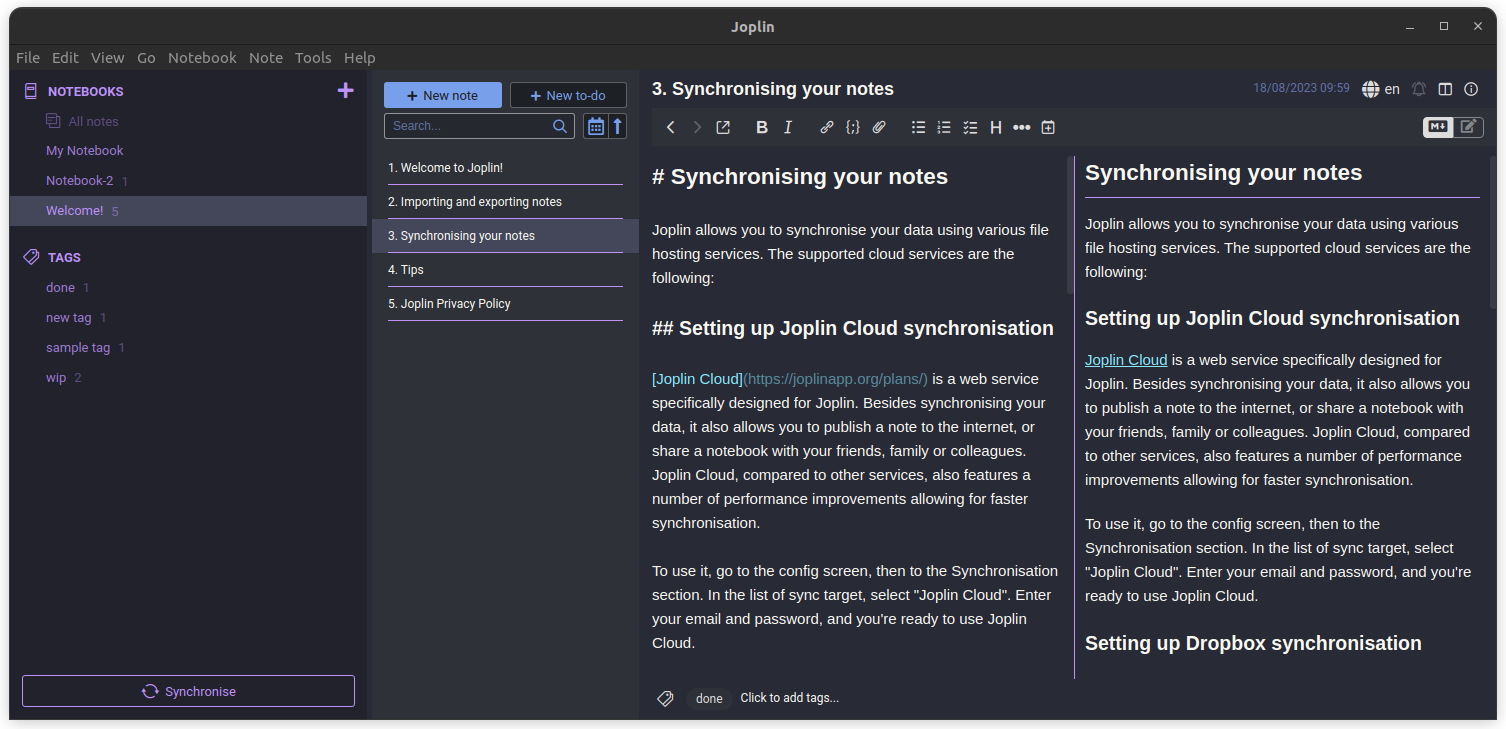
Synchronization with End-to-end Encryption
Synchronization with end-to-end encryption across different types of cloud providers is one of the top features of Joplin. To start a sync, first, go to Tools > Options > Encryption. Here, set a Master password, which will be used to encrypt all your notes.
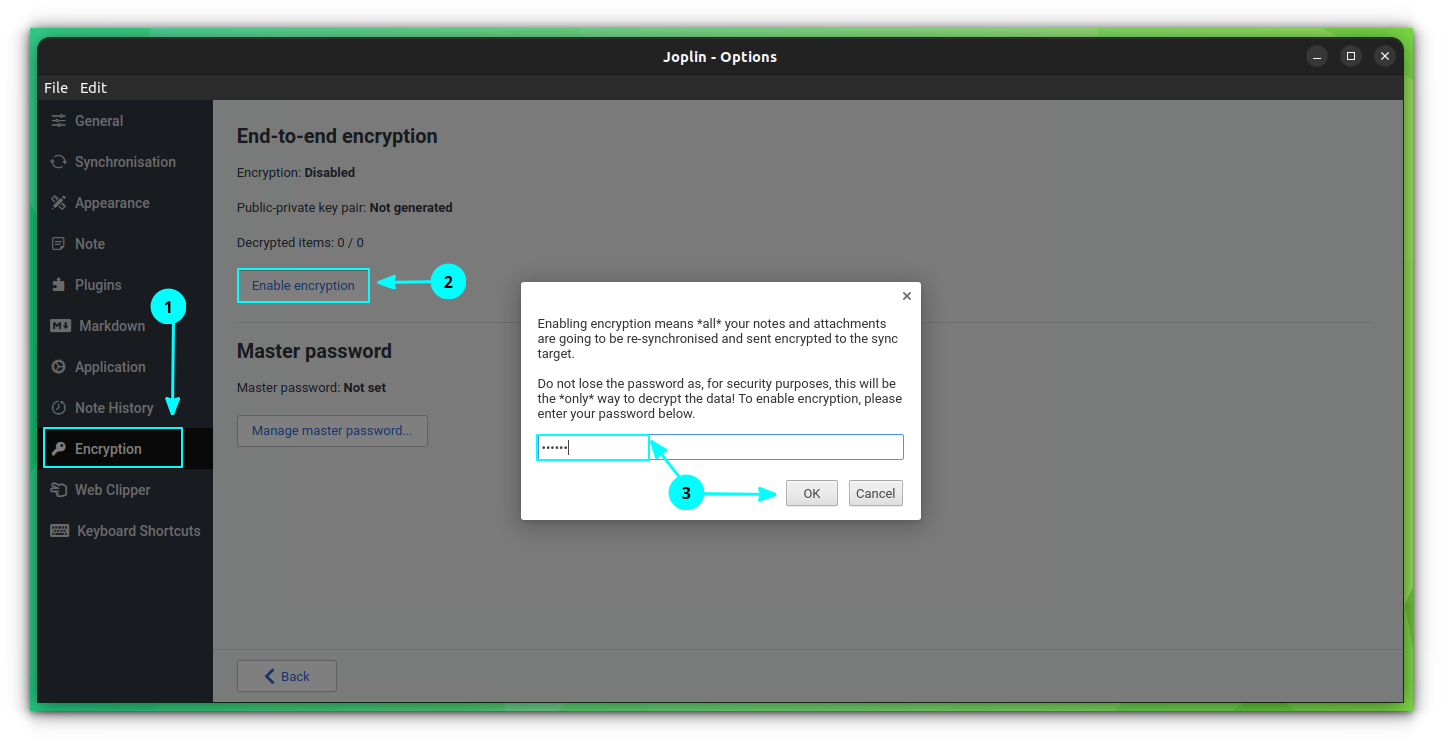
Do not lose this password.
Now, go to the Synchronization tab and select the open-sync wizard button. It will show you the available cloud sync options. There are other supported ways also, like WebDAV Nextcloud, etc., which you can test as needed.
Some options include Joplin Cloud, Dropbox and OneDrive. You can also choose to self-host.
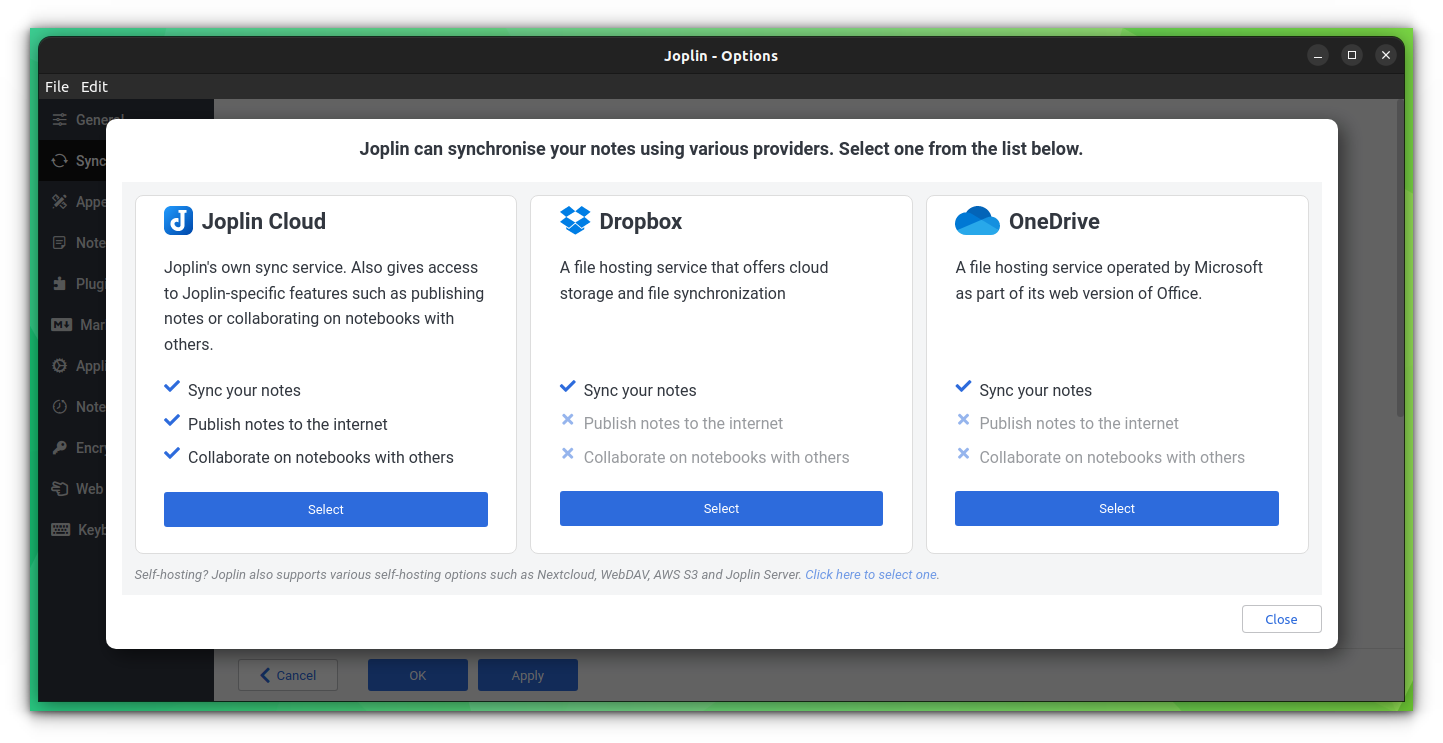
Follow the on-screen instructions to complete the sync process.
Suggested Read 📖
Ankush Das
Web Clipper
Joplin offers a web clipper for both Firefox and Chrome, with which you can take screenshots of webpages (or save webpages). You can access the settings on Tools > Options > Web clipper.
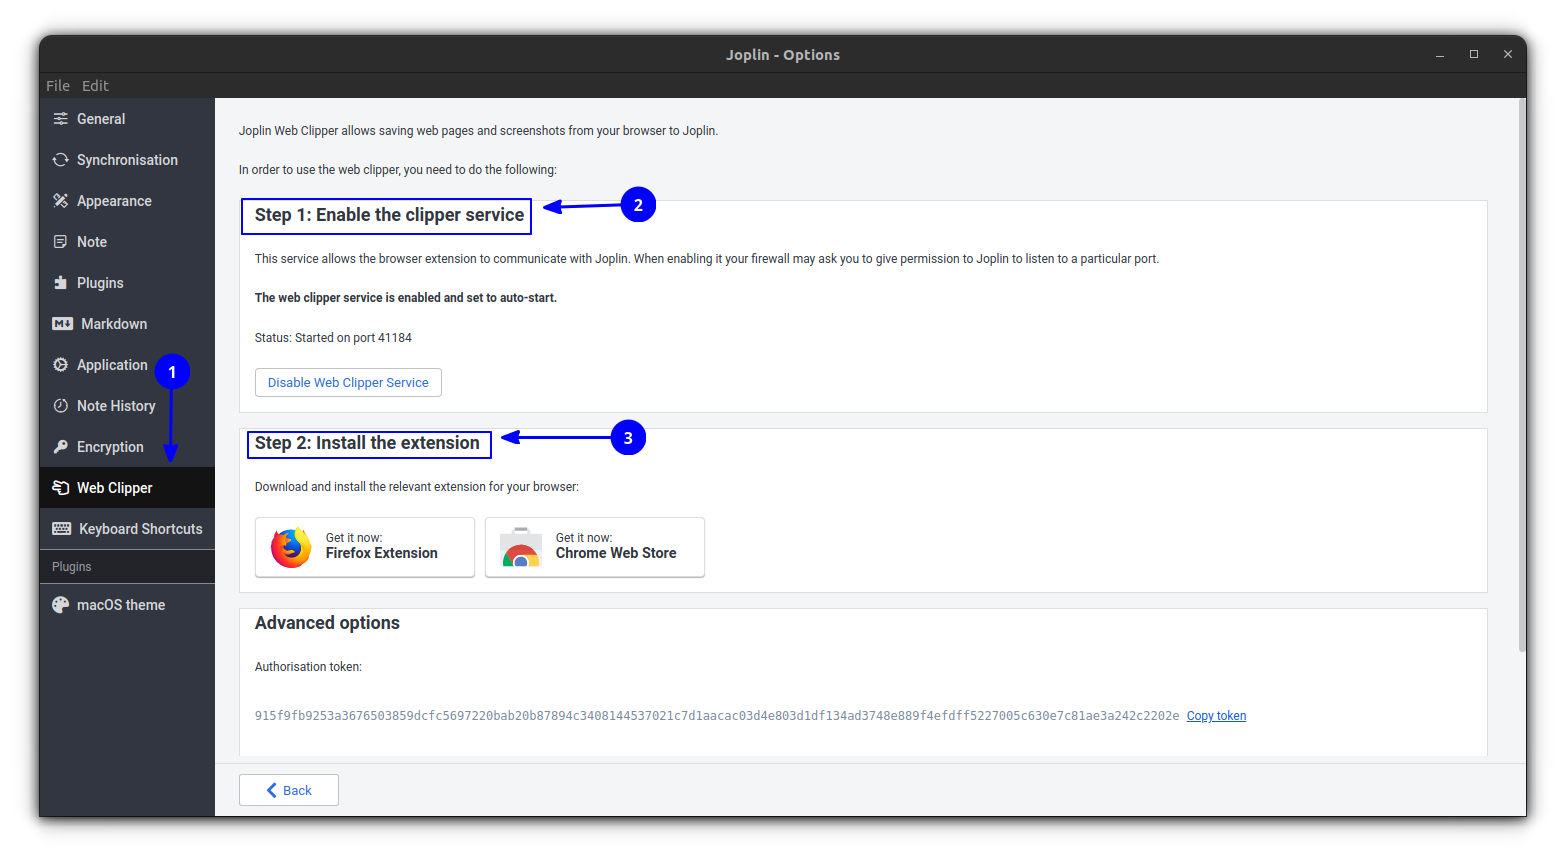
Depending on your browser, install the appropriate extension to get started.
Improve the Performance Using External Plugins
Joplin provides some cool plugins to make your experience even smoother. Furthermore, with some plugins, you can add more features, that are not by default enabled in Joplin.
Installing a Third-party Plugin in Joplin
Joplin features a huge number of third-party plugins, you can install them effortlessly. Some theme plugins are also available, and those will be listed at the end of the article.
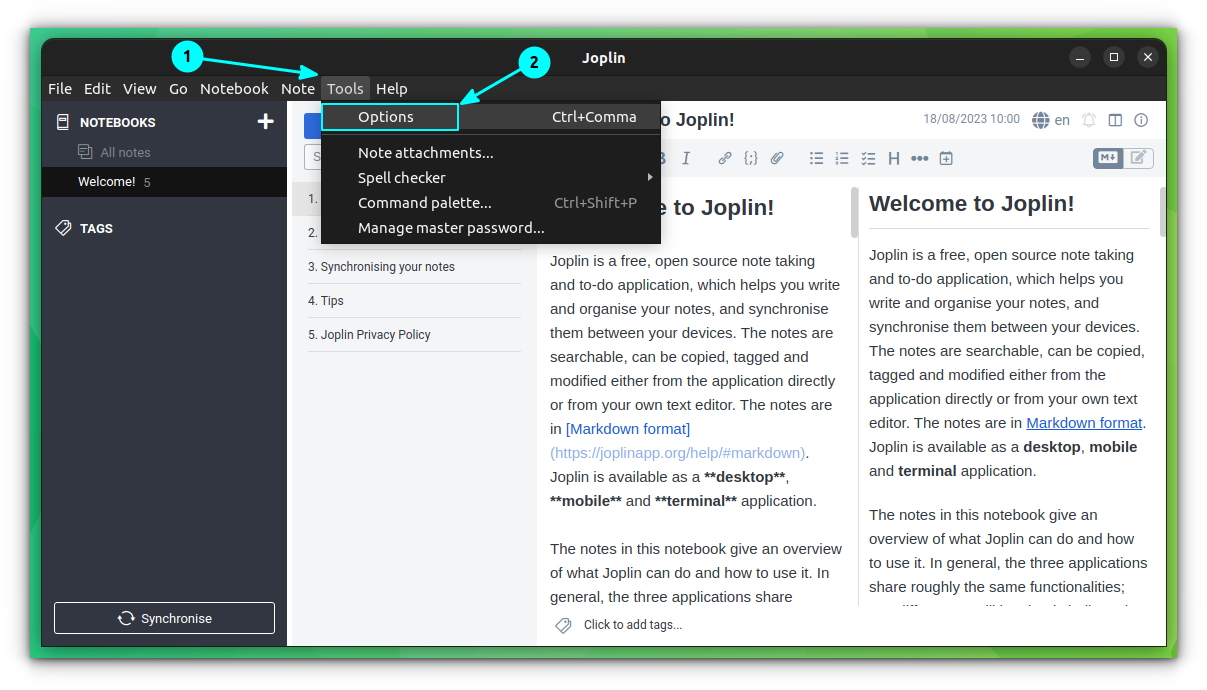
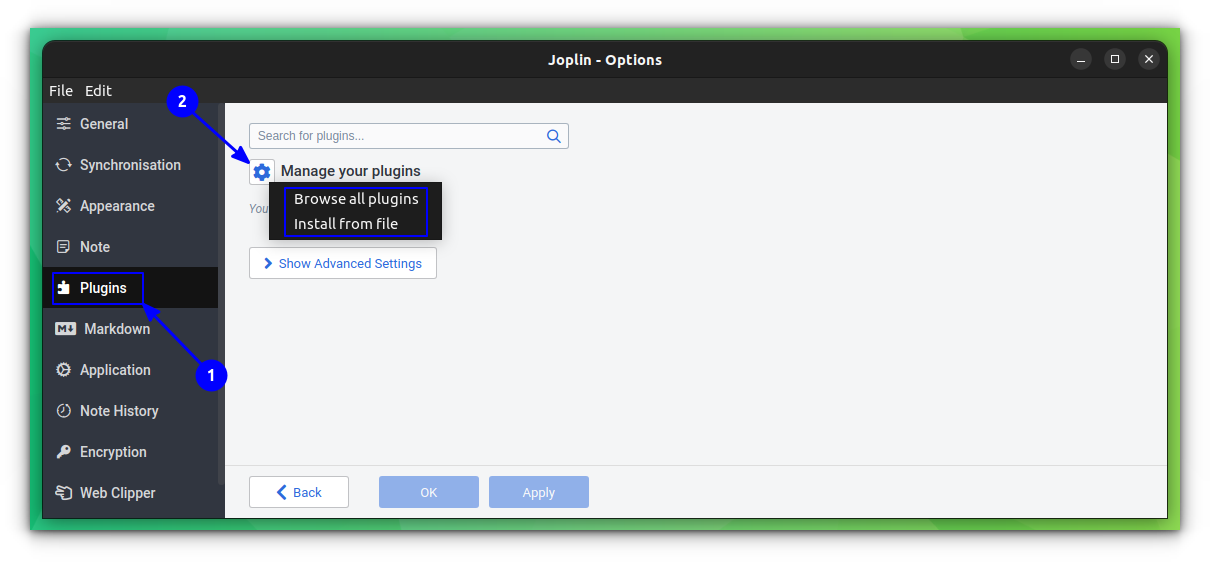
To install plugins, open Joplin and select Tools > Options.
From there, head to Plugins. Now, click on the gear icon as shown below. Here, you will get two options, install plugins from file or browse plugins.
If you click on the Browse all plugins button, it will bring you to the plugins download page. Click on the download button corresponding to the plugin you want. It will download a .jpl file.
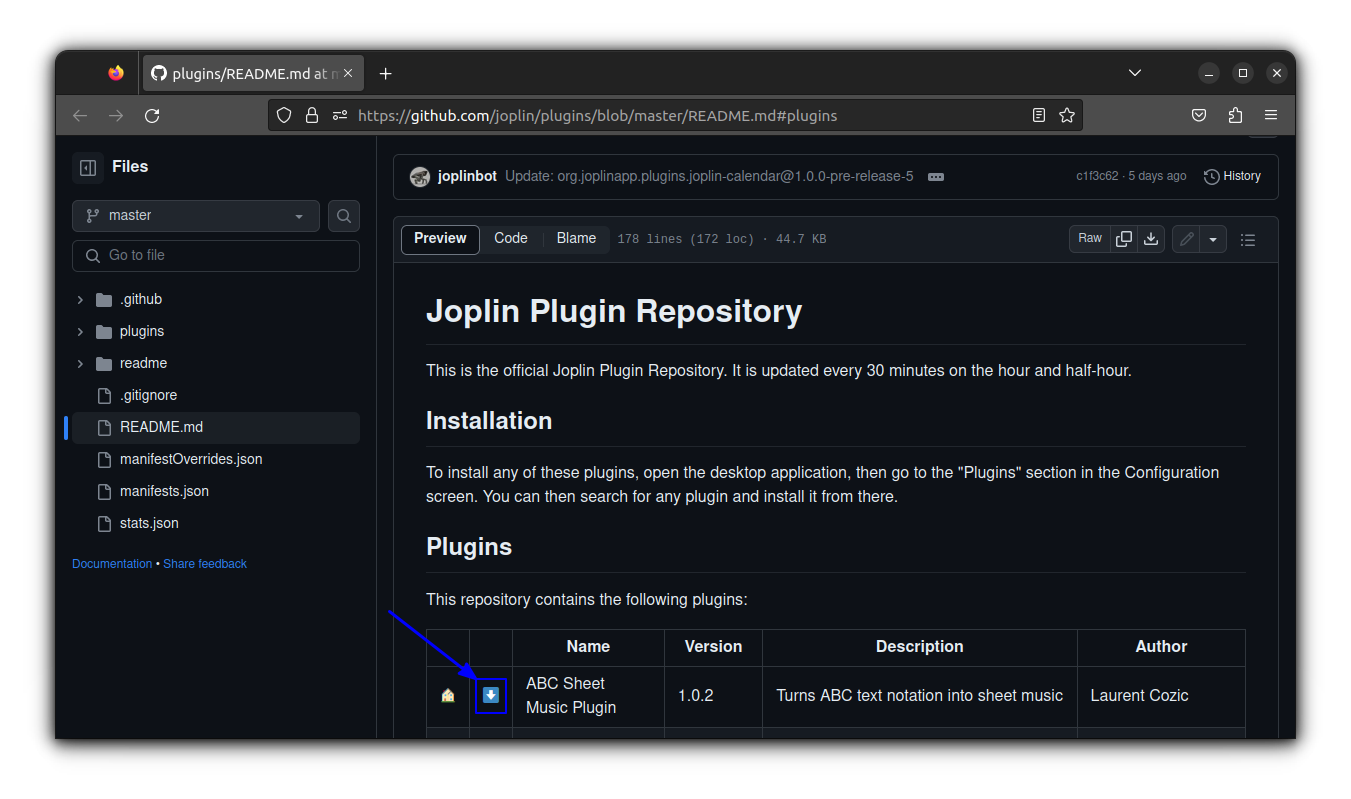
Once you download a plugin file, again head to Tools > Options > Plugins, click on the gear icon and select install from file option. Open the plugin file you downloaded earlier.
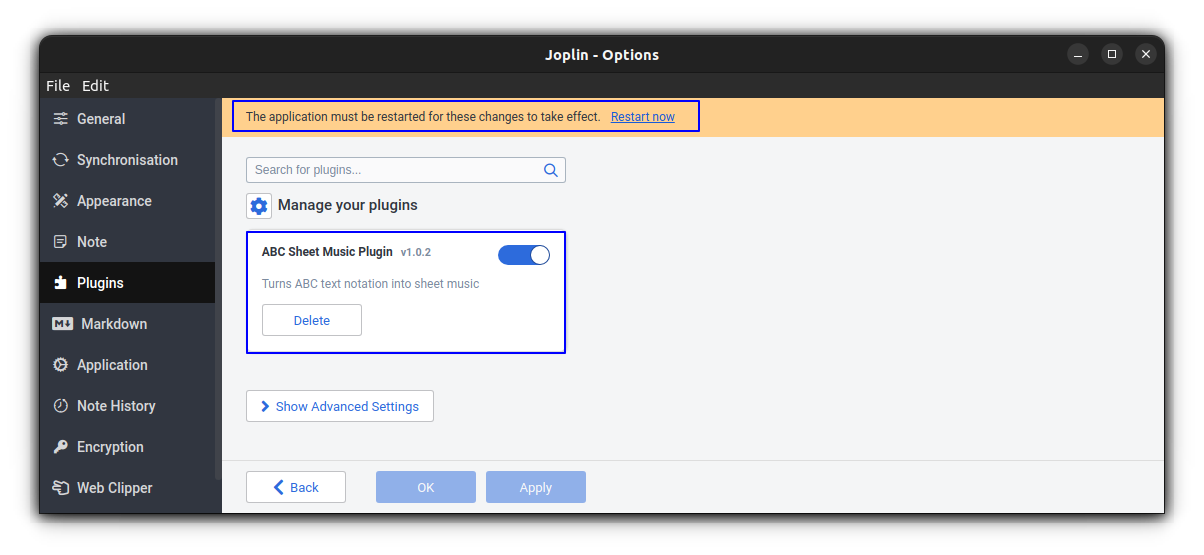
Now, restart Joplin to make the changes into effect.
Plugin 1: Favorite Notes
Do you want to pin notes or notebooks so that you can access it quickly? Use the Favorites' plugin for this. Download and install this plugin. Now, when you reopen Joplin, you can see the Favorites panel on the right-hand side (default position).

You can add a note or notebook to favorite by right-clicking on them and select Add to favorite, or just drag and drop to the favorites panel.
Plugin 2: Note Graph with Visualization of Internal Linking
One of the features that knowledge management applications like Obsidian offers is, the note graph, a visual overview of notes and its link. There is a similar feature available in Joplin as a plugin. First, download it and install the Graph plugin to Joplin.
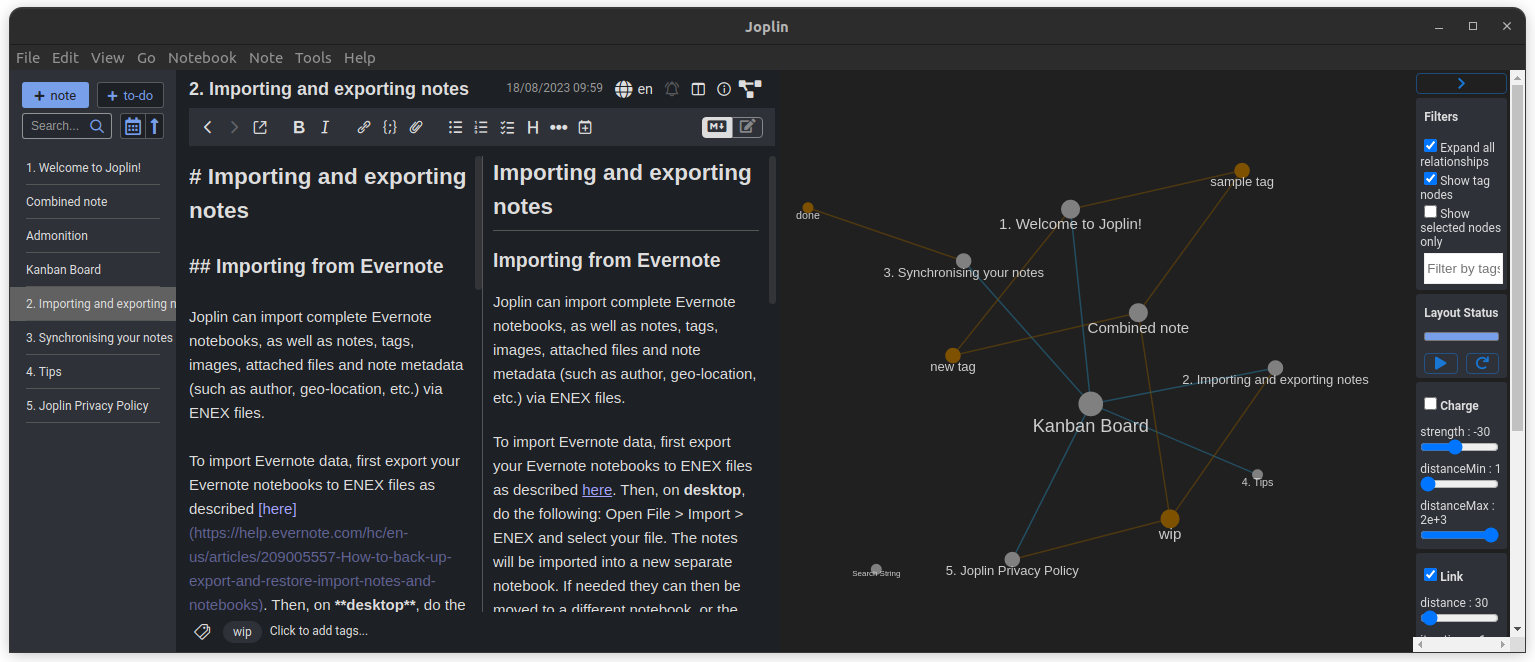
You can also see several options to tweak on the right side.
Plugin 3: Kanban Board
Kanban boards can make you productive, especially if you have a multitude of tasks. In Joplin, kanban board feature is available as a plugin. First, you need to download and install the plugin. Then, restart Joplin.
Thereafter, open an empty note in the required notebook and enter the code below:
```kanban
columns:
- name: Backlog
backlog: true
- name: Work in progress
tag: wip
- name: Finished
tag: done
```You will get a board, and you can change the existing field names or add new fields by editing the above code chunk.

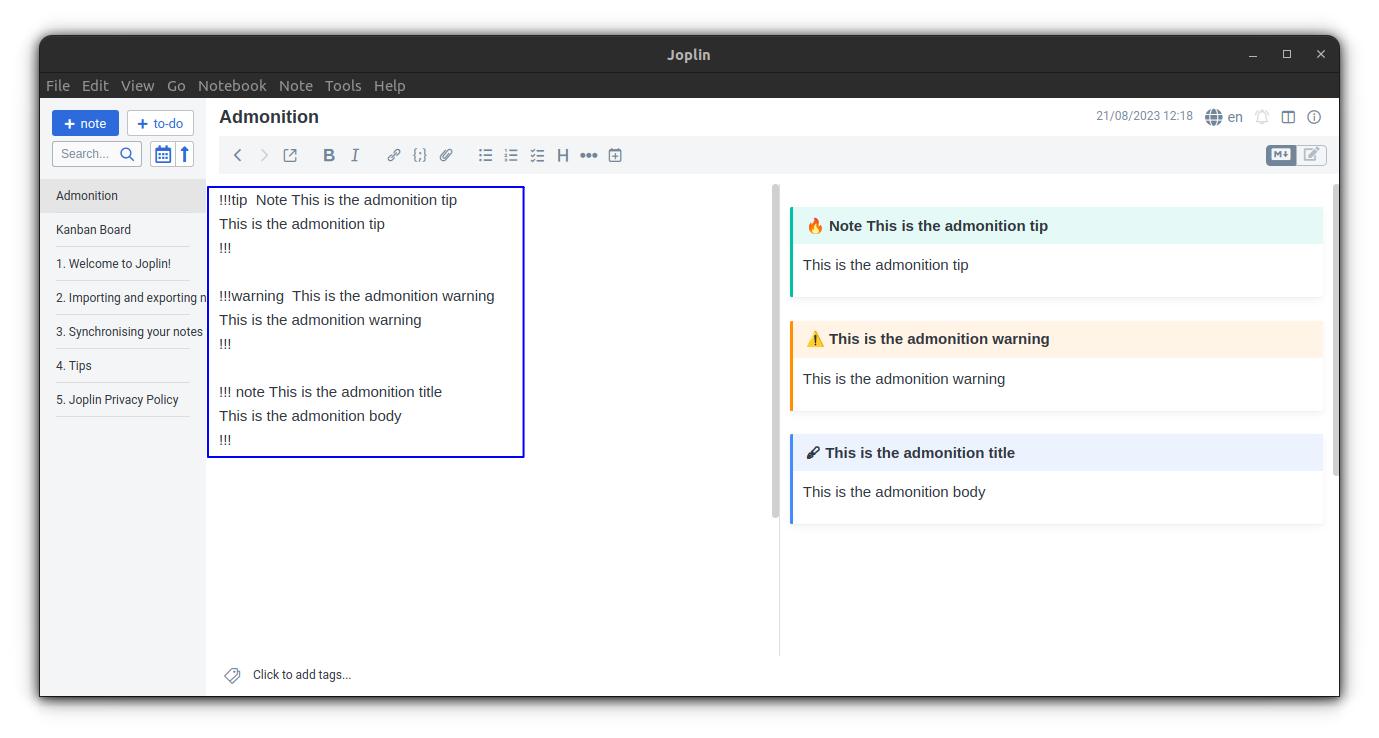
Plugin 4: Admonition Blocks
Notes can be improved using special blocks, such as tips, warnings etc. Download and install the Admonition plugin. Restart Joplin. Now, when you want to add a special block, use the code below:
!!!name Your Title Goes Here
This is the admonition body
!!!
For example, to add a tip, use:
!!!tip note This is the admonition title
This is the admonition body
!!!
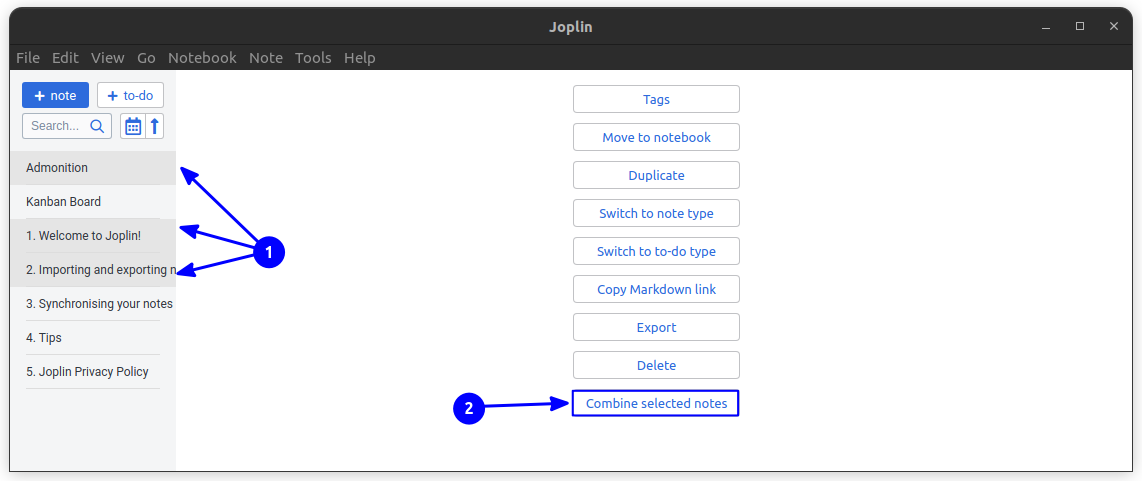
Plugin 5: Combine Notes
Use this extension to combine notes. Once installed, select the notes you want to combine by CTRL+click. Now, you can see a new section with various options on the right. Click on combine notes to combine them into one note.
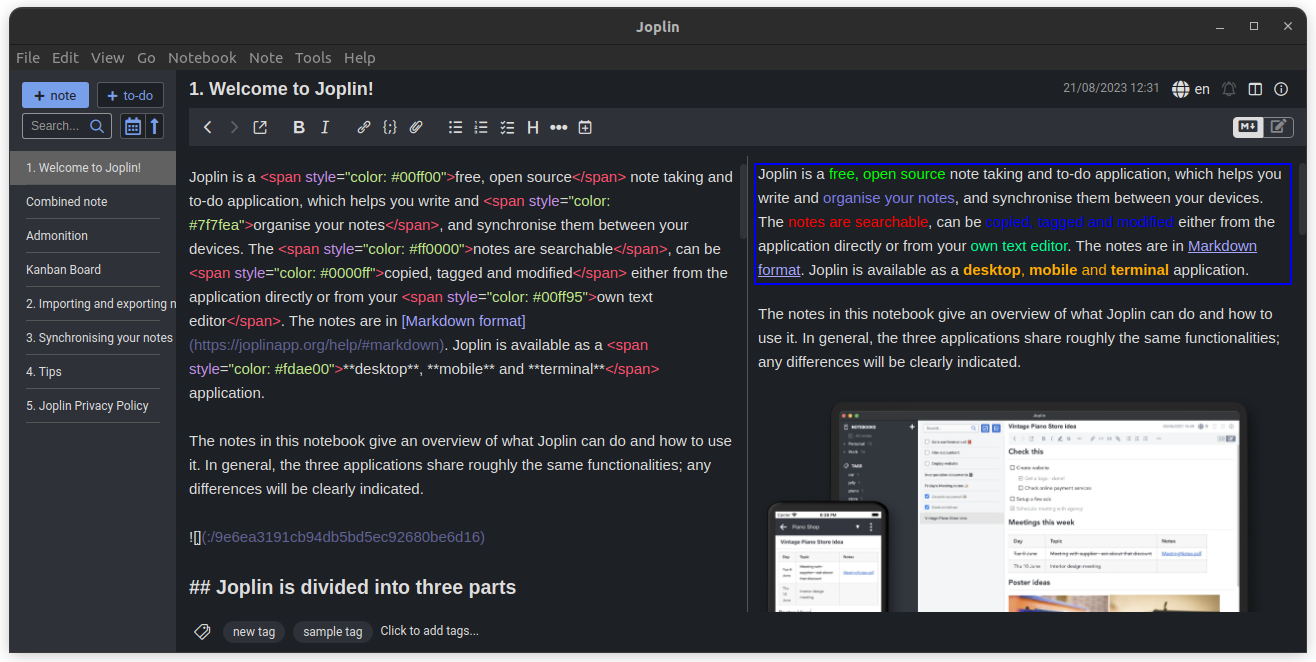
Plugin 6: Colored Text in Notes
Applying different colors to the text inside a note will be helpful for students to highlight important part of notes. In Joplin, to accomplish this, download and install the Text Colorize plugin.
Now, on the markdown editor interface, select the text you want to change color and press CTRL+SHIFT+C. You will get a color palette. Select a color and press either apply as text color or "Apply as BG" to set it as a highlight color.
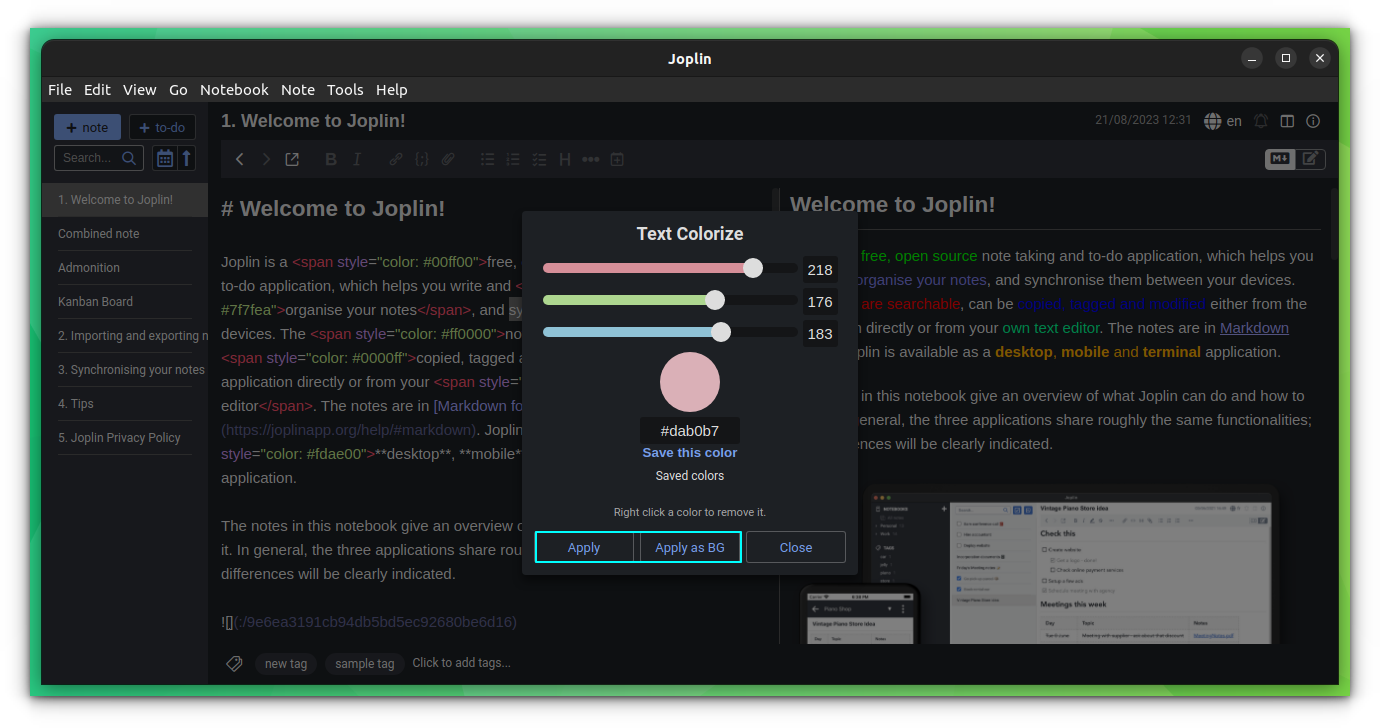
That's it. You can see the result below.
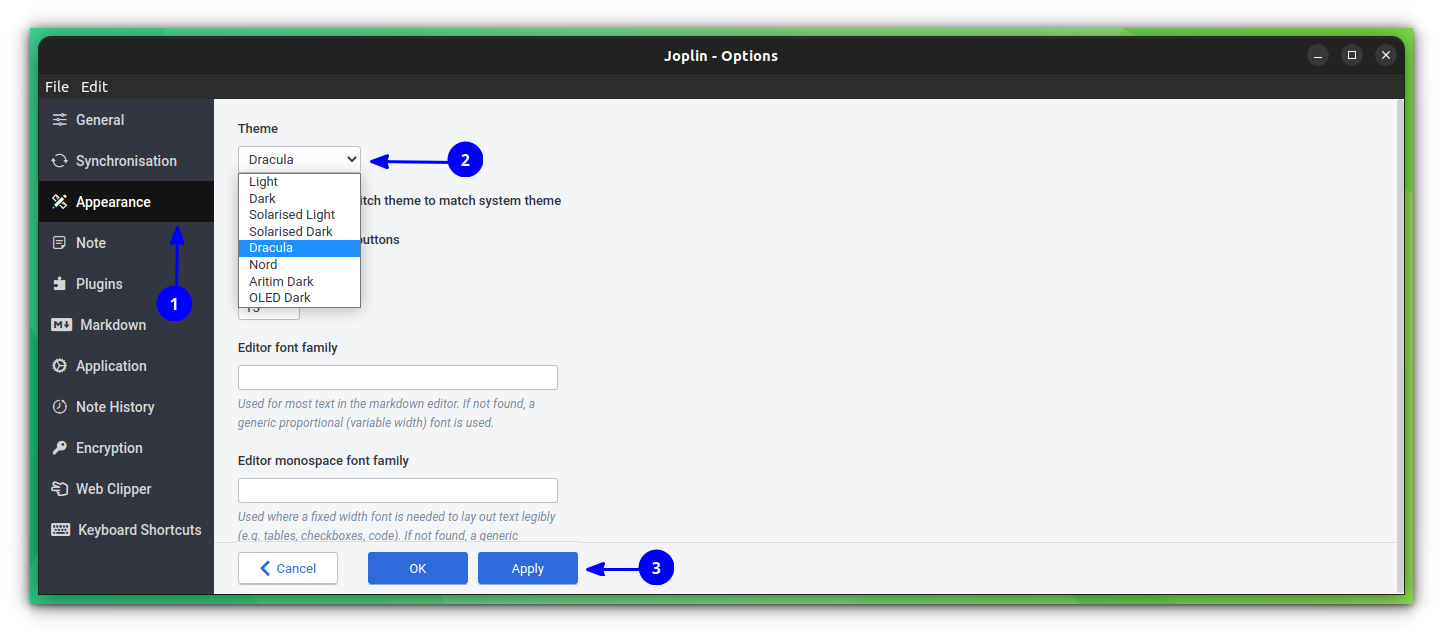
Theme Joplin with third-party themes
By default, Joplin provides some presets, like Dark, light etc. To switch between them, go to Tools > options > Appearance. From there, chose your theme and click apply.
If you would like to explore other themes over the default options, I highlight two options below.
Apply a GitHub Theme
This is a minimal GitHub theme for Joplin. Download the theme using the button below and install it.
Now restart Joplin to get effect.
Give Joplin a macOS Look
This theme will give a macOS effect for Joplin.
Wrapping Up
Joplin Notes is a breeze to use. Sure, some may not want all the functionalities it offers. But, if you do not know what you might require in your note-taking journey, you cannot go wrong with Joplin Notes.
💬 How is your experience with Joplin Notes? Did I miss listing any of the important features that you find handy? Let me know your thoughts in the comments below.
Source: It's FOSS