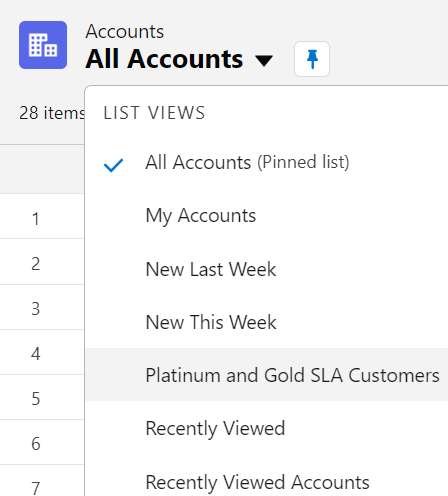
List Views in Salesforce
For each object, the standard list views exist. If you want to create your own list view based on your requirement, you can go with the custom list view. For example, you will see that there are seven standard list views for the Account (standard object).
1. Create a List View
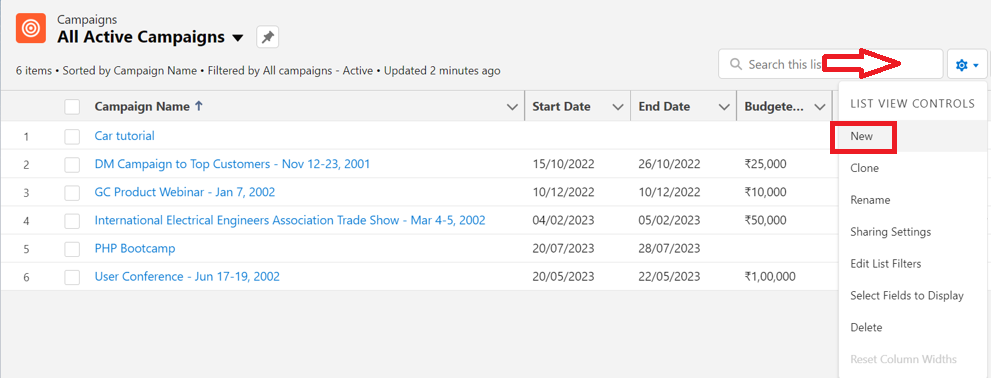
In this scenario, we utilize the Campaign object to create a list view on it. We already have the “All Active Campaigns” standard list view. Open that list view and go to the settings icon. There, you will find many options. Choose the first option (New) which creates a new list view.
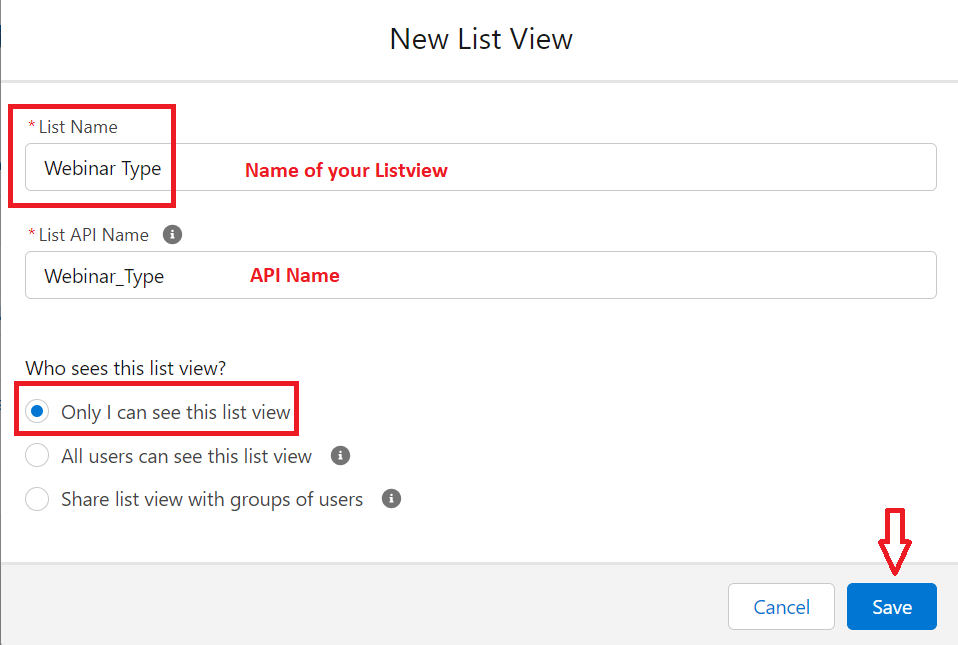
A popup will show to specify the name for your list view. We provided the name as “Webinar Type”. As of now, we can only see this list view. Click on “Save”.
2. Add Filters to the List View
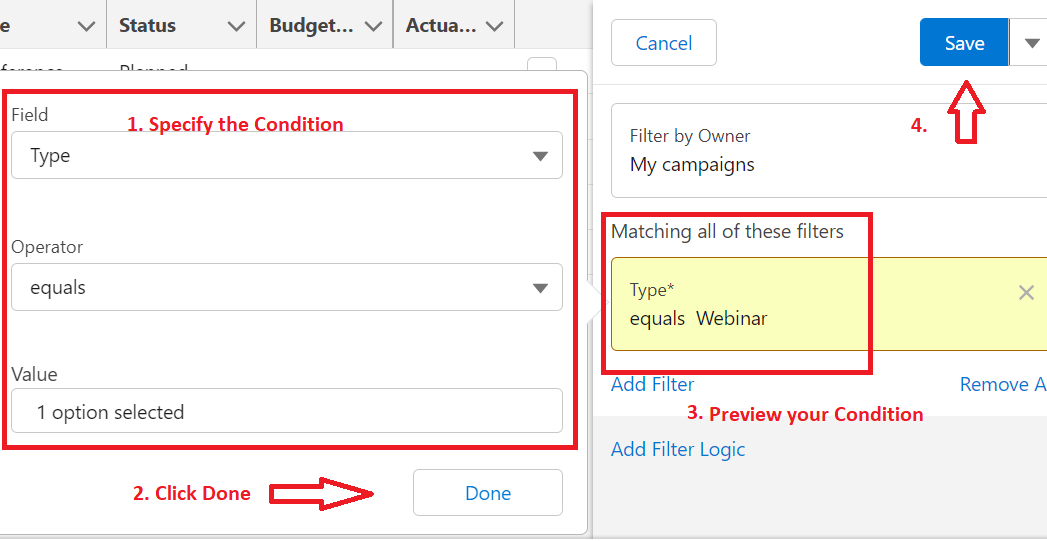
Now, we have a “Webinar Type” list view. Go to the “filters” icon and click on “Add Filter”.
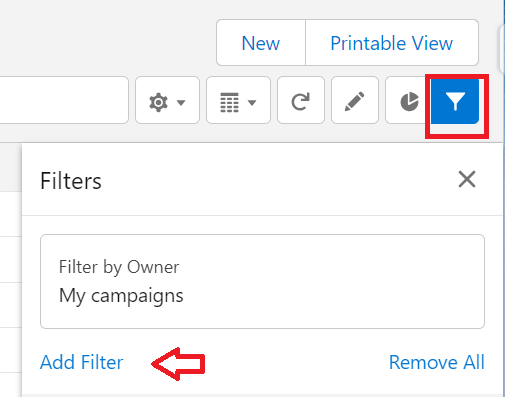
- Specify the condition. Select the field under the “Field” section. Here, we will store the records with the “Webinar” type.
- The operator is “equals”.
- Select the value as “Webinar” only and click on “Done”.
- Preview the condition and save the filter.
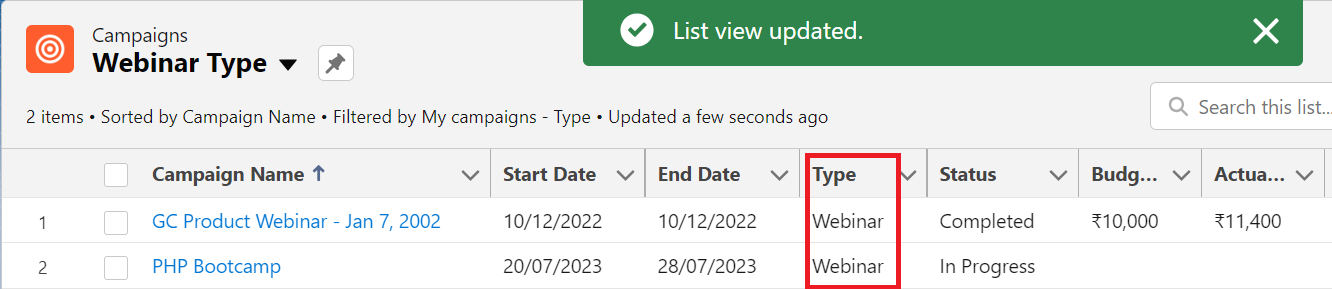
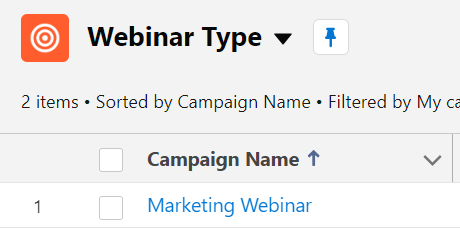
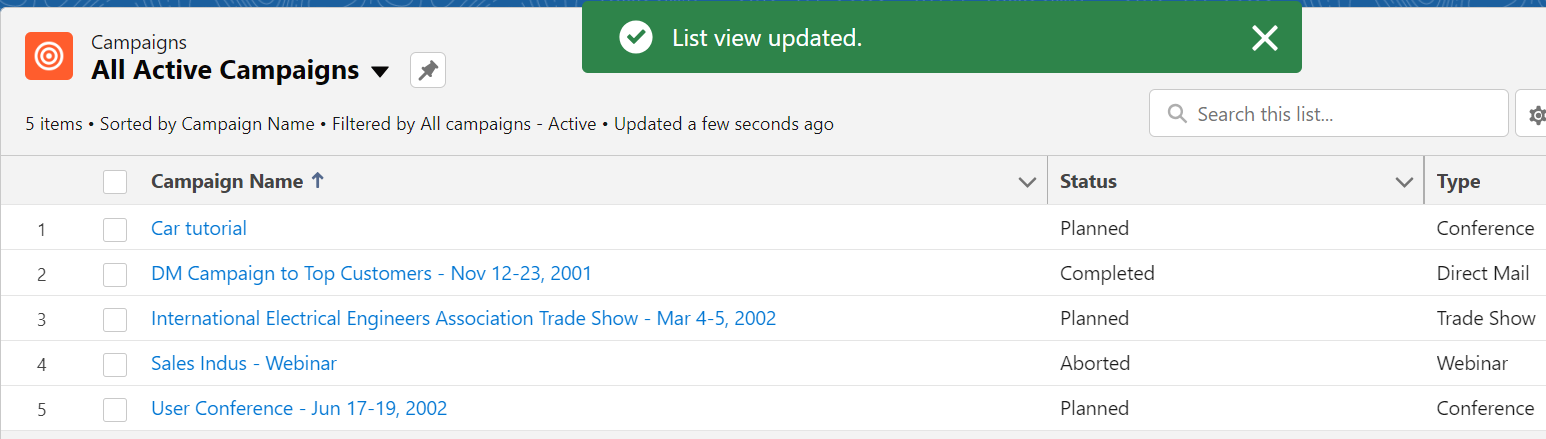
You can see that the list view is updated and there are only two records with the “Webinar” type.
3. Edit the Records in the Listview
Without navigating to the record, we can directly edit the entire record/specific fields from the list view itself.
Example 1:
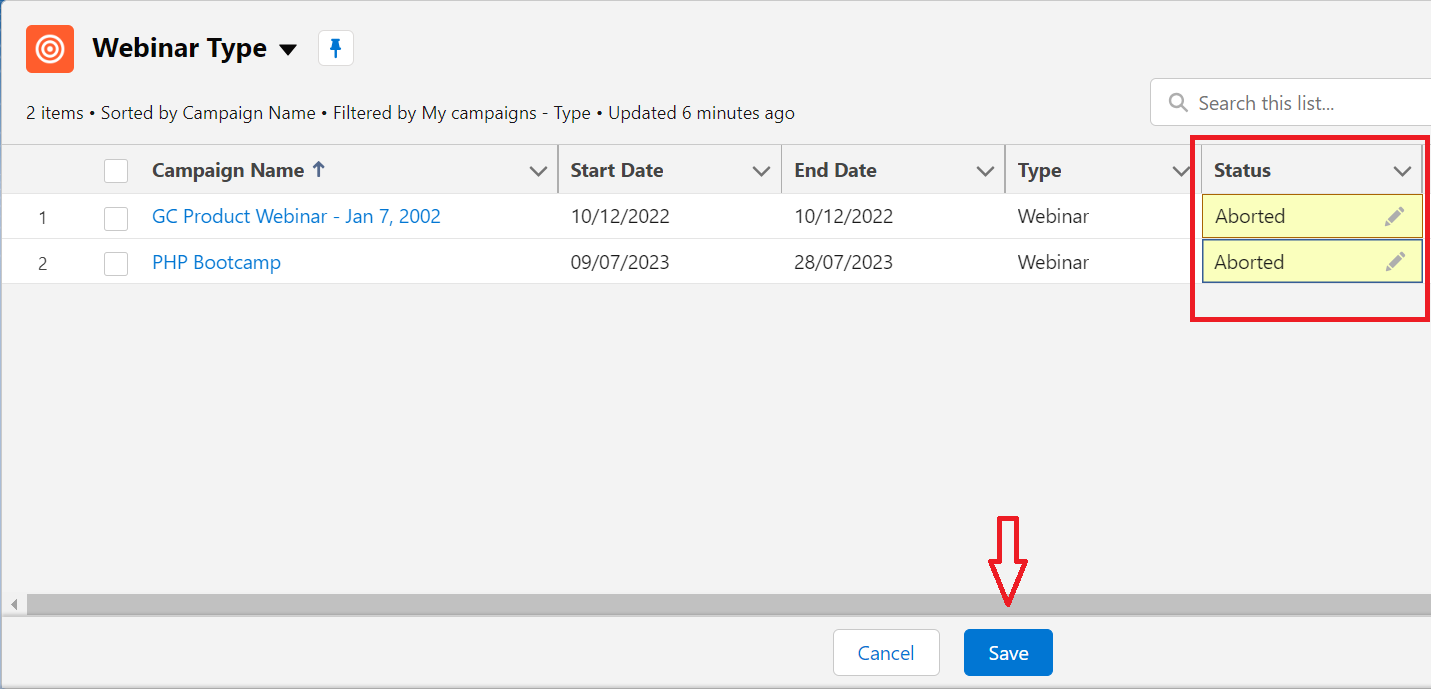
Let’s edit specific fields in the records that are present in the list view.
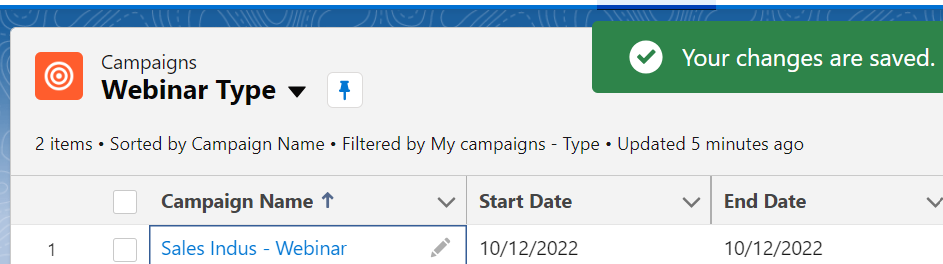
Here, an inline-edit option is available for each field so that we can edit a single or multiple records at a time and save them. The save option is enabled if you start changing the fields. Change the “Status” field to “Aborted” for both records.
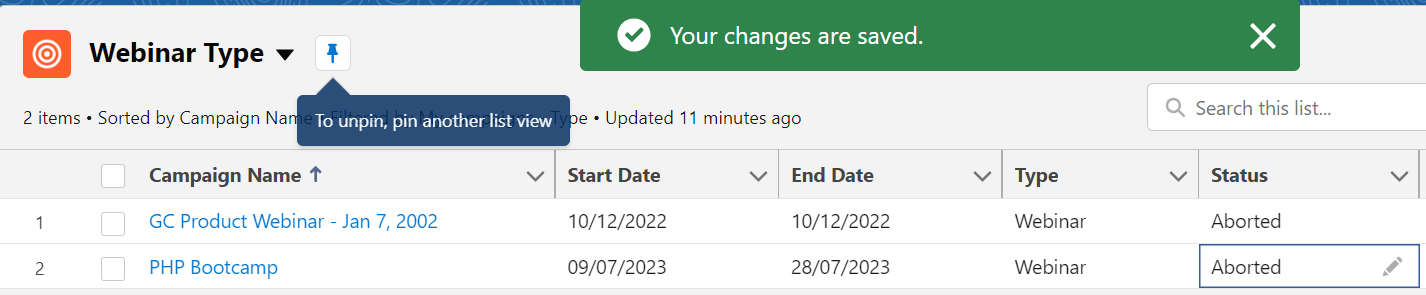
Your changes are updated. Now, the status is “Aborted”.
Example 2:
If you want to change only one particular record in the list view, select the dropdown menu and choose the “Edit” option.
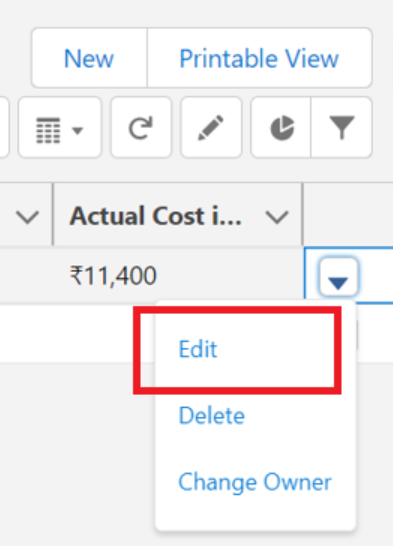
A pop-up will open and you are able to edit single/multiple fields. Click “Save” to update the record. Here, we update the campaign name to “Marketing Webinar”.
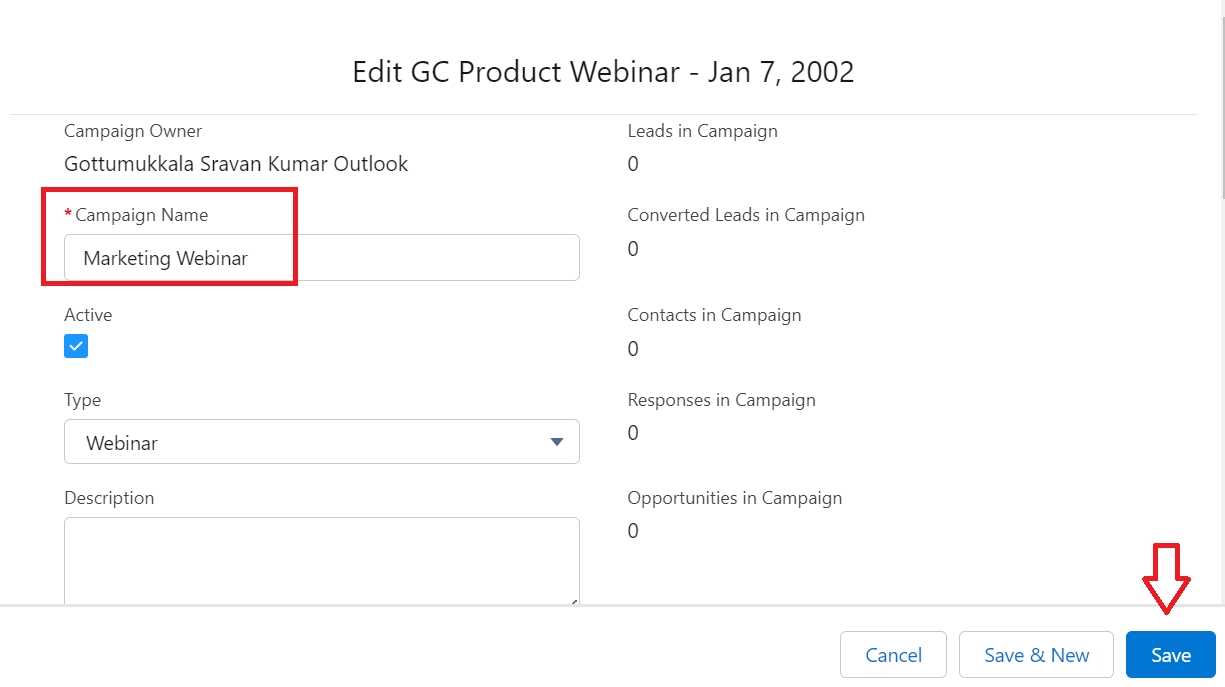
The campaign name is now updated.
Example 3:
You can also use this icon to edit the records.
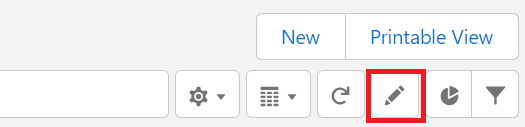
It is similar to Example 1 where we need to save it after modifying the field. Let’s update the campaign name from “Marketing Webinar” to “Sales Indus – Webinar”.
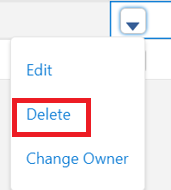
4. Delete Any Record
You can delete any record in the list view using the “Delete” option. Navigate to the dropdown menu and choose “Delete”. This removes the record from the Salesforce object.
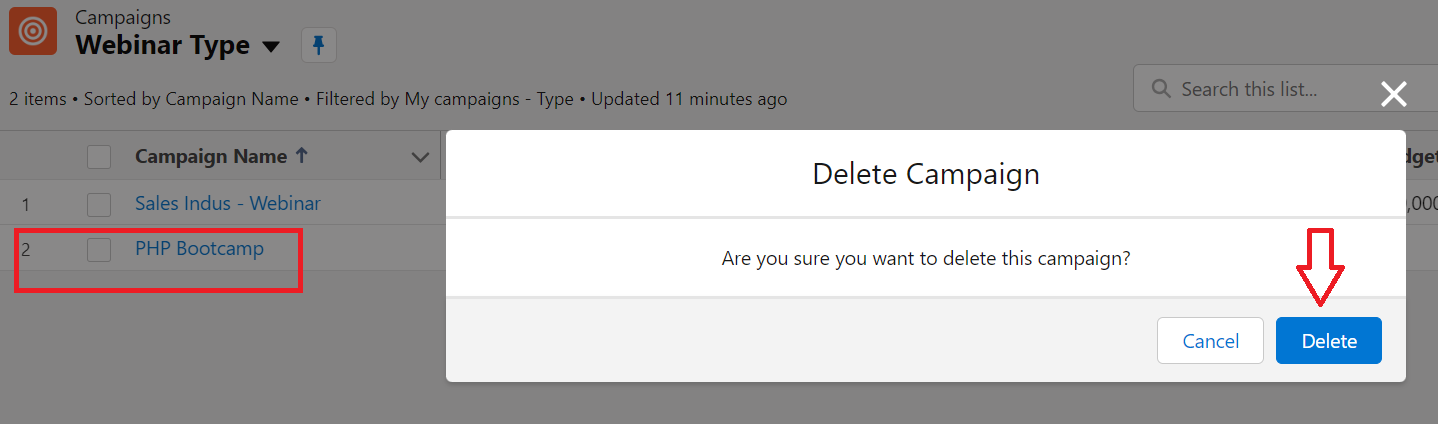
Let’s delete the second record that is present in our list view. It will ask for your confirmation to delete this record. Click on “Delete”.
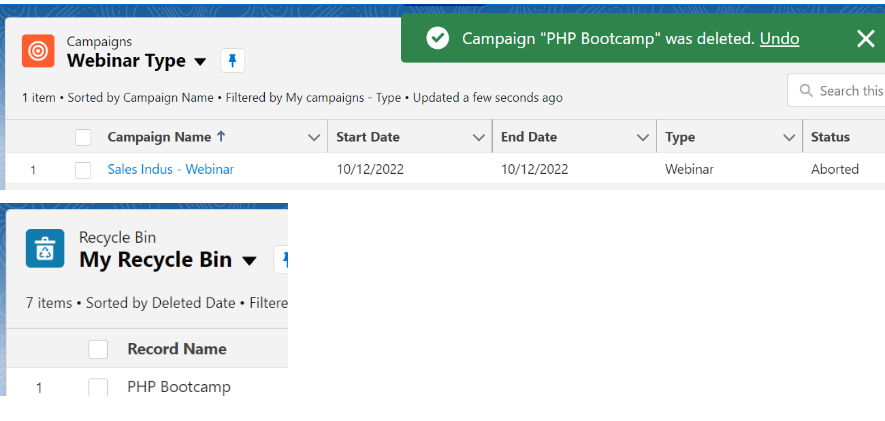
The record is deleted from the Salesforce Campaign object. It exists in the Salesforce Recycle Bin.
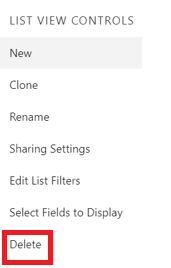
If you want to delete the entire List View, you can use the “Delete” option under the LIST VIEW CONTROLS.
Let’s delete the “My Active Campaigns” list view.
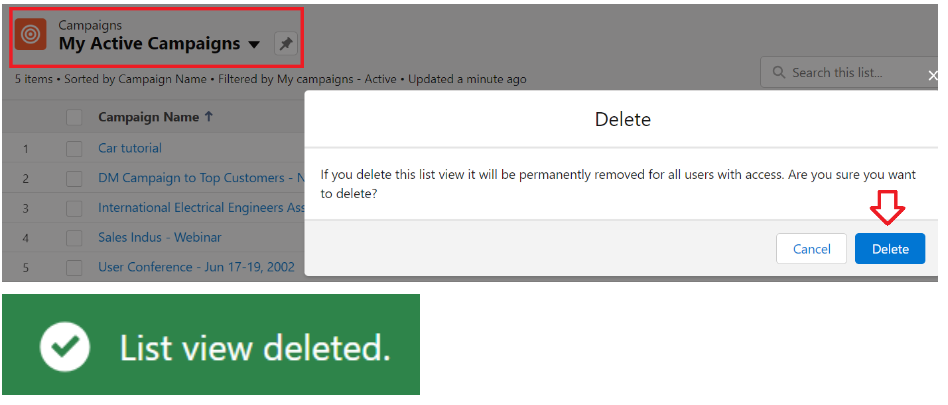
Now, the “My Active Campaigns” list view no longer exists.
1. Display the List View
We can display specific fields in the list view. Pictorial representation like (Vertical Bar charts, etc.) can also be viewed. Let’s see how to do it.
Example 1:
Select specific fields in the “All Active Campaigns” list view.
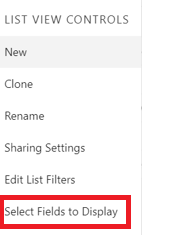
Go to the “LIST VIEW CONTROLS” and choose “Select Fields to Display”.
A dynamic multi-select picklist will appear with all the present fields in the Salesforce object (here, it is Campaign). You can include the field from the “Available fields” section into the “Visible fields” section using the “Include” forward-arrow-icon and “Exclude” unwanted fields from the “Visible” fields section to the “Available” fields section using the backward-arrow-icon. As of now, select only the campaign name, status, and type fields.
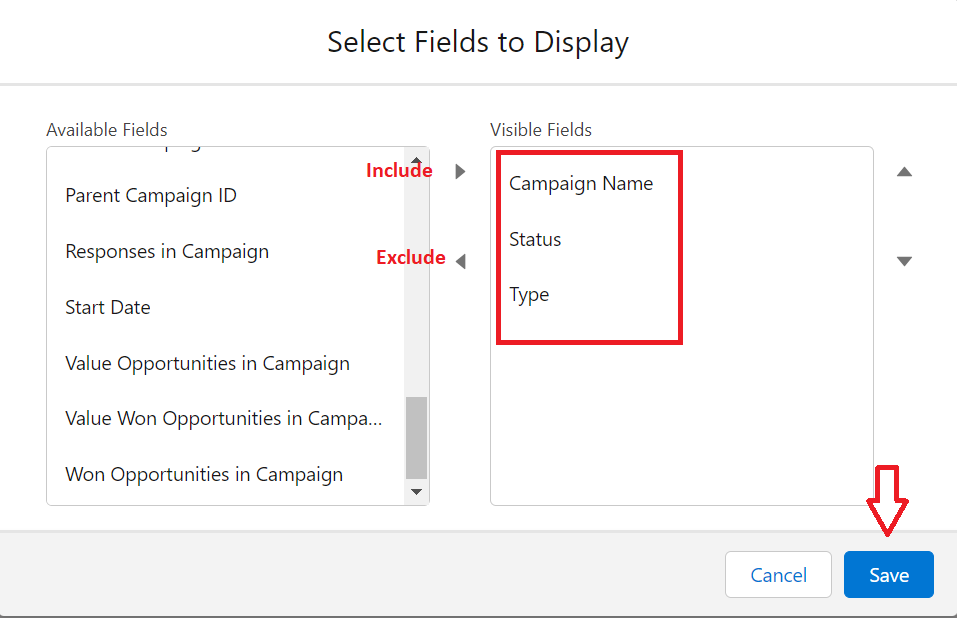
Now, you are able to see the list view with these three fields.
Example 2: Visualization
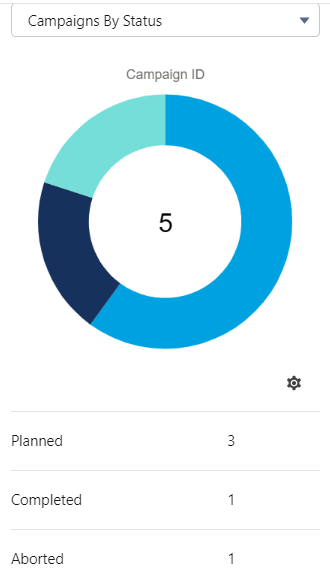
Let’s visualize the records that are present in the list view. Go to the “Show charts” icon and view the pie chart
![]()
View the pie chart based on status (Planned – 3, Completed – 1, and Aborted – 1).
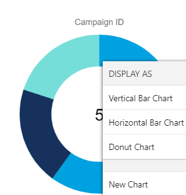
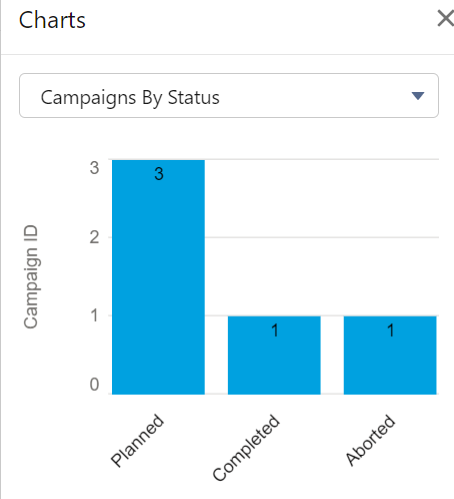
2You can also view different charts like Vertical Bar Chart, Horizontal Bar Chart, and Donut Chart. A custom chart can be built by opting the “New Chart”.
Vertical Bar Chart:
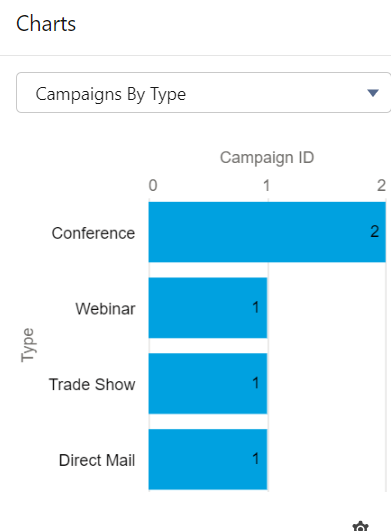
Horizontal Bar Chart by type (Conference – 2, Webinar – 1, Trade Show – 1, and Direct mail – 1).
Example 3: Display the Views
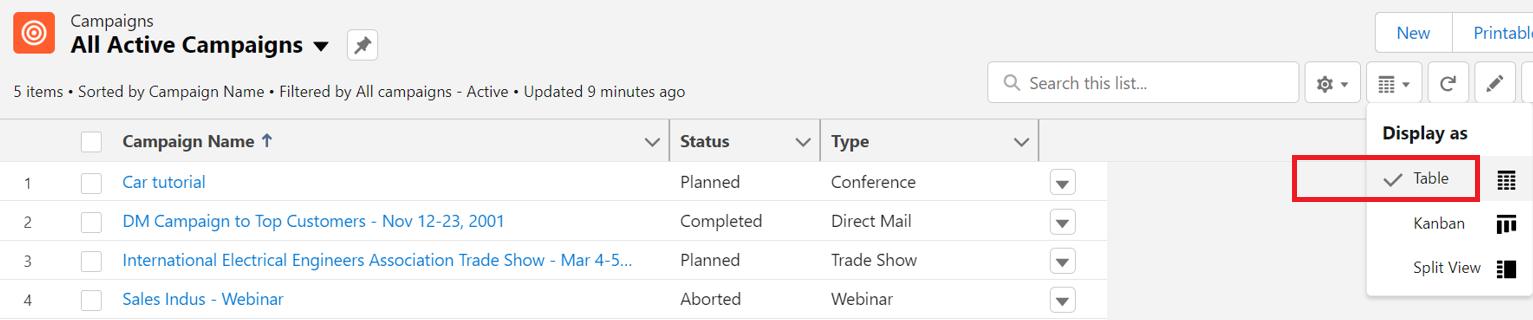
Listview: By default, the list view is displayed as a table. In this case, the records are the rows and the fields are the columns.
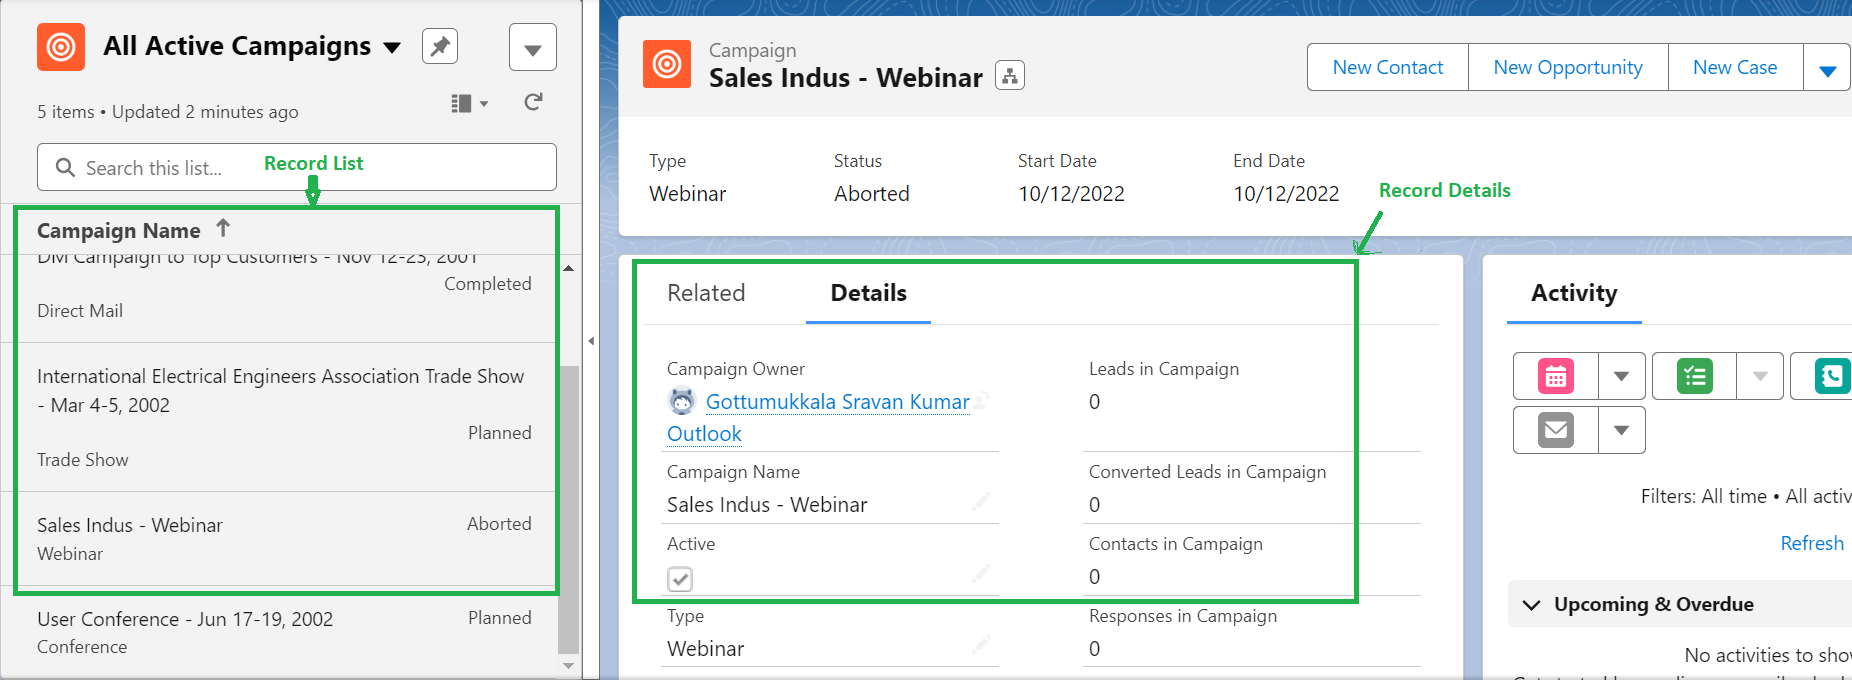
Split View: It shows both record list and record details at a time. The record list is shown on the left. When you click on any record, the record details are shown at the center of the page. Let’s see “All Active Campaigns” in the Split view.
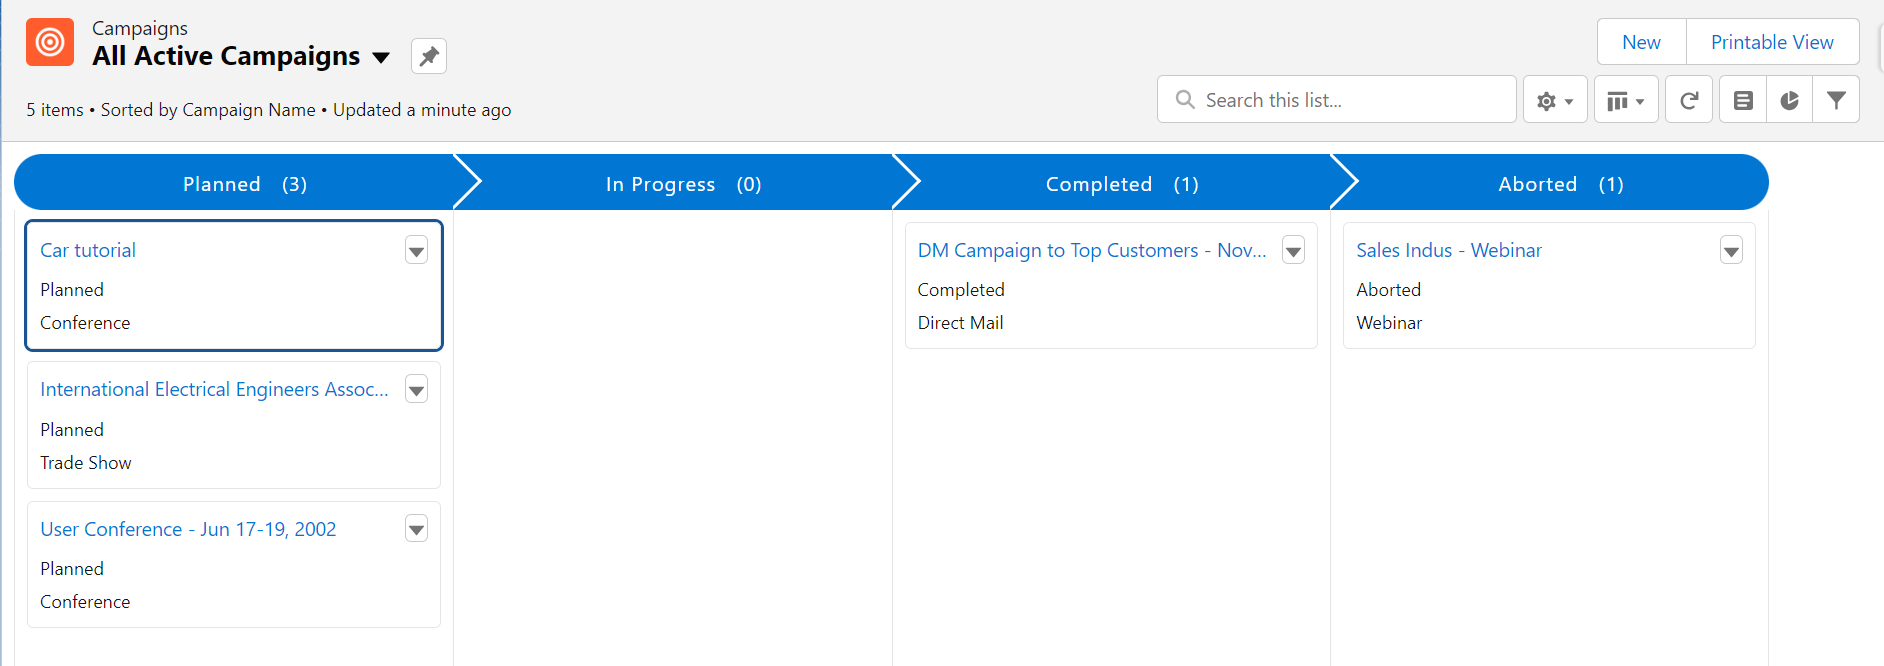
Kanban view: Kanban views display the records in a list view graphically such that we can monitor the work.
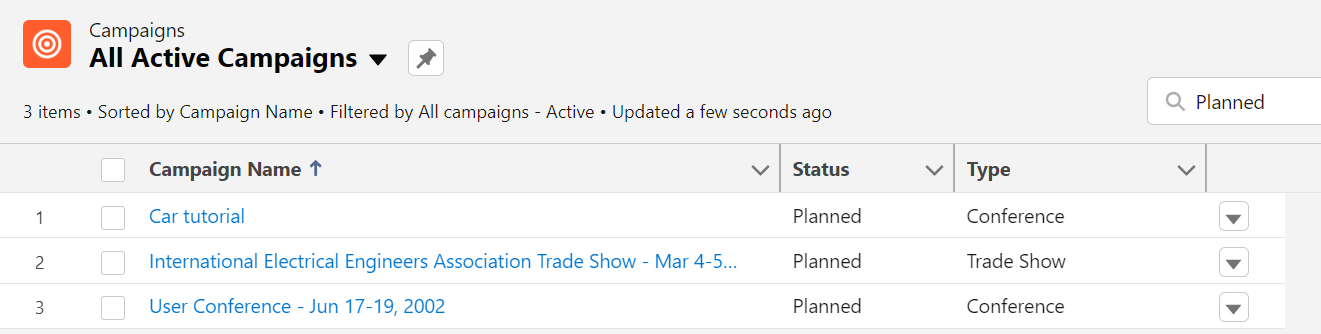
Example 4: Search
The search option is available in all list views to search for a particular field value. Let’s search for “Planned” in the “All Active Campaigns” list view.
Conclusion
We learned how to create a list view in Salesforce on the Campaign object. Next, we added a filter that displays the records based on the specified condition in the filter. We can edit the records in the list view in three ways. Then, we showed how to delete the entire list view and specific records from the list view with an example. We wrapped this guide by displaying the list view in different graphical representations and views.
Source: linuxhint.com