Linux Screen Command Tutorial
The screen command is a very useful command of the Linux operating system. When any task is done by dividing the task on multiple terminal windows, it is difficult to manage the task. This problem can be solved easily using the screen command. Multiple terminal instances can be opened in a single terminal window using the screen command. This command has many other advanced features that do not exist in the general terminal. The different uses of this command are described in this tutorial.
Prerequisites:
The screen utility is required to install in the operating system if it is not installed before. It is installed by default for the Ubuntu 20+. Run the following command to check the installed version of the screen command.
You must have the root user privileges to run the screen command.
Keystrokes of the Screen Command
The uses of different keystrokes are described in the following to use the screen command:
| Keystrokes | Purpose |
| Ctrl + a and c | To open a new screen window. |
| Ctrl + a and d | To detach the current screen window. |
| Ctrl + a and 0 | To switch to the particular window. |
| Ctrl + a and A | To rename the current window. |
| Ctrl + a and “ | To display the list of all opened windows. |
| Ctrl + a and S | To split the window horizontally. |
| Ctrl + a and | | To split the window vertically. |
| Ctrl + a and tab | To switch between the screen split areas. |
| Ctrl + a and n | To switch to the next window. |
| Ctrl + a and p | To switch in the previous window. |
| Ctrl + a and x | To lock the current window. |
| Ctrl + a and Q | To terminate all windows except the current window. |
Open the Linux Screen
Login as root user and run the following command to open the Linux screen:
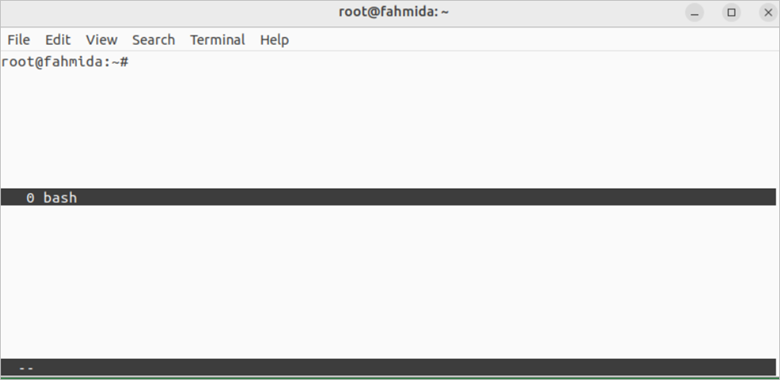
The following screen appears if the “screen” command is executed for the first time. You can press the space bar to go to the next page or you can press the Enter button to open the command prompt. Press the Enter button to open the screen window with the command prompt:

The following window appears after pressing the enter button. It is the default screen window. You can now execute any command in this window:

Open a Screen Window with the Session Name
When working with multiple screen windows, it is better to open the screen window with the session name. It helps the user to keep track of the windows.
Run the following command to open a screen window with the session name, mysession:
Run some commands after opening the screen window for testing purposes. Here, the “date” and “pwd” commands are executed:

Detach the Screen Window
Open the on-screen keyboard and press the following keystrokes to detach the current screen window:
Ctrl + a and d
The following similar information appears after detaching the screen window. The output shows the screen window name with the ID:

Reattach the Screen Window
Run the following command to reattach the previously created screen window:
List of Created Screen Windows
Run the following command to print the list of created screen windows:
According to the following output, two screen windows are created. One of them is attached and another is detached.

Reattach the Screen Window Based on ID
The ID of any screen window can be found after detaching the window. After detaching the particular screen window, run the following command to attach that screen window using the ID value, 1062:
You will be attached to the screen window again if the ID value is valid.
Lock and Add the Password
Open the on-screen keyboard and press the following keystrokes to lock the current screen window:
Ctrl + a and x
The same password key has to type two times after locking the screen. Next, you have to type the password every time to unlock the screen when you want to open this screen window.

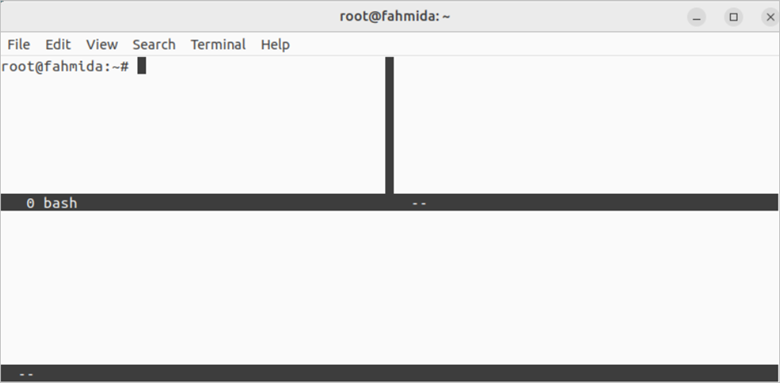
Split the Screen Horizontally
Sometimes, it requires dividing the screen window into multiple parts to perform the different types of related tasks from the same window. The screen window can be divided horizontally and vertically. Open the on-screen keyboard and press the following keystrokes to split the screen horizontally:
Ctrl + a and S
The screen is looked like the following image if the screen window is divided horizontally. Here, the main screen window is divided horizontally into equal portions:
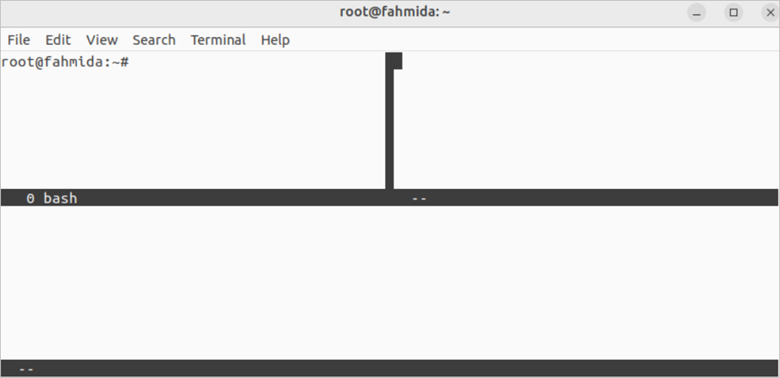
Split the Screen Vertically
Open the on-screen keyboard and press the following keystrokes to split the screen vertically:
Ctrl + a and |
The screen looks like the following image if the upper top of the screen area is divided vertically:
Switch Between the Screen Split Areas
Open the on-screen keyboard and press the following keystrokes to switch between the screen split areas:
Ctrl + a and tab
The screen looks like the following image if the cursor is blinking in the left top command prompt. The cursor is moved to the right-top of the screen area:
Terminate All Windows Except the Current Window
Open the on-screen keyboard and press the following keystrokes to terminate all screen windows except the current window:
Ctrl + a and Q
Conclusion
The basic uses of the screen command are explained in this tutorial by creating multiple screen windows. This command is very useful when it requires doing multiple tasks from the same window. We hope that the Linux users will be able to use the screen command after reading this tutorial properly.
Source: linuxhint.com