Linux Mint Add User Command
Whoever is using anything is said to be a user. It can be a system user, mobile user, internet user, or any sort of user. While we tend to work on different operating systems daily, it is very important to have control over all the users within our operating system. Users can make use of your system according to their privileges. Therefore, it’s very necessary to take a deep look at each one and the activities that are performed by them. Every operating system provides you with different user management sections to control the users. This guide discusses how you can add the users to the Linux Mint system using the “adduser” instruction.
Add a New User
To add a user to the Linux Mint system, you should use the sudo rights which must be a root user with administrative rights. Therefore, we launch the Linux Mint terminal and add the following instruction in it. The command contains the “sudo” keyword with the “-s” option to change to the root user. On the prompt, you need to provide your root user password as we did in the following. Now, we are working as root users as per the third line.
After turning into a root user, we display all the current users of our system before creating any new user so that we cannot create a user with the same name. Therefore, we use the cat instruction followed by the “etc/passwd” path to the file which contains the list of all users and their login information. The following output shows that the “omar” user is also listed:
root:x:0:0:root:/root:/bin/bash
daemon:x:1:1:daemon:/usr/sbin:/usr/sbin/nologin
omar:x:1000:1000:Omar,,,:/home/omar:/bin/bash
sssd:x:127:137:SSSD system user,,,:/var/lib/sss:/usr/sbin/nologin
Now, we use the “adduser” command to create a new user, “test”, within our system using the “Sudo” rights. The output shows that the system adds a user with a user id 1002 and “test” group. After creating its directory, it asks for the password of a new user. Then, you need to provide the name and the other information for a “test” user and confirm the user creation.
Set the Password
Well, let’s try to add the “tom” user with its password using the “passwd” option in the following adduser instruction. But it doesn’t take passwd as an option but a new username which adds the multiple users at a time. Therefore, it won’t allow you to add more than one user at a time. To add a user with a password, we need to opt for the previous illustration method here.
adduser: Only one or two names are allowed.
To separately set a password for a new user, you can utilize the “passwd” instruction with the new username as follows. It prompts twice for a new password and update it at last.
We can also use the “adduser” command as “useradd” to add the new users to our system. If you want to create a new user along with its password in a single instruction, you can use the useradd command followed by the new username, -p option, password, and then a password.
The cat instruction shows the newly created users in the list of system users as follows:
root:x:0:0:root:/root:/bin/bash
daemon:x:1:1:daemon:/usr/sbin:/usr/sbin/nologin
bin:x:2:2:bin:/bin:/usr/sbin/nologin
omar:x:1000:1000:Omar,,,:/home/omar:/bin/bash
dummy:x:1001:1001::/home/dummy:/bin/bash
test:x:1002:1002:test,,,:/home/test:/bin/bash
john:x:1003:1003::/home/john:/bin/sh
Add a User to the Group
You can modify the user properties in the Linux system via the use of the usermod instructions. If you want to add a new user to a specific group of your Linux Mint system, you can do so by using the –G option in the “usermod” instruction. The following instruction shows that we add the new user, “john”, to a sudo” group “via the –G option preceded by the “-a” option:
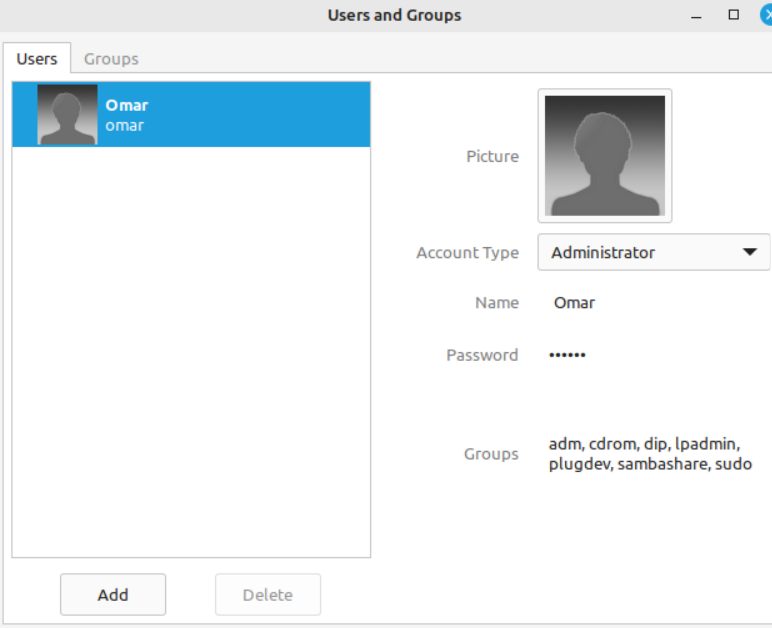
Along with adding a user to a group, you can also take a look at the groups from which a specific user belongs – sudo, root, etc. For this, the “group” keyword is used with the sudo rights and the name of a user, the groups to which the “omar” user belongs. It shows many groups that are listed in the output for “omar” user.
After searching for the groups of “john” user, we get to know that it belongs to the “john” group and “sudo”.
While the “dummy” user only belongs to its group which is “dummy”.
Delete the User
Deleting any user other than the currently working user is not a big deal in Linux Mint. For this, you only need to use the “deluser” instruction with the name of a user to be removed. In our case, we delete the “john” user here. The output shows that it removes the user while displaying a warning and completing the process on “Done”. Using the same instruction, we can remove all the users we just created.
Using the System Settings
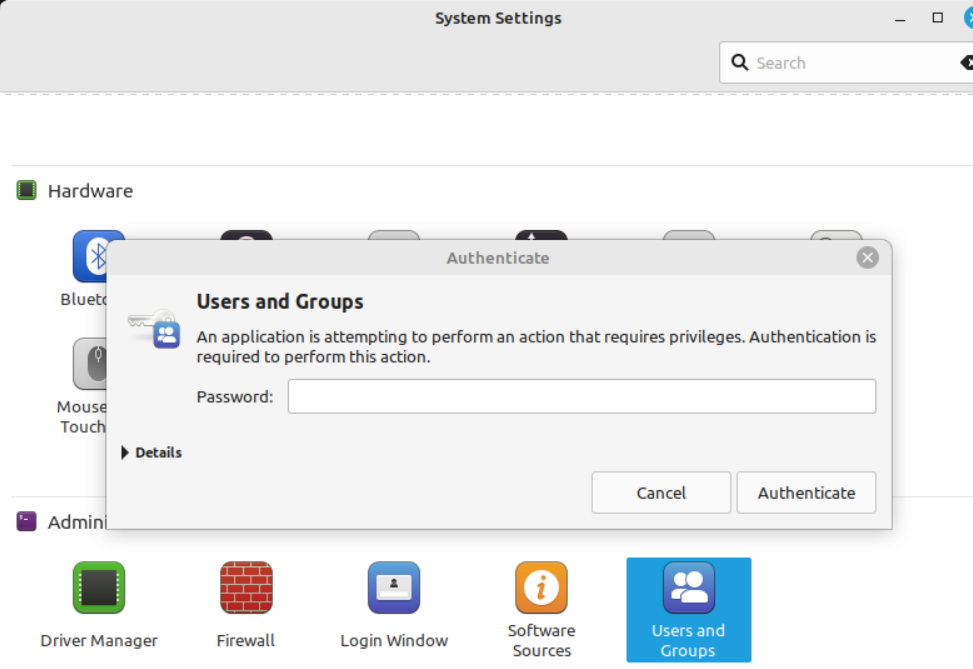
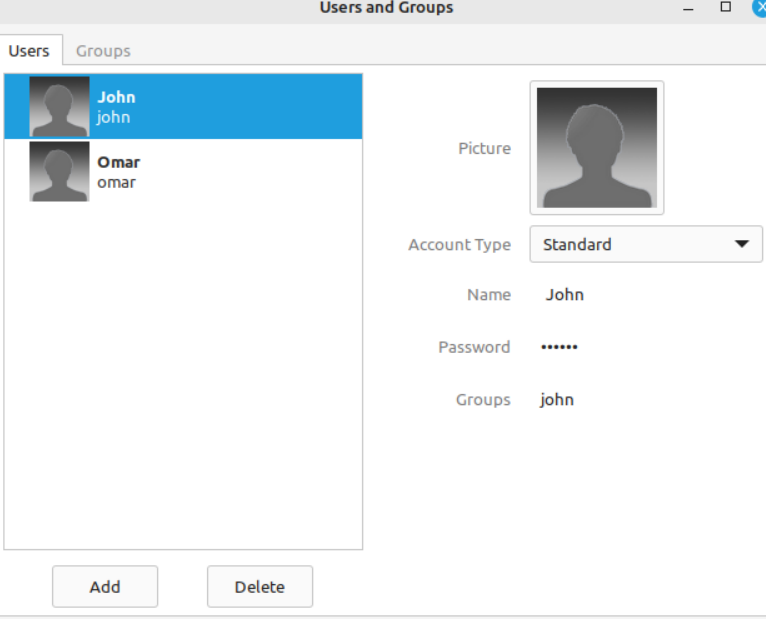
Within the System Settings utility of Linux Mint, you can find the “Admin” section that contains the utility named “Users and Groups”. When you reach here, you will be asked to provide the password for the root user and tap the “Authenticate” button.
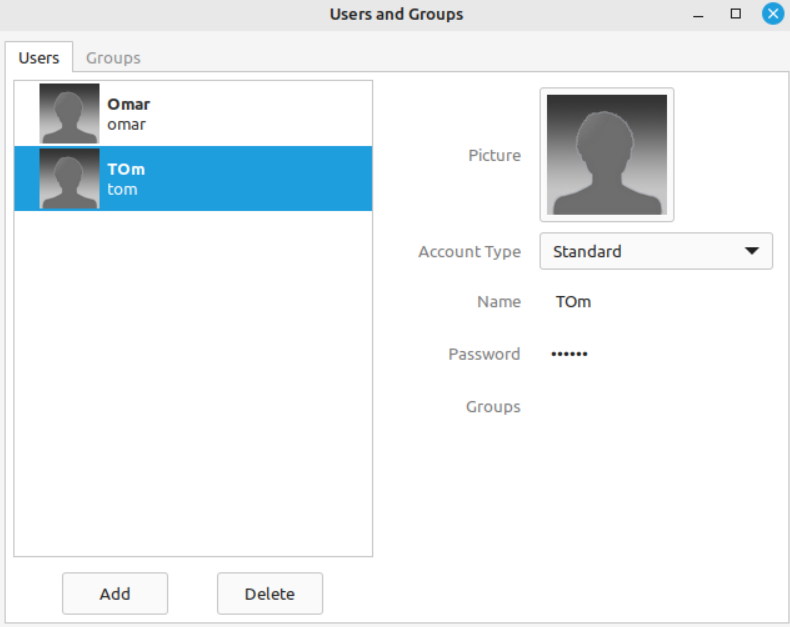
The following screens show two users here. The “Omar” user is currently a root user, so we cannot make any changes to it. However, by choosing it and then clicking the “Delete” button, we eleminate the “Tom” user.
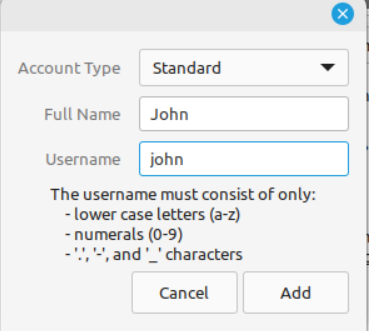
Now, tap the “Add” button to add a new user to our system.
Select the user type and add its full name and username. Then, tap the “Add” button to continue.
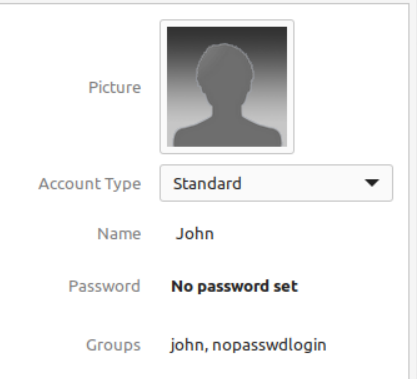
Tap on the “No password set” field to add a new password for this user.
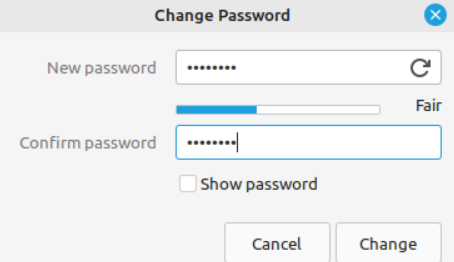
Add a new password for the “john” user twice and tap the “Change” button to reflect the update.
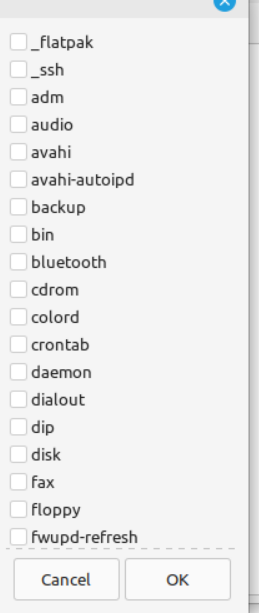
By clicking on the “Groups” section, you can select one or more groups to add your user to them.
The options for groups are shown in the image. Check mark any group where you want to add your user in and hit the “OK” button.
Conclusion
This guide illustrates the use of the user management utility in the operating system and discussed the different Linux Mint instructions to add the new users. For this, we tried the useradd and adduser instructions. To set the password, we used the “passwd” instruction while we tried the usermod instruction to modify the user settings to add it to a specific group. Also, we showed a way to delete the user using the deluser command and the GUI user settings.
Source: linuxhint.com