LibreOffice Writer: Mail Merge Made Easy
This tutorial will help you to create mail merge with LibreOffice explained step by step with pictures and examples. Mail merge is a method of making stuffs consisted of multiple personalized copies like official letters, invitations, envelops, identity cards, student score reports etc. using word processor, spreadsheet and database. Finally, in this exercise we will make school letters for students' parents as an example so you can practice and then adapt it to your own needs. Let's study now!
Subscribe to UbuntuBuzz Telegram Channel to get article updates.
What is mail merge?
The basics of mail merge is automatically changing data from a spreadsheet or database source to multiple final documents aimed for different recipients. This helps us so we do not need to create multiple mails manually. For example, a set of mail merge documents might contains variable items as the following:
- Name of the recipient:
- His/her address:
- His/her occupation :
- His/her position (in business):
- His/her email (if any):
- Prices or bill (for payment):
- etc.
What we will make?
We will make, in automatic ways, multiple mails intended for individual parents of the students of an imaginary school containting each student's study scores, respectively. Think of this as school's student score cards in form of mails. Every mail should contains as the following:
- Name of the student,
- His/her parent's name,
- Address, and
- His/her scores.
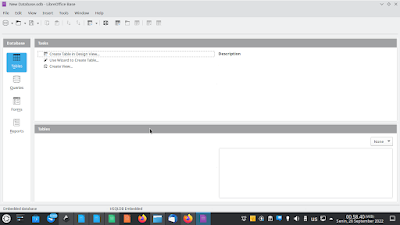
Requirements
LibreOffice Base is required to work with Mail Merge. Thus, you should install it first if you didn't have it yet:
$ sudo apt-get install libreoffice-base
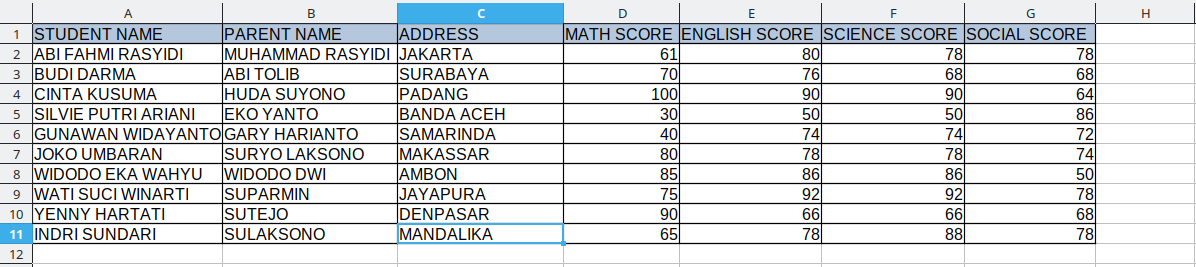
Step 1. Prepare the Data
Before processing, you need a data. Write this spreadsheet with Calc and save the document as mail-merge-data.ods. Remember that this is just the same as the previous exercise from Calc Basics with a little changes -- you may find some names of city or place from Indonesia here.
Step 2. Prepare the Document
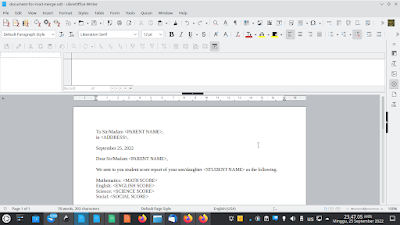
Next you need the document as a template for all the mail copies. Write this document with Writer and save it as document-for-mail-merge.odt.
Step 3. Adding Data Source
Next you need to show data source on the document so you can later create your template from it. Follow the following procedures:
- Open menubar File > Wizards > Address Data Source.
- Address Book Data Source Wizard will open.
- Select 'Other external data source' and click Next.
- Click 'Settings' and new dialog will open.
- Select Database type = 'Spreadsheet' and click Next.
- Select spreadsheet file mail-merge-data.ods created previously and click Next.
- If the data source is spreadsheet, do not click Field Assignment, but click Next.
- Tick check marks for 'Embed this ...' and 'Make this address book ...' and then fill Address book name = mail-merge-data. Finally,
- Click Finish.
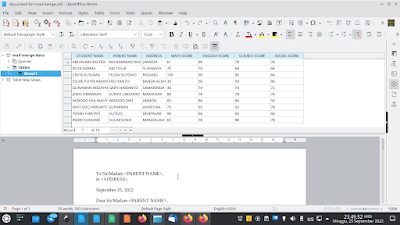
- Open menubar View > Data Source > data source panel will open like pictures below.
- In the Data Source, navigate the mail-merge-data item and double click Sheet 1 to show the spreadsheet on Writer window. See picture below.
Before adding the data:
After adding the data:
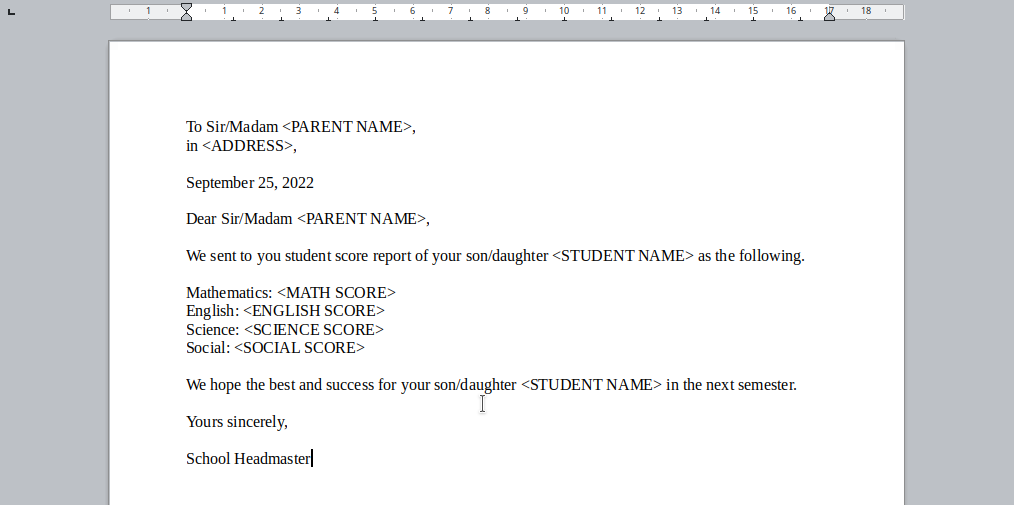
Step 4. Finishing the Template
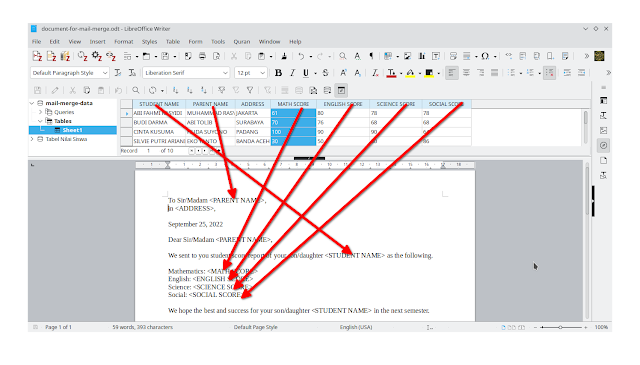
Next you need to put (drag and drop) every item into the right place from data source into your document template. Firstly, please notice that we have 7 variables STUDENT NAME, PARENT NAME, ADDRESS, MATH SCORE, ENGLISH SCORE, SCIENCE SCORE, and SOCIAL SCORE. Your job is to put each of those variables into the right places in the document. This is the heart of mail merge.
1. In the letter, first line, remove <PARENT NAME> text and drag and drop PARENT NAME header from the Data Source into its place. See picture.
2. Second line, remove <ADDRESS NAME> text and drag and drop ADDRESS header from the Data Source replacing its position. See picture.
3. Next line, remove <STUDENT NAME> text and drag and drop STUDENT NAME header from Data Source replacing its position.
4. Do the same as steps 1 2 3 with <MATH SCORE>, <ENGLISH SCORE>, <SCIENCE SCORE>, and <SOCIAL SCORE>.
5. Check for the other variables if any. If haven't replaced with drag and drop, do drag and drop for them until all variables put correctly.
6. Save document.
Step 5. Run Mail Merge
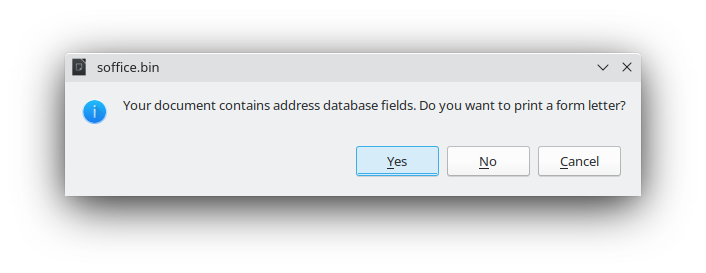
Next go to menubar File > Print > when asked for printing a form letter, answer with Yes > Mail Merge dialog will open.
On the Mail Merge dialog, select 'File' instead of 'Print' option. See picture.
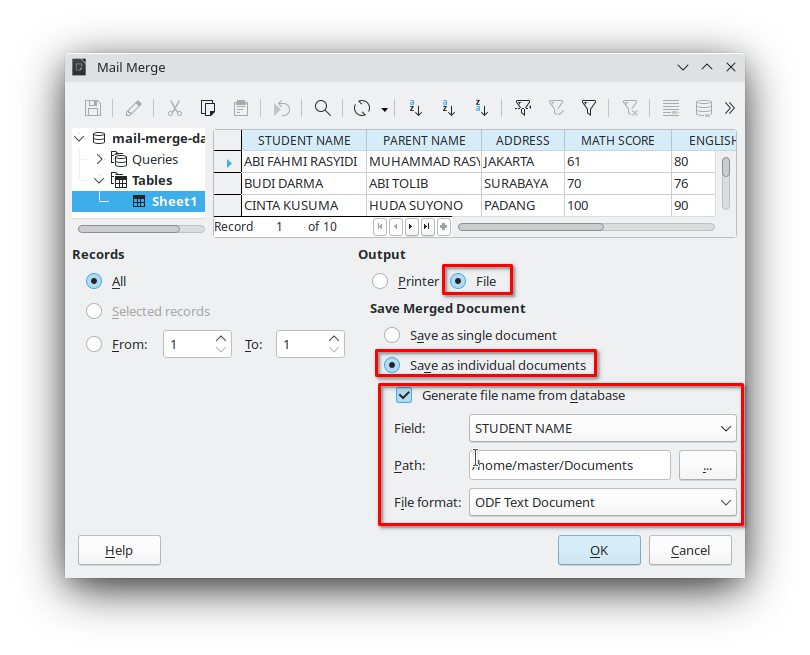
Under Save Merged Document section, select 'Save as individual documents' > select 'Generate file name from database' > select field STUDENT NAME > select path /home/username/Documents if you want to save there > select file format ODF Text Document > OK.
NOTES: you can change multiple options here for example, instead of 'student name' you can choose 'parent name' as the document file name if you need.
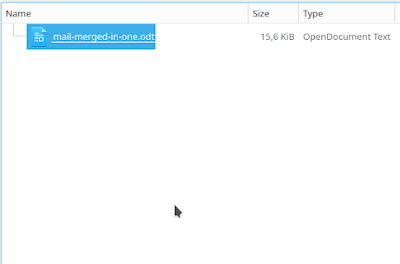
Step 6. Save as Single File
To sum all mails in one document, do the step 5 above but instead change the selection to 'Save as a single document' and OK. This will result in one document containing all of the multiple mails.
You can choose this Step 6 or instead Step 7 below according to your needs.
Step 7. Save as Multiple Files
To produce multiple documents containing individual mails, for example if you need to send each one to individual recipients, simply do Step 5 without changes. This will result in multiple Writer documents (ODT files) with student name as the file name.
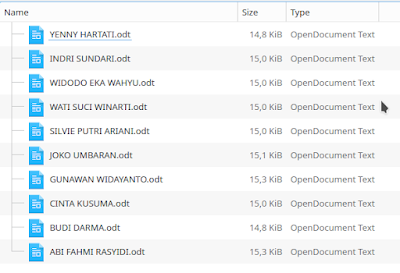
You can also select either this Step 7 or Step 6 above suiting your needs.
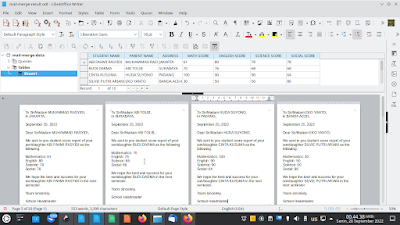
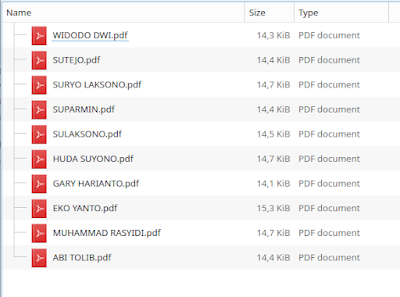
Step 8. Save as PDF
Instead doing step 7 or 8, you can also save single or multiple documents as PDF directly to help you printing. To do so, simply do Step 5 but change the format into PDF - Portable Document Format. See picture below showing the same mail documents but with parent name as the file name and in PDF format.
Final Results

Afterwords
As per this exercise, now you should be able to do basic mail merge -- enough to make your own letters for businesses, ID cards, reports and unlimited number of any other kind of documents with multiple recipients. Keep exercising and maximizing your creativity. See you next time.
References
Chapter 14 Mail Merge -- by LibreOffice
LibreOffice: Mail Merge -- by Ellak Course
This article is licensed under CC BY-SA 3.0.
Source: Ubuntu Buzz !