LibreOffice: How To Configure Font Replacements
This tutorial will help you configure font replacements on LibreOffice. This means the computer will automatically replace a font in an opened document with an existing font on your Ubuntu system, for example, replacing Times New Roman with a very identical font like FreeSerif. This is useful for teachers and students in increasing document compatibility/readability for themselves. This is applicable for all application suites including Writer, Calc and Impress. See also a companion of this article List of Alternative Fonts to know more and download them. Now let’s take care of it.

Subscribe to UbuntuBuzz Telegram Channel to get article updates.
Materials
Any font installed in Ubuntu system.
Tools
LibreOffice.
Method
1. Run LibreOffice Writer.
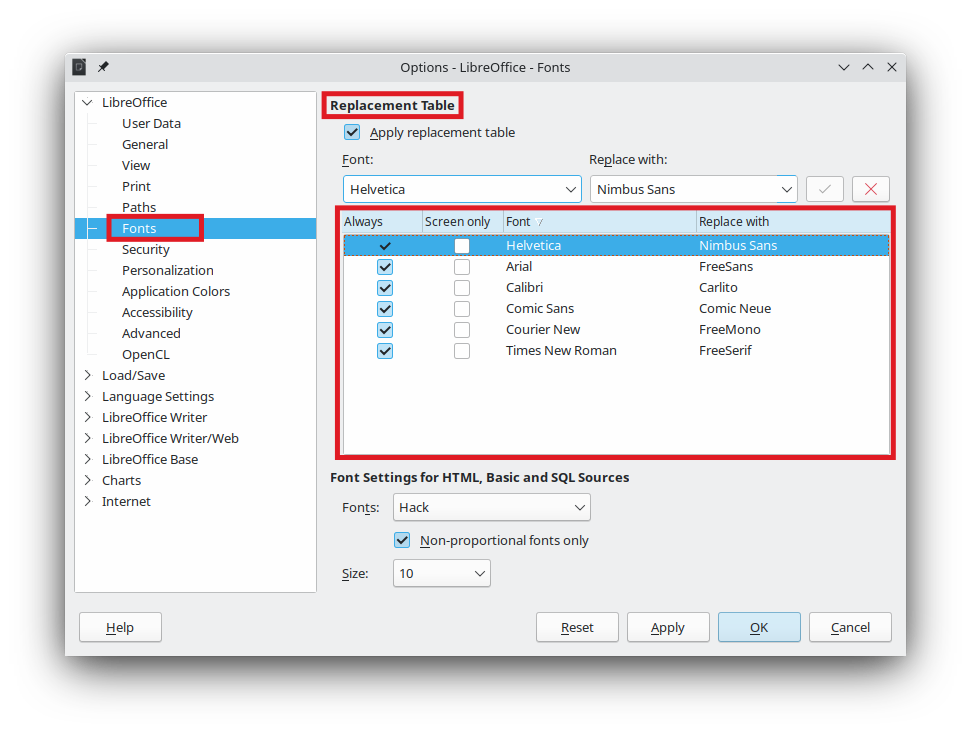
2. Open menu Tools -> Options -> LibreOffice -> Fonts.
3. Replacement Table will show.
4. Check ‘Apply replacement table’ option.
5. To create a replacement, under Font: option, write a font name to be replaced.
6. Then, under Replace with: option, write a font name as a replacement.
7. To add, click Check Mark to the right of it. (to remove, click the Cross Mark instead).
8. A replacement is created in the list.
9. Check ‘Always’ option to the left of the replacement entry.
10. Repeat step 5-9 to make more font replacements. See picture below as example. Click OK to finish making font replacements.
See Also
Source: Ubuntu Buzz !