Learn How to Git Apply patch & Git Create patch
In the beginning, when developers used Git for team projects, they shared their source code files with other project members by creating Git patches and sending them via email. The other member can utilize these created patches by applying them to the Git repository. At that time, Git pull requests did not exist, and Git patches were the best available option for source code collaboration. However, now you can use the hosting service to perform the same operation.
In this manual, we will discuss the procedure of creating and applying the Git patch.
How to Git Apply patch & Git Create patch?
To create and apply a patch, first, navigate to the directory and view the current directory list of content. Then, select the required file, open it, and make the desired changes. Next, add all made changes to the Git directory. Check the repository status and run the “$ git diff –cached > <file-name>” command to create a patch file. Lastly, Git applies the patch file through the “git apply –3way <file-name.patch>” command.
Now, follow the below provided instructions to understand the given scenario!
Step 1: Navigate to Git Directory
At first, move to the Git Local repository through the “cd” command:

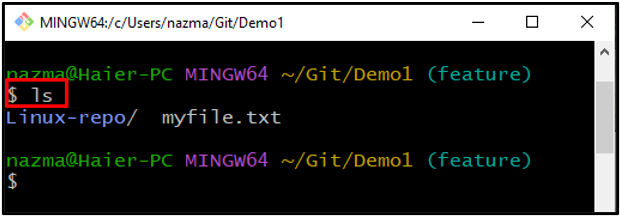
Step 2: List Directory Content
Execute the “ls” command to view the Git current directory content:
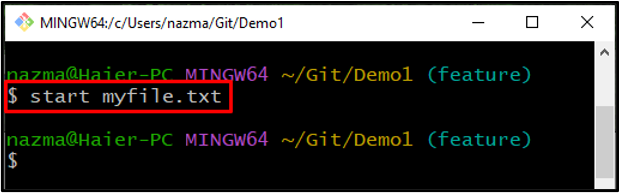
Step 3: Open File
Run the “start” command to open the existing file. For instance, we want to open “myfile.txt”:
As a result, the specified file will be open. Make the desired changes and save it:
Step 4: Update Git Directory
Now, add all changes to the Git repository, and update it:

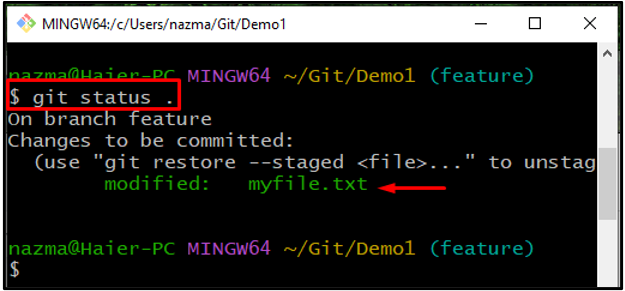
Step 5: Check Status
To check the current directory status through the “git status .” command:
It can be seen that we have successfully updated the “myfile.txt”:
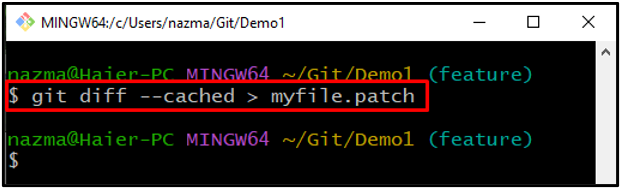
Step 6: Git Create Patch
Now, create a patch for the uncommitted changes by using the “git diff” command with the “–cached” option:
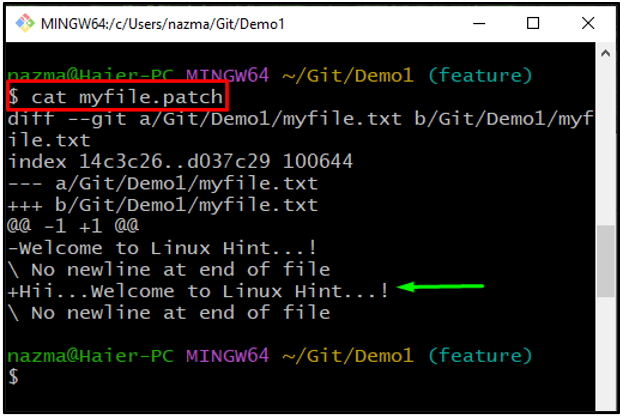
Step 7: View Patch File
To view the newly created patch file, utilize the following command:
As you can see, the added changes in the file are shown at the end of the output:
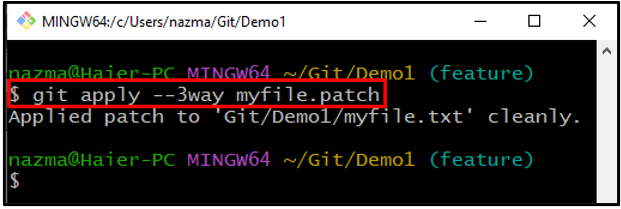
Step 8: Git Apply Patch
Finally, apply the created patch using the “git apply” command with the “–3way” flag to merge and apply patch cleanly:
According to the below output, the created patch is applied successfully:
We have offered the easiest way to create and apply a patch.
Conclusion
To create and apply a Git patch, first, move to the directory and view the current directory list of content. Select the required file, update it, and add all made changes to the Git directory. Check the status and run the “$ git diff –cached > <file-name>” command to Git to create a patch. Lastly, apply the patch through the “git apply –3way <file-name.patch>” command. This manual described the method for creating and applying the Git patch.
Source: linuxhint.com