Laravel 9 File Upload Tutorial
What Is File Validation in Laravel?
Laravel validation is a way to perform a validation role. We can check the file type, file size, etc. File validation is typically used to avoid unwanted file uploads in a server or application.
Today, we will learn about file upload and storing in Laravel 9.
Project requirements are provided below:
- MySQL 8.0+
- MariaDB 10.2+
- PHP 8.1
Here is an example of defining the FileUpload:
- Process 1. Create a FileUpload Project
- Process 2. FileUpload Project Database Connection
- Process 3. Create a Model and Controller in the FileUpload Project
- Process 4. Run and Test the FileUpload Project
Process 1. Create a FileUpload Project
Step 1 is to run this command line to install Laravel 9 on our server or pc. For that, we need to open the Windows SSH terminal in the folder.

Process 2. FileUpload Project Database Connection
Open the .env file on the FileUpload project and add a new database name, username, and password.
Here is the following code:
DB_HOST=127.0.0.1
DB_PORT=3306
DB_DATABASE= FileUpload Database name
DB_USERNAME= FileUpload Database user name
DB_PASSWORD= FileUpload Database password
Process 3. Create a Model and Controller in the FileUpload Project
Once the database is connected, we must create a model and controller for the FileUpload Project.
For that, we need to run the following command:

Now, go to “database\migrations\2022_07_11_074014_create_file_uploads_table.php” file. This name could be different on your side. Now, we need to put these two lines in the file:
$table->string('file_path_location')->nullable();
Its looks like this
{
public function up()
{
Schema::create('file_uploads', function (Blueprint $table) {
$table->id();
$table->string('file_name')->nullable();
$table->string('file_path_location')->nullable();
$table->timestamps();
});
}
public function down()
{
Schema::dropIfExists('file_uploads');
}
};
We modify our FileUpload model in “app\Models\FileUpload.php”. We add fillable property there. The code is shown below:
namespace App\Models;
use Illuminate\Database\Eloquent\Factories\HasFactory;
use Illuminate\Database\Eloquent\Model;
class FileUpload extends Model
{
use HasFactory;
protected $fillable = [
'file_name',
'file_path_location'
];
}
Now, we need to migrate the table to the database to run this command:

Once migration is completed, we need to create two functions. One function is for going to the upload page, and another is to upload a file in the directory and store it in the database.
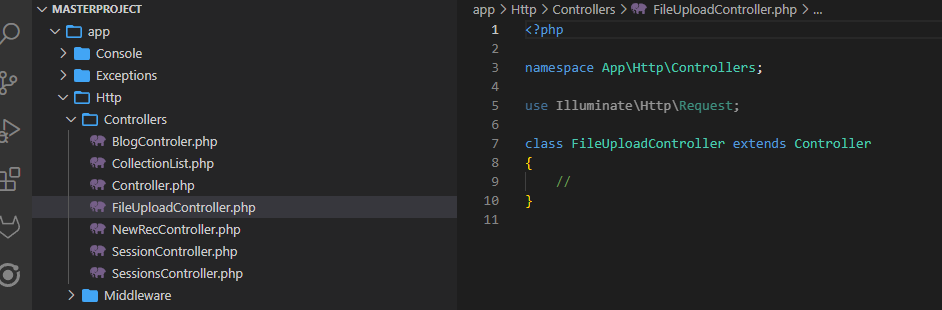
Go to the “app\Http\Controllers\FileUploadController.php” file:
Now, add this code to the controller:
{
return view('file-upload');
}
And another function is shown below:
{
$rules = array(
'attachment' => 'mimes:jpeg,png,jpg,gif,svg,pdf|max:1000',
);
$messages = array(
'attachment' => ' Image need Less then 1Mb.',
);
$validator = Validator::make($request->all(), $rules, $messages);
if ($validator->fails()) {
return redirect()->route('fileviews')->with('success', 'Successfully Added');
return redirect()->route('fileviews')->withErrors($validator);
}else{
$imageName = time() . '.' . $request->attachment->extension();
//remove image before upload
$path = $request->attachment->move(public_path('storage/attachment/'), $imageName);
$departmentname['file_name'] = $imageName;
$departmentname['file_path_location'] = $path;
FileUpload::create($departmentname);
return redirect()->route('fileviews')->with('error', 'No file added');
}
}
In the uploadTheFile function, we used the Validator.
We created this function to upload the view. Thus, we need to create the view in the Laravel view located in “resources\views\file-upload.blade.php”.
Let’s build the view for uploading the file.
Copy the code and paste it into the view.
<html lang="en">
<head>
<meta charset="utf-8" />
<meta name="csrf-token" content="{{ csrf_token() }}">
<meta name="viewport" content="width=device-width, initial-scale=1.0">
<!-- CSS only -->
<link href="https://cdn.jsdelivr.net/npm/bootstrap@5.2.0-beta1/dist/css/bootstrap.min.css" rel="stylesheet"
integrity="sha384-0evHe/X+R7YkIZDRvuzKMRqM+OrBnVFBl6DOitfPri4tjfHxaWutUpFmBp4vmVor" crossorigin="anonymous">
<!-- JavaScript Bundle with Popper -->
<script src="https://cdn.jsdelivr.net/npm/bootstrap@5.2.0-beta1/dist/js/bootstrap.bundle.min.js"
integrity="sha384-pprn3073KE6tl6bjs2QrFaJGz5/SUsLqktiwsUTF55Jfv3qYSDhgCecCxMW52nD2" crossorigin="anonymous">
</script>
</head>
<body>
<div clas="container">
<div class="col-lg-12">
<div class="card-box">
<div>
Message
@if ($errors->any())
@foreach ($errors->all() as $error)
<div>{{$error}}</div>
@endforeach
@endif
</div>
</div>
</div>
<div class="col-lg-12">
<div class="card-box">
<form action="{{ route('uploadTheFile') }}" method="POST" enctype="multipart/form-data">
@csrf
<div class="form-group">
<label for="name">Upload FIle</label>
<input type="file" class="form-control" name="attachment" required>
</div>
<div class="text-right">
<button type="submit" class="btn btn-success waves-effect waves-light">Save</button>
</div>
</form>
</div>
</div>
</div>
</html>
Now, we need to create two routes for uploading files in our project:
Route::post('/file-upload', [FileUploadController::class, 'uploadTheFile'])->name('uploadTheFile');
Once the route is created, go to the “/file-view” and it should look like the following image in the browser:

Process 4. Run and Test the FileUpload Project
Now, we need to run the command and check file upload if it is working or not:
We need to check whether the code is working or not through the route for checking.
Select a file and try to upload it. In my case, it worked fine.
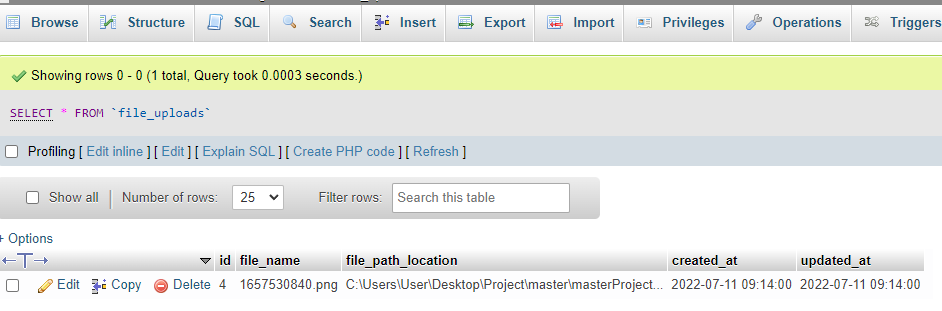
Once a file is uploaded, it can be found in the following:

Image is here
Also, it is inserted into the Database.
Conclusion
In this article, we created this Laravel FileUpload project with Laravel 9. Creating a data table in Laravel using FileUpload is very useful to call the file again. We hope this FileUpload project example will help you to understand the file Upload in Laravel 9.
Source: linuxhint.com