Intrusion Detection with Snort
This article explains how to install Snort and how to get started with Snort alerts and rules to successfully implement an Intrusion Detection System.
Snort is an Intrusion Detection System which analyzes the traffic and packets to detect anomalies, such as malicious traffic, and report them. If you are not familiar with Intrusion Detection Systems, you may want to start reading the final conclusion on them. If you want to go straight to practical instructions, keep reading.
After reading this article, you will be able to install Snort on Debian and RedHat based Linux distributions, set different Snort modes, define alerts and rules. The Snort usage instructions in this tutorial are valid for all Linux distributions.
All instructions in this document contain screenshots to make it easy for all Linux users to understand and apply them.
Installing Snort
You can install Snort using the apt packages manager on Debian or Ubuntu as shown in the following screenshot:

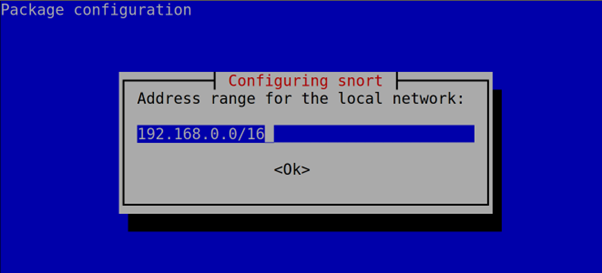
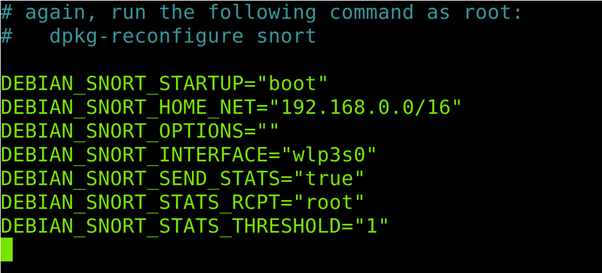
During the installation process, you will be asked to define your network. Press OK to continue with the next step.
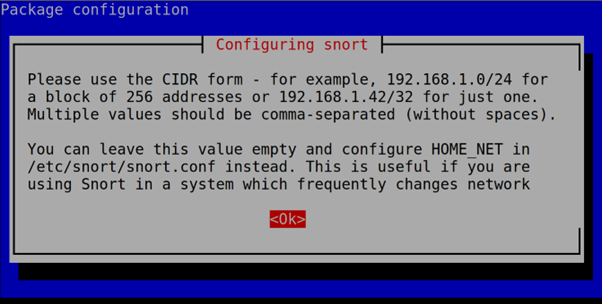
Now, type your network address in CIDR format. Normally, Snort auto detects it successfully.
Then, press OK or ENTER. Don’t worry about this step; this configuration can be edited later.
Red Hat based Linux distribution users can download the Snort package from https://www.snort.org/downloads#snort-downloads and then install it by running the following command, where <Version> must be replaced with the current version that you downloaded.
Keeping the Snort Rules Updated
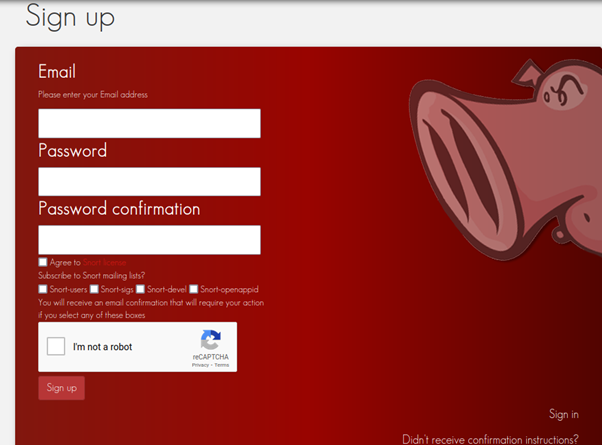
Snort contains two main types of rules: community rules developed by the Snort community and official rules. You can always update the community rules by default. But to update the official rules, you need an Oink Code – a code which allows you to download the latest rules.
To get an Oink Code, register at https://www.snort.org/users/sign_up.
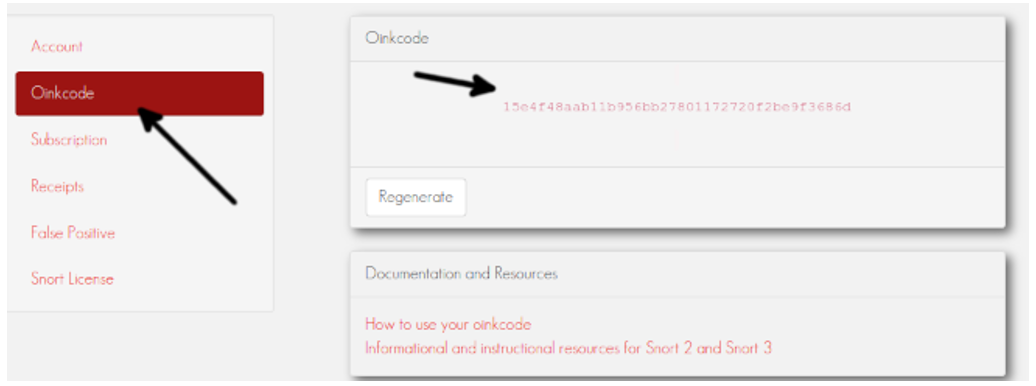
After registering, confirm the account from your email and login to the Snort site.
On the dashboard left side menu, press OinkCode and you will see your code.
https://www.snort.org/rules/snortrules-snapshot-<Version>.tar.gz?oinkcode=<OinkCode>
In my case, I used the Snort 2.9.15.1 and the following link to download the rules:
https://www.snort.org/rules/snortrules-snapshot-29151.tar.gz?oinkcode=15e4f48aab11b956bb27801172720f2be9f3686d
You can create a cron script to download and extract the rules to the proper directory.
Configuring Snort
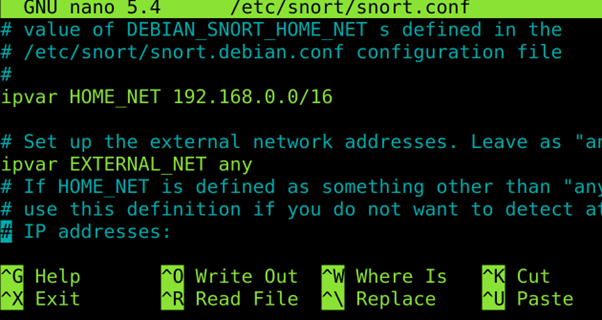
Snort configuration file is /etc/snort/snort.conf. Before getting started, Debian users must follow the steps mentioned in the following. Other distro users can continue reading from the /etc/snort/snort.conf file edition.
Note for Debian users: Debian Linux overwrites some network settings in the Snort default configuration file. Under the /etc/snort directory, there is the /etc/snort/snort.debian.conf file from where the Debian network settings are imported.
If you are a Debian user, run the following code:
Check that all the information in this configuration file is correct including the CIDR address, network device, etc.
Save the file. Let’s start configuring the Snort.
To configure the Snort, use any text editor as shown in the following (I used nano) to open the /etc/snort/snort.conf file.

Check your network configuration and scroll down.
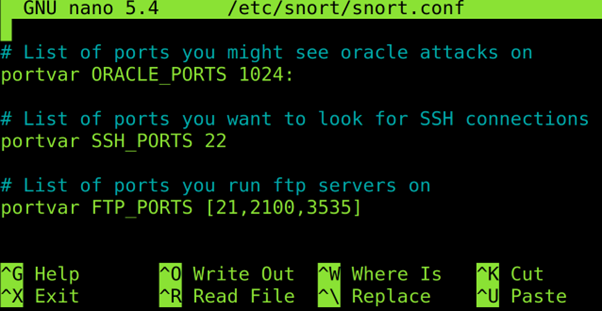
Define the ports that you want to be monitored.
Don’t close the file and keep reading the next section (keep the configuration file open).
Snort Rules
Snort rules are enabled or disabled by commenting or uncommenting lines in the /etc/snort/snort.conf file. But the rules are stored in the /etc/snort/rules file.
To enable or disable the rules, open the /etc/snort/snort.conf with a text editor. Rules are located at the end of the file.
When you reach the end of the file, you will see a list of rules for different purposes. Uncomment the rules that you want to enable and comment the rules that you want to disable.
For example, to detect the traffic related to DOS attacks, uncomment the DOS rule. Or uncomment the FTP rule to monitor ports 21.
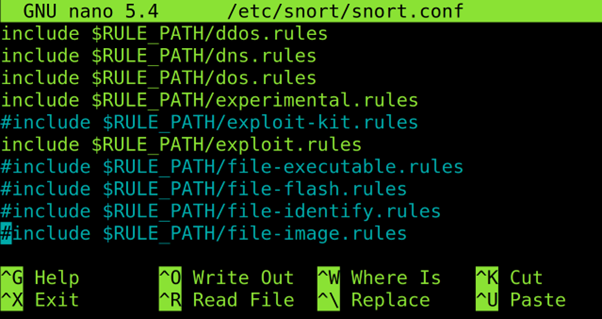
After uncommenting the rules, enable, save, and exit the document.
The 7 Snort Alert Modes
Snort includes 7 different alert modes to be notified about events or incidents. The 7 modes are the following:
- Fast: Snort alerts include the timestamp, sending an alert message, showing the source and destination IP addresses and ports. To implement this mode, use the -A fast
- Full: Additionally, in the previously reported information in the fast mode, the full mode also prints the TTL, datagram length and packet headers, window size, ACK, and sequence number. To implement this mode, use the -A full
- Console: It shows the real time alerts in the console. This mode is enabled with the -A console
- Cmg: This mode is only useful for testing purposes.
- Unsock: This is used to export alerts to Unix sockets.
- Syslog: This mode (System Logging Protocol) instructs Snort to send a remote alert log. To run this mode, add -s
- None: No alerts.
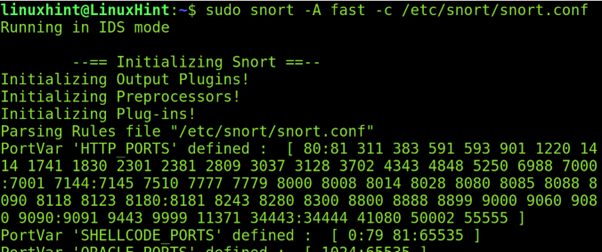
To end this article, let’s try the full mode by running the following command, where -A fast indicates a fast mode scan and -c specifies the configuration file (/etc/snort/snort.conf).
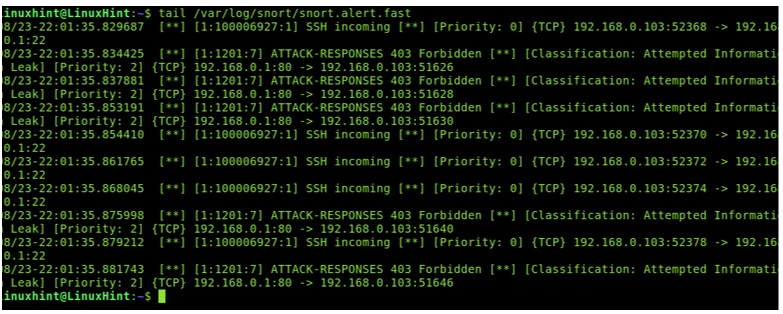
Now, launch some Nmap scans or try to connect through SSH or FTP to your computer and read the /var/log/snort/snort.alert.fast last lines to check how the traffic is reported. As you can see, I launched an Nmap aggressive scan and it was detected as a malicious traffic.
I hope this tutorial serves as a good introduction to Snort. But you must keep learning it by reading the Snort Alerts and the Snort rules creation tutorials mandatory readings to get started with Snort.
About Intrusion Detection Systems
The general thought is that if a firewall is protecting one’s network, the network is considered secure. However, that is not entirely true. Firewalls are a fundamental component of a network, but they cannot fully protect the network from forced entries or hostile intent. Intrusion Detection Systems are used to evaluate the aggressive or unexpected packets and generate an alert before these programs can harm the network. A host-based Intrusion Detection System runs on all the devices in a network or connects to an organization’s internal network. A network-based Intrusion Detection System is instead deployed at a certain point or group of points from which all the ingoing and outgoing traffic can be monitored. The advantage of a host-based Intrusion Detection System is that it also can detect anomalies or malicious traffic that are generated from the host itself like if the host is affected by malware, etc. Intrusion Detection Systems (IDS) work by monitoring and analyzing the network traffic and compares it with an established ruleset to determine what should be taken as normal for the network (for ports, bandwidths, etc.) and what to take a closer look at.
An Intrusion Detection System can be deployed depending upon the size of the network. There are dozens of quality commercial IDS, but many companies and small businesses cannot afford them. Snort is a flexible, lightweight, and popular Intrusion Detection System that can be deployed according to the needs of the network, ranging from small to large networks, and provides all the features of a paid IDS. Snort does not cost anything but that does not mean that it cannot provide the same functionalities as an elite, commercial IDS. Snort is considered a passive IDS, which means that it sniffs the network packets, compares with the ruleset, and, in the case of detecting a malicious log or entry (detecting an intrusion), it generates an alert or places an entry in a log file. Snort is used to monitor the operations and activities of routers, firewalls, and servers. Snort provides a user-friendly interface that contains a chain of rulesets that can be very helpful to a person who is unfamiliar with IDS. Snort generates an alarm in case of an intrusion (buffer overflow attacks, DNS poisoning, OS fingerprinting, port scans, and much more), giving an organization a greater visibility of the network traffic and making it much easier to meet the security regulations.
Now, you are introduced to IDS. Let’s now start setting up the Snort.
Conclusion
Intrusion Detection Systems like Snort are used to monitor the network traffic to detect when an attack is being carried out by a malicious user before it can hurt or affect the network. If an attacker performs a port scan on a network, the attack can be detected along with the number of attempts made, the attacker’s IP address, and other details. Snort is used to detect all types of anomalies. It comes with a large number of rules that are already configured, along with the option for the user to write their own rules according to their needs. Depending on the size of the network, Snort can easily be set up and used without spending anything, as compared to the other paid commercial Intrusion Detection Systems. The captured packets can be analyzed further using a packet sniffer like Wireshark to analyze and break down what is going in the mind of the attacker during the attack and the types of scans or commands performed. Snort is a free, open-source, and easy-to-configure tool. It can be a great choice to protect any medium-sized network from an attack.
Source: linuxhint.com