Introducing PowerShell Unzip and Zip Commands on Archives
This blog will cover methods to zip or unzip files.
How to Zip or UnZip Files in PowerShell?
These are the methods given that will be elaborated:
Method 1: Compress or Zip Files in PowerShell Using the “Compress-Archive” Cmdlet
Files in PowerShell can be zipped or compressed using the “Compress-Archive” cmdlet. It can compress single or multiple files at once.
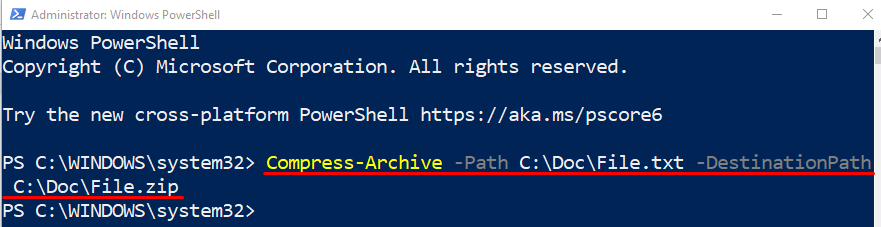
Example 1: Use the “Compress-Archive” Command to Zip a Single File
The following example will zip a single file by utilizing the “Compress-Archive” cmdlet:
According to the above code:
- First, add the “Compress-Archive” cmdlet, specify the “-Path” parameter, and assign the file path to be zipped.
- After that, define the “-DestinationPath” parameter and assign the target path with the file and “.zip” extension:
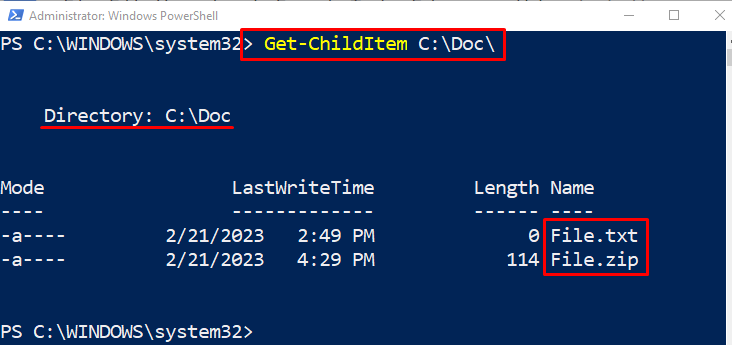
Let’s check whether the file was zipped or not by executing the below code:
In the above-stated code, first add the “Get-ChildItem” cmdlet and then assign the directory address:
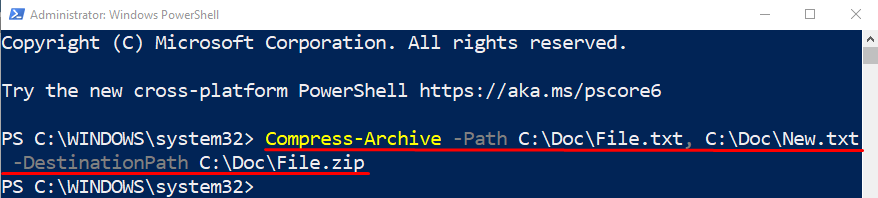
Example 2: Use the “Compress-Archive” Command to Zip Multiple Files at Once
This following example will zip multiple files with PowerShell “Compress-Archive” cmdlet. To do so, simply assign the multiple file addresses to the “-Path” parameter, separated by a comma:
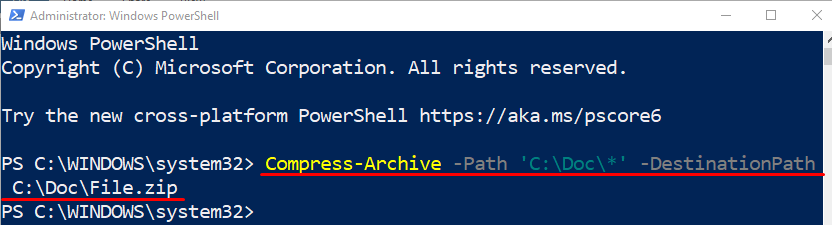
Example 3: Use the “Compress-Archive” Command to Zip All Files in the Folder
Now, archive or zip all the files in the folder using the wildcard “*” operator. For that reason, add the “*” operator at the end of the directory address, as demonstrated below:
Method 2: Uncompress or UnZip Files in PowerShell Using the “Expand-Archive” Cmdlet
Files that are zipped or compressed can be unzipped or uncompressed with the aid of the “Expand-Archive” cmdlet.
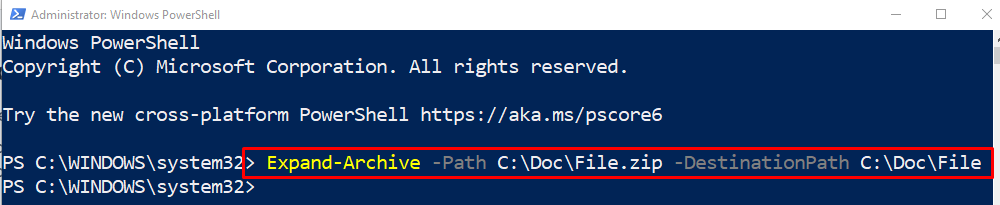
Example: Use the “Expand-Archive” Command to Unzip a File
In this example, the zipped file will be unzipped using the “Expand-Archive” cmdlet:
According to the above code:
- First, add the “Expand-Archive” cmdlet, specify the “-Path” parameter and assign it the file address along with the name of the file:
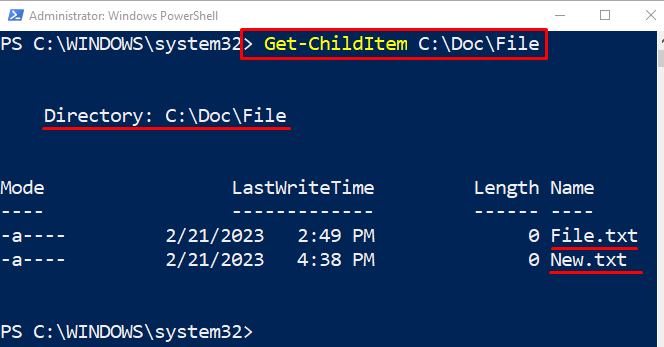
Let’s check whether the files were extracted or not by using the “Get-ChildItem” cmdlet along with the directory address:
That was all about the procedure of zipping and unzipping files using PowerShell.
Conclusion
To zip or compress the file in PowerShell, the “Compress-Archive” cmdlet is used. While to unzip or uncompress a file, the “Expand-Archive” cmdlet can be utilized. Moreover, multiple files can also be zipped or unzipped at once. This write-up has observed the stated query and resolved the stated query.
Source: linuxhint.com