Install TeamViewer on Linux Mint
Method 1: Manually Downloading the TeamViewer File from the Official Website
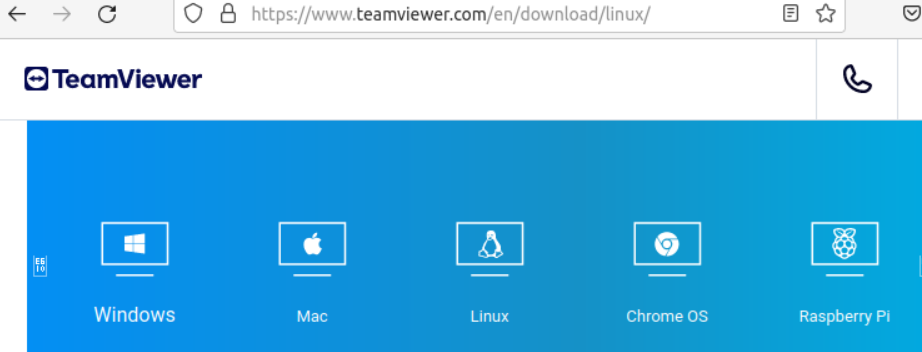
The first and mostly-used conventional way of installing the TeamViewer on Linux Mint is to download it from its official website. Therefore, we head toward the search engine to look for the TeamViewer official site. After launching its site, we move within its download section. This section is categorized into 5 sections of operating systems to select the download for the particular operating system. We select the “Linux” category from the available choices.
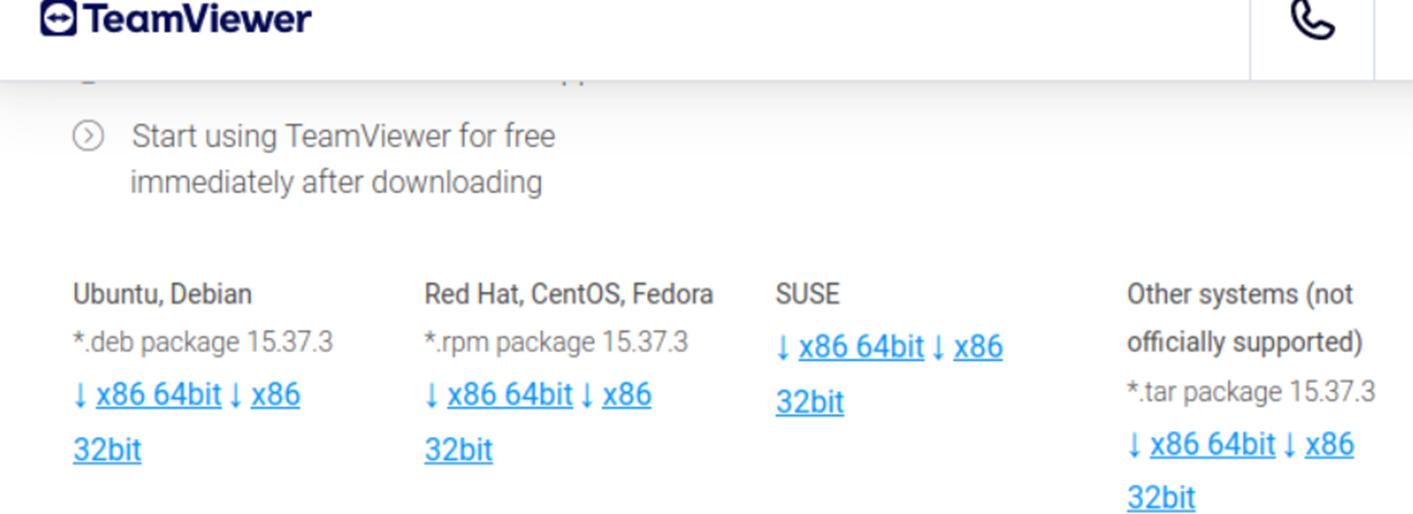
On expanding the Linux category, we get the deb files for different Linux distributions. Choose according to your system. We go with the x86_64bit “Ubuntu, Debian” file.
You need to wait until the deb file of TeamViewer is fully downloaded into your system. It won’t take more than 10 minutes.

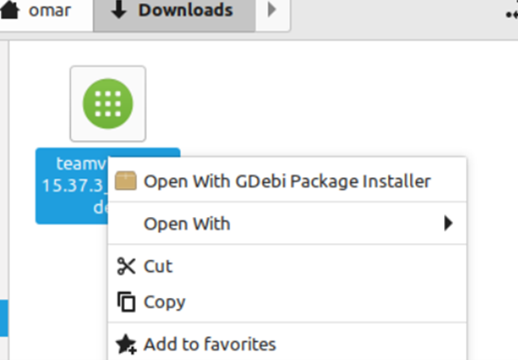
After the download for the TeamViewer is completed, you can find it within your “Downloads” folder or Linux Mint operating system by exploring the file explorer. To install the download “deb” file of TeamViewer, right-click on it and tap on the “Open With GDebi Package Installer” option which is shown in the attached image. The TeamViewer’s installation starts.
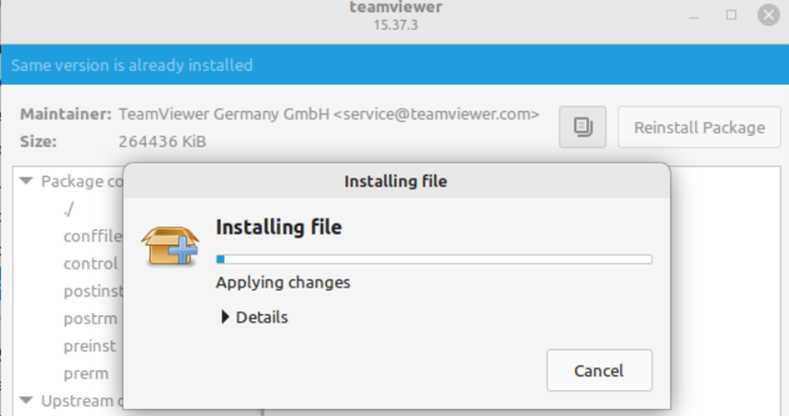
An installer of TeamViewer will appear on your desktop screen. In Linux Mint, the installer is similar to the following attached image:

The installer displays the list of packages to be installed and a dialog box pops up, displaying the installation process of these packages as per the following image. Wait until the installation process of TeamViewer ends itself.
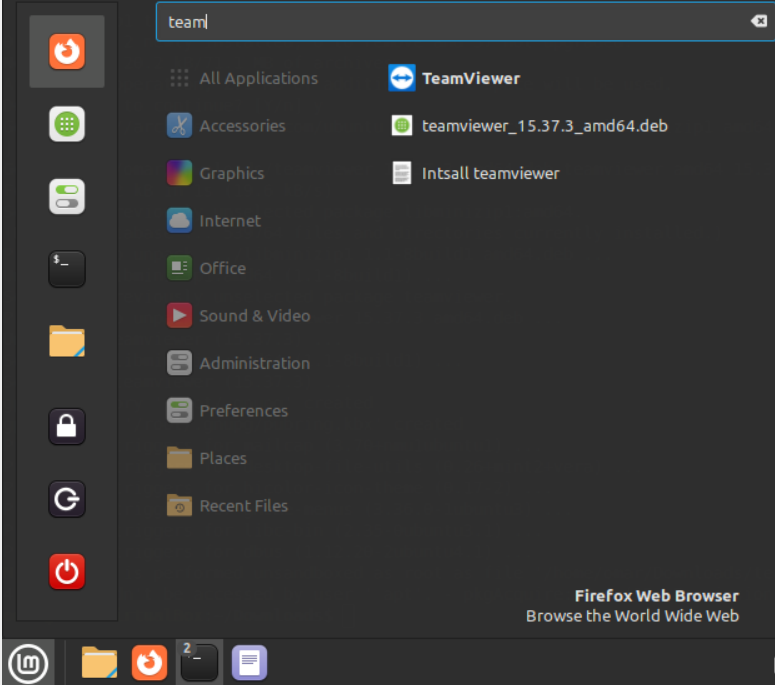
After the proper installation of TeamViewer, you can open it through the application section of Linux Mint or use the one-word instruction in the terminal application. After searching for the “TeamViewer” in the applications section, you will get the installed TeamViewer as shown in the following. Now, tap on the “TeamViewer” app to finally launch it.
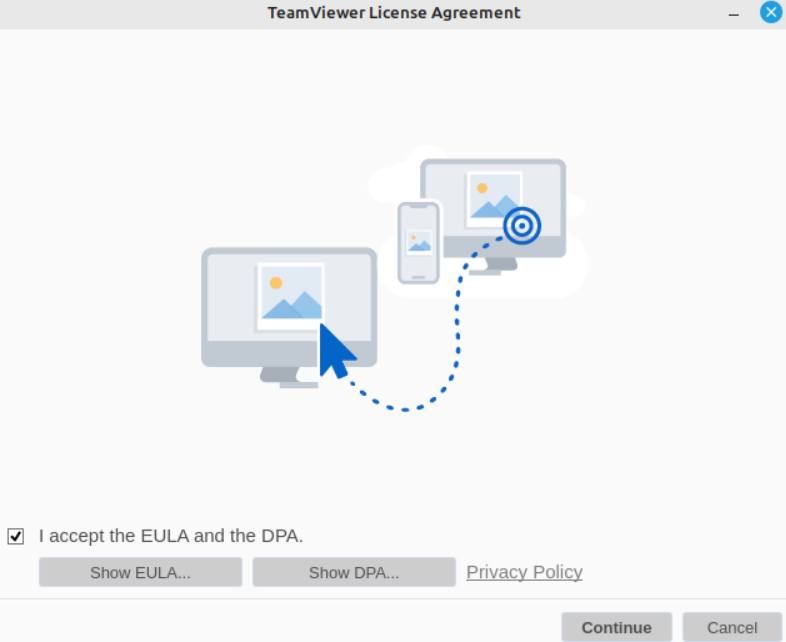
Before moving towards the connection between your PC and another user’s PC, you need to go through all the prerequisites. After a launch, the first thing we have to do is to sign the license agreement of TeamViewer as presented in the following displayed image. You have to check mark the “I accept the EULA and the DPA” checkbox and hit on the “Continue” button.
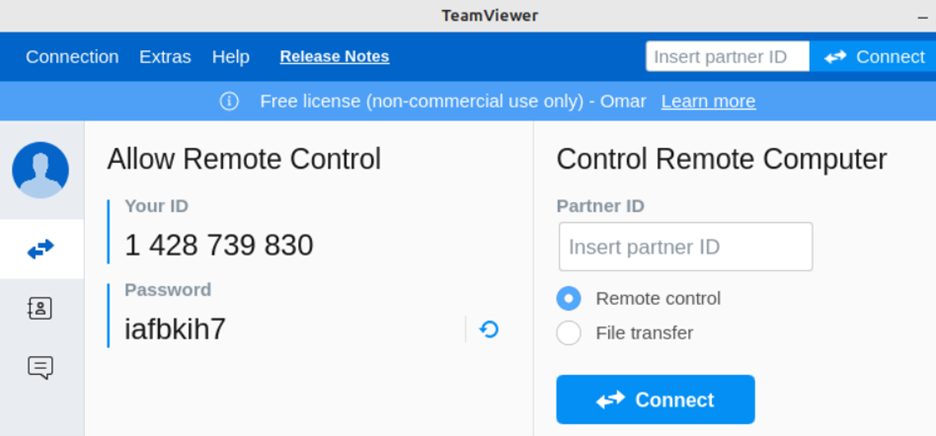
After the TeamViewer is launched and ready for the user, you can see your user ID and Password to connect with another user to share a screen with. For this, you should add the ID of another user in the Partner ID field which is displayed on the right side of the TeamViewer screen.
Method 2: Use the Wget Tool to Install TeamViewer
First of all, you have to make sure that the Linux Mint is fully updated and upgraded. If not, you must open its command line utility and run the basic apt “update” instruction to update it. You will wait for a while to let the updating process complete as shown in the following attached output:
[sudo] password for omar:
Get:1 http://security.ubuntu.com/ubuntu jammy-security InRelease [110 kB]
Hit:3 http://packages.linuxmint.com vera Release
Get:20 http://archive.ubuntu.com/ubuntu jammy-backports/universe amd64 DEP-11 Metadata [11.4 kB]
Fetched 3,823 kB in 1min 5s (58.8 kB/s)
Reading package lists… Done
While listing the current files and folders of our Linux Mint file explorer, we found that it has no “Deb” file for TeamViewer yet. So, we need to download it first.
Desktop Public Documents Music Templates Warpinator
Downloads Pictures Videos
Now, we use the “Wget” utility of the Linux operating system to download the TeamViewer’s “Deb” file from its official download site. Therefore, start this query with the “wget” keyword followed by the “-c” option and the “URL” to the download page of TeamViewer’s “Deb” file. Wait until the download process is completed up to 100%.
–2023-01-08 16:52:11— https://download.teamviewer.com/download/linux/teamviewer_amd64.deb
Resolving download.teamviewer.com (download.teamviewer.com)… 104.16.63.16, 104.16.62.16, 2606:4700::6810:3e10, …
Connecting to download.teamviewer.com (download. Teamviewer.com)|104.16.63.16|:443… connected.
HTTP request sent, awaiting response… 200 OK
Length: 71121296 (68M) [application/octet-stream]
Saving to: ‘teamviewer_amd64.deb’
teamviewer_amd64.deb 100%[================================>] 67.83M 402KB/s in 85s
2023-01-08 16:53:37 (816 KB/s) – ‘teamviewer_amd64.deb’ saved [71121296/71121296]
The downloaded “deb” file of TeamViewer can be seen within the current working directory of Linux Mint using the “ls” list instruction.
Desktop Public Documents Music teamviewer_amd64.deb
Templates Warpinator Downloads Pictures Videos
It’s high time to install the downloaded “Deb” file within our Linux Mint operating system. For this, we cast off the “apt” utility of Linux. The “install” instruction starts with the sudo, apt, and install keywords and ends at the path to the “deb” file, i.e. “./teamviewer_amd64.deb”.
Reading package lists… Done
The following NEW packages will be installed:
teamviewer
0 upgraded, 1 newly installed, 0 to remove, and 37 not upgraded.
After this operation, 271 MB of additional disk space will be used.
Setting up teamviewer (15.37.3) …
After completing the installation of the TeamViewer in our Linux Mint system, we launch it using the command-line utility. Write “teamviewer” in the query area and tap “Enter”. It initializes the TeamViewer application in your Linux Mint.
Init…
CheckCPU: SSE2 support: yes
Checking setup…
Launching TeamViewer …
Launching TeamViewer GUI …
Now, you have to set up the TeamViewer at your end by accepting the terms of the License Agreement of TeamViewer to start using the TeamViewer at the very next screen. For this, you have to mark the “I accept the EULA and the DPA” checkbox and tap the “Continue” button to proceed. If you don’t mark this checkbox, you won’t be capable of making use of it.

Here you go. The TeamViewer home screen is launched to start the remote access.
To remove the TeamViewer completely from your system, try the following purge query:
Reading package lists… Done
The following packages will be REMOVED:
teamviewer*
0 upgraded, 0 newly installed, 1 to remove, and 37 not upgraded.
After this operation, 271 MB of disk space will be freed.
Do you want to continue? [Y/n] y
(Reading database … 540229 files and directories currently installed.)
Removing teamviewer (15.37.3) …
done
Purging configuration files for teamviewer (15.37.3) …
Conclusion
The purpose of this guide is to help the users understand the different ways of downloading and installing the TeamViewer application in the Linux Mint operating system. Therefore, we started with the introduction of the remote access in the field of computers and discussed how the TeamViewer can help us. After that, the manual way of downloading and installing TeamViewer in Linux Mint is discussed followed by the method of installing it through the “Wget” utility.
Source: linuxhint.com