Install & Set Ptyxis as Default Terminal in Ubuntu 24.04 | 22.04

Like the new Ptyxis terminal emulator introduced in Ubuntu 25.10, here’s how to install and set it as default in current Ubuntu 24.04 and 22.04 LTS.
Ptyxis is a modern terminal emulator designed for GNOME with first-class container integration, such as auto-discovery and option to launch a container in new tab, preferences profiles with container integration for Podman, Toolbox, Distrobox, and JHBuild.
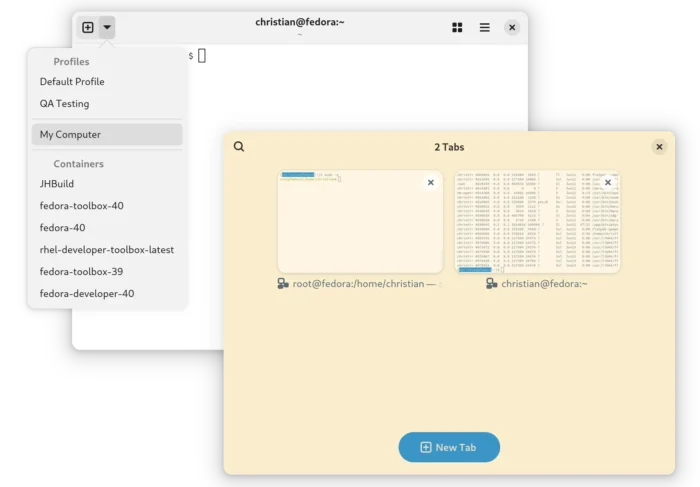
The terminal uses GTK4 + LibAdwaita for its modern user interface well integrated into GNOME. And, it supports configurable keyboard shortcuts, user-installable color palettes, GPU acceleration, integrated developer tool, and more.
Ubuntu 25.10 since snapshot 4 has added this terminal app as a replacement of GNOME Terminal. For current 2 Ubuntu LTS releases, it’s easy to install through Flatpak via the steps below.
1. Install Ptyxis
The latest Ptyxis (48.5 so far) won’t build in current Ubuntu 24.04 or 22.04 due to outdated GTK4 and libadwaita libraries. User may choose to install it as Flatpak package, which runs in sandbox environment.
NOTE: This step works only on X86_64 (modern Intel/AMD) and ARM64 platforms.
First, press Ctrl+Alt+T on keyboard to open terminal. When it opens, run the command below to install the flatpak daemon:
sudo apt install flatpak
You may run sudo apt update to refresh your system package cache, if the last command failed.
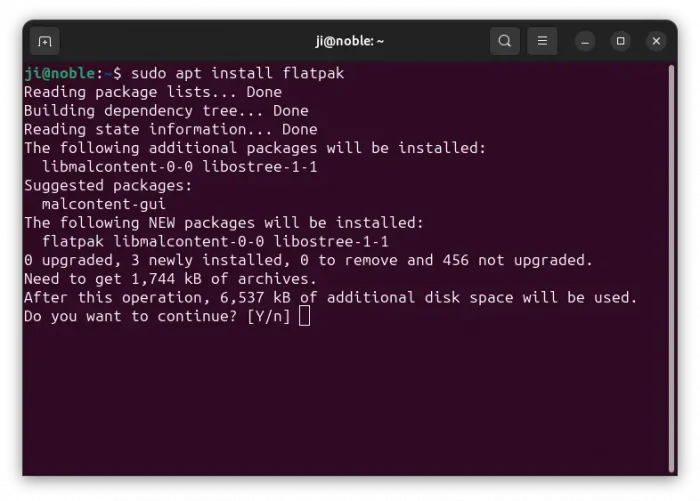
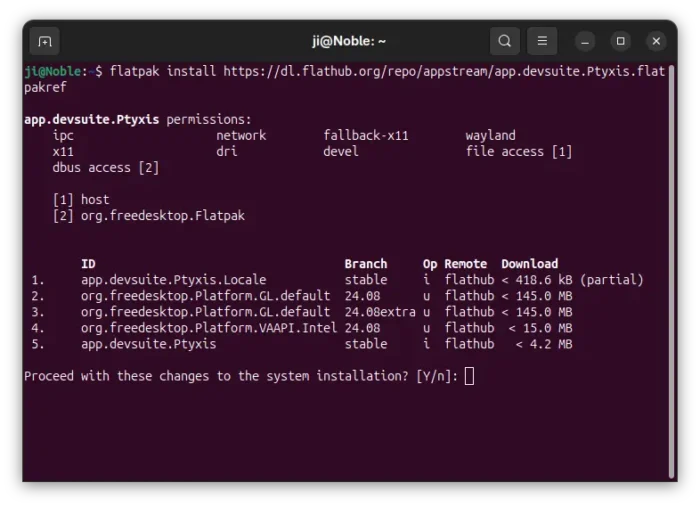
Then, install the terminal emulator by running command:
flatpak install https://dl.flathub.org/repo/appstream/app.devsuite.Ptyxis.flatpakref
This will install the app system wide, so all users can access it. For choice, you may add --user flag in command to install it for current user only.
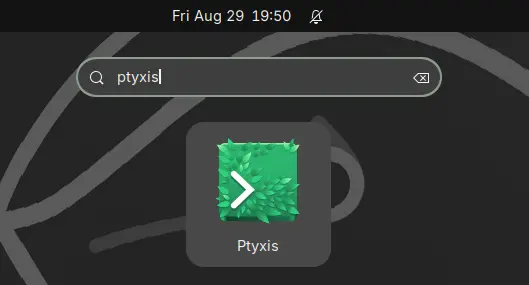
Finally, either launch the terminal from menu (log out and back in if app icon not visible) or run flatpak run app.devsuite.Ptyxis to start from terminal.
And for future updates, run the command below to check & install:
flatpak update app.devsuite.Ptyxis
Step 2: Set Ptyxis as default terminal
If you would like to make your terminal apps use Ptyxis as default, and Ctrl+Alt+T launch this terminal instead of Gnome-Terminal, then run following commands one by one.
NOTE 1: Ptyxis has an option in its preferences dialog to set as default, though NOT work in my case.
NOTE 2: This step no longer works for Ubuntu 25.04 and later due to policy change.
Ubuntu until 25.04 uses /etc/alternatives/x-terminal-emulator symbolic link to determine the default terminal app. To configure it, use update-alternatives command to add alternatives and set which to use as default.
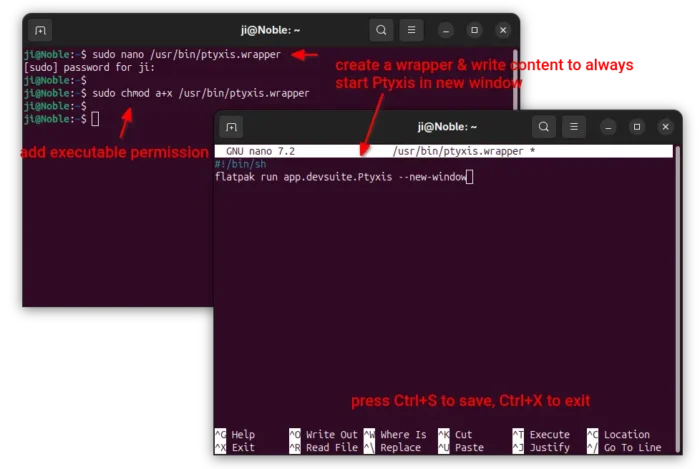
1. First, create a wrapper for Ptyxis executable by running command:
sudo nano /usr/bin/ptyxis.wrapper
This command will create a script ptyxis.wrapper under /usr/bin with nano command line text editor.
When it opens, paste the line below, so it will launch Ptyxis with --new-window flag.
#!/bin/sh
flatpak run app.devsuite.Ptyxis --new-window
Finally, press Ctrl+S to save and Ctrl+X to exit. And, run command below to add executable permission:
sudo chmod a+x /usr/bin/ptyxis.wrapper
You may skip creating the wrapper, and use /var/lib/flatpak/exports/bin/app.devsuite.Ptyxis in next commands. Which however only allows to open a single Ptyxis window when pressing Ctrl+Alt+T keyboard shortcut for multiple times.
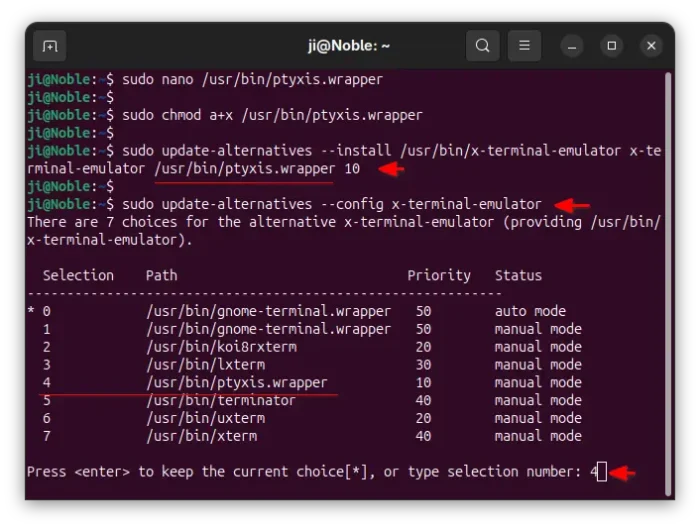
2. Next, run command to install Ptyxis as an alternative:
sudo update-alternatives --install /usr/bin/x-terminal-emulator x-terminal-emulator /usr/bin/ptyxis.wrapper 10
Here you may replace /usr/bin/ptyxis.wrapper with one of the PATH to Ptyxis executable file below. As mentioned, it however allows only one Ptyxis window, unless passing --new-window flag.
/var/lib/flatpak/exports/bin/app.devsuite.Ptyxisfor default system-wide installation.$HOME/.local/share/flatpak/exports/bin/app.devsuite.Ptyxisif installed the terminal with--userflag.
Then, run the command below to choose default terminal:
sudo update-alternatives --configure x-terminal-emulator
In my case (see the screenshot), type 4 and hit Enter to select Ptyxis.
Step 3: Add “Open in Terminal” Context Menu option for Ptyxis
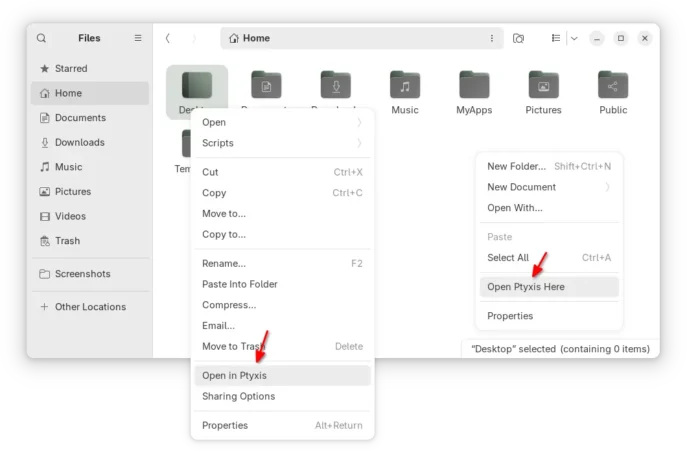
If you would like to add “Open in Terminal” look-like context menu to open selected folder in Ptyxis, the popular nautilus-open-any-terminal extension can do the job for Nautilus (aka GNOME Files).
1. First, run command in terminal to install dependency libraries:
sudo apt install python3-pip python3-nautilus gir1.2-gtk-4.0

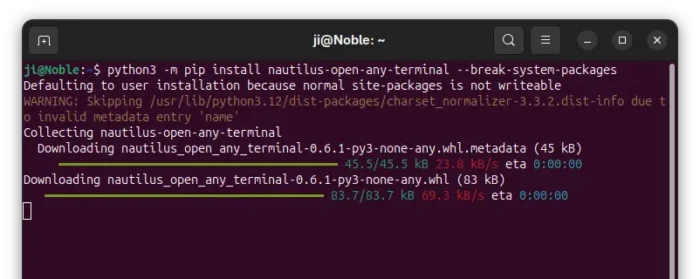
2. Then, install the extension through pip:
python3 -m pip install --user nautilus-open-any-terminal --break-system-packages
The --break-system-packages flag is required in 24.04 due to PEP 668, though not for 22.04.
3. After installed the Nautilus extension, run the command below to generate dconf configuration:
glib-compile-schemas ~/.local/share/glib-2.0/schemas/
Then quit Nautilus to apply changes:
nautilus -q
4. Finally, launch Dconf Editor which can be installed from either Ubuntu Software or App Center (filter by Debian package).
Then, navigate to “com/github/stunkymonkey/nautilus-open-any-terminal”, and disable default values and set:
- flatpak to ‘system’ (or ‘user’ if you used
--userflag when installing Ptyxis). - terminal to ‘ptyxis’.
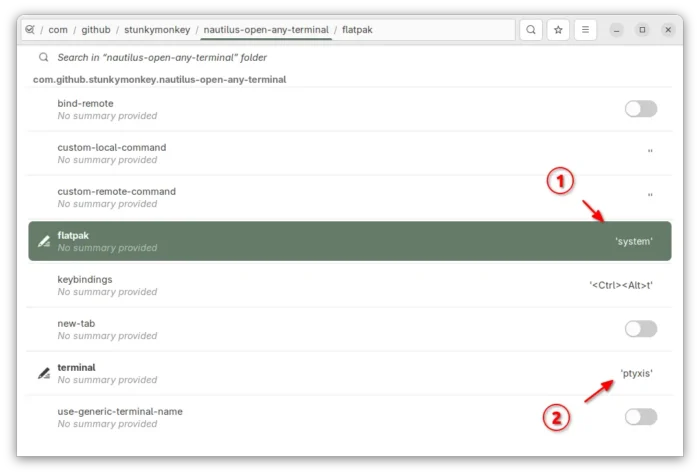
Finally, right-click on any folder or blank area in file manager to see the new option.
And, remove nautilus-extension-gnome-terminal package to get rid of the default ‘Open in Terminal’ option.
Source: UbuntuHandbook