Install Python Windows 11
Step # 01: Downloading of Python in Windows 11
The first step is to open the browser on your laptop/desktop for the newest version of python in Windows 11.
Python Download link: Python WebSite
Choose the latest Stable release and pick the appropriate CPU architecture for your system, which unless you know you have something unique or different will be the 64 bit package for that version. Choose the Installer and not the embedded version as shown below:
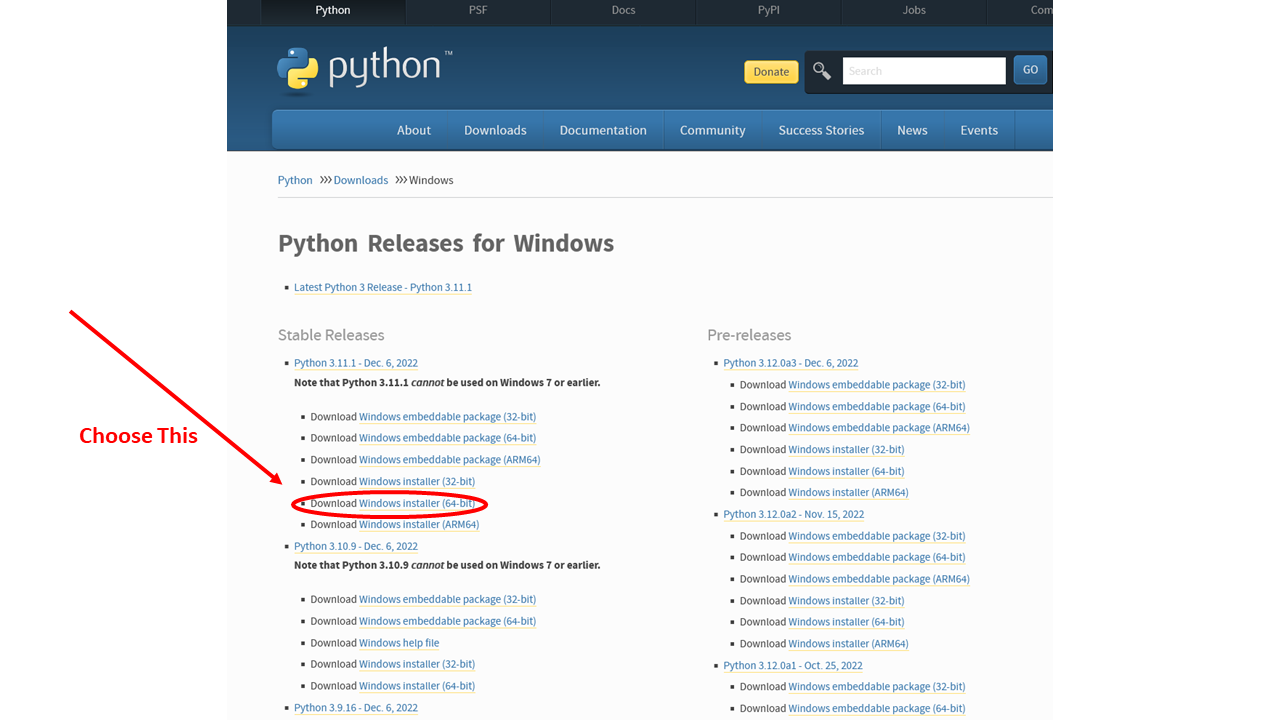
Choose Python Package to Install on WIndows
Step # 02: The Installation of Python in Windows 11:
After choosing it and clicking, the download will start. It will take a little time. After the downloading, open the file explorer on your desktop or just search the downloads and open it. There we see the installer downloaded of the python which means that the python is downloaded but yet not installed. To install it for use, we need to click the installer in the downloads.
There we see the install now option. First lets option the customize options before proceeding with the install:
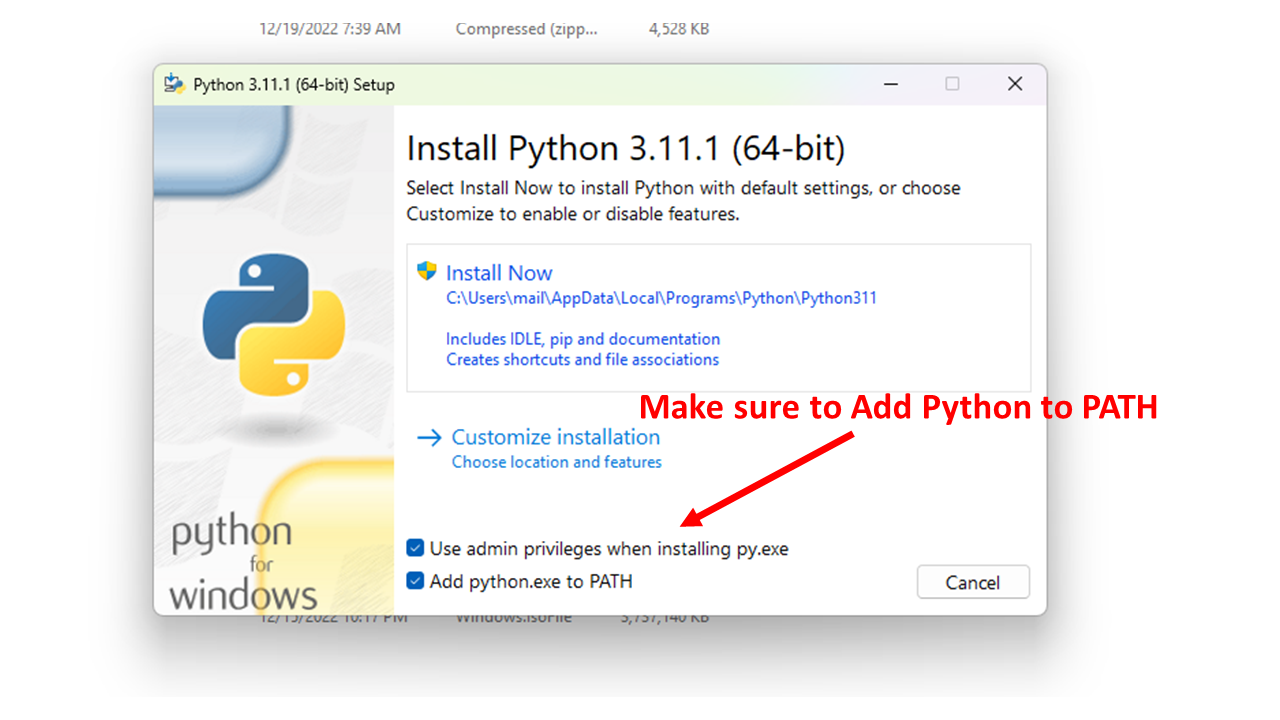
install window
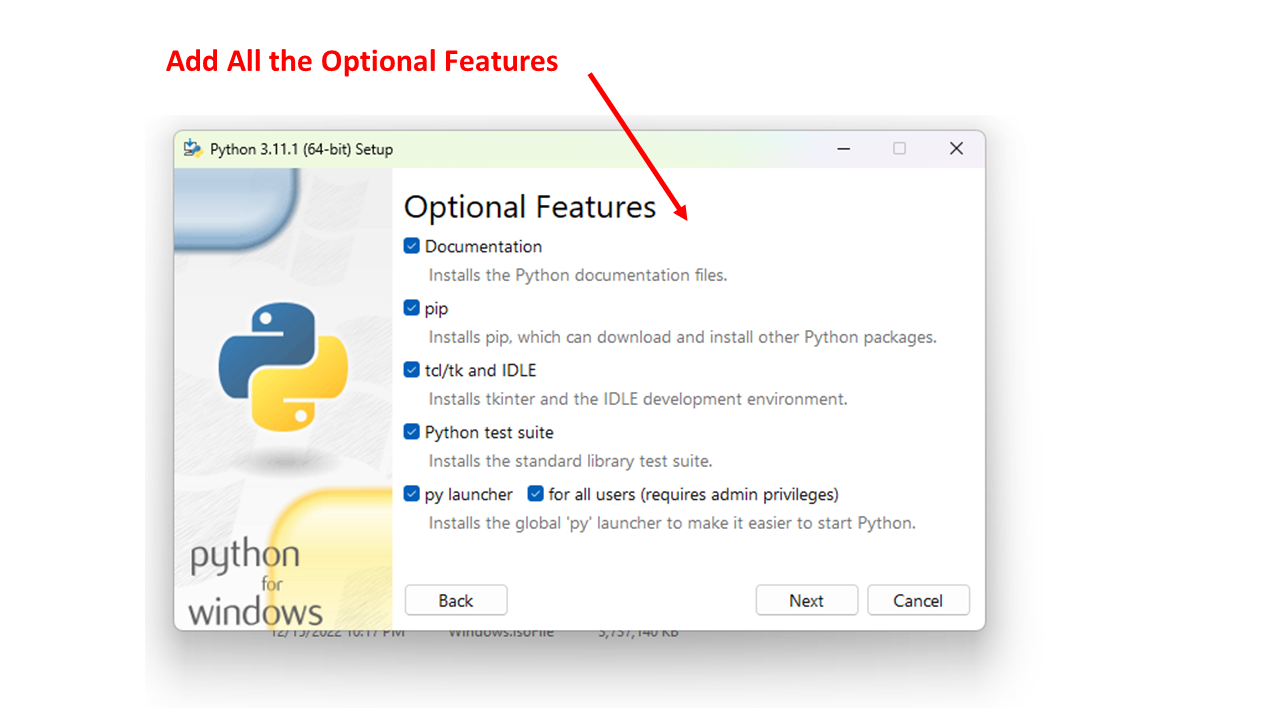
This installation process is for the installation of the additional tools of python which are required for the language processing, the most important one is the “pip” tool install.
You can also check the Advanced Options, mostly the important thing is to update all the PATH and Environment variables to include the new python installation:
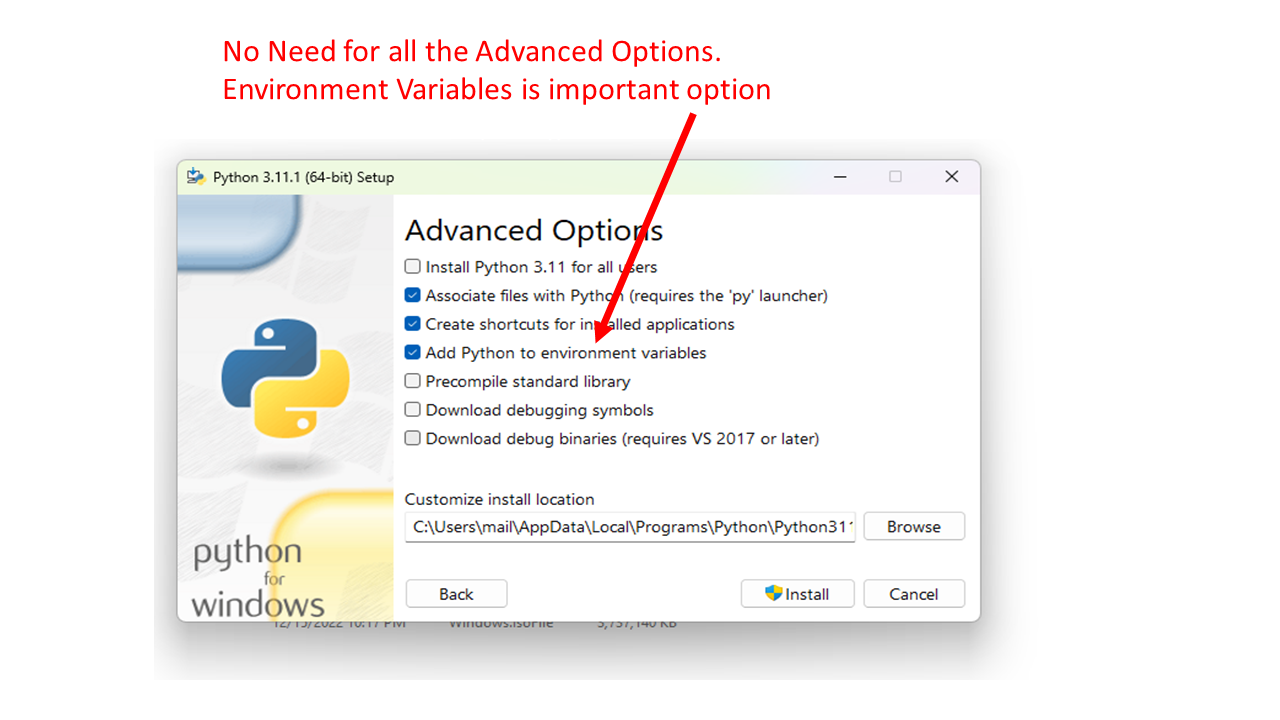
Python install advanced options
Step # 03: Checking Successful Installation of Python in Windows 11:
Once the procedure of installation is done, we need to check that the installation is performed successfully. For that, open the cmd which is the Windows command prompt. We can open it by searching it in the start menu or searching bar. Just search it and click it to open the cmd. Then, on the cmd, enter the version command of python to ensure python is found:
Python 3.11.1
If we see the command emerging the results as the version we have downloaded, that means we have done the installation perfectly and we can start working on it now.
You may also want to use Power Shell which has more features than CMD, let’s check Power Shell can find python also. Search for and open Windows PowerShell application and run the command:
Python 3.11.1
What if you get an error: python command not found
The most likely reason for such an error is improper setting of the Environment Variable for PATH to include python executable in the path. Look for the command in Windows called Edit the System Environment Variables, which is part of Control Panel. Click on and edit the Advanced tab of the System Properties and click the Environment Variables button as shown below.
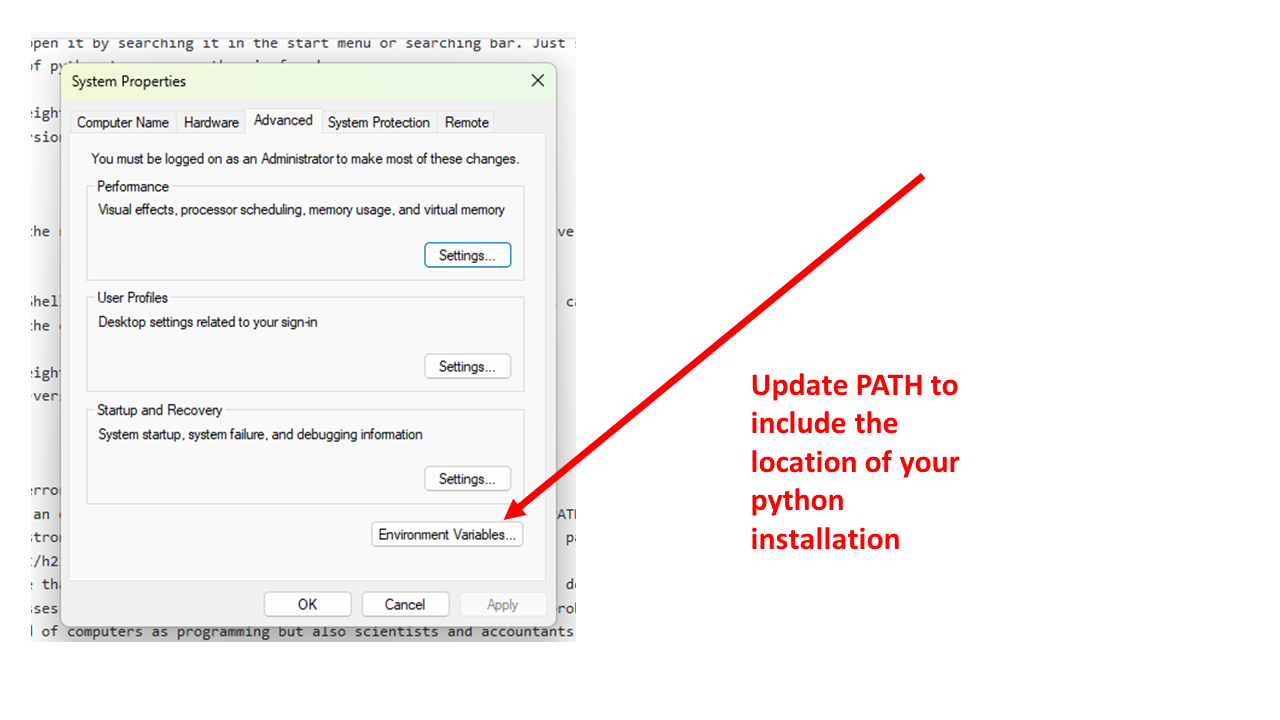
Update Environment Variables
In our system in this test the PATH included the following directory:
Adding the directory of your python installation will ensure the python program can be found.
Conclusion
Following these steps you should be able to get Python installed and working correctly on your Windows system. We encourage you to try out Windows PowerShell and use that enviornment for your coding in python on Windows.
Source: linuxhint.com