Install Multiple Domains NGINX server
NGINX is open-source software that can be used for media streaming, caching, reverse proxies, web serving, and other functions. It originally began as a web server built for utmost speed and dependability. A request sent to one of the websites served by an NGINX server is handled by the virtual host whose domain name matches the one in the URL.
Hosting Multiple Domains on a Single NGINX Server
Installing NGINX
Nginx supports hosting multiple domains using server blocks. All your websites can be stored on a single server if you select a VPS as your hosting platform, allowing you the freedom to take charge of the situation yourself.
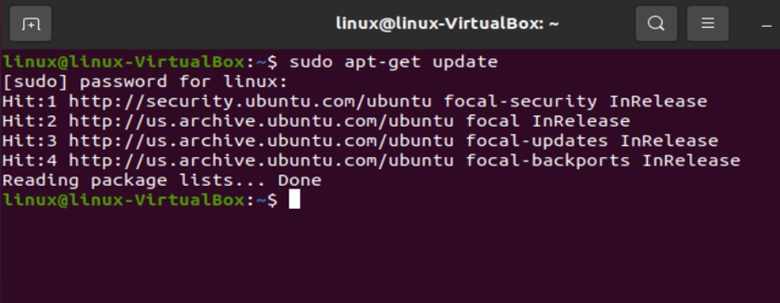
To create our multiple domains in “NGINX”, we first have to install it. For installation of NGINX, we have to run the following commands:
“apt-get update” doesn’t install new versions of software. However, it updates the package lists with new packages that have just been added to the repositories and those that need to be upgraded.
Following the execution of this command, you will be prompted to provide the repository password you selected when you created the new repository, as seen in the following sample. If the repository is preloaded, the link will be displayed
After updating the version of our software, we will install Nginx using the following command:
“apt-get install Nginx” is used to install our Nginx packages.

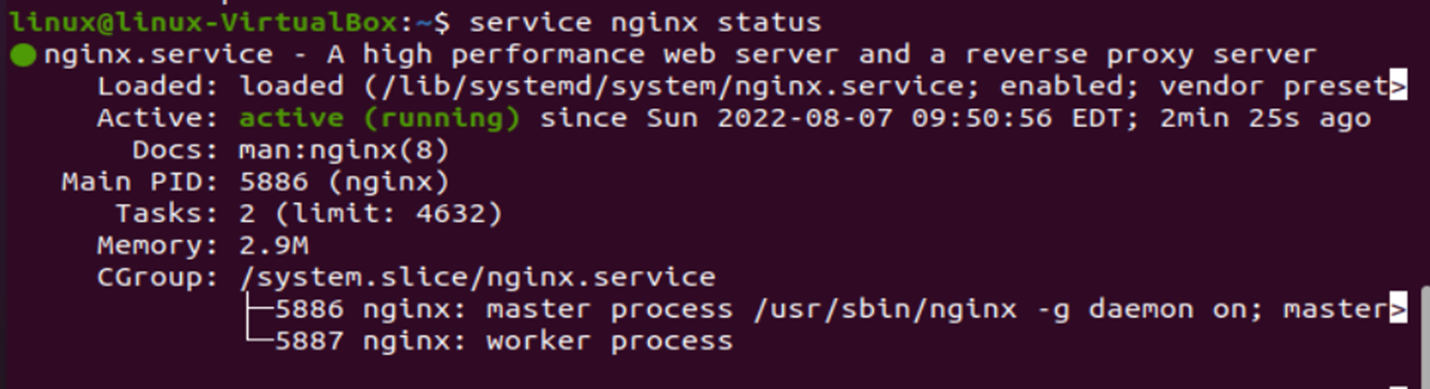
You can verify the status of “nginx” after installation by running the following command:
Here are a few outcomes that could happen after using this command. The service will display the text “active (running)” in green, identifying the active status if it is operating without any issues, as shown in the following snippet. To exit status, you have to press “q”.
Config Firewall
After installation of nginx, you have to configure the firewall. To do so, we will run the following commands:
$ sudo ufw enable
In the following screenshot, you will see two commands, “sudo ufw allow ‘Nginx HTTPS’”, which includes HTTPS profile in the firewalls allow list, and the second one enables firewall.

Creating Two Root Directories
Now is the time to set up your directory structures and Server Blocks if you want to use Nginx to host numerous sites or domains. Nginx uses /var/www/html as its default path. There must be many directories for each domain. The steps in the following instructions show how to set up several directories to distribute content across various domains.
Now, create our root directories using the following commands:
sudo mkdir -p /var/www/myfirstproject1.com
“mkdr” is used to create or modify folders in Linux/Unix using the “mkdir” command. “Make Directory” is the definition of “mkdir”. Along with creating several directories (folders) at once and setting permissions, “mkdir” also allows you to perform many other tasks. Where “-p” indicates the parent directory, the “-p” option must be used to “mkdir” to create a structure with numerous subdirectories. By doing this, “mkdir” will ensure that any parent directories that are missing are added. If one of the folders in the string doesn’t exist, the terminal returns an error without the -p argument.
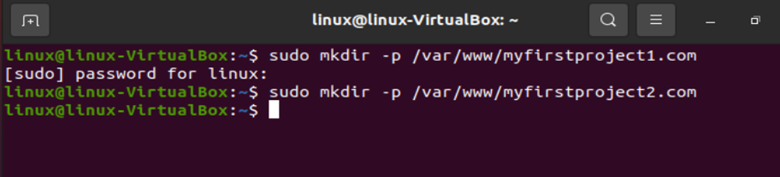
As shown in the previous snippet, we created two directories named “myfirstproject1.com” and “myfirstproject2.com”.
Afterward, we’ll give the directories to new owners.

The “chown” command modifies the user who owns a file, directory or link in the previous command. Each file has a user or group that serves as the owner. Setting up file and folder permissions correctly is essential, whereas the first “$user” indicates the user, and the second “$user” denotes the group from which the user belongs.
Now, the directories are entirely under the user’s control. However, the user is taken from the currently logged-in user. It is crucial to log into the user account that will be used to access the directory.

Moving to our next step where we will change the permission of directories for our user, to do so, we will run the following commands:
$ sudo chmod -R 755 / var/www/myfirstproject2.com/html

A file’s access mode can be changed using the chmod command, where chmod stands for change mode. There are three types of permissions read, write and execute. For reading permission, the value “4” is used. For writing value, “2” is used; for execution, value “1” is used. In the previous code, 755 indicates the user has all permissions, i.e., read, write and execute (4+2+1=7), and group and public can only read and execute (4+1=5). In “755”, the first digit is for the user, the second one is for the group, and the last number is for all/public.
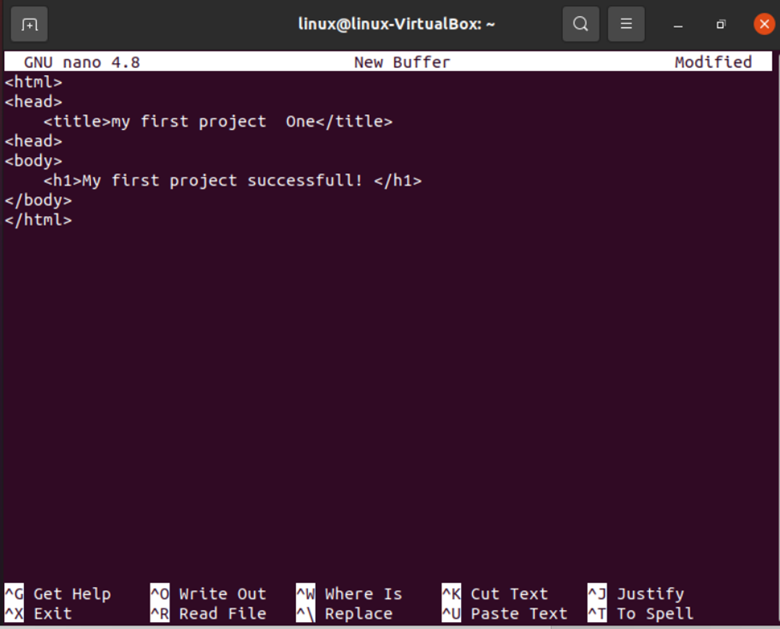
Now, creating default pages for both domains naming them “home.html”, we used nano which is a basic, intuitive, and user-friendly text editor.
![]()
![]()
The following screenshot is the output for the commands we used before. Nano allows us to cut, replace, justify, write, etc.
Configuring Virtual Hosting for NGINX Domain and Subdomains
Since Nginx supports many domains by default, configuring it is not that complicated. Although it is technically feasible to utilize the configuration data for several domains in the same file, it is recommended that you use separate files for the configuration data for each domain.
Creating Server Block/h2>
Open the default “/etc/nginx/default” NGINX configuration file.
While applying this command resulting file configuration will be copied to add it to our defined domains.
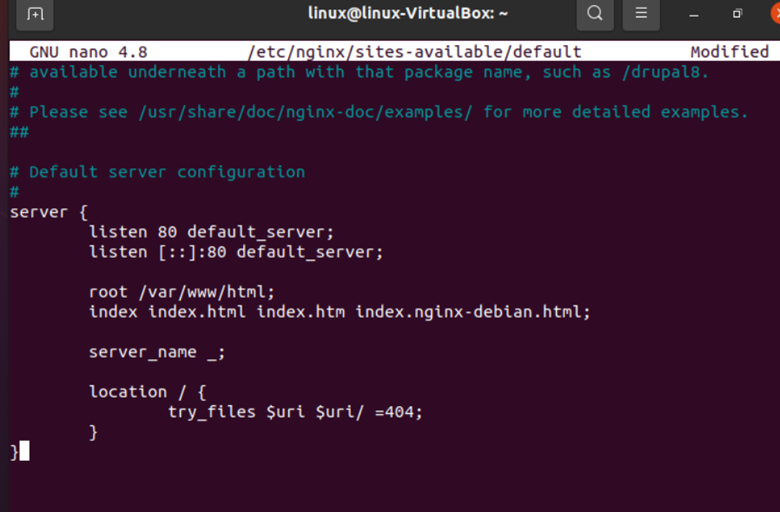
Use the following command to copy the configuration data from the default configuration file to a domain-specific configuration file. In this command, cp is used to replicate data from one file to the other. Using it, we copied the default configuration to our desired file, “myprioject1.com”.

Now, repeat the same step for both domains

Now, changing both file server names, we will open them both using commands in the following snippet:
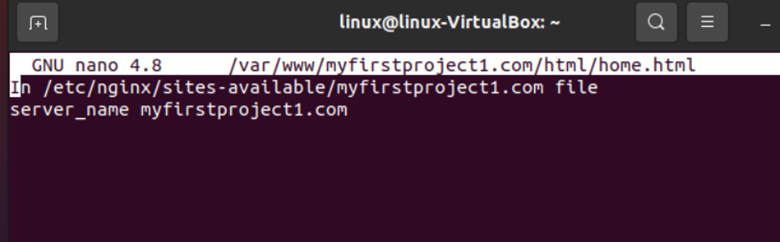
In our first file, we named the server “myfirstproject1.com” and saved it successfully.

The same steps were repeated for the second domain naming the server “myfirstproject2.com”.
Now, to activate our domain configuration, we will copy them to directories, creating a link between directories and domains.

Conclusion
This article demonstrates how to install and configure NGINX on Ubuntu 20.04. Additionally, some server blocks will be configured so that we can host several domains. An NGINX web server makes it simple to configure multiple domain names by offering a wide range of settings. On Ubuntu, one server block is enabled by default for Nginx. While this works great for a single site, we’ll need more directories if we want to serve many sites.
Source: linuxhint.com