HTML pre Tag
This guide will explain the HTML <pre> tag. So, let’s start!
What is HTML pre Tag?
The HTML “<pre>” tag, also known as a preformatted text element, displays preformatted text on the web page. More specifically, preformatted means the text will display as coded in the HTML page, and it will not omit any space and line breaks from the text.
Syntax
In the above-given syntax, the first pre-tag is the opening tag, whereas the second one is the closing tag.
Example: How to Add pre Tag in HTML?
Let’s display a SQL query on the web page. Before diving into the example demonstrating the working of the HTML <pre> tag, we will first see how a <p> tag will display the query.
In HTML, first, add <h2> tag for the heading. Then, add <p> tag that holds the SQL query example code as mentioned in the below HTML code:
Currently, the web page looks like this:
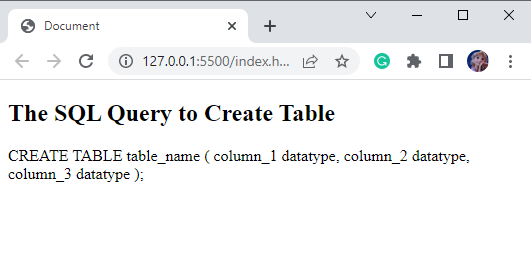
It can be seen from the above image that the spaces and line breaks have been omitted from the code. So, to display the text as it is, HTML provided us with <pre> tag.
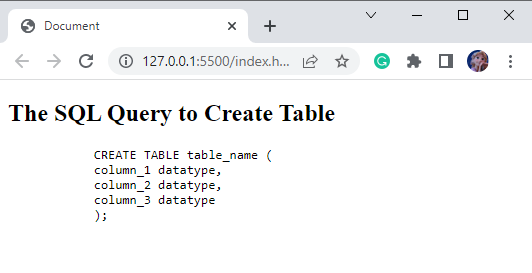
In HTML, add a div element with the class name “main”. Inside the div element, add <h2> tag for the heading and “<pre>” tag that holds the SQL query:
By providing the above-mentioned code, we will get the result as follows:
Now, apply styles according to your choice.
Style main div
font-size: 15px;
width: 90%;
height: 150px;
margin: auto;
padding: 8px;
background-color: rgb(245, 183, 27);
border: 3px dashed teal;
}
The explanation of the CSS properties provided above is listed below:
- “font-size” property is utilized for the setting of the element’s font size.
- “width” sets the width of the div element.
- “height” property specifies the element’s height.
- “margin” property adds spaces around the div element.
- “padding” property adds space around the element’s content or inside the border.
- “background-color” property adds the element’s background color.
- “border” property sets the border around the element with the width of the border, style of the border, and color of the border.
By providing the above-mentioned code, the div element will look like this:
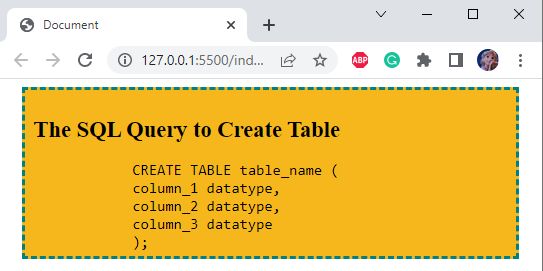
We have successfully learned the HTML <pre> tag with an example.
Conclusion
The HTML <pre> tag is utilized to display the preformatted text on the web page. It holds the property to add space and line breaks in the HTML page. For better understanding, this post has provided a guide related to the usage of the HTML <pre> tag with a practical example.
Source: linuxhint.com