HTML Image Maps
This post will teach you:
- What are HTML Image Maps?
- How to Create Image Maps in HTML Document?
- How to Create an Image Map Linked to Other Page?
What are HTML Image Maps?
The image map is a picture with areas that can be clicked. To make an image map in HTML, the “<map>” element is utilized. Moreover, one or more “<area>” tags are added within the “<map>” element to specify the areas.
Syntax
The syntax to specify image maps in an HTML document is mentioned below:
The “<img>” element is defined with the following attributes:
- “src” specifies the image path.
- “alt” shows an alternate text when an image cannot load.
- “usemap” is specified to make the image areas clickable. To make a link, its value must be the same as the class or id of the “<map>” element.
The “<map>” element is added with the following attributes:
- “shape” specifies the area size of an HTML “<map>” element.
- “coords” attribute defines the coordinates of the clickable area.
- “href” attribute set out the URL of the source.
How to Create Image Maps in HTML Document?
To create an image map in an HTML document, check out the given instructions:
- In HTML, add a “<div>” element, and assign a class “image-map”.
- Within this div, add an “<img>” element to add an image associated with the above-discussed attributes.
- Then, add an HTML “<map>” element and assign it the “clickspace” name.
- Note that the “usemap” attribute is assigned the name “#clickspace” pointing to the “name” attribute of the “<map>” tag.
- Inside it, add the “<area>” tag with the above-stated attributes:
Let’s move toward the CSS section to adjust the size of the image.
Style “<div>” in CSS
Utilize the “.image-map” class to access the “<div>” element and apply the following CSS properties:
width: 700px;
margin: auto;
}
Here is the description of the mentioned CSS properties:
- The “width” property sets the div element’s width.
- The “margin” property adds more room around the element.
Style “img” Element
width: 100%;
}
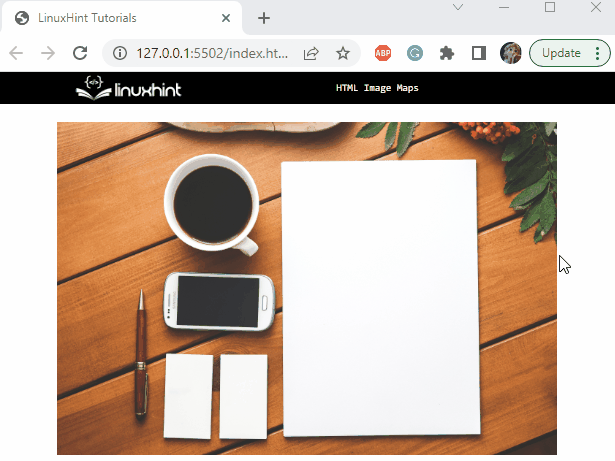
See, the area coordinates specified in the “coords” attribute are now clickable:
In the next section, we will learn how to link the image map to another source.
How to Create an Image Map Linked to Other Page?
Create another HTML page with the extension “.html” by following the steps mentioned below:
- In our case, we give it the name “laptop.html”.
- Add a div element and assign it a class “laptop-img”.
- Then, place an image using the “<img>” element and associate the “src” and “width” attributes.
- Next, specify a paragraph using the “<p>” element:
In CSS, specify the following CSS properties to the “laptop-img” class:
width: 500px;
margin: auto;
}
Output
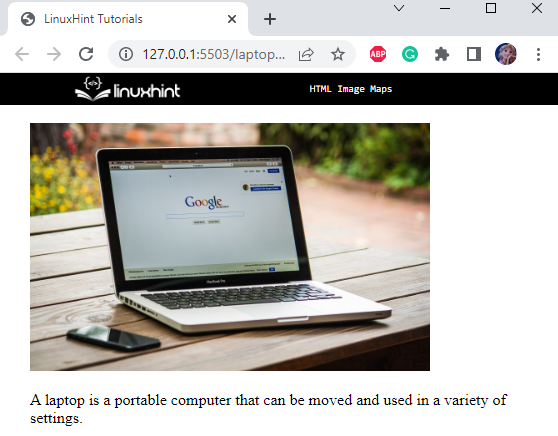
Now, we will link the “laptop.html” page to an image “<area>” element of the first page. To do so, specify the URL of the page to the “href” attribute of the “<area>” element as shown below:
Output

We have successfully learned what image maps are and how they are linked with other sources.
Conclusion
The HTML “<map>” element is utilized to create an image map or an image with clickable areas. To define the image’s clickable areas, one or more “<area>” tags are added within the “<map>” element. Moreover, the attributes associated with the “<area>” tag are “shape”, “coords”, and “href”. This post has illustrated how to create HTML image maps with an example.
Source: linuxhint.com