How TypeScript Can Be Used with React?
TypeScript is known as the superset of JavaScript that comes with all of its functionalities as well as its own additional features(classes, interface, generics, etc). It is a strongly typed programming language that catches the error at compile time to enforce consistent code style and standards.
TypeScript is famous for its “type-checking” and “error-detection” features. These features help in web and app development to write stronger, and maintainable code. That’s why it is considered the best language for all web and app development frameworks like React, React Native, Ionic, NextJS, etc.
This post explains how TypeScript can be used with React.
How TypeScript can be Used With React?
To use TypeScript with React follow the given steps of instructions.
Step 1: Install and Link TypeScript
First, open the Window Command Prompt, and install the latest version of the “TypeScript” in the local system by executing this command:
In the above command, the “g” flag installs the TypeScript globally in the local system.

The above command installed TypeScript’s latest version.
For more verification check the installed TypeScript “version” with the help of the given command:

It can be seen that the latest version “5.1.6” of TypeScript has been installed successfully into the local system.
Next, link the “TypeScript” with “Node Package Manager(npm)” as it is installed globally:
npm audit mix //Fix if an error occurs
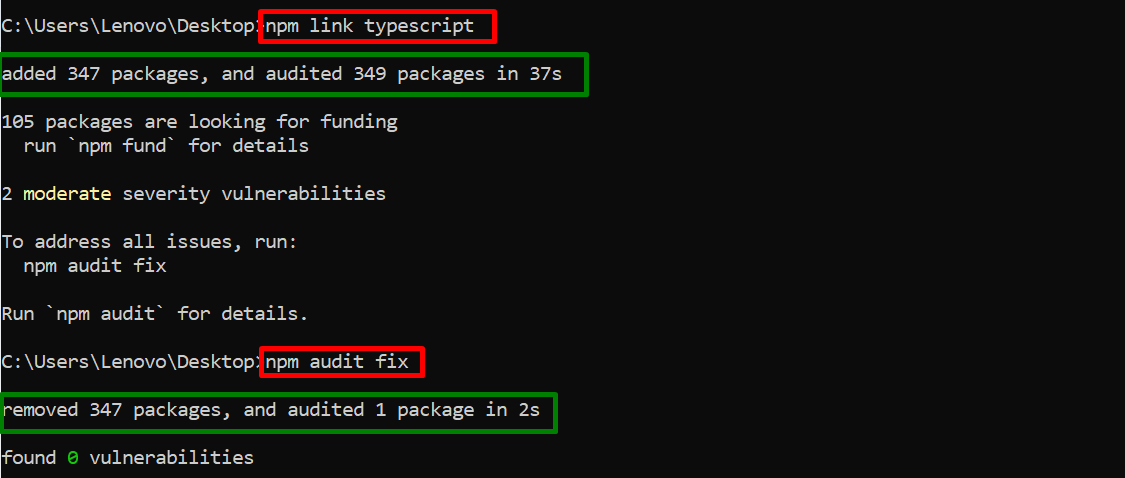
The above output first linked the TypeScript and then fixed the generated error respectively.
Step 2: Make a New Directory
Now, make a new directory for the React project and then navigate to it by running the below-stated commands:
cd first-react-project
The below output shows that the user is in the newly created directory:

Step 3: Setting the React Project
Now, execute the given command to initiate the React project in the created directory:
In the above command, the “y” flag is used to specify “yes” for all queries:
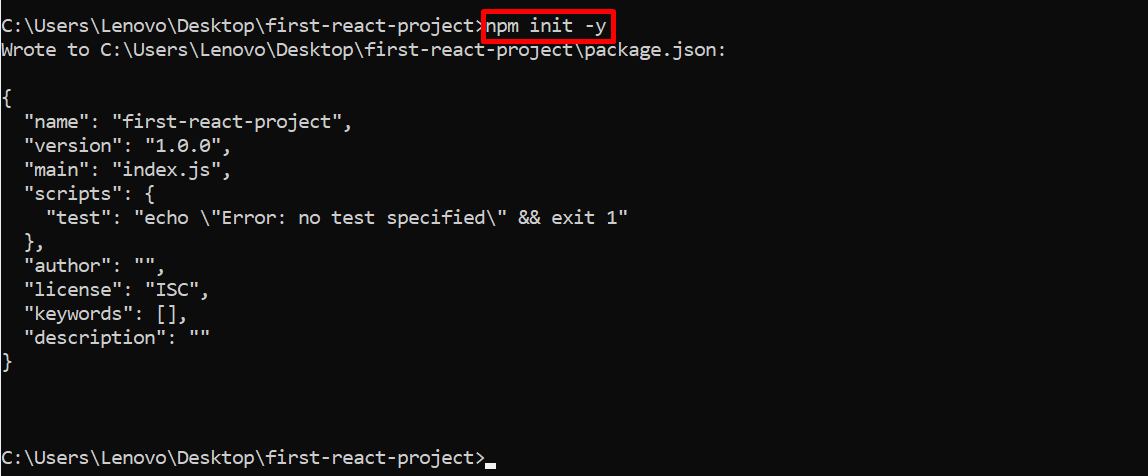
The executed command has successfully initiated the React project.
Step 4: Install React Dependencies
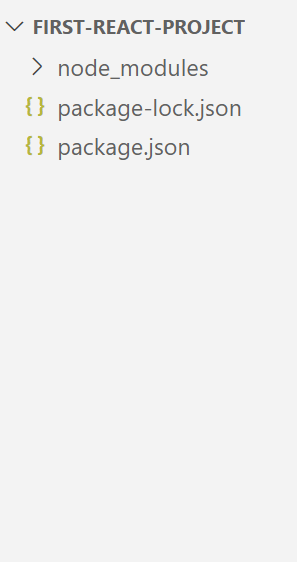
When the initialization of the project is done, then install the “react” and “react-dom” dependencies that automatically create a folder structure for the React application:
The above command creates a ready-made folder structure for the React application:

Now, open this folder structure into the installed code editor in this way:

The above command opened the created React application folder structure into the code editor like this:
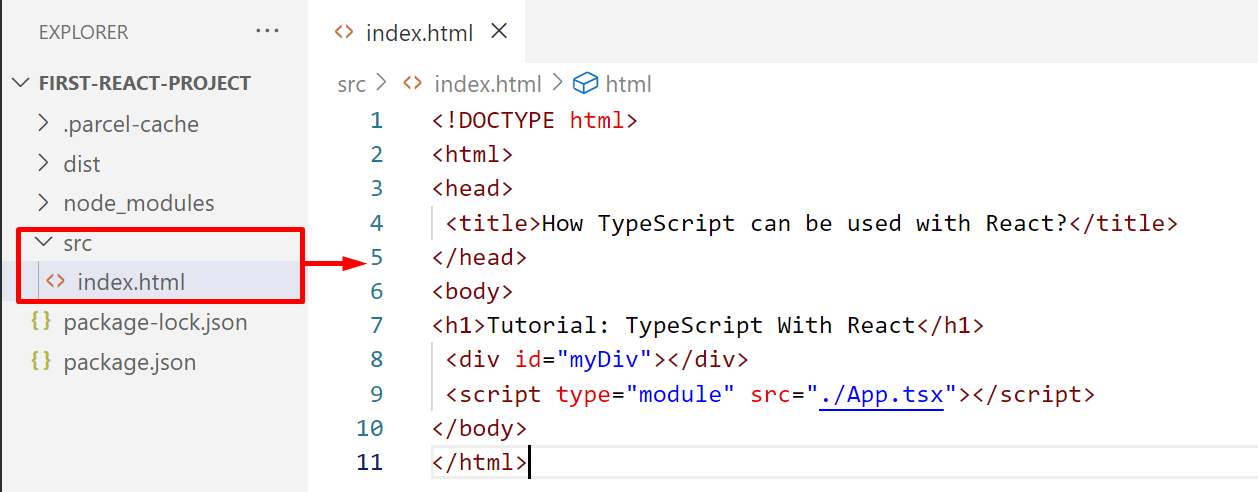
Step 5: Create “.html” and “.tsx” Files
Create the “.html” and the “.tsx” files in the newly created “src” folder to show the practical implementation of the React application. Let’s see them one by one respectively.
Index.html File
Save and close the file.
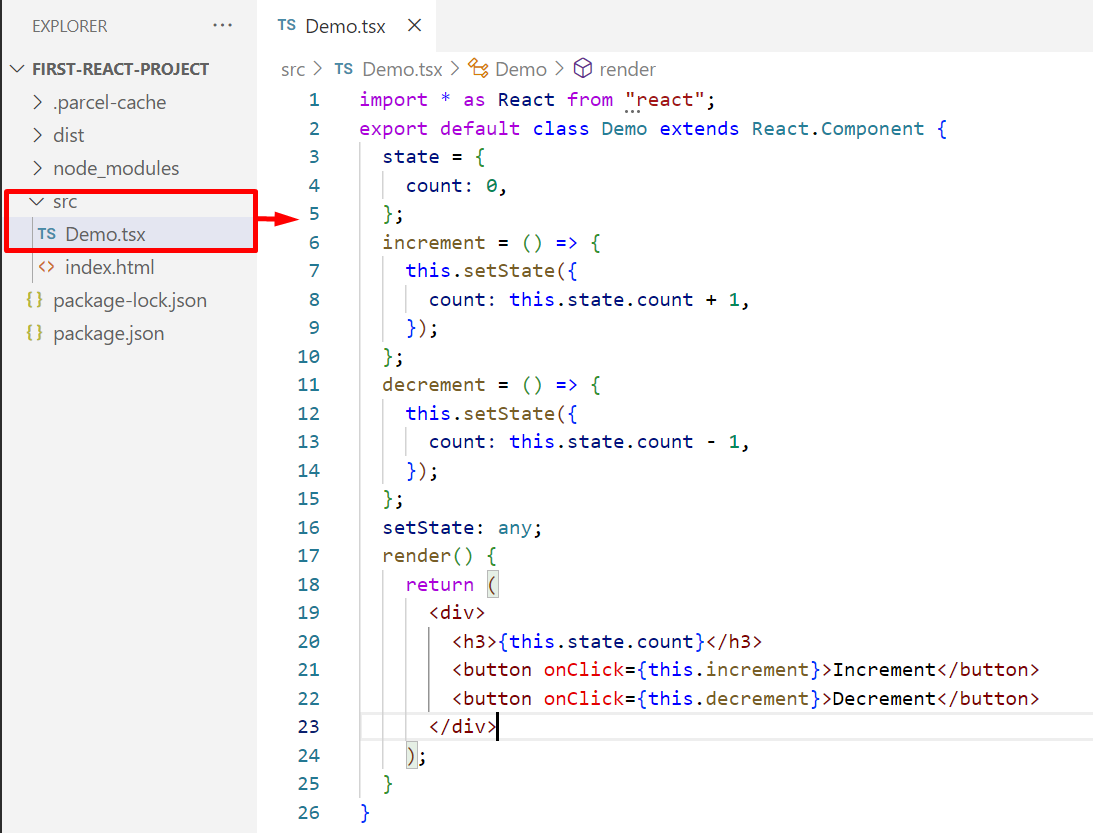
Demo.tsx File
export default class Demo extends React.Component {
state = {
count: 0,
};
increment = () => {
this.setState({
count: this.state.count + 1,
});
};
decrement = () => {
this.setState({
count: this.state.count – 1,
});
};
setState: any;
render() {
return (
<div>
<h3>{this.state.count}</h3>
<button onClick={this.increment}>Increment</button>
<button onClick={this.decrement}>Decrement</button>
</div>
);
}
}
Save and close the file.
App.tsx File
import { render } from ‘react-dom’;
import Demo from ‘./Demo’;
render(<Demo />, document.getElementById(‘myDiv’));
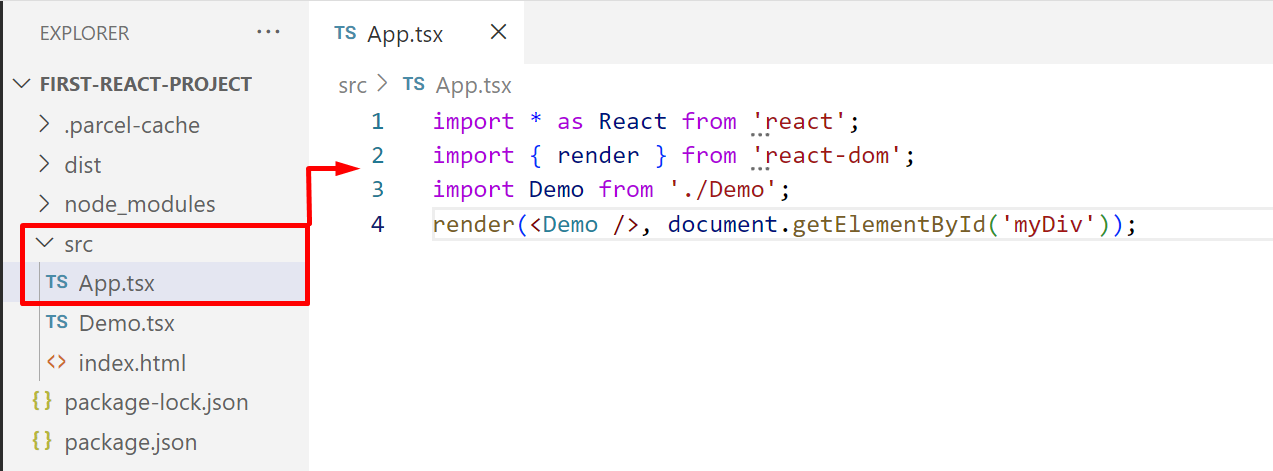
Save the file(Ctrl+S).
Step 6: Install and Configure the Parcel Bundler
The user can install “webpack”, “parcel” and many other bundlers to see the changes in the React application after the editing instead of reloading the page. In this scenario, the “parcel” bundler is installed using the given “npm” command:
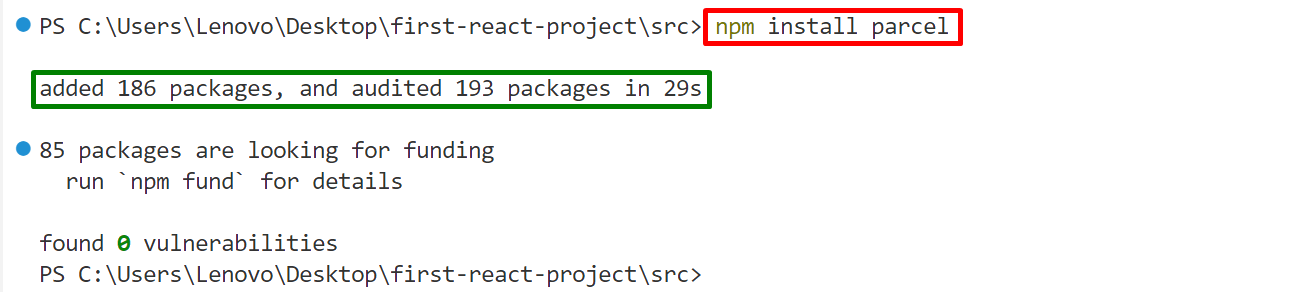
The “parcel” has been installed in the created React application.
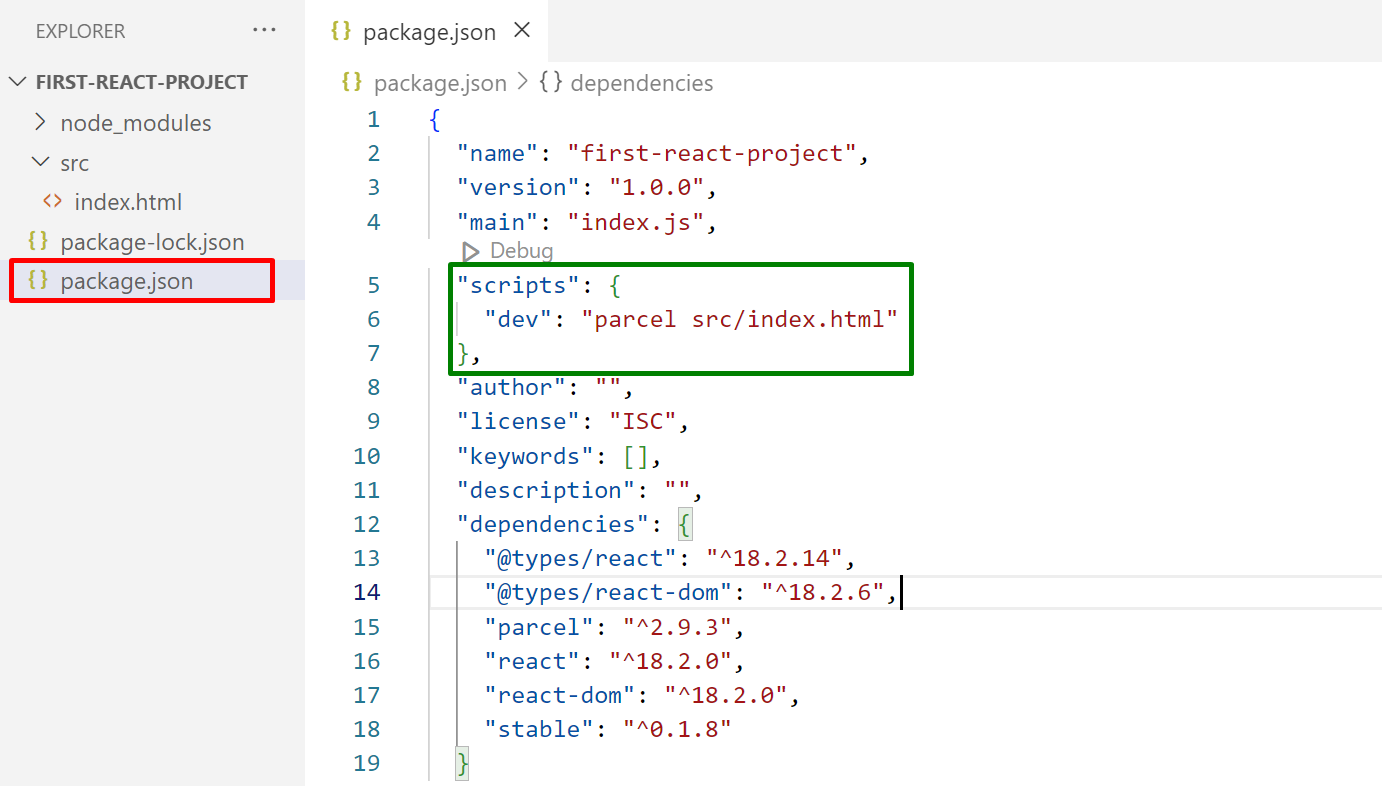
Configuration of Parcel
Now, open the main configuration file “package.json” from your React application folder and configure the “parcel” bundler in the “scripts” section:
"dev": "parcel src/index.html"
},
In the above code block, the “src/index.html” file specifies the path of the “.html” file that the user wants to edit:
Press “Ctrl+S” to save and “Ctrl+X” to close the file.
Step 7: Run the React App
Lastly, run the created React application with the help of the given command:
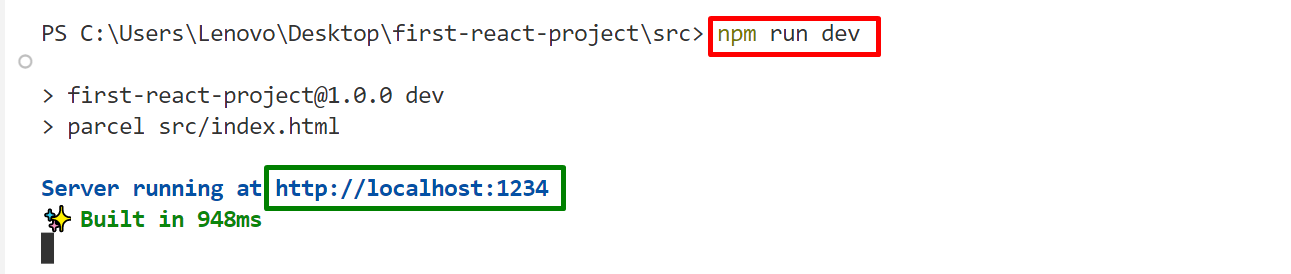
Click on the highlighted link to see the output on the browser.
Output
It can be seen that the React application runs successfully i.e. incrementing or decrementing the number by clicking their associated buttons.
Conclusion
TypeScript can be used with “React” by installing the latest version of TypeScript, setting up the React project, and installing the React dependencies. Once all these steps are performed, then create the “.html” and the “.tsx” file to practically verify the working of React application. This post explained the complete process to use TypeScript with React.
Source: linuxhint.com