How to Work with CSV Files in PowerShell
A CSV is basically a text file that is saved with the “.csv” extension. It contains the values that are separated by commas. It stores the data in a tabular form in a simple text file. Normally, it is created using the Microsoft Excel application, however, it can also be created with PowerShell. PowerShell has certain commands that can create, view, import, or export CSV files.
This write-up will overview various methods to work with CSV files.
How to Work with CSV Files in PowerShell?
With PowerShell, users can:
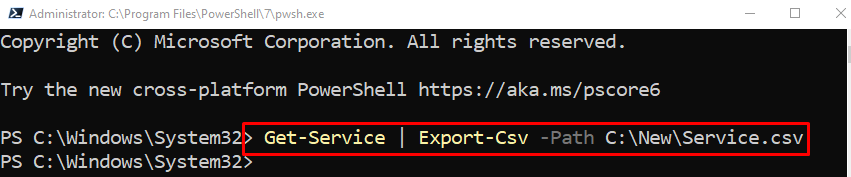
Example 1: Export and Create a CSV File Using PowerShell
To export or create a CSV file, first, place the command of which you want to export the data into a CSV file. Then, pipe the command to the “Export-CSV” cmdlet along with the “-Path” parameter having the target CSV file path assigned to it:
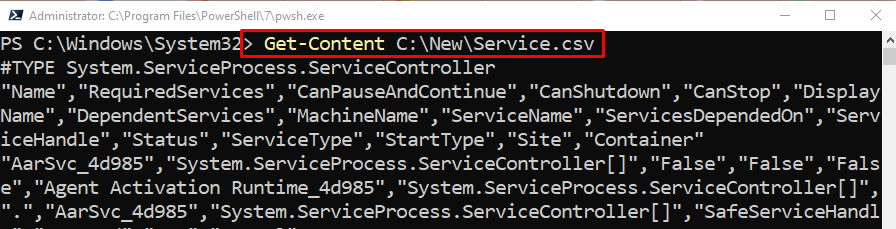
Example 2: View CSV Data
After creating the CSV file, users can get to see the data inside the CSV file. For that reason, first, use the “Get-Content” cmdlet and assign it the CSV file path:
Example 3: Import CSV Data
Users can also import the data using PowerShell. To do so, first, write the “Import-CSV” and then specify the CSV file address. Lastly, to view the CSV data in the table format, simply pipe the whole command into the “ft” cmdlet:
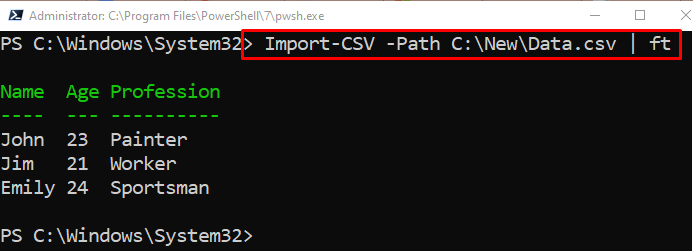
It can be observed that the data was imported from a CSV file in PowerShell.
Conclusion
To work with CSV files, PowerShell has several commands. These commands can help users to view, import, or export data within the CSV files. This post has elaborated on the management of CSV files using PowerShell commands.
Source: linuxhint.com