How to Use the sftp Command in Linux
This tutorial explains how to connect and transfer files through the sftp protocol in Linux, as well as securing by implementing security measures.
The sftp command is one of the most useful tools for every network user, including domestic users. This command can be also implemented in Windows systems, making it attractive for every network type.
This is one of the main command line tools to securely share files between computers. Additionally, to downloading and uploading files and directories, the user can remotely change permissions, remove, and rename files and more.
SFTP is a command which definitely will improve the networking experience from the command line.
After reading this article and applying examples (They also can be reproduced in a virtual machine), the reader will know how to configure Linux systems to transfer files with the sftp command, both in interactive mode and command line.
The content is valid for all Linux distributions and includes real scenario screenshots, making it easy for all readers to understand how commands are applied independently of the previous knowledge level.
Brief Introduction to sftp
Formerly FTP (File Transference Protocol) was the only method to transfer files between clients and servers or between two network devices.
Users used to upload all download files from FTP servers with permissions to read and write on the allowed directories.
But the FTP protocol suffered high risk vulnerabilities and was replaced with newer and more secure protocols. Two widely known examples are SCP (Secure Copy Protocol) and SFTP (Secure File Transference Protocol). SFTP is one of the most popular replacements for the FTP protocol.
Like FTP, SFTP can be used through an interactive text mode or by executing single commands. This tutorial explains both techniques.
Previous Requirements to Use sftp
The sftp protocol requires ssh (Secure Shell) to be installed and running on the server you want to download files from or upload files to.
If your server already has the ssh running, you can jump to the next sftp section.
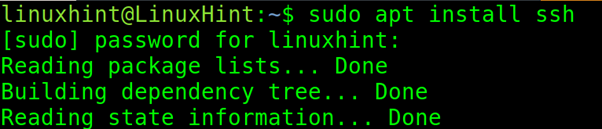
On Debian based Linux distributions, ssh can be installed using the apt packages manager as shown in the screenshot below.
On RedHat based Linux distributions, ssh can be installed by executing the following command:

Once installed, on the server you want to connect to, start the service with the systemctl command as shown below (Debian based distributions).

To start the ssh service on RedHat based distributions, run:

How to Use sftp in Interactive Mode
This section covers the sftp interactive mode usage.
The only command to be executed to access the sftp server before getting the sftp command prompt is the connection request, which has the similar syntax to ssh and scp.
The example below describes the correct syntax, where <User> must be replaced with an existing user on the server and <ServerIP> with the server host or IP address.
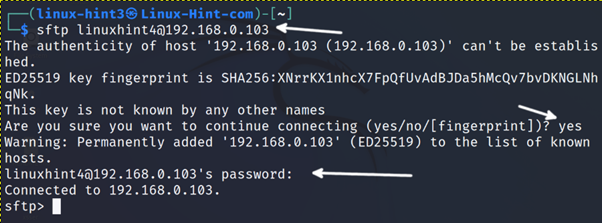
In the screenshot below, the local user linux-hint3 connects as the remote user linuxhint to the server with IP address 192.168.0.103.
The first time the user connects to the server, he will be requested to confirm the connection. The user must type “yes”, press ENTER and fill the password.
Once the user connects, the server will return an sftp> command prompt where the user can execute the sftp commands.
The sftp interactive mode allows users to interact both with the local and remote systems.
Normal Linux commands impact on the server. Commands starting with a “l” are executed in the local system.
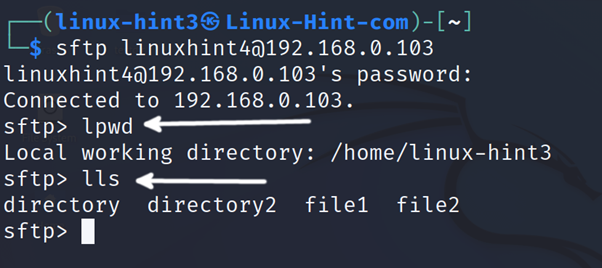
For example, if the user executes the pwd command, it will show the remote current working directory. But if the user runs the lpwd, it will show the local current directory.
By default, the local remote directory is the remote user home directory, except for some cases like the following example, in which the remote user has not a home directory.
In the screenshot below, the pwd command is executed to show the remote current working directory.
Then, lpwd is executed to show the local current working directory.
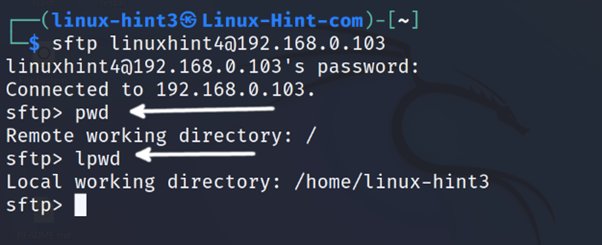
As you can see in the screenshot above, the remote current working directory is the root directory (because the linuxhint4 remote user user has not a home directory) and the local working directory is the local home.
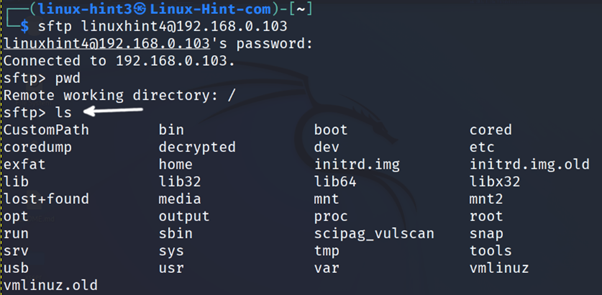
If the user runs the ls (List) command, it will show remote files and directories within the current working directory.
By executing lls (Local List), the command will show files and directories within the local current working directory.
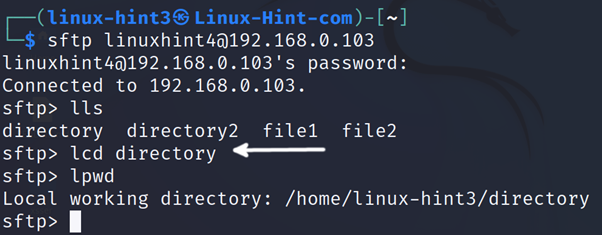
With the cd (Change Directory) command, the user can move between remote directories. With the lcd (Locally Change Directory) command, the user can move between local directories, as shown in the following figure.
The syntax to download a file from the server is the following:
Or
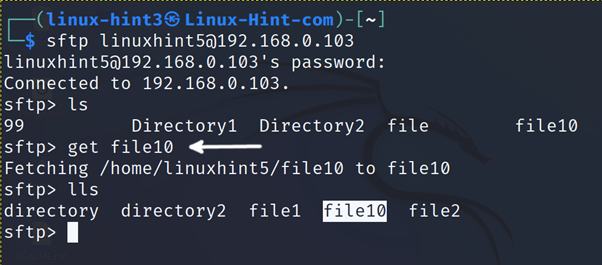
In the example below, the user downloads the file named file10 and then runs lls (Locally List) confirming the file was properly downloaded.
To download directories, the syntax is almost the same except for the -r flag as shown below.
Or
In the example below, the user downloads a directory named Directory1.

To upload files, the syntax is the following:
In the practical example below, the user uploads a file named <file>

To upload directories, just add the -r flag.
Or

Users can remove files also remotely using the same Linux commands. For example, to remove a file just run:

To remove directories, add the -r flag as shown below.

The df -h command can be used to show total server space, used and available space.

Users can also change file and directory permissions with the chmod command as shown in the example below.

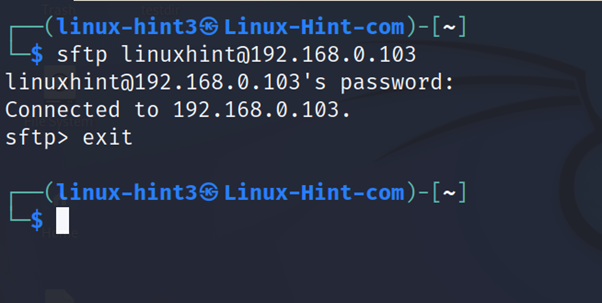
To exit the interactive mode run exit.
Another way to exit the sftp session is the bye command.

Using sftp With Single Commands
Additionally, to the interactive mode, sftp can be used with single commands. This section covers how to download and upload files without previous connection to the interactive mode.
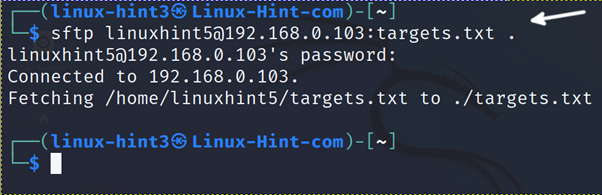
The syntax to download files is the following:
In the example below, the user logs in as the linuxhint5 user and downloads the targets.txt remote file to the local directory represented by a period.
In the practical example below, the user downloads the file named something2.txt located in the remote testdir/ subdirectory to the local Desktop/ subdirectory.

As shown in the example below, by adding the -r flag, the user can download directories recursively. In the following example, the user downloads the testdir/ directory to the local Desktop/ directory.

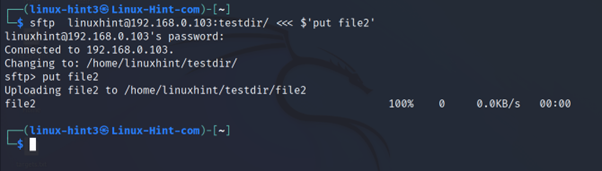
To upload files by executing a single command with sftp, apply the syntax below.
In the example below, the local File2 is uploaded to the testdir/ directory.
To upload a directory, add the -r option using the following syntax
In the example below, the Desktop/ local directory is uploaded into the remote perl5/ directory.

Increasing the sftp Security With Key Authentication
By default, sftp connections are safe and protected by the ssh protocol.
But one of the risks is the default password login method as a consequence of password weakness, which includes password exchange or password sharing channels, processes. In which, passwords may get leaked, for example, with a MiM (Man In the MIddle) attack followed by a successful description.
If the server is not properly configured, password login can expose the system to brute force attacks.
To prevent this, a good practice for small and medium size networks is to implement ssh key authentication and disable password login.
Implementing ssh Key Authentication and Disabling Password Login
The sftp security is granted by the ssh protocol, whose configuration file is /etc/ssh/sshd_config, the file users need to edit to enable key authentication and disable password login among more options to reinforce security.
On the server allowing incoming connections, edit the /etc/ssh/sshd_config file with privileges using a plain text editor like nano or vi.

To enable key authentication, on the server computer, open the /etc/ssh/sshd_config file with privileges and find the line containing PubkeyAuthentication no. Replace it with PubkeyAuthentication yes (Replace the “no” with “yes”).
Also confirm PermitRootLogin no to disable root login.
The root user is present in all Unix based systems including Linux. It is a bad decision to allow login in with a username with privileges known by everyone.

Don’t edit the options to disable password login yet, because the key sharing process requires password authentication before the system is able to authenticate with keys.
Exit the configuration file saving changes and restart the ssh service.
Debian based Linux distributions:

RedHat based Linux distributions:
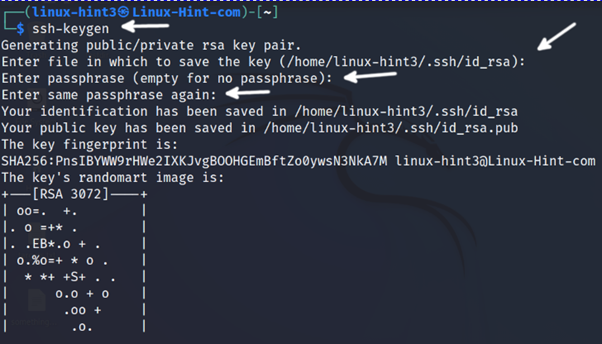
On the client side, requesting outcoming connections, generate the keys pair by executing the ssh-keygen command.
The process will request key directory confirmation, press ENTER to leave the default local directory (~/.ssh/id_rsa) or the equivalent in your Linux distribution. The process will offer to include a passphrase to be required when logging in. By adding a passphrase, the security can be increased. It is recommended to type one and press ENTER. If you don’t want to add a passphrase, just press ENTER without typing it.
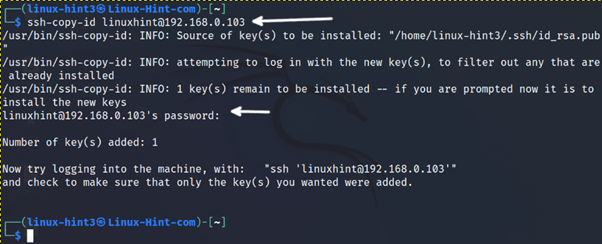
Now, the client must share the key with the server with the command ssh-copy-id using the syntax of the following example.
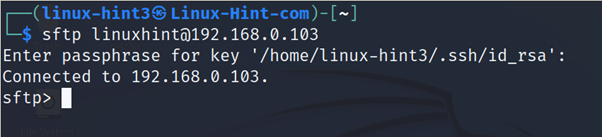
After sharing the key, test the key authentication method by connecting to the server.
If the authentication succeeds, the user will login without password. If the user defines a passphrase, it will be requested instead of the password as in the example below.
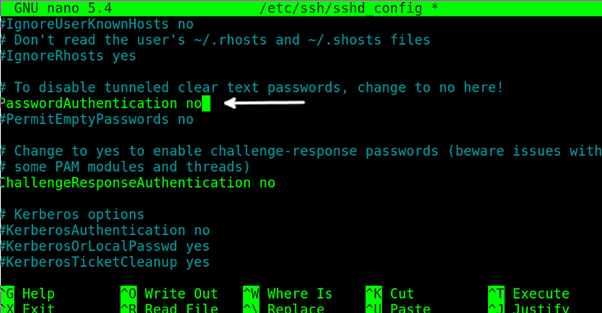
After checking the key authentication works, it is highly recommended to disable the password login.
On the server side, edit the file /etc/ssh/sshd/config again with a text editor like nano or vi.

Scroll down and replace the line PasswordAuthentication yes with PasswordAuthentication no.
Restart the ssh service.

RedHat based Linux distributions:
Now, authentication security is properly increased.
Conclusion
Sftp is a very useful tool to share files between devices and offers two simple modes. The sftp protocol can be installed on every operating system, offering security, reliability, and speed. Alternatively, the SCP command also offers reliability, speed and security and works through the ssh protocol. This second command was also deeply explained at Linux Hint (The link was given in the introduction of this document).
Source: linuxhint.com