How to Use the Set-Acl Cmdlet in PowerShell?
In this post, the “Set-Acl” cmdlet will be illustrated with the aid of numerous examples.
How to use the Set-Acl Cmdlet in PowerShell?
To use the stated cmdlet, first, specify the “Set-Acl” cmdlet. Then, use the “-Path” parameter to specify the registry key or a file address along with the “-AclObject” parameter and assign it to the security descriptor whose values need to be supplied.
Let’s walk through some of the examples regarding the “Set-Acl” cmdlet to learn more about its usage.
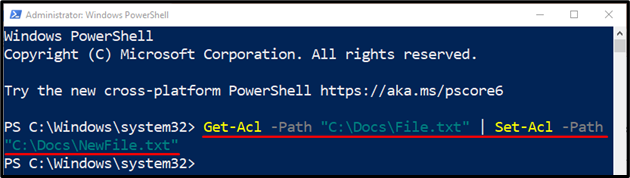
Example 1: Use the “Set-Acl” Cmdlet to Pass a Descriptor Using the Pipeline Operator
At first, use the “Get-Acl” cmdlet along with the “-Path” parameter and provide the path to get the security descriptor. Then, pipe it to another file using the “Set-Acl” cmdlet:
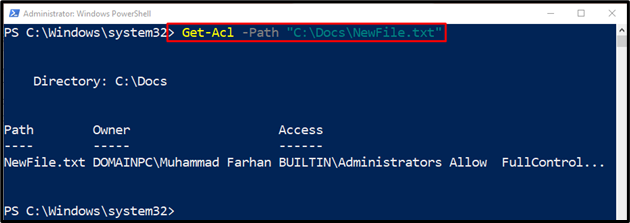
Run the provided command to check the descriptor of a file was copied to another file or not:
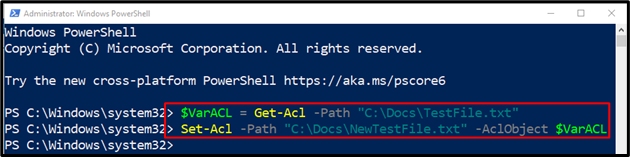
Example 2: Use the “Set-Acl” Cmdlet to Copy a Descriptor from One File to Another
Execute the following code to copy one file’s descriptor to another file:
Set-Acl -Path "C:\Docs\NewTestFile.txt" -AclObject $VarACL
According to the above code:
- First, initialize a variable and assign it a file using the “Get-Acl” cmdlet.
- Next, use the “Set-Acl” cmdlet, then add the “-Path” parameter and assign it the file address.
- Lastly, use the “-AclObject” parameter and specify the above-stated variable:
Example 3: Use the “Set-Acl” Cmdlet to Apply Descriptor to Multiple Files
Run the below-given code to apply the descriptor of one file to all files in the specified folder:
Get-ChildItem -Path "C:\New" -Recurse -Include "*.txt" -Force | Set-Acl -AclObject $Var1Acl
Here:
- First, initialize a variable “$Var1Acl” and assign it the “Get-Acl” cmdlet to retrieve file details.
- Then, use the “Get-ChildItem” cmdlet along with the “-Path” parameter and assign it to the directory containing multiple files.
- Next, use the “-Recurse” parameter to look for the files even in the subdirectories.
- Use the “-Include” parameter and specify the “*.txt” value to only select the text files after that pipe it to the variable “$Var1Acl” using the “Set-Acl” cmdlet:

That’s all! We have provided the usage of the “Set-Acl” cmdlet in PowerShell.
Conclusion
PowerShell’s “Set-Acl” cmdlet is used to change the security descriptor of a specified item, registry key, or file. It uses the “-AclObject” parameter to specify the security descriptor. The provided security descriptor contains values that need to be supplied. This post elaborated on the usage of the “Set-Acl” cmdlet in PowerShell.
Source: linuxhint.com