How to Use the Data Import Wizard in Salesforce
Data Import Wizard Integrations
- As we discussed, we only import the records of specific standards. They are accounts, contacts, leads, solutions, campaign members and person accounts.
- The Data Import Wizard supports all the custom objects.
- At a time, it is possible to import only 50K records.
- Also, each record is limited to 90 fields.
- The Data Import Wizard does not support deletion.
- The good scenario in using the Data Import Wizard is that we can include/exclude the duplicate records while importing.
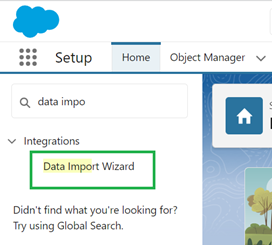
Quickly login to Salesforce Org (Production/Sandbox) and navigate to “Setup”. There, you will see the “Quick Find”. Type in the “Data Import Wizard”. You will see it under “Integrations”. Click on it.
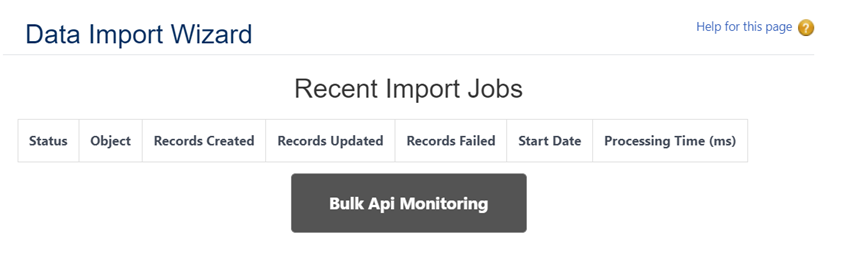
Then, navigate to this page where we can monitor and launch the Data Import Wizard.
Getting Started
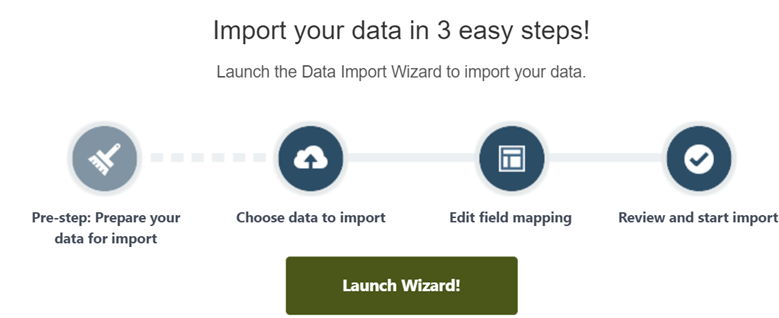
If you want to import the data using the Data Import Wizard, we need to go over three steps. Without getting late, click on “Launch Wizard!”.
Use Case 1: Add New Records
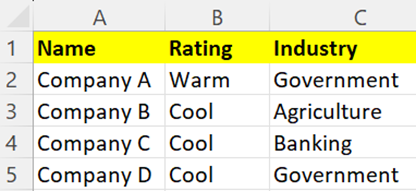
In this scenario, we will see how to insert new records into the Salesforce “Account” object using the Data Import Wizard. Let’s have the following four records in a CSV file.
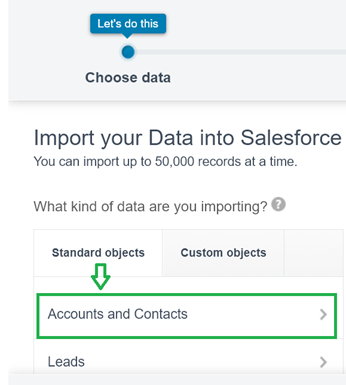
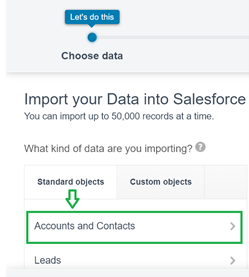
Step 1: Now, we are in the first step where we need to choose the “Accounts and Contacts” under the “Standard objects”.
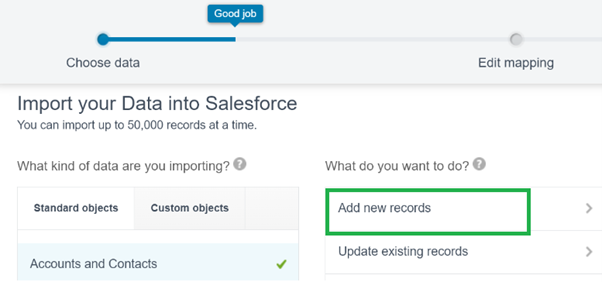
Choose “Add new records” option as we insert new records.
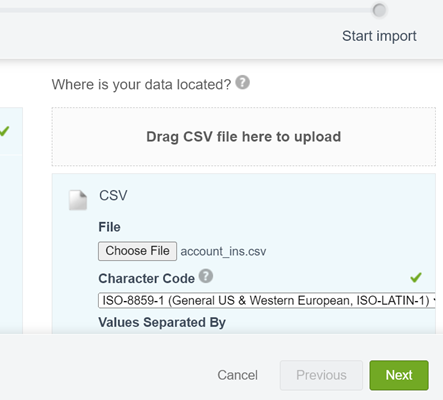
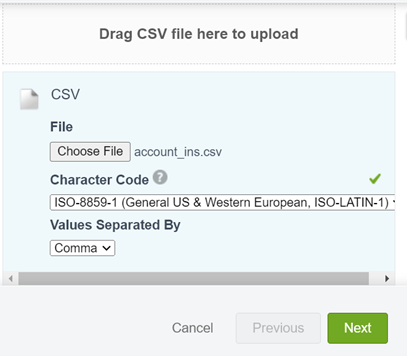
It’s time to upload the CSV file from the local path. Here, we click on CSV and upload the previous CSV file.
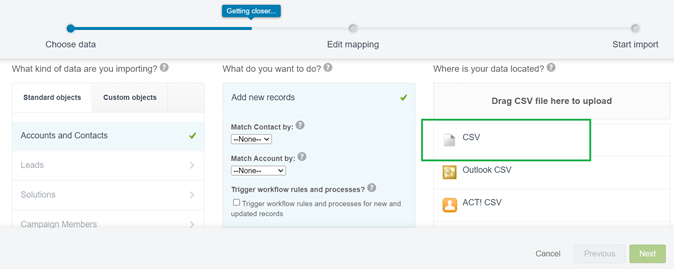
The “acccount_ins.csv” file is uploaded. Click on “Next”.
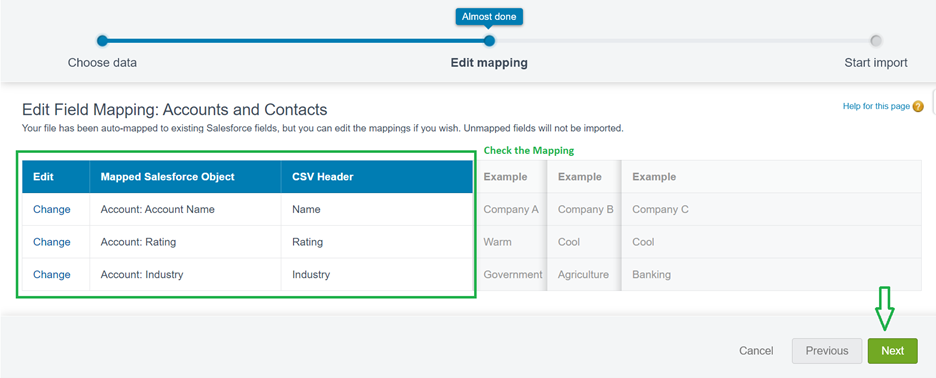
Step 2: Step 1 is done. Now, we need to map the Account object fields with column names in the CSV file. It maps the fields by default. We need to cross verify the mappings and change if anything is wrongly mapped. Then, go to “Next”
Step 3: In this stage, we can verify the total number of mapped and unmapped fields, object and CSV file. Start importing and click on “OK” to view the import status (pop-up).

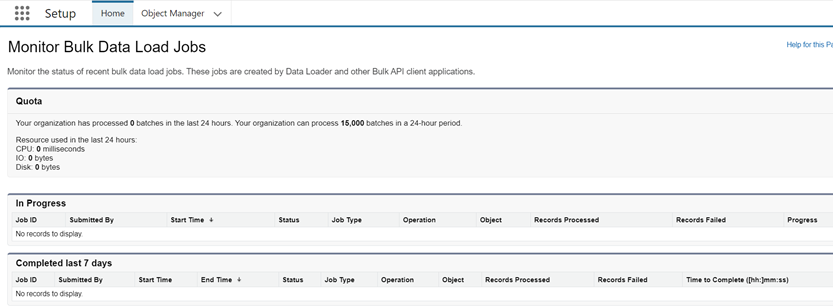
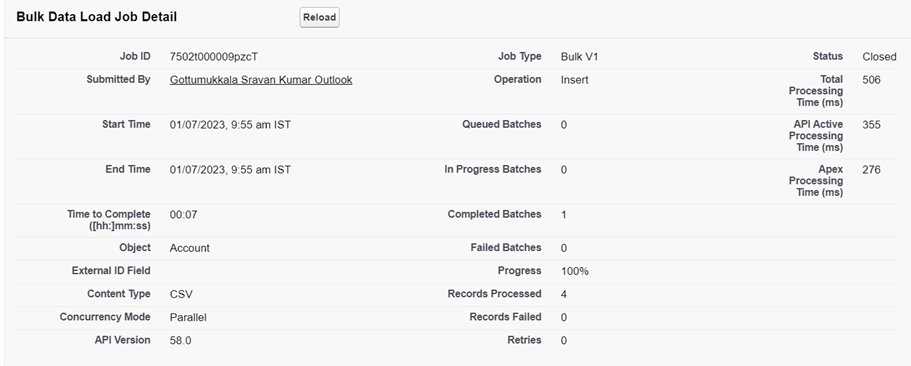
We can view the processed records details under the “Bulk Data Load Job Detail”.
Check:
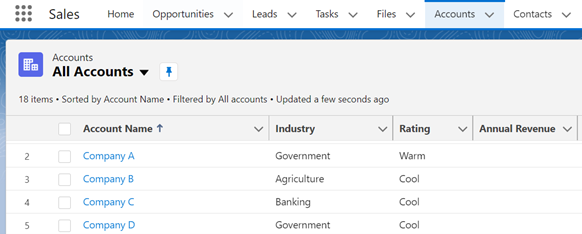
Now, these four records appear in the Accounts view. Make sure that the “All Accounts List” view is selected.
Use Case 2: Update the Existing Records
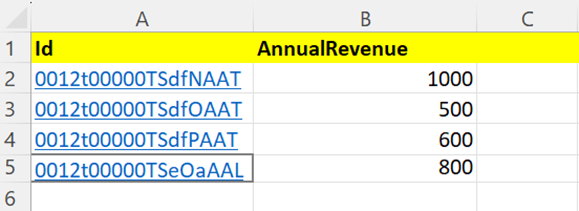
In this scenario, we will see how to update the “Annual Revenue” field of the existing records for the Salesforce “Account” object using the Data Import Wizard. Consider the previous CSV records that we inserted in the previous use case. Fetch the ID of these four records and set the “AnnualRevenue” to 1000, 500, 600 and 800.
Step 1: Now, we are in the first step where we need to choose the “Accounts and Contacts” under the “Standard objects”.
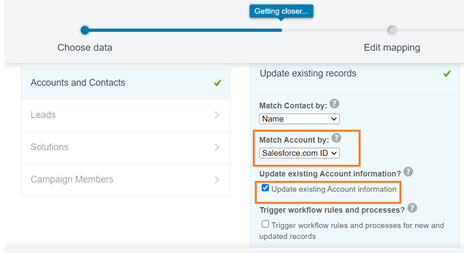
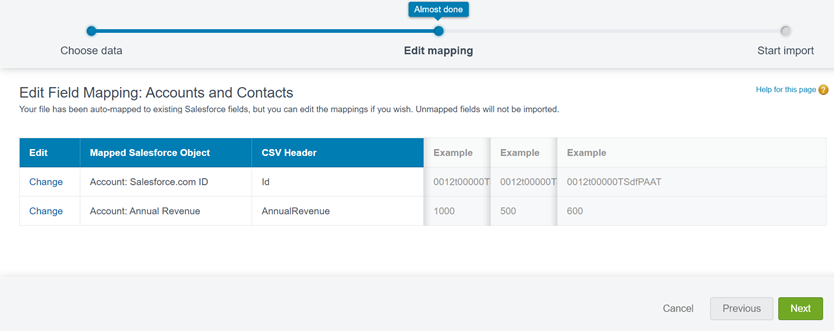
Now, select the “Update existing records” and set the “Match Account by:” parameter to “Salesforce.com ID” and the “Update existing Account information” to True (checked).
Upload the CSV file (account_ins.csv_) and click on “Next”.
Step 2: Check the Mapping and proceed.
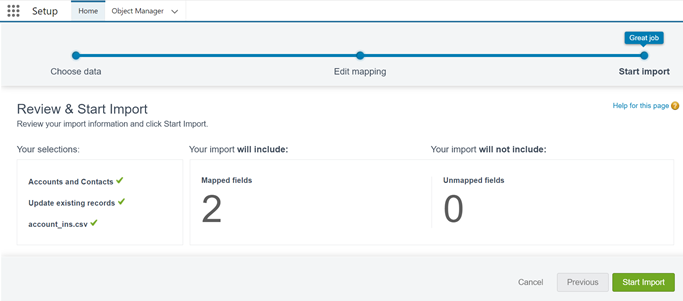
Step 3: Start importing (click the “Start Import” button.)
Check:
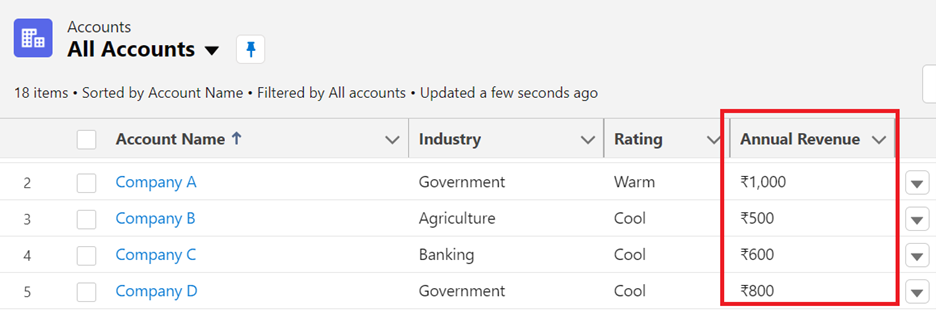
Previously, the “AnnualRevenue” is empty for all these four records. Now, we can see that the annual revenue is updated to all the records.
Conclusion
The Data Import Wizard at a time loads only 50,000 records. If you want to load the Accounts/Contacts, etc. without going to external data load, we can utilize this feature which can be directly used without any license. In this guide, we learned the two use cases that insert and update the account records in each use case. To get clear understanding, the step-by-step process is explained along with screenshots.
Source: linuxhint.com