How to Use the atq Linux Command
The atq command displays a list of all pending jobs and their details, such as hour, date, username, queue, and the job number. The atq command mainly works as a supplement for the at command used to schedule jobs, and we will cover how to use the atq command in this post.”
Basic Usage of the atq Linux Command
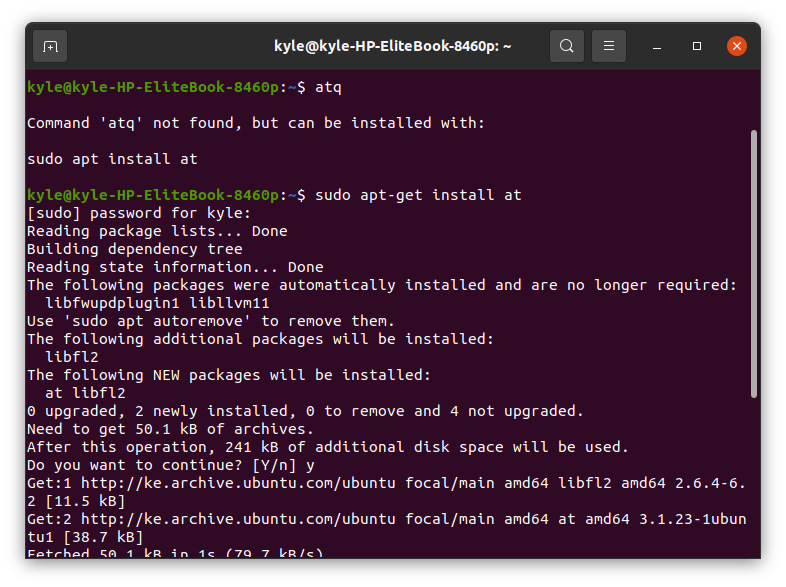
The atq command will display all the jobs scheduled with the at command. To start using the atq command, you need to install the at tool using the command below.
Once installed, you can start using the command by opening its help page.
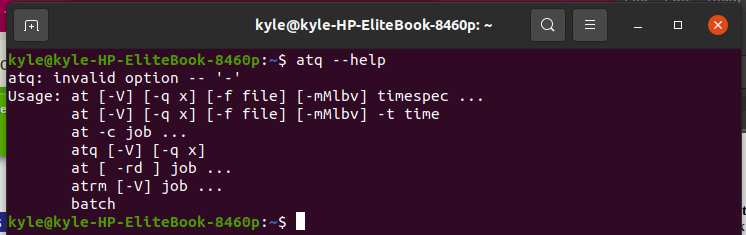
You will notice that even though it lacks many options, the few options available can come in handy, and we will see that in this post.
The atq command will only display the scheduled jobs. So, let’s create a few jobs using the at command.
Scheduling a Script Job
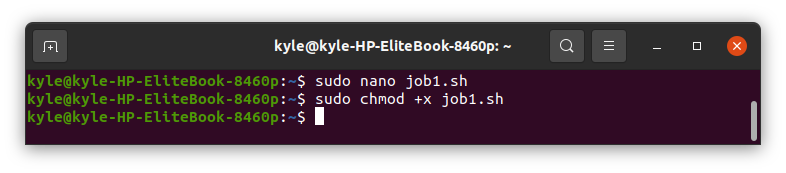
Open your editor, such as nano, and create a simple bash script like the one below. Let’s create a job1.sh script.
Save the script and make it executable.
Next, schedule the script to execute after one hour using the command:

Viewing All Scheduled Jobs
The obvious way to see all the scheduled jobs is to run the atq on the command line.
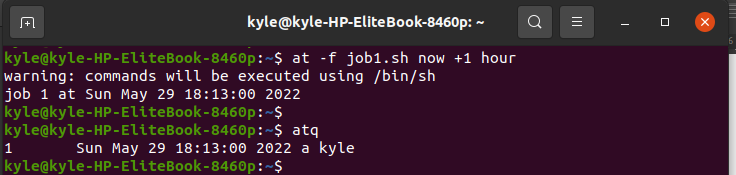
Here, you will notice the job we created a while ago.
a – it represents the name of the queue
kyle – the username of the person who scheduled the job
18:13:00 – the hour to execute the job
Sun May 29 – it represents the date the job will run
1 – it represents the job number
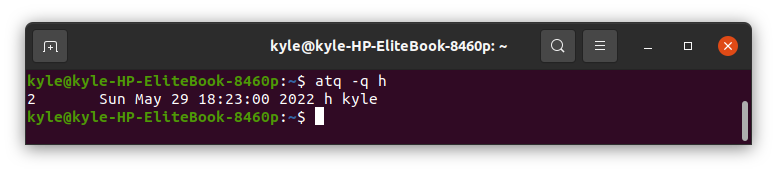
Display Jobs of Specific Queue
By default, a is the queue name used by the at command. However, you can create jobs with different queue names and use the atq command to display jobs based on the queue name.
To create a job with a different queue name, create another bash script job2.sh, but in this case, schedule the job using the command:

Next, display the scheduled jobs. You will note we now have job number 2 with the queue name as h.

To display only jobs for queue h, use the command:
The output will now display jobs with h as the queue name.
Note: When displayed using the atq command, a running job will have the ‘=’ sign in its queue name.
Furthermore, if you are root, the job schedule will display all the scheduled jobs even by other users. However, specific users will only see jobs that pertain to them alone.
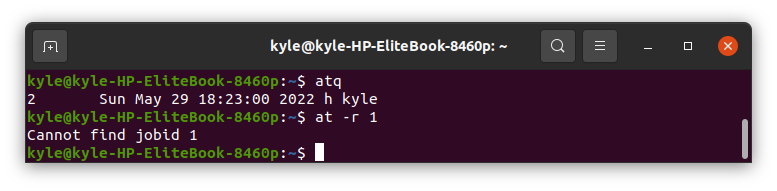
Remove a Job From Queue
The atq command helps see the list of scheduled jobs. However, if you see a job on the queue that you need to remove, you can achieve that using the command:
Here, 1 represents the job number of the job you wish to remove. In our case, it’s job 1. If we run the atq command, we will notice job 1 is now removed.
Other atq Options
-V: show the atq version.
-r: alias for atrm and is used to remove a job from the queue
-q: sets the queue name for the job.
-f: used to read a job from a file and is used when scheduling the job.
At -l: same as atq. It displays the scheduled jobs.
Conclusion
The atq Linux command works in combination with the at and atrm commands. Scheduling commands is part of using Linux, and if you need to check which jobs are scheduled, the atq command is your best buddy. Besides, if you are a system admin, you will see all the jobs on the queue, and you can remove scheduled jobs, as we have seen in the post. That said, it’s your turn now to use the atq command and schedule and view jobs to your liking.
Source: linuxhint.com