How to Use Laptop as a Monitor for Raspberry Pi
Since most users do have laptops nowadays, you can use them as monitors for Raspberry Pi and this article will show you how you can use a laptop as a monitor for the Raspberry Pi display.
How to Use Laptop as a Monitor for Raspberry Pi
Using your laptop as a monitor for Raspberry Pi is simple and you can do so easily by following the steps given below:
Step 1: Enable SSH on Raspberry Pi
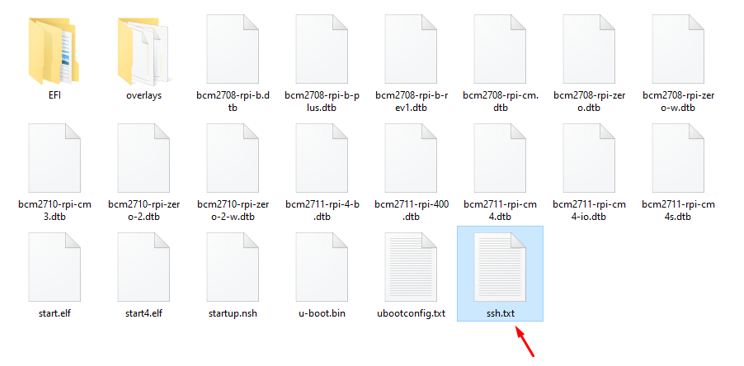
If you are using Raspberry Pi for the first time, you must enable the SSH service on your device. For this purpose, take out your Raspberry Pi SD card from your device and plug it into your laptop through a card reader.
Open the SD card folder and create an empty file with the name “ssh.txt”.
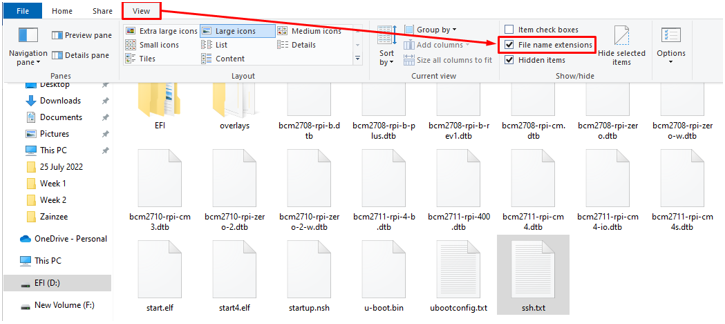
Now, head to the “View” option and checkbox the “File Extension” option.
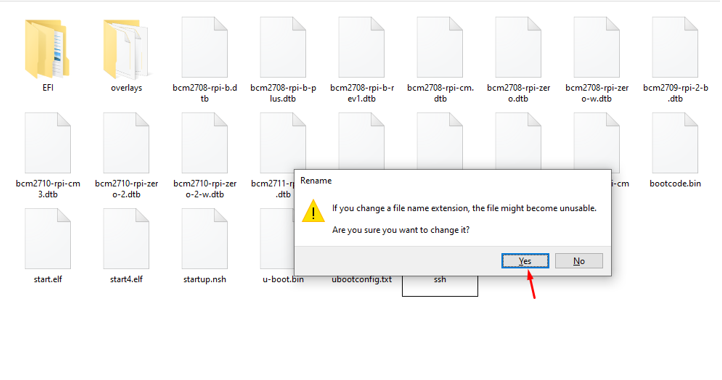
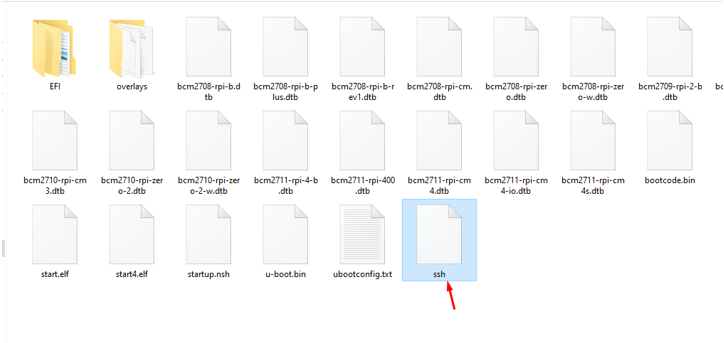
Remove the .txt extension from the “ssh.txt” file by renaming it and click the “Yes” option to ignore the warning.
This will successfully create an SSH file.
Step 2: Enable Wi-Fi on Raspberry Pi
You can easily connect Raspberry Pi to the internet through an Ethernet cable; however, if you don’t have a cable, you can use this method to connect the device to your Wi-Fi network.
Create a file with the name “wpa_supplicant.conf” inside the Raspberry Pi SD card directory.

Open the created file and paste the below-mentioned text:
ctrl_interface=DIR=/var/run/wpa_supplicant GROUP=netdev
update_config=1
network={
ssid="Name of your WIFI Network "
scan_ssid=1
psk="Password of your WIFI Network"
key_mgmt=WPA-PSK
}
From the above text, it’s important to note that you must specify your country code and add the exact name of Wi-Fi and password to connect your device to the network successfully.
After doing the following changes inside the file, save it and remove your SD card from a laptop, turn on your Raspberry Pi device and insert the card into it.
Step 3: Access Raspberry Pi Terminal from Laptop
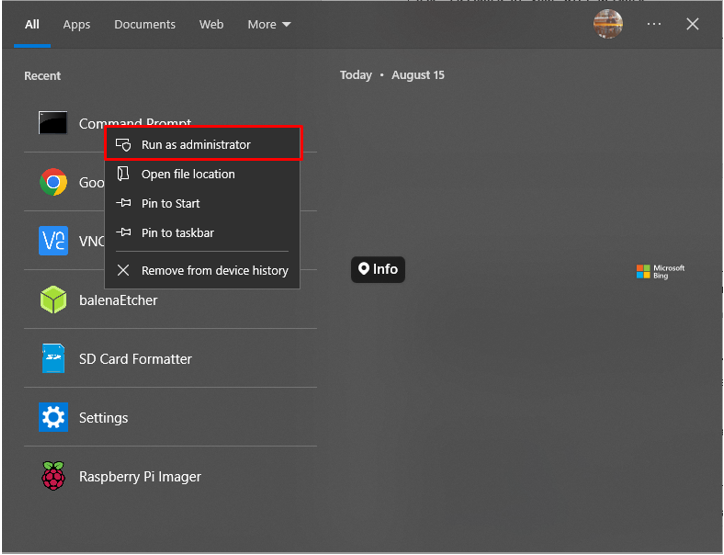
Now, to access the Raspberry Pi terminal from a laptop, open Command Prompt with Administrator by right clicking on it.

Next, use the following command on Command Prompt to access the Raspberry Pi terminal:
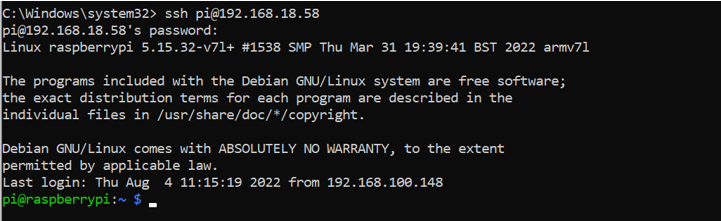
You must remember your username and password that you set after finalizing the Raspberry Pi setup at the initial stage. In case you don’t know about your Raspberry Pi IP address, you can execute the “arp -a” command in Command Prompt to find the address associated with your device.
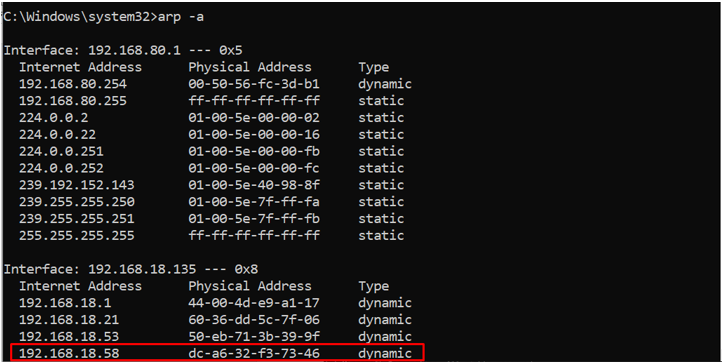
If you have multiple devices connected to your network, you must try each IP one by one, so it’s better to turn off Wi-Fi for other devices except for your laptop.
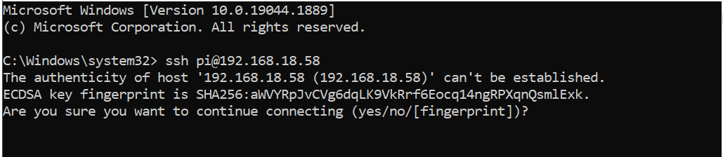
After executing the SSH command, enter “yes” to allow connecting to your Raspberry Pi device. Add your Raspberry Pi default password and press Enter.
![]()
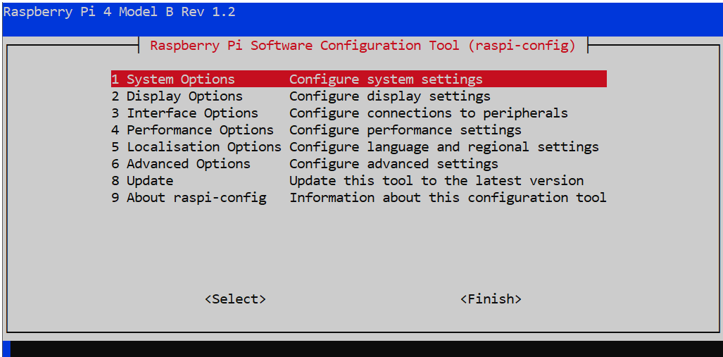
Step 4: Enable VNC on Raspberry Pi
VNC is a platform that allows users to use the Raspberry Pi device display on your laptop. However, by default, this service is disabled on your device. To enable it, open Raspberry Pi configuration on Command Prompt using the following command:
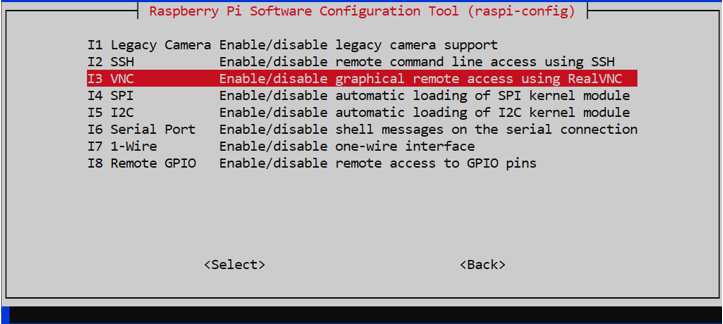
Head towards the “Interface Options” and select the “VNC” option.
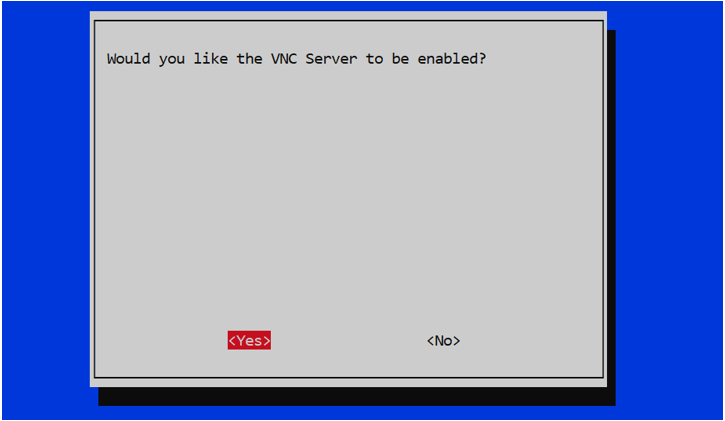
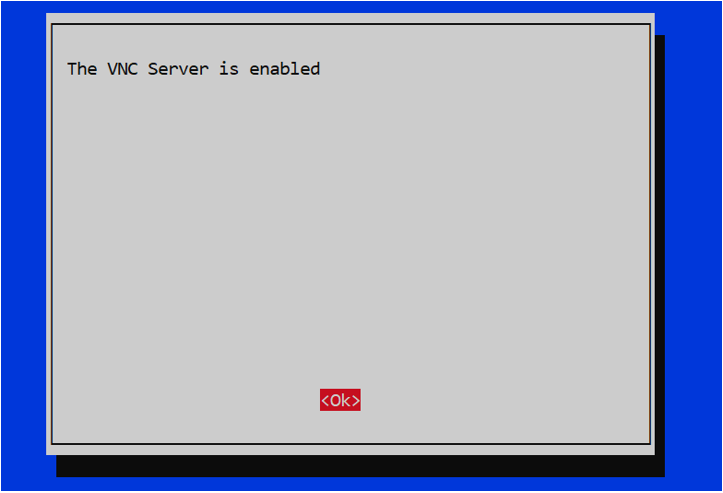
Select the “Yes” option to enable the VNC service on the Raspberry Pi device.
Step 5: Download and Install VNC Server on Laptop
Now, download and install the VNC server on your laptop, which you can do so by heading toward the VNC installation page and downloading the .exe file.
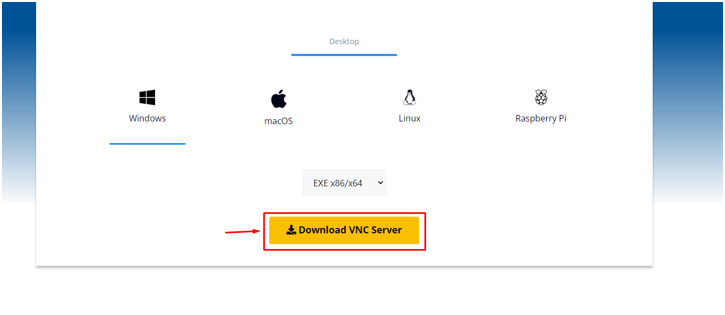
Install the .exe file on your laptop.
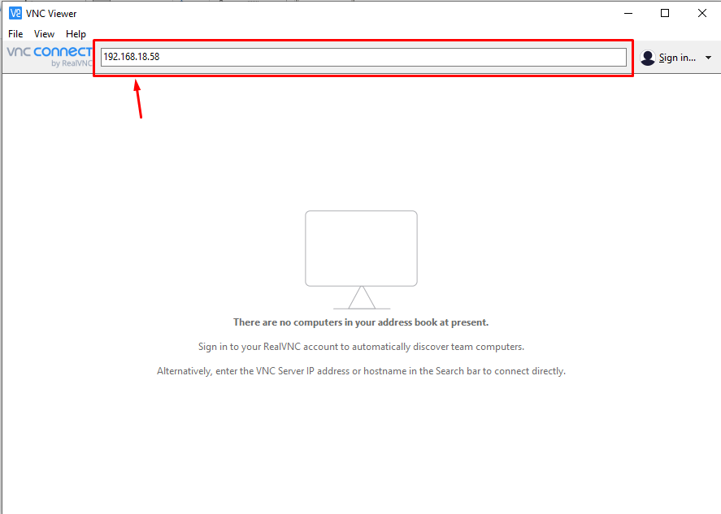
Step 6: Access Raspberry Pi from VNC on Laptop
After successfully installing VNC on a laptop, run the application on your desktop and enter the IP address of your Raspberry Pi in the highlighted section as shown below:
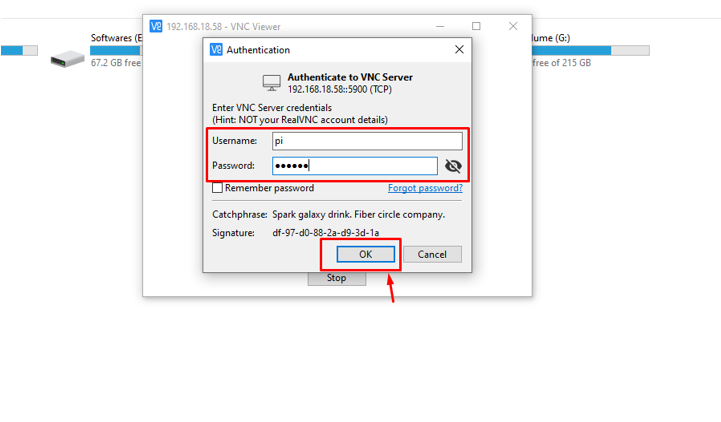
Type your Raspberry Pi username and password and press Enter.
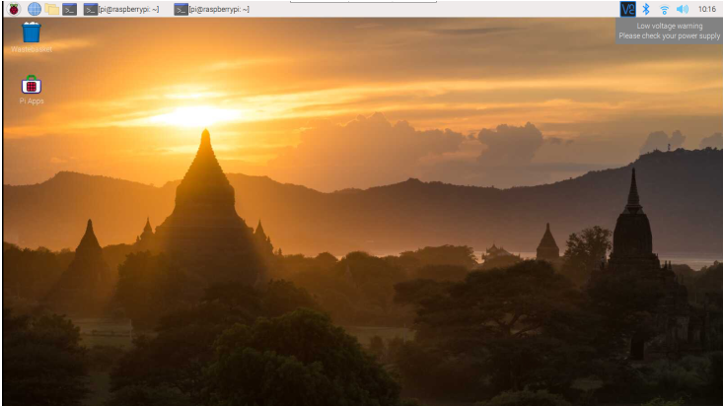
This will show the Raspberry Pi desktop on the VNC server and you can use it without requiring any separate mouse or keyboard because you can control it with your laptop touchpad and keyboard.
Conclusion
The Raspberry Pi display on your laptop is crucial for users who don’t want to purchase a separate desktop environment. To do this process, you must enable SSH and WIFI on your Raspberry Pi’s SD card by creating files within the SD card’s directory. Next, you must enable the VNC service by opening the Raspberry Pi configuration on Command Prompt using the device’s IP address. Once done, you must install the VNC server on your laptop and provide your device IP address, username, and password to start using your laptop monitor as a Raspberry Pi display.
Source: linuxhint.com