How to Use IRC on Ubuntu
You might have heard about real-time internet communication between different users using some special platform. IRC (Internet Relay Chat) is primarily intended for group interaction in discussion boards called channels, but it also supports private messaging, chat, and data transmission, especially file sharing, in addition to one-to-one communication. In such forums or channels, you can discuss anything of interest with like-minded people to gain knowledge, expand your learning areas, teach others, and add positivity to the technology era. In this article, we will show you how to install an IRC client on Ubuntu and how to use it with some example commands and outputs.
Update and Upgrade the Ubuntu System
Before starting, we should make sure that the system that we are using is already in its most updated form. If you are not sure about that, open your command-line utility in the Ubuntu system first and run the following command in the terminal to update it. Within a few seconds, your system will be updated while you are relaxing.
Hit:1 http://packages.microsoft.com/repos/code stable InRelease
Get:2 http://security.ubuntu.com/ubuntu jammy-security InRelease [110 kB]
Fetched 438 kB in 3s (135 kB/s)
Reading package lists... Done
Now, it’s time to upgrade your system as well. For this, we use the same pattern of apt instruction with a single word change which replaces update with an upgrade as shown in the following. The upgrade instruction might take a little longer to get the system utilities upgraded.
Reading package lists... Done
Calculating upgrade... Done
After this operation, 55.9 MB of disk space will be freed.
Do you want to continue? [Y/n] y
Fetched 184 MB in 25min 42s (119 kB/s
Processing triggers for dbus (1.12.20-2ubuntu4.1) ...
Setting up nautilus (1:42.2-0ubuntu2.1) ...
Step 1: Install the IRC Client
Installing an IRC client on your Ubuntu machine is the first step. Among many of the IRC clients which are available on the web, Polari is one of them that can be utilized in the Ubuntu Linux system. Polari is an IRC client for the GNOME desktop environment which is written in JavaScript and uses the GTK+ toolkit. It is designed to be simple, easy to use, and visually appealing as it has a graphical user interface that works very well.
Let’s look at installing Polari on Ubuntu and using it. First, we should have a Linux system with the “Apt” utility that is already working on it. Then, we launch the command shell of our Ubuntu Linux system and run the following apt instruction to install Polari. Installing won’t require much of your time. The following listed instruction installs Polari at its best along with all of its dependencies.
Reading package lists... Done
The following NEW packages will be installed:
gir1.2-telepathyglib-0.12 gir1.2-telepathylogger-0.2
libmission-control-plugins0 libtelepathy-glib0 libtelepathy-logger3 polari
telepathy-idle telepathy-logger telepathy-mission-control-5
0 upgraded, 9 newly installed, 0 to remove, and 8 not upgraded.
After this operation, 5,083 kB of additional disk space will be used.
Do you want to continue? [Y/n] y
Fetched 1,144 kB in 12s (98.0 kB/s
Setting up polari (41.0-3) ...
Step 2: Launch Polari
Once the installation of Polari “a real-time communication channel” is completed, you have to launch it by searching it from the search area of your Ubuntu system in the application menu or by simply using the command-shell query area. The command is as follows:
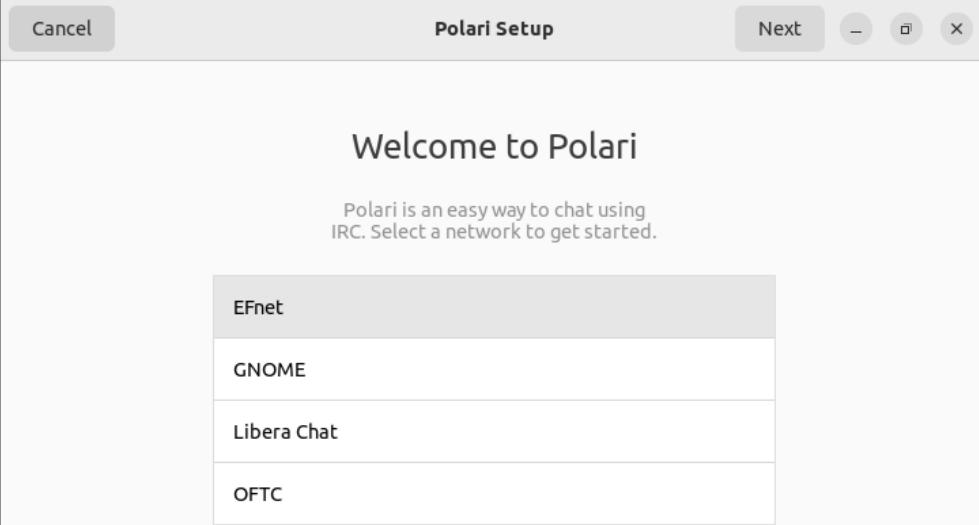
When you first launch Polari, you are prompted to create a new account. To create a new account, click on the “Create” button and fill in the required information such as your username, server, and password. The Welcome screen of Polari Setup is shown in the attached image. You need to select the network type that you want to connect with the Polari users.
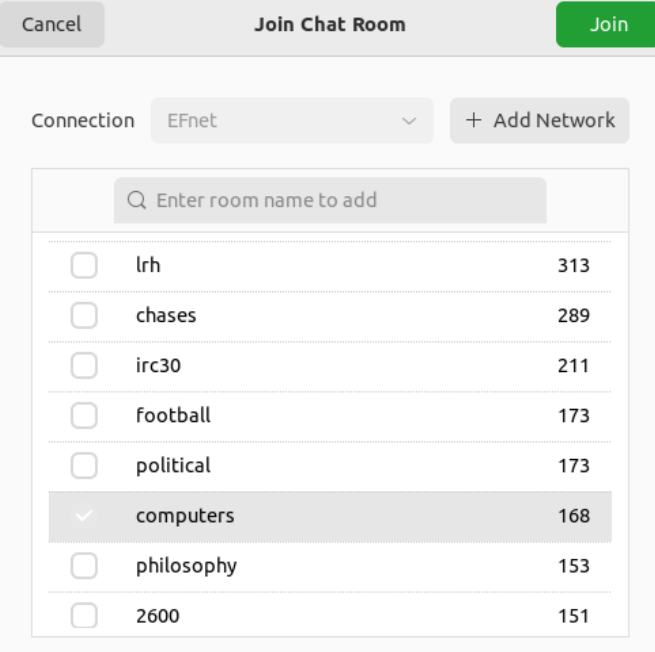
Once you created an account, you can join a room by clicking on the “+” button in the top right corner of the window and entering the name of the room that you wish to join. You can also join the rooms by clicking on the “Rooms” button in the sidebar and selecting a room from the list. You can see the available built-in rooms there. Choose any one of them to get in; we choose “computers”. Tap the “Join” button after that.
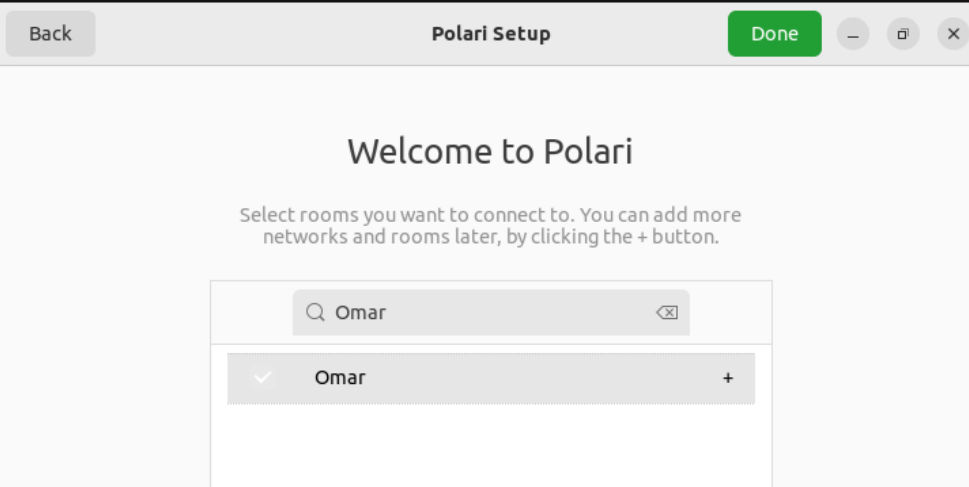
If you want to create your room, you can do so using the Welcome screen of Polari. In its Setup Welcome screen, you will see a text area as shown in the following image. Click on it and write the name of a room that you want to create like “omar”. Then, tap “Done” to continue.
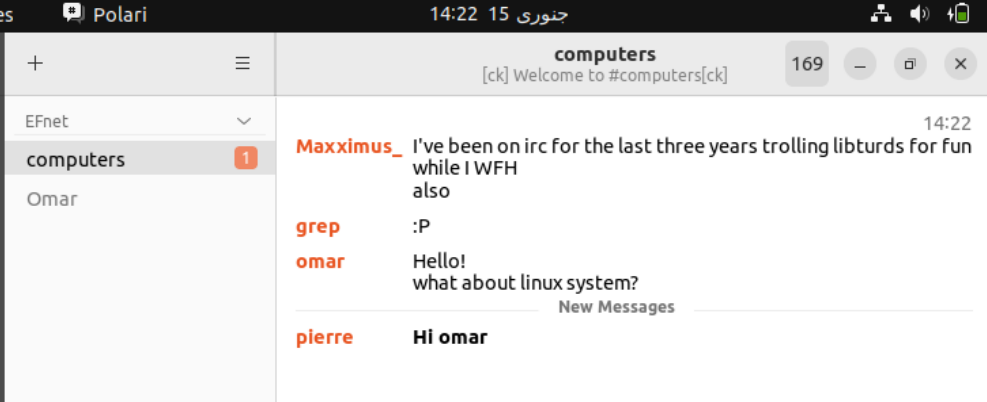
The chat screen of “Polari” is shown in the attached photo. Once you join a room, you can start chatting with the other users. Simply write your message in the text box at the bottom of the window and hit enter to send it. To view the previous messages in a room, click on the “History” button in the sidebar. The following attached photo shows the conversation between our user and other Polari users in the “computers” room. You can also change the settings of a room by clicking on the “Room Settings” button in the sidebar. This allows you to change the topic of the room, invite other users to the room, and more.
When you join a room, you will see a list of users in the room on the sidebar, i.e. “169”, along with their status (e.g. online, away). You will also see a list of previous messages in the room in the main window. When you send a message, your message appears in the main window, along with your username and the timestamp on the right-most side. For example, the attached image shows the number of messages between the user “omar” and others who are connected around the world.
In this chart area, you can see the chatting of the other users that are communicating with each other before you join the particular room. When you receive a message, the message appears in the main window, along with the timestamp and the username of the person who sent the message. For example:
Conclusion
Polari is a simple and easy-to-use IRC client for Ubuntu. It allows you to join rooms, chat with the other users, and change the settings of a room. Starting from the introductory paragraph, we explained the uses of IRC in the computer field and its advantages. After this, we covered the Ubuntu instructions with an explanation to update and upgrade our system and the installation of Polari with a simple “apt” utility in the command line. With the discussed method, you will be able to use the Polari IRC in the Ubuntu system.
Source: linuxhint.com