How to Use Git With VisualSVN Server?
Using Git with SVN provides the various advantages of a distributed versioning control system. It maintains compatibility with an existing SVN infrastructure. It permits all SVN teams to take advantage of Git’s powerful features and workflows without completely leaving SVN.
This guide briefly explains the process for using Git with SVN.
How to Use Git With VisualSVN Server?
To use Git with SVN, try out the below-mentioned step:
- Download the “VisualSVN Server” on your system.
- Launch the downloaded setup for starting the installation process.
- Mark the agreement box to agree with the terms.
- Add the required information step by step.
- Create an SVN repository and copy the URL on the clipboard.
- Launch “Git Bash” on your system.
- Navigate to Git local directory.
- Clone the SVN repository utilizing the “git clone” command with the URL of the SVN repository.
- Verify the cloned repository with the help of the “ls” command.
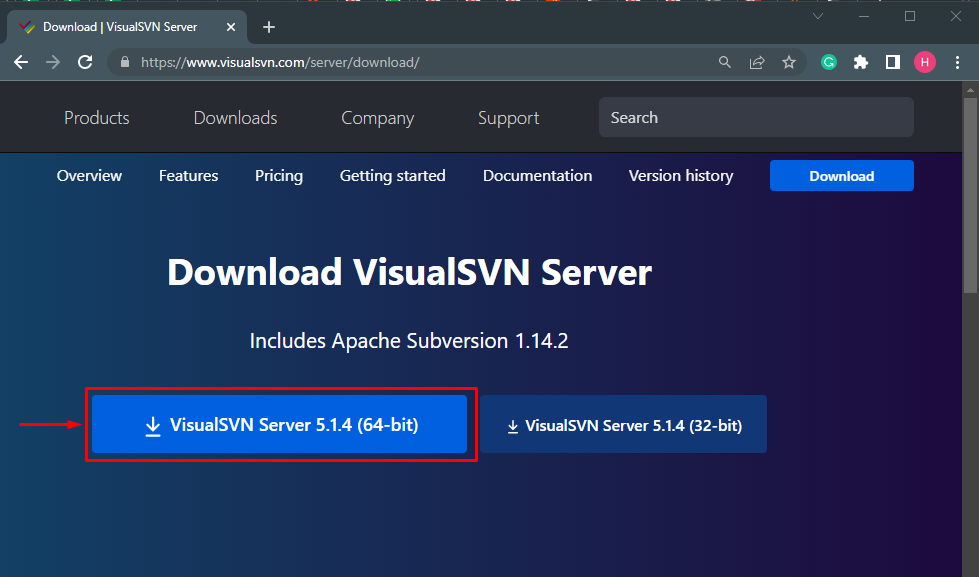
Step 1: Download VisualSVN Server
First of all, search VisualSVN server on your preferred web browser and download the setup. Furthermore, visit the provided link VisualSVN Server and click on the highlighted area to start downloading the SVN setup:
Step 2: Verify the Downloaded Setup
Open the downloads folder and verify the downloaded setup:

Step 3: Install VisualSVN Server
Click on the downloaded file and hit the “Next” button to move ahead:

Step 4: License Agreement
Mark the checkbox to accept the license agreement and click on the “Next” button:

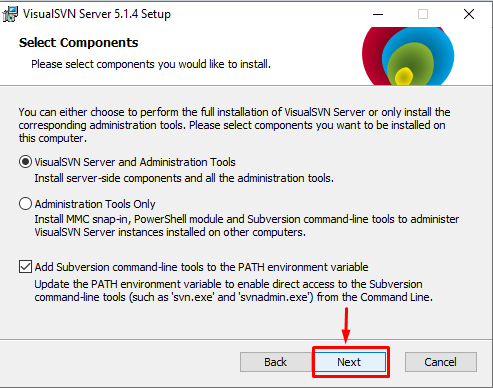
Step 5: Select Component
Next, choose your preferred components and move forward by hitting on highlighted area:
Step 6: Setup Configuration Setting
Now, set the mentioned configuration setting, including “location”, “Repositories”, “Server Port” and “Backups” location, and move ahead:

Configure the repository search indexing by marking the checkbox and providing the desired folder path:

Move ahead by clicking on the “Next” option to start the installation process:

The progress bar indicated that the installation process has been started successfully:

Step 7: Create SVN Repository
After a successful installation, the VisualSVN server main window will be launched. Now, create an SVN repository to start working on it. For that purpose, hit the “Create new repository” option to generate an SVN repository:

Step 8: Specify the Repository Type
Choose the type of repository according to your specification and move forward:

Step 9: Set Repository Name and Structure
Here, set the name of the SVN repository. In our case, we have typed “firstsvnRepo” and click on the “Next” button for moving toward the next step:

Choose your preferred repository structure:

Mark the provided box if you want to allow the repository search indexing:

Step 10: Copy the URL of SVN Repository
Next, go toward the “Repositories” and right-click on the newly created or preferred SVN repository you want to clone in Git. A small prompt window will appear on the screen, copy its URL path on the clipboard for further use. Here is the path of our repository:
Note: The path of the SVN repository varies from system to system.
Step 11: Launch Git Bash
Open “Git Bash” on your system by using the “Startup” menu:

Step 12: Navigate to Local Git Directory
Run the “cd” command and redirect to the Git local directory:
Step 13: Clone SVN Repository in Git
Now, clone the SVN local repository in Git by executing the “git clone” command along with the copied URL of the SVN local repository:
The resultant image indicates that the SVN repository has been cloned in Git local directory successfully:

Step 14: Verify SVN Cloned Repository
Run the “ls” command for checking whether the cloned repository exists in the Git directory or not:
The below-stated output determines that the SVN repository has been cloned and is available as a subdirectory in the Git local directory:

That’s all about using Git with a VisualSVN server.
Conclusion
To use Git with the VisualSVN server, first, install “VisualSVN Server” on your system. Then, create an SVN repository and copy the URL on the clipboard. After that, launch the Git Bash utility and move to the Git local directory. Next, clone the SVN repository using the “git clone” command along with the URL of the SVN repository and verify the cloned repository with the help of the “ls” command. This guide demonstrated the procedure for using Git with the VisualSVN server.
Source: linuxhint.com