How to Use Docker to Make Local Development a Breeze
This post is all about how to use Docker for making local development a breeze.
How to Use Docker to Make Local Development a Breeze?
Docker components such as Docker Engine, Containers, and Docker images make local development a breeze. Containers are beneficial because they manage all the project dependencies, libraries, and code. When users are required to deploy the application, it is only needed to run a Docker image or container. With the help of containers, developers can quickly deploy applications on another machine.
To use Docker for local development, go through the given instruction.
Step 1: Create a Directory
First, open a folder where you want to create a new directory for local development. Next, right-click on the screen, and move the mouse pointer to the “New” option. After that, click on the “Folder” to create a new directory:
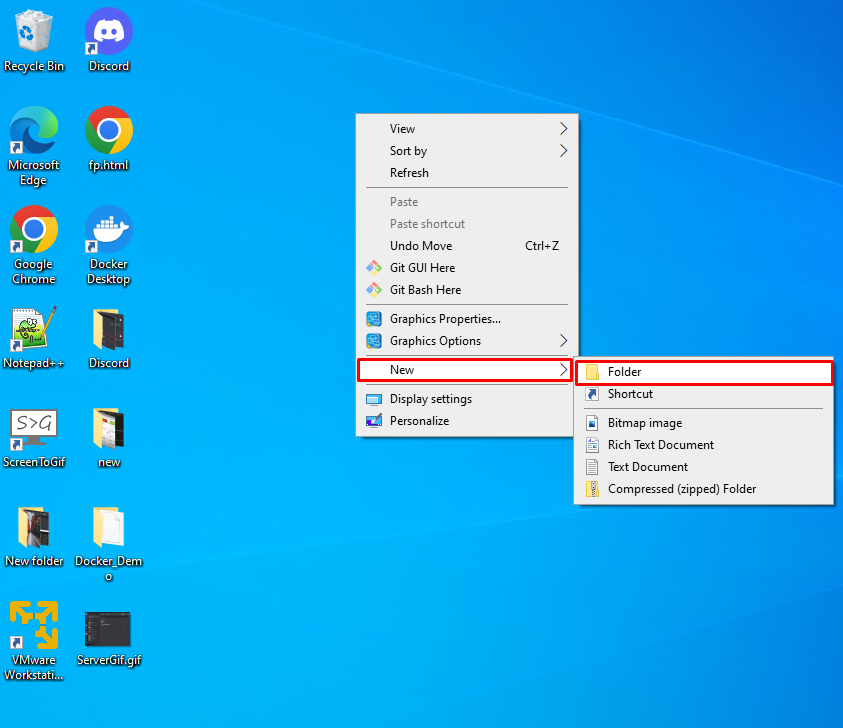
Here, you can see we have created a “DockerDemo” directory on the Desktop:

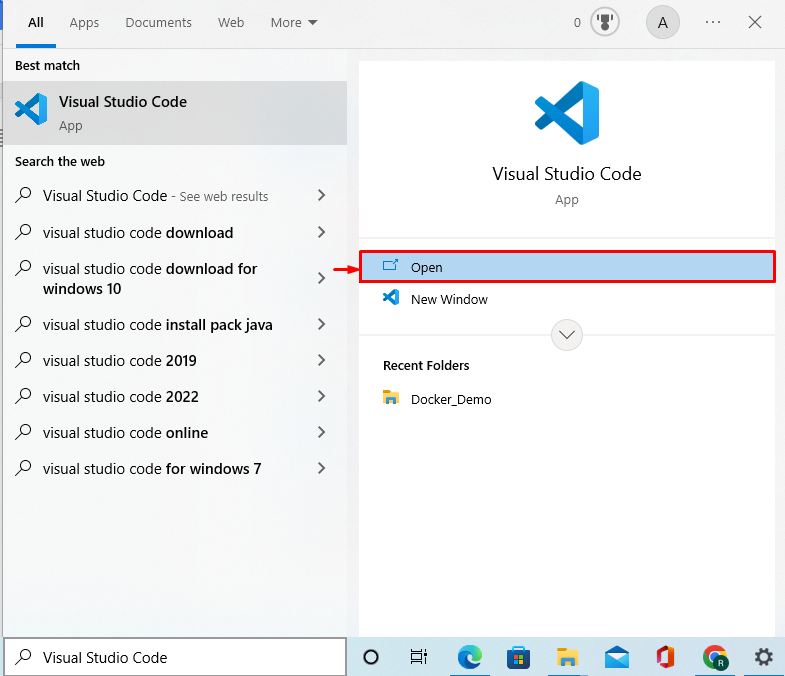
Step 2: Launch Visual Studio Code
In the next step, launch the Visual Studio Code editor from the Windows Start menu:
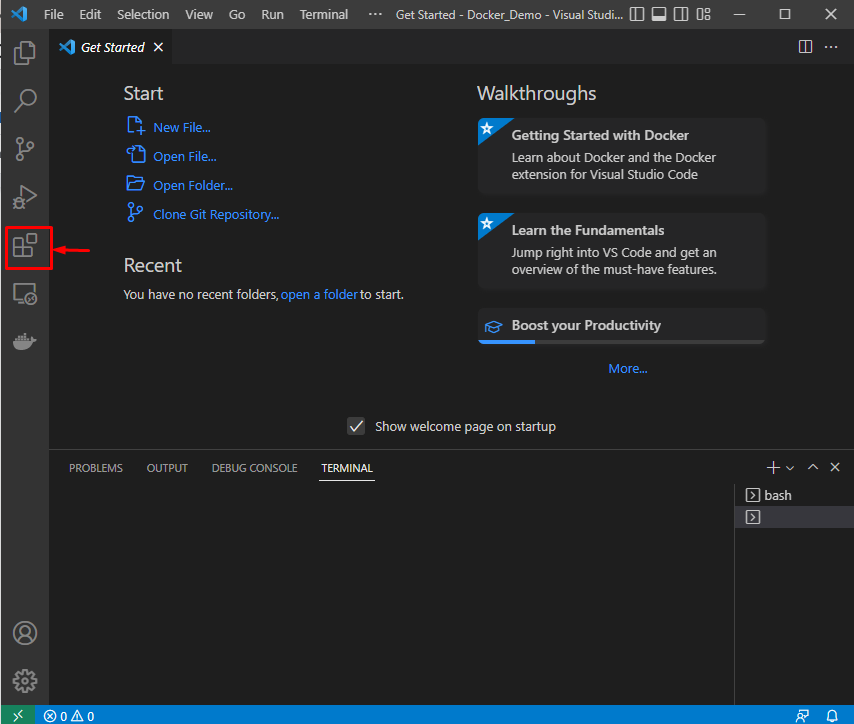
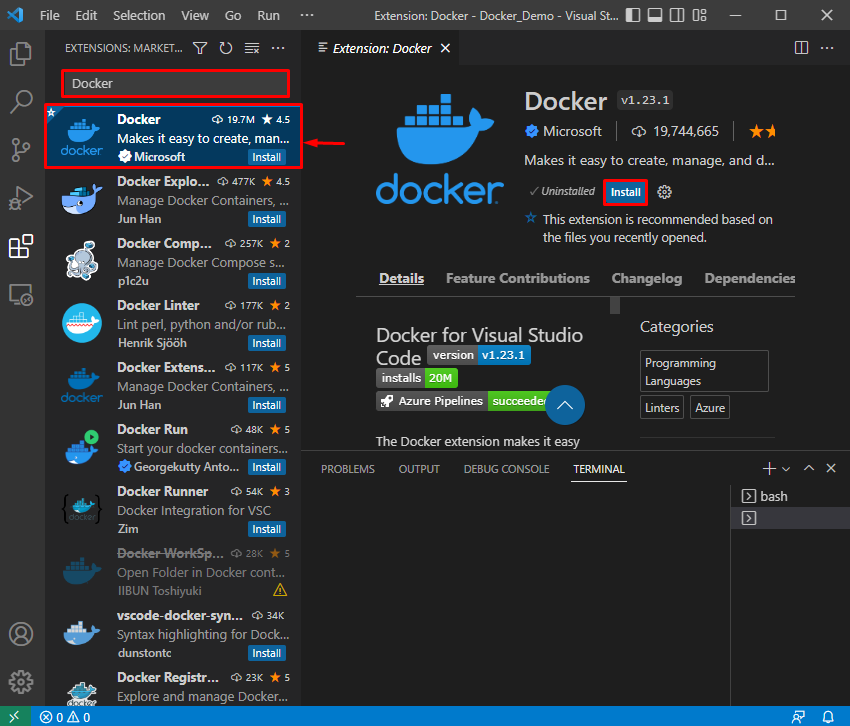
Step 3: Install Docker Extension
For the development using Docker, add an extension of Docker in Visual Studio to visualize projects and dependencies in Docker containers. For this purpose, click on the below-highlighted icon to add a Docker extension:
Search for “Docker” in the search field and install the below-highlighted Docker extension:
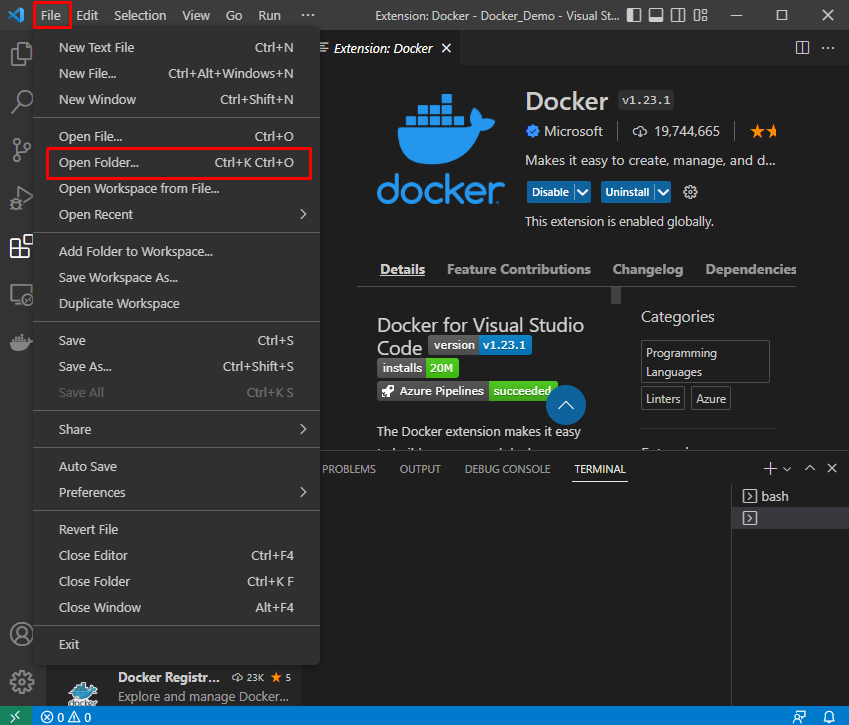
Step 4: Open Directory
Next, click on the “File” menu, and choose the “Open Folder” option to open the newly created directory:
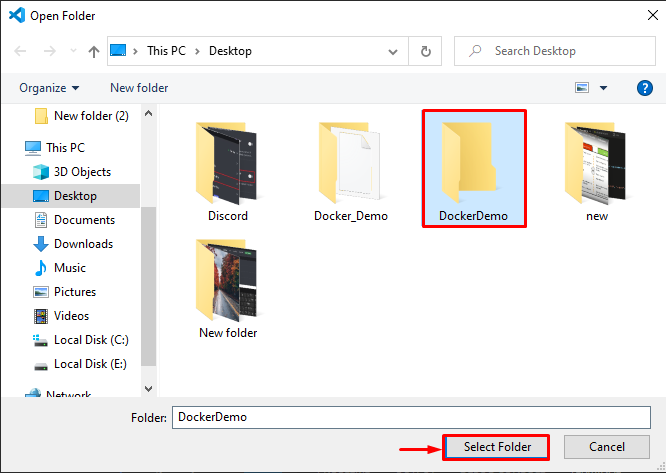
Here, go to the location where you have created a new directory for local development and open it by hitting the “Select Folder” button:
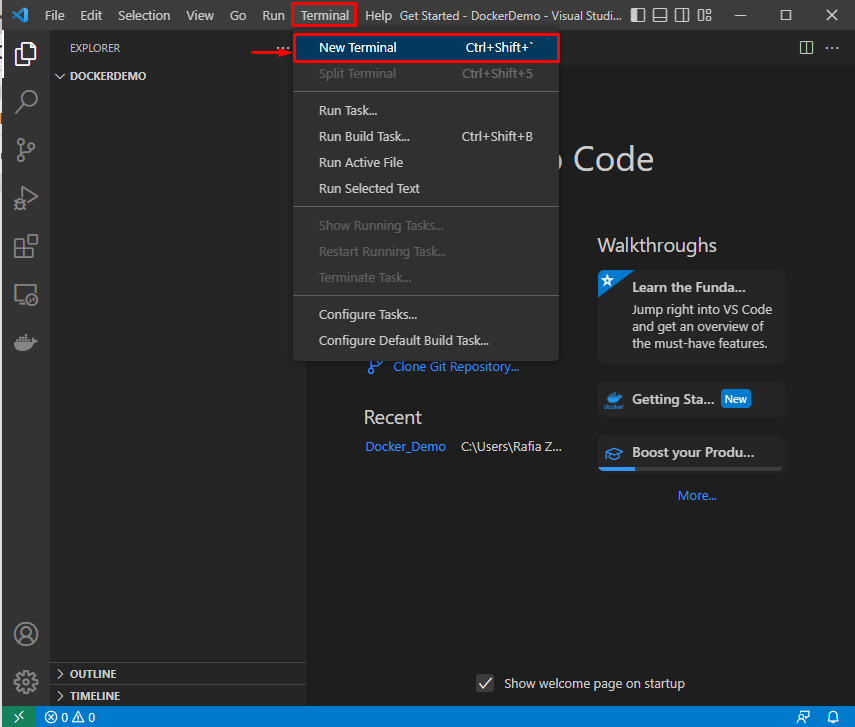
Step 5: Open Terminal
Press “CTRL+SHIFT+`” or open the “New Terminal” with the help of the Terminal menu:
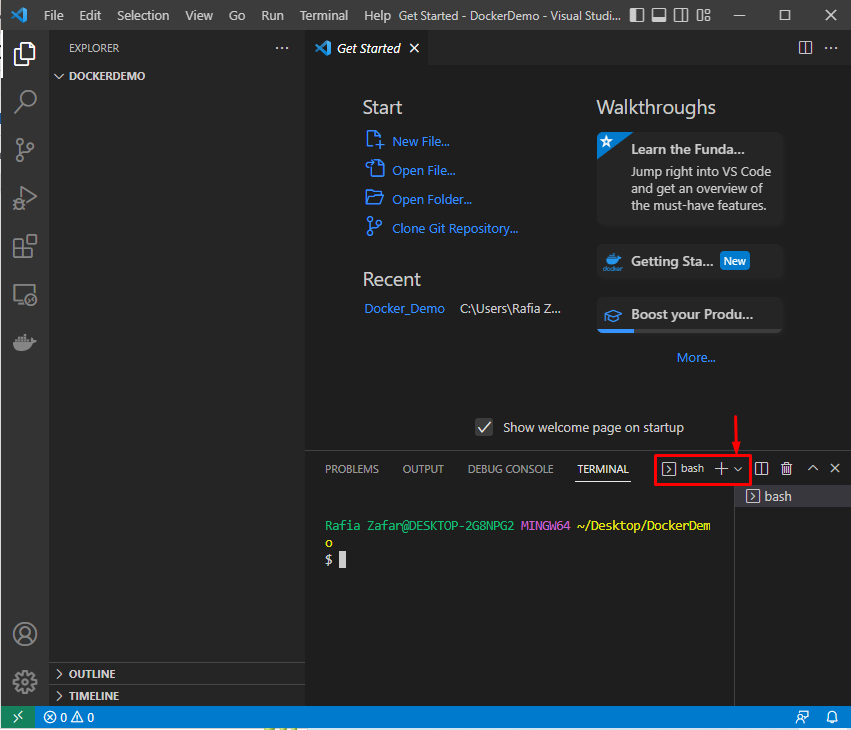
From the highlighted drop-down menu, users can open their favorite terminal:
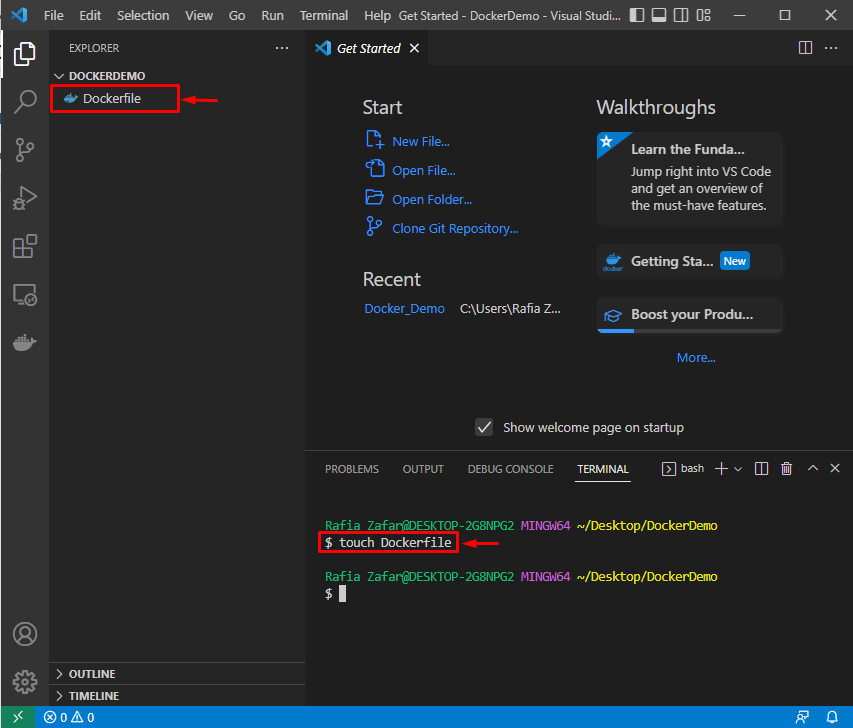
Step 6: Create DockerFile
Next, create a new DockerFile using the “touch” command:
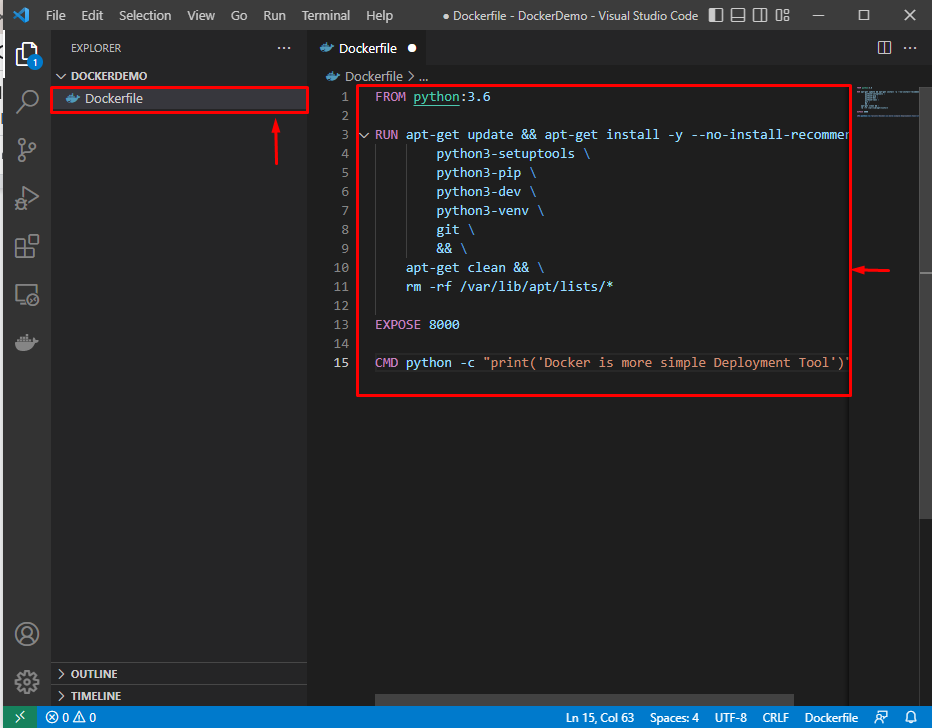
Paste the following code inside the Dockerfile. The code contains an instruction to run a simple python application that will display “Docker is a more simple Deployment Tool”:
RUN apt-get update && apt-get install -y --no-install-recommends \
python3-setuptools \
python3-pip \
python3-dev \
python3-venv \
git \
&& \
apt-get clean && \
rm -rf /var/lib/apt/lists/*
EXPOSE 8000
CMD python -c "print('Docker is more simple Deployment Tool')"
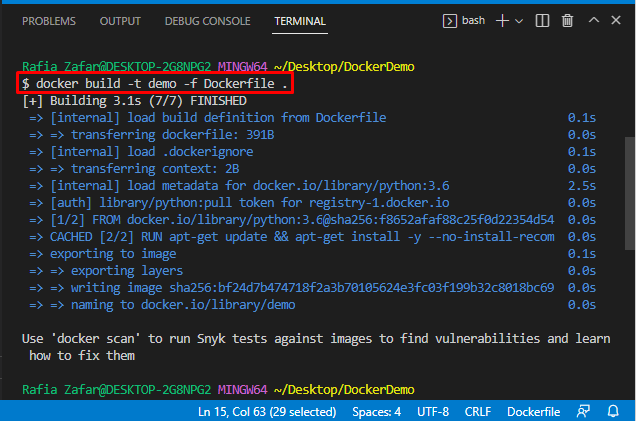
Step 7: Build Docker Image
Make a Docker image that will run the project in the container. The “-t” option is utilized to specify the image name:
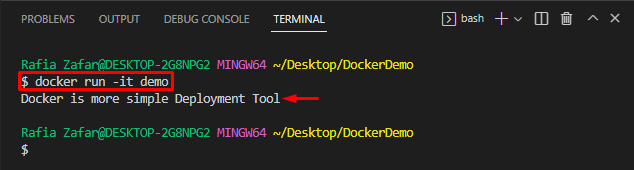
Step 8: Run Docker Image
Now, run the Docker image using the “Docker run” command:
Here, you can see we have successfully run the local application:
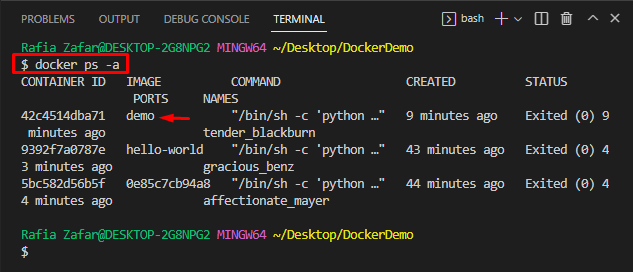
To visualize the docker containers as well as images, utilize the “docker ps -a” command:
Here you go! You have learned how to use the Docker tool for making local development a breeze.
Conclusion
To use Docker for making local development a breeze, first, launch the VS code editor. Then, open the directory in which you want to start local development. After that, create a Dockerfile as explained above. Then, create a Docker image with the help of Dockerfile using the “$ docker build -t demo -f Dockerfile .” command. Then, utilize the “$ docker run -it demo” command to execute the Docker image. This post has demonstrated how to utilize the Docker tool for making local development a breeze.
Source: linuxhint.com