How to Use Docker CLI on Mac Without the Need for Docker Desktop
Docker cli is a command-line tool that makes it easy to use docker-related commands right from your terminal. You can use this tool to interact with the docker engine, can easily create, start, stop and delete docker containers and manage docker images and volumes. While docker does have a desktop version, some users still prefer using docker cli on Mac without the need for desktop version.
Read this guide if you want to use docker cli on your Mac system without installing docker desktop.
How to Use Docker CLI on Mac Without the Need for Docker Desktop?
You can use docker cli on Mac without the need for docker desktop by using the Homebrew package manager that allows you to install docker cli on the terminal. The following steps will help you install docker cli from Homebrew and use it without installing docker desktop.
Step 1: Install Homebrew Package Manager on Mac
Ensure you have already installed the Homebrew package manager on your Mac and if it is not installed, you can use the following guide to install it on Mac.
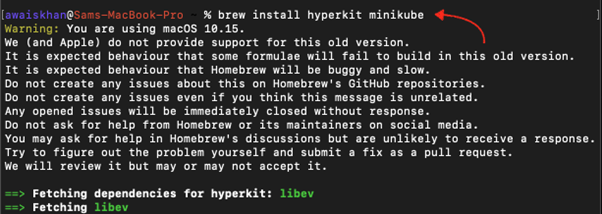
Step 2: Install Hyperkit and Minikube
Now, install Hyperkit and Minikube on your Mac system as they will help you run docker containers on MacOS. The Hyperkit is a hypervisor that helps in creating virtual machines, while Minikube is a tool that helps you in creating a single-node Kubernetes cluster on a virtual machine.
To install both these tools on your Mac system, you can use the following command:
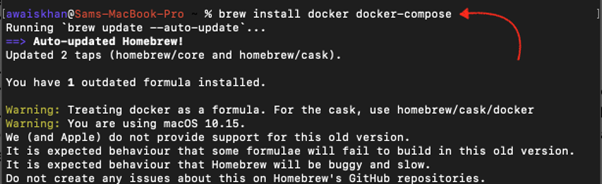
Step 3: Install Docker CLI and Docker Compose on Mac
After completing the installation of Hyperkit and Minikube, you can now install docker cli and docker compose on Mac by running the following command:
Step 4: Confirm Docker Installation on Mac
Once the docker and docker-compose installation is completed, you can confirm the docker-engine installation by running the following command:
![]()
Step 5: Start Minikube
After successfully installing docker and docker-compose on Mac, you must start Minikube on the terminal through the following command:
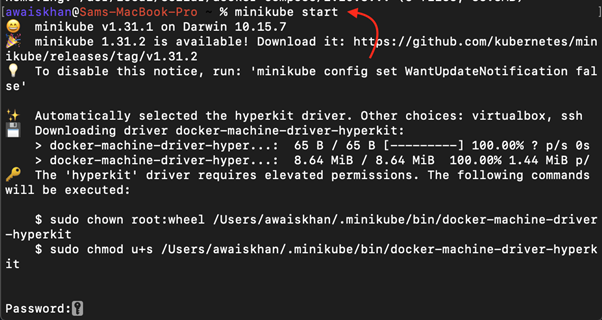
Wait till the above process finishes downloading Minikube clusters and download all necessary files on your system.
Step 6: Tell Docker CLI to Talk to Minikube VM
You have to run the following command later on to tell docker cli to talk to the Minikube’s VM on Mac.

The above command will set the docker environment variable, allowing docker to interact with the Minikube cluster instead of docker daemon running on your local machine.
Step 7: Save Minikube VM’s IP to the Hostname
Finally, you have to run the below-given command to save the Minikube VM’s IP to the hostname.
![]()
The above command will add the Minikube VM’s IP address to the end of /etc/host file.
How to Use Docker on Mac?
To learn how to use docker on Mac, let’s test out the following command:
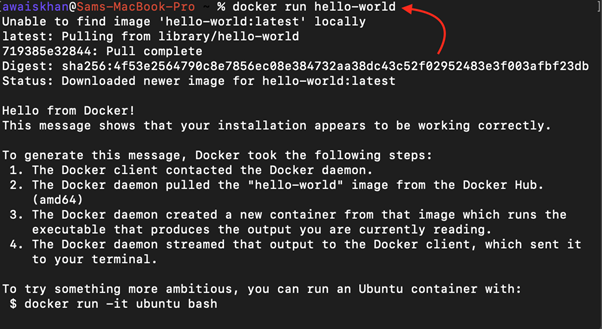
The above command will pull the official hello-world image from the docker hub and run it as a container on Mac. Successfully running the above command will ensure that docker cli is running on your Mac system.
Conclusion
Using docker cli on Mac without installing docker desktop is pretty straightforward. First, you need to install the Homebrew package manager on your Mac. Then, you can install Hyperkit and Minikube, which are tools that allow you to run docker containers. Once those are installed, you must run the Minikube, perform the remaining steps in the above guidelines and start running docker containers on your terminal.
Source: linuxhint.com