How to Use Container Queries Plugin in Tailwind?
Tailwind is a popular utility-first CSS framework that offers a collection of predefined classes for styling elements. Container queries permit users to create responsive layouts based on the size of a container element instead of the viewport. This can enable more flexible and modular design patterns, such as card components that adapt to different contexts. However, Tailwind does not support container queries by default. In this situation, there is a plugin that adds container queries support to Tailwind.
This write-up will explain the method to use the container queries plugin in Tailwind.
How to Use Container Queries Plugin in Tailwind?
To use container queries plugins in Tailwind, follow the below-provided steps:
- Install the container queries plugin in the project
- Add container queries plugin in the “tailwind.config.js” file
- Utilize the container queries plugins in the HTML program
- View the HTML web page to verify the output
Step 1: Install Container Queries Plugin in Tailwind Project
First, open the terminal and execute the provided command to install the container queries plugin in the project:
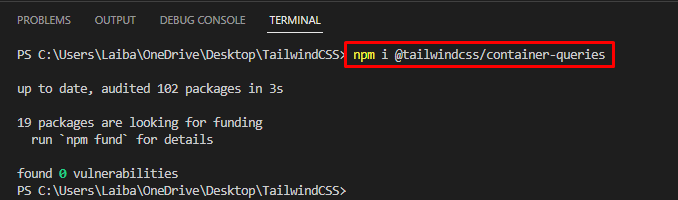
The container queries plugin has been installed successfully.
Step 2: Add Container Queries Plugin in Tailwind Config File
Then, open the “tailwind.config.js” file and add the container queries plugin in it:
content: ["./index.html"],
plugins: [
require(‘@tailwindcss/container-queries’),
],
};
This has added the container queries plugin in the configuration file.
Step 3: Use Container Queries Plugins in HTML Program
Now, make elements as a container by utilizing the “@container” class and then apply styles based on the size of that container through the container variants like “@md:”, “@lg:”, “@xl:” or “@2xl:”. For instance, we have applied the following style:
<div class="@container">
<div class="@lg:underline @2xl:text-center @4xl:bg-violet-300 h-screen">
<h1 class="text-3xl text-blue-700 ">
Linux Hint!
</h1>
<h2 class="text-2xl text-red-700">
Welcome to this Tutorial
</h2>
<h3 class="text-2xl text-green-700">
Tailwind CSS
</h3>
<br>
<p class="text-2xl text-amber-800">
Container Queries Plugin
</p>
<br>
</div>
</div>
</body>
Here, in the first “<div>”, the “@container” class indicates that the parent “<div>” is a container and will be used as a reference for container query variants.
In the second “<div>”, three classes are using container query variants to apply styles based on the size of the parent container.
- The “@lg:underline” class underlines the text when the parent container reaches the “lg” (32rem) size.
- The “@2xl:text-center” class centers the text horizontally when the parent container reaches the “2xl” (42rem) size.
- The “@4xl:bg-violet-300” sets the background color to a violet shade when the parent container reaches the “4xl” (56rem) size.
Step 4: Verify Output
Finally, run the HTML program and view the web page for verification:
It can be observed that initially, the text alignment was on the left and the background color was white. But when the parent container reached “lg” size, the text was underlined. When it reached the “2xl” size, the text alignment was set to the center horizontally, and when it reached the “4xl” size, the background color changed to a violet shade. This indicates that the container query plugins are working properly in Tailwind.
Conclusion
To use container queries plugins in Tailwind, first, install the container queries plugin in the project. Then, add the container queries plugin in the “tailwind.config.js” file. After that, make an HTML program and use the container queries plugins in it. Finally, view the HTML web page to verify the output. This write-up has explained the method to use the container queries plugin in Tailwind.
Source: linuxhint.com