How to Use Assert in Selenium
You might have run lots of tests using various TestNG functions and may never deem a test “passed” or “failed” during these executions. It is time to run some actual tests using Selenium WebDriver in TestNG now that we are familiar with all the key principles in TestNG. We will take advantage of TestNG Asserts for this objective. This article performs assert methods implementation and describes code soft and hard assertion advantages. In this tutorial, we execute two cases: Simple asserts and Hard and Soft assert. This content describes the usage of soft assertion as compared to hard assertion. Before writing the script, we tend to install Java JDK and Eclipse, add selenium Jars libraries, and configure the dependencies along with browser drivers.
Requirements:
Before writing code, you should create a development environment for running and executing the code. Firstly, install and configure the JDK kit and eclipse. After that, you must download and include the TestNG jar file in your eclipse installation to use the Assertion in Web Driver. You can get TestNG jar files from the given link: https://mvnrepository.com/artifact/org.testng/testng. Then, add the jar files into the eclipse library by the following process: go to the project => build and configure option>Java Build Path>libraries to add those downloaded external jars. Now, add the dependencies into the Eclipse > pom.xml file.
<dependencies>
<dependency>
<groupId>io.github.bonigarcia</groupId>
<artifactId>webdrivermanager</artifactId>
<version>5.3.1</version>
<scope>test</scope>
</dependency>
<!-- https://mvnrepository.com/artifact/org.apache.maven/maven-artifact -->
<dependency>
<groupId>org.apache.maven</groupId>
<artifactId>maven-artifact</artifactId>
<version>4.0.0-alpha-2</version>
</dependency>
</dependencies>
</project>
TestNG Assertion with an Example:
In this tutorial, we will cover two cases:
-
- Simple assertion
- Hard and soft assertion
Case 1:
We go through basic assert methods to verify.
Step # 1: Create a Void Class
To apply assertion, we have to create a separate class “Public void” and perform assertion testing inside that class unlike other selenium properties of automation testing using the main static class.
{
}
Step #2: Setup the WebDriver
In this step, we will set up the Browser driver through the following script, which the chrome browser has been using for this tutorial. The following script code uses:
ChromeDriver driver = new ChromeDriver();
Step #3: Open the Browser
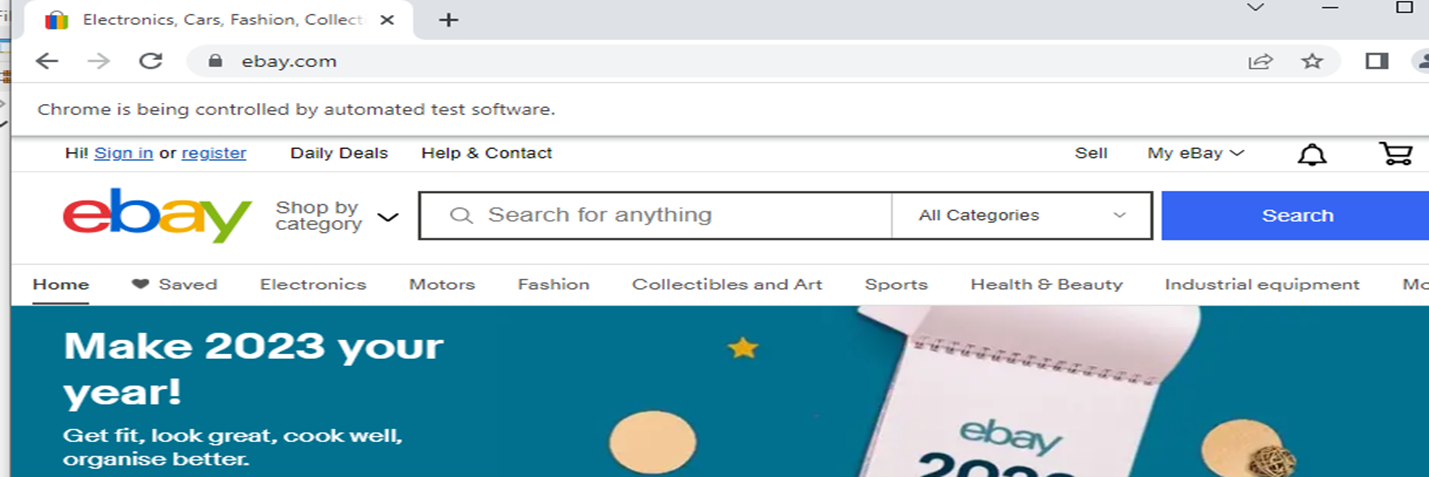
In this step, the chrome browser will open the given website URL. As in this example, use https://www.ebay.com/ site.
Use the following script method:
It can be seen in the figure below that chrome is controlled by automated test software.
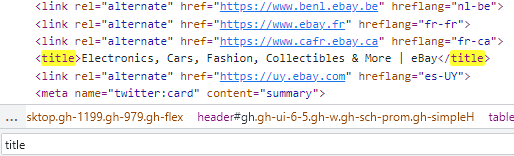
Step #4: Searching for the Title from the Site
In this step, the chrome browser will open the given website URL. As in this example, use https://www.ebay.com/ site.
Inspect the webpage and find the title of the website. As shown in the figure below.
Here is the syntax:
The title is a string that creates the variable string.
Step #5: Set the Expected Title
In this step, the copied title from the webpage will be used to create a String for the expected title.
As shown in the code below, String created the “expectedtitle” variable.
Step #6: Get the Actual Title
In this step, we get the actual title by using getTitle() method.
Following the code String, we have created the “actualtitle” variable that saves the text provided getTitle() method.
Step #7: Verify the Title We are Getting
In this step, we match the actual title with the expected title.
The syntax is given below:
There are many methods of assets such as assertEqual, assertUnequal, and etc.
As you can see, the parameter has two values:
-
- Actual: The value that the tester obtains. For instance, the real title of the page must be provided here if the tester’s assertion corresponds to it.
- Expected: If the tester’s claim relates to the page’s title, for example, then the value of the title you anticipate should go here.
The following code that uses the assertEqual() method to match the title of both is the same or not.
Step #8: Match Title True Case
When the actual title of the site and the expected title match then the condition is true.
Consider the example code given below:
String actualtitle = driver.getTitle();
Assert.assertEquals(actualtitle, expectedtitle);
The first line of the code is the expected title. After that, we get an actual title. Following that, the assert() method is used to match the actual and expected title.
Output in the Console
After running the code above, the output shows in the console that the code was executed successfully and the test has been PASSED = titletest.

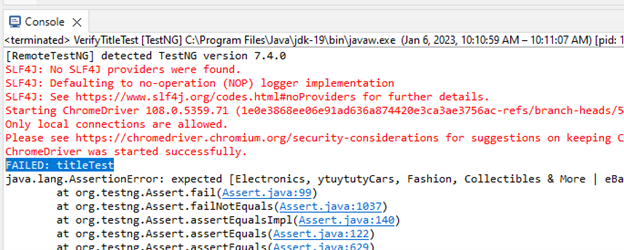
Step #9: Match Title Failed Case
When the actual title of the site and the expected title match, then the condition fails.
Output in the console:
After running the code above, the output shows in the console that the code executed unsuccessfully and the test has been FAILED = titletest.
Case 2:
In this case, we go through soft assertion and hard assertion.
Hard Assertion and Soft Assertion:
There are requirements of assertion in many cases. You might be having multiple assertions in the single test case. There are five-six different verification points in your particular test cases. As if you get failure in one particular assertion then what will happen to other assertions that are ahead of that particular assertion?
Example Scenario:
You are verifying the title and the title match failed. After that, you verify the certain text and some web elements on the same page.
Hard Assertion Test Case
In hard assertion, if any single assertion failed then the script stops there.
Example Scenario:
As the title fails to match and if you are using Assert.arrertEquals() method, then the test case stops at that particular failure. You cannot go further and go for verification of other assets that are available in the same test case. Hard assets are a challenge because they stop if a single failure occurs.
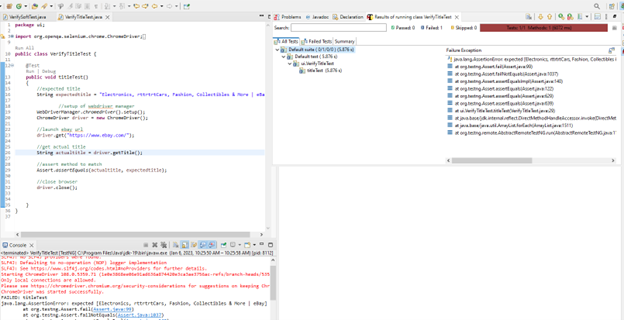
Here is the example code that you can run and see the result.
String actualtitle = driver.getTitle();
Assert.assertEquals(actualtitle, expectedtitle);
After running the above code, the output shows in eclipse that the code executed unsuccessfully. And the test has been FAILED = titletest. We can observe that the right side <All tests> alert in red color indicates the alerts and stop the execution of code there.
Soft Assertion Test Case
In the case of soft assertion, the Assert verification fails script will continue, even if the failure happened there and the failure will record. And the script will continue.
Step #1: Get the Value of the Search Button
In this step, let us inspect the https://www.ebay.com/ site and obtain the name of the search button attribute.

The syntax is given below:
Here is an example code:
Step #2: Get Actual Text
In this step, we get the XPath of the actual text of search button by following the steps:
Rightclick > inspect > goto code > Rightclick code > select copy option > copy XPath = [“//*[@id=”gh-btn”]”] it will copy XPath for you.
Get attribute value, attributes of the web page are (value, type, class) and we select Value attribute for this example .getAttribute method() is used to get the attribute.
The syntax is given here:
The example code is mentioned here:
.getAttribute("value"); => get vale and store in “actualtext ”
Step #3: Verify the Text
Verify by using Assert.assertEquals() method.
@Test
public void searchbtnTest() throws InterruptedException
{
String expectedtitle = "Electronics, Cars, Fashion, Collectibles & More | eBay";
String expectedText = "Search";
WebDriverManager.chromedriver().setup();
ChromeDriver driver = new ChromeDriver();
driver.get("https://www.ebay.com/");
String actualtitle = driver.getTitle();
String actualtext = driver.findElement(By.xpath("//*[@id="gh-btn"]")).getAttribute("value");
System.out.println("Verifying title");
softassert.assertEquals(actualtitle, expectedtitle, "Title Verification failed");
System.out.println("Verifying text");
softassert.assertEquals(actualtext, expectedText, "Text Verification failed");
System.out.println("close browser");
driver.close();
}
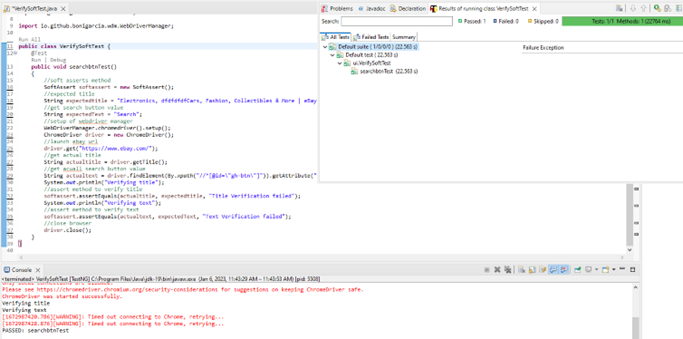
Step #4: Execute the Code
Here, we will execute the code mentioned in step # 3 and see the output.
Output in Eclipse:
After running the code above, the output shows in eclipse. This code was executed successfully and the test has been PASSED = searchbtntest. The green color shows the test case pass.
Conclusion
It is difficult to find a TestNG code without assertions because they are the most often used methods in TestNG. This article illustrates the use of the Assert method using the selenium framework to TestNG, the tester determines whether or not the test was successful, as well as any exceptions through an automatic control tool. In this tutorial, we write code to set the browser driver, launch the browser driver, and execute simple assertions and soft and hard assertions. In this content, you learned how soft assertion is more important than hard assertion.
Source: linuxhint.com