How to Use a New Windows Terminal App for SSH
The windows terminal is a Microsoft application. It provides us with command-line shells such as Windows PowerShell, Command Prompt, and WSL for Linux. It is also known as a multi-tabbed tool as it opens different command line tools in different tabs.
In this article, we will illustrate the method for using a new Windows terminal for SSH.
Prerequisite: Install Windows Terminal
Windows Terminal is a Microsoft application that can run various command line tools simultaneously. Here, we will demonstrate how you can get the windows terminal application on your windows PC and use it for SSH.
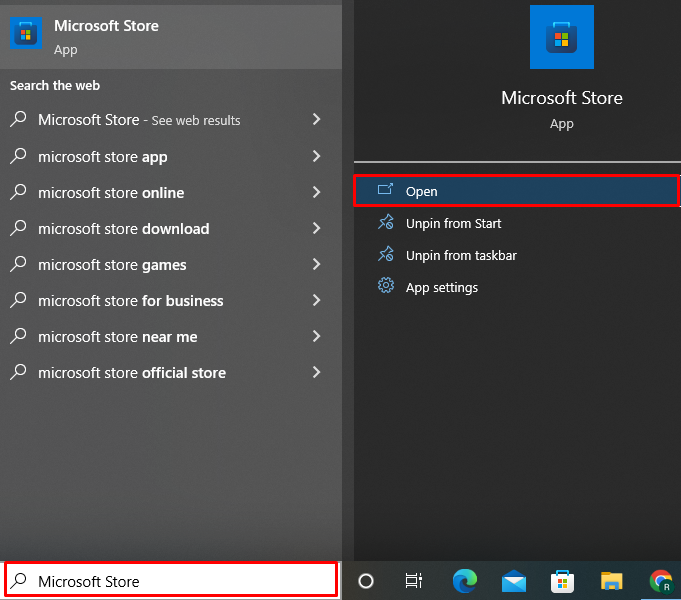
Step 1: Open Microsoft Store
First, type “Microsoft Store” in the “Startup” menu and open the Microsoft store from the displayed results:
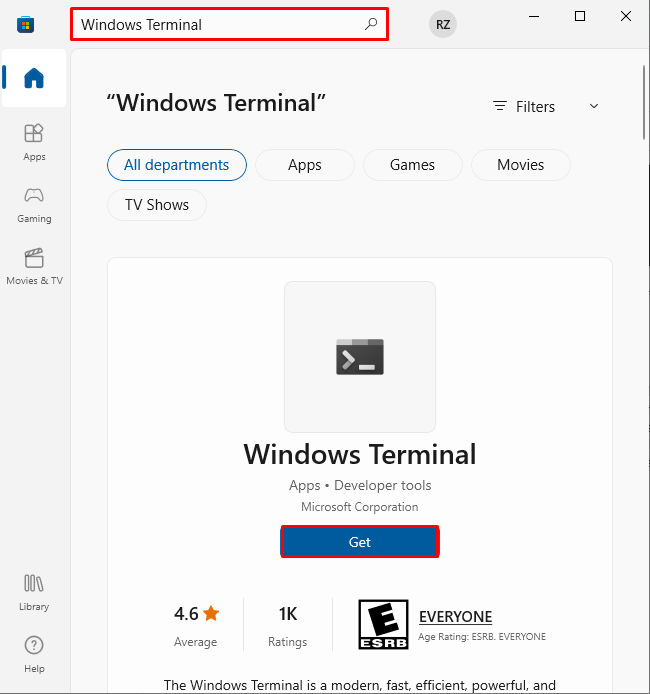
Step 2: Install Windows Terminal
Make a search for “Windows Terminal” in the search bar. The Windows Terminal application will display on the screen. Click on the “Get” button to install Windows Terminal:
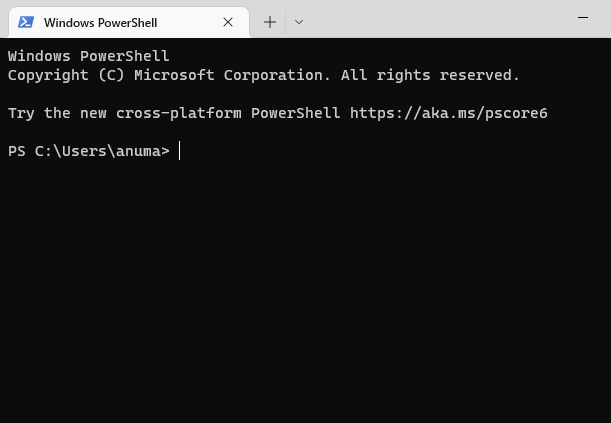
Step 3: Open Windows Terminal
After completing the installation, hit the “Open” button to launch Windows Terminal:

You can see that we have successfully installed the new Windows Terminal on the system:
Let’s check out how to use the Windows terminal tool for SSH.
Prerequisite: Install OpenSSH on Windows
The OpenSSH client tool is used to connect to the machine remotely via the OpenSSH server. OpenSSH works on the client-server connection mechanism, and therefore, it is recommended that your system must have the OpenSSH-client and OpenSSH-server. If it is not already installed on Windows, first install the OpenSSH client tool using the below-mentioned steps.
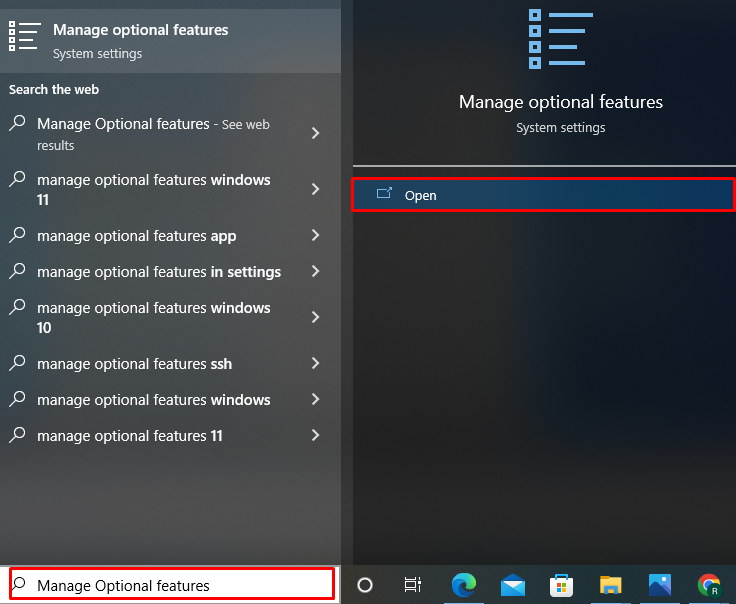
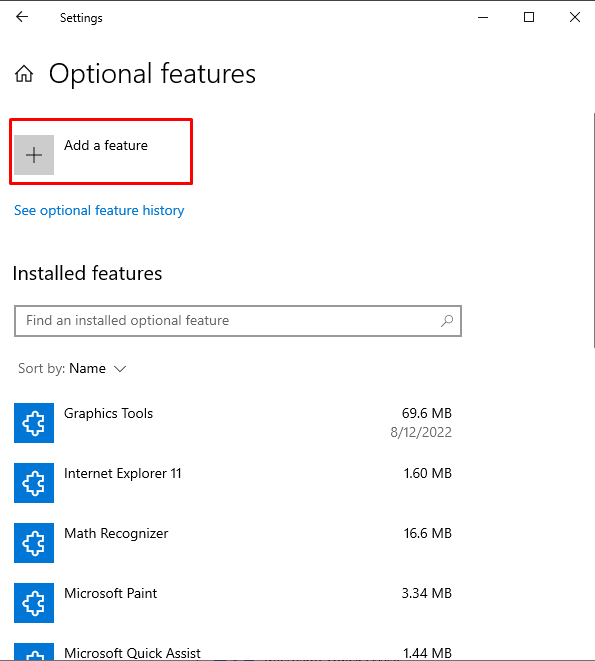
Step 1: Open Manage Optional Feature Settings
First, open the Optional Feature setting by searching “Manage Optional Feature” in the “Startup” menu:
Step 2: Install OpenSSH
Next, press the “+ Add a feature” option to install the OpenSSH client tool:
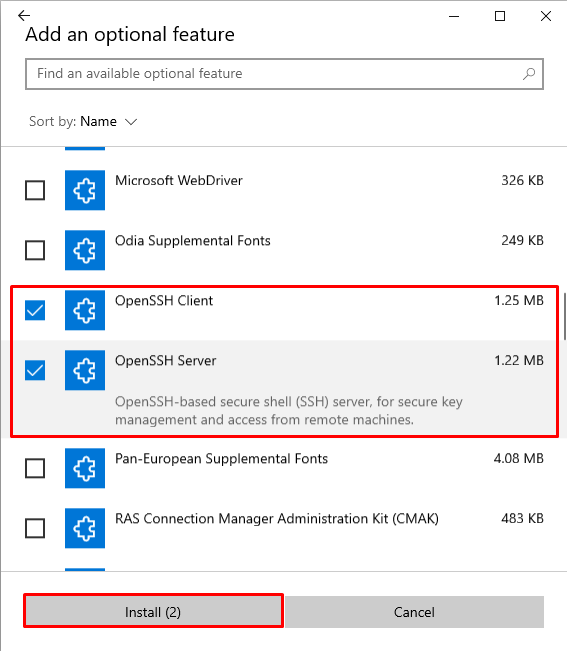
We recommend you install the OpenSSH server as well as the OpenSSH client tool. For this purpose, mark their respective checkboxes and press the “Install” button:
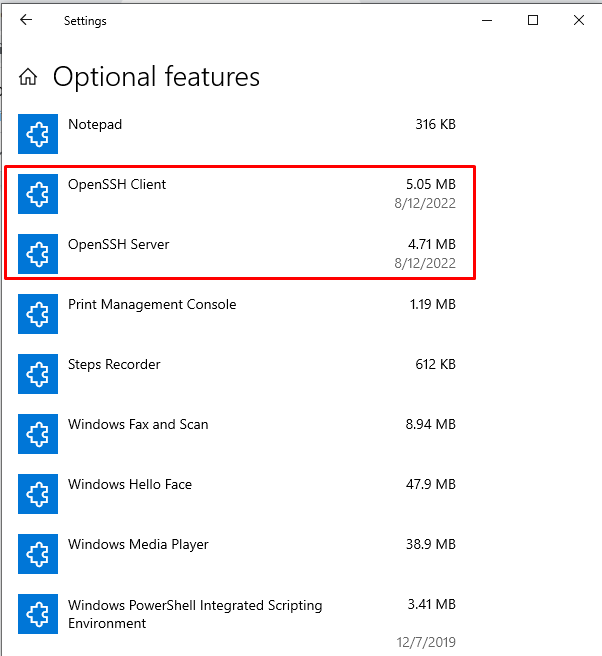
Now, you can see that we have successfully installed the OpenSSH client and OpenSSH server on Windows:
Let’s move ahead to use the new Windows terminal for SSH.
How to Use a New Windows Terminal App for SSH?
Once you fulfill the prerequisites, you are all set to use the new Windows terminal app for SSH. The new Windows Terminal is a multi-tabbed application, we are already familiar with the fact that we can use Command Prompt, PowerShell, bash, and many other command line programs in various tabs. Follow the instructions below to add and utilize SSH in a new windows terminal.
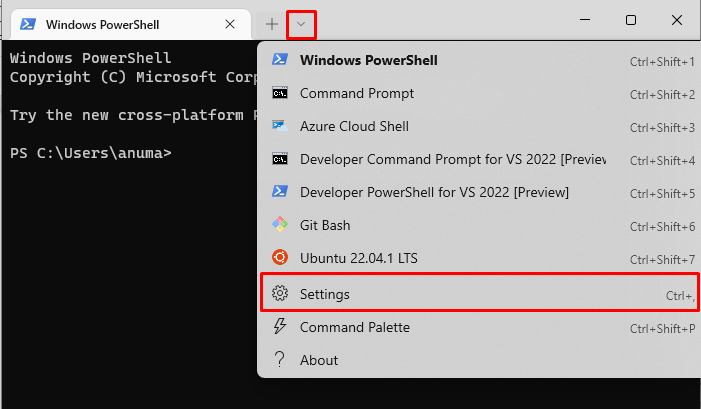
Step 1: Open Settings
Open the Windows terminal from the Startup menu. Click on the drop-down menu and open the “Settings” from the displayed options:
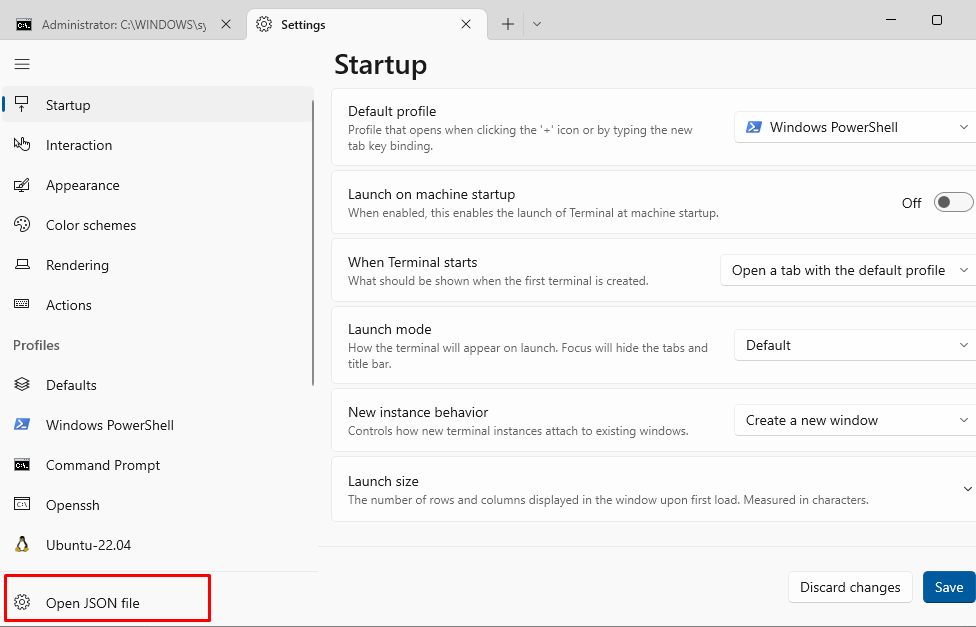
Step 2: Open JSON File
Next, from the “Settings” tab, click on the “Open JSON file” gear icon:
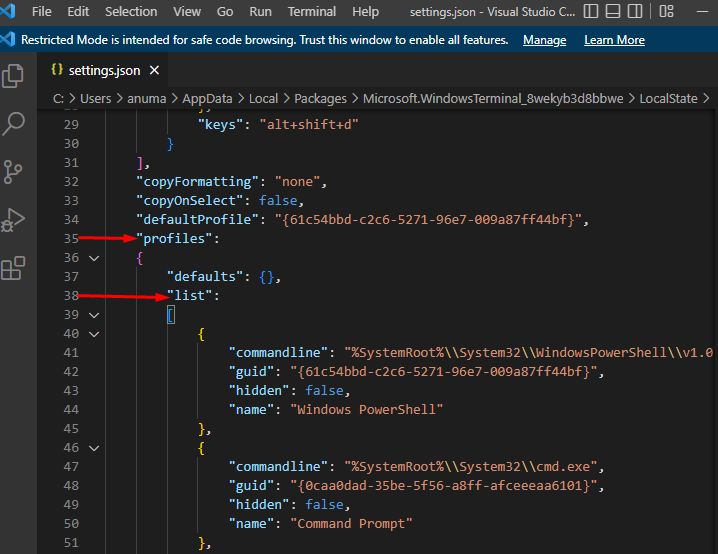
Step 3: Add SSH to Windows Terminal
The JSON file will open and appear on the screen. Go to the “Profiles” options menu and then move to the “list” array:
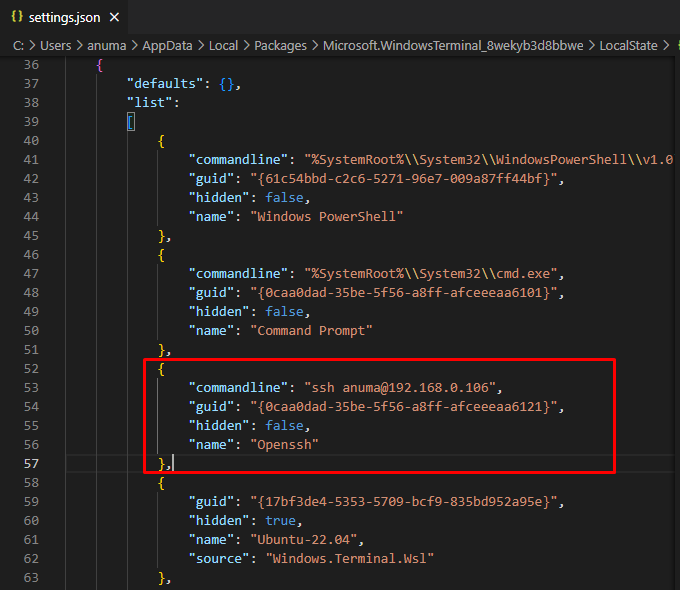
Paste the below-provided code in the list array after the “},” comma. Change the “commandline” information and paste your ssh credentials. Also, choose the name for your new SSH connection window.
"commandline": "ssh anuma@192.168.0.106",
"guid": "{0caa0dad-35be-5f56-a8ff-afceeeaa6121}",
"hidden": false,
"name": "Openssh"
},
Then, press the “CTRL+S” key to save changes:
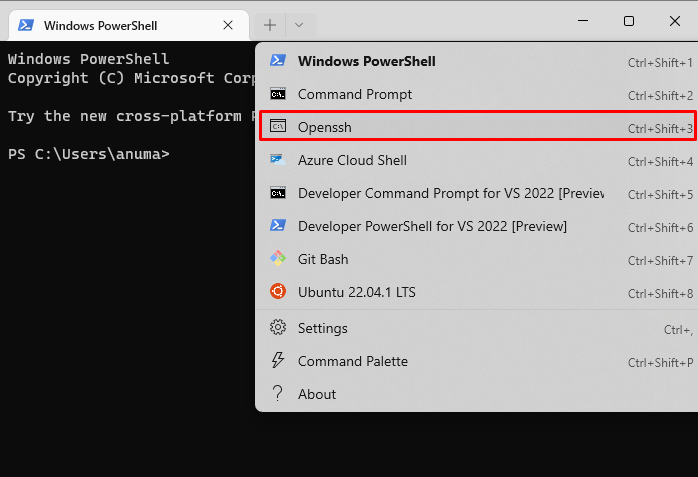
Step 4: Open SSH in the New Tab of Windows Terminal
Now, go to Windows Terminal, choose the newly configured ssh command line from the drop-down menu. The terminal will appear as the name that you set while editing the JSON file:
Provide the system password to access the system via ssh protocol from the new Windows terminal:
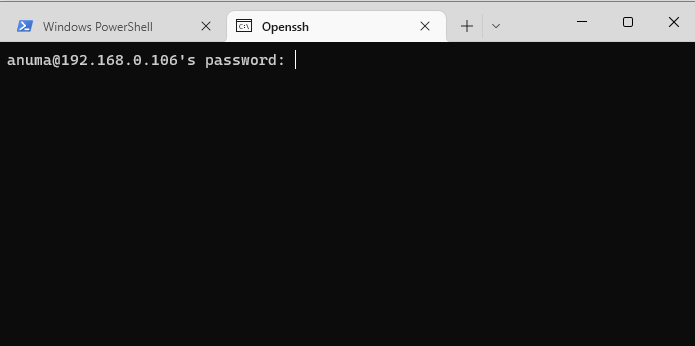
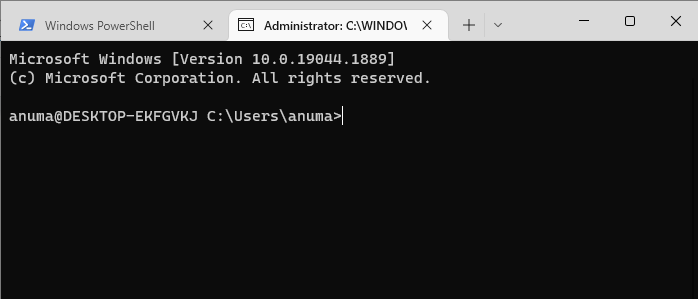
As you can see, ssh has been introduced successfully to the new Windows terminal. Enjoy it and use it now:
We have elaborated the approach to install and use the new Windows terminal for ssh.
Conclusion
To use the new Windows terminal, we need to install it first from the Microsoft store. Then install the OpenSSH client and OpenSSH server tools on Windows. To use the new Windows terminal for SSH, you need to add the connection string in the JSON settings file. Whenever you open the terminal, you need to provide the password, and you will be connected to the remote machine instantly. We have demonstrated the method to install and use a new Windows terminal for SSH.
Source: linuxhint.com