How to Uninstall VirtualBox from Mac?
This post will explain:
- How to Uninstall VirtualBox From Mac Using VirtualBox Installer?
- How to Uninstall VirtualBox From Mac Manually Using Finder?
- How to Delete Virtual Machines(created by VirtualBox) Completely From Mac?
- Conclusion
Attention: VirtualBox is only available for intel-based x86 Macbooks(not for ARM-based processors).
Method 1: How to Uninstall VirtualBox From Mac using VirtualBox Installer?
To uninstall VirtualBox using the app’s uninstaller, the user must have an installer file of VirtualBox in the system. In case a file is misplaced or deleted, the user can directly download it from its official website.
For demonstration, go through the following procedure.
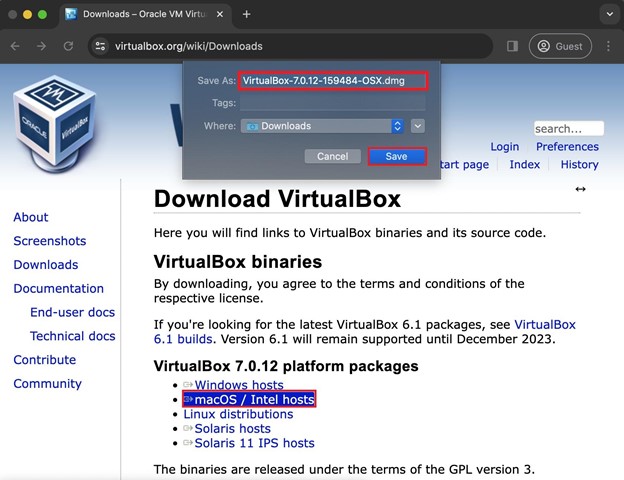
Step 1: Download VirtualBox Installer
Visit the official VirtualBox website, and click on the “macOS / Intel hosts” to download the VirtualBox installer “.dmg” file. After that, press the “Save” button:
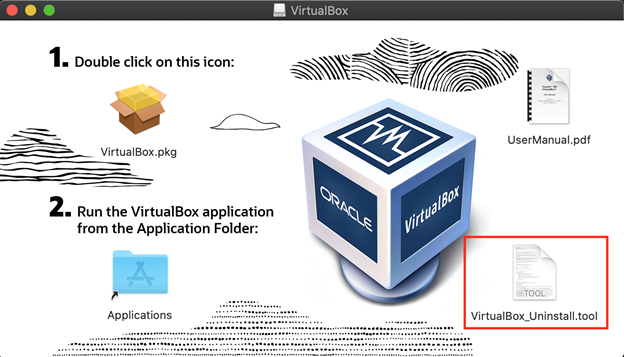
Step 2: Launch VirtualBox Uninstall Tool
Once the installer is downloaded, launch it from the “Downloads” directory. In the installer, open up the “VirtualBox_Uninstall.tool”:
This will pop up a warning box, hit the “Open” button to proceed:
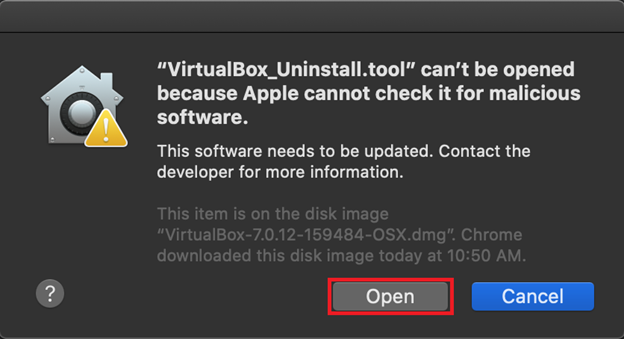
A warning message will appear as MacOS won’t allow apps to run that are not from identifier developers.
Step 3: Grant Permissions to VirtualBox_Uninstall.tool”
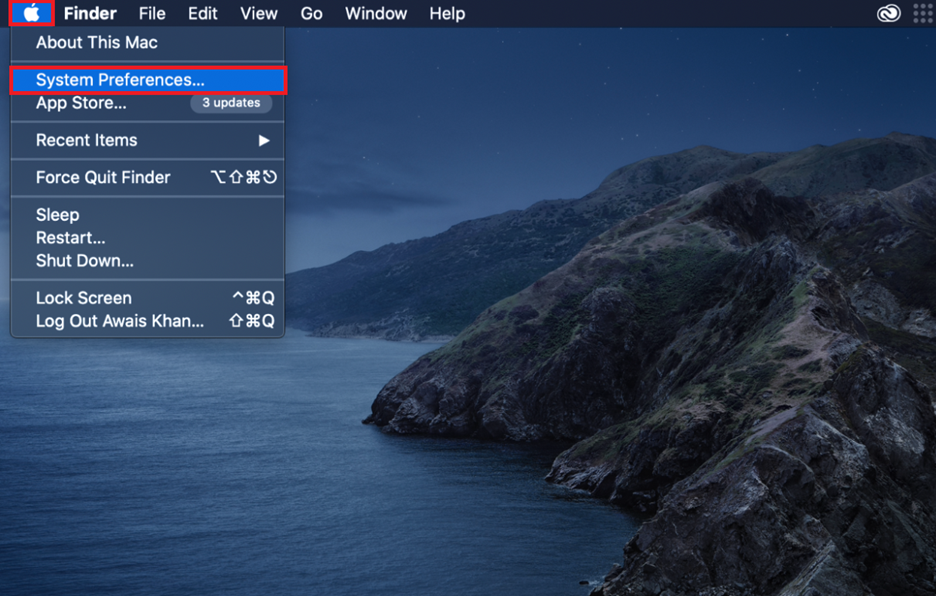
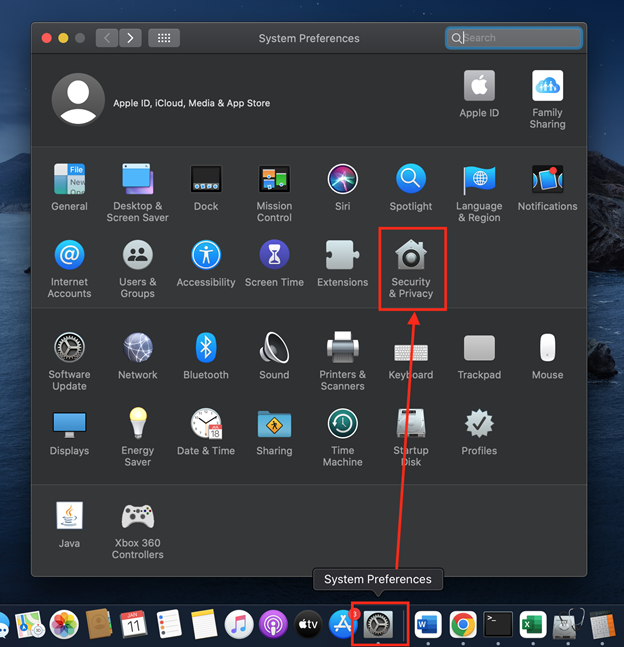
To allow third-party apps to run, open up the System Preference settings by clicking on the “Apple” icon at the top left corner and selecting “System Preferences”:
Alternatively, you can open up the system preferences from the Dock and open the “Security and Privacy” Settings:
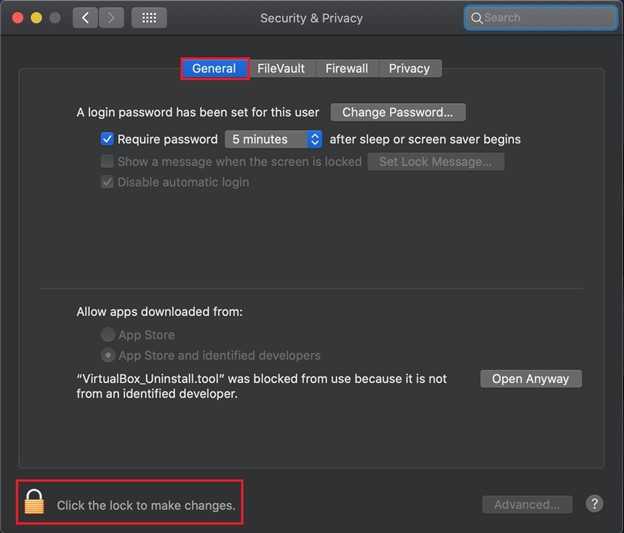
In the “General” tab of “Security & Privacy”, you will see a lock button in the bottom left corner. Click on it to unlock the settings and make changes:
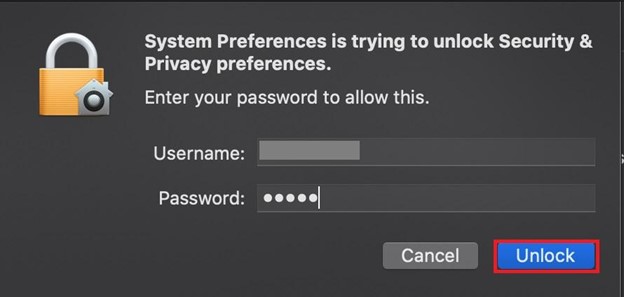
This will ask you to provide the system password. Provide the password and press “Unlock”:
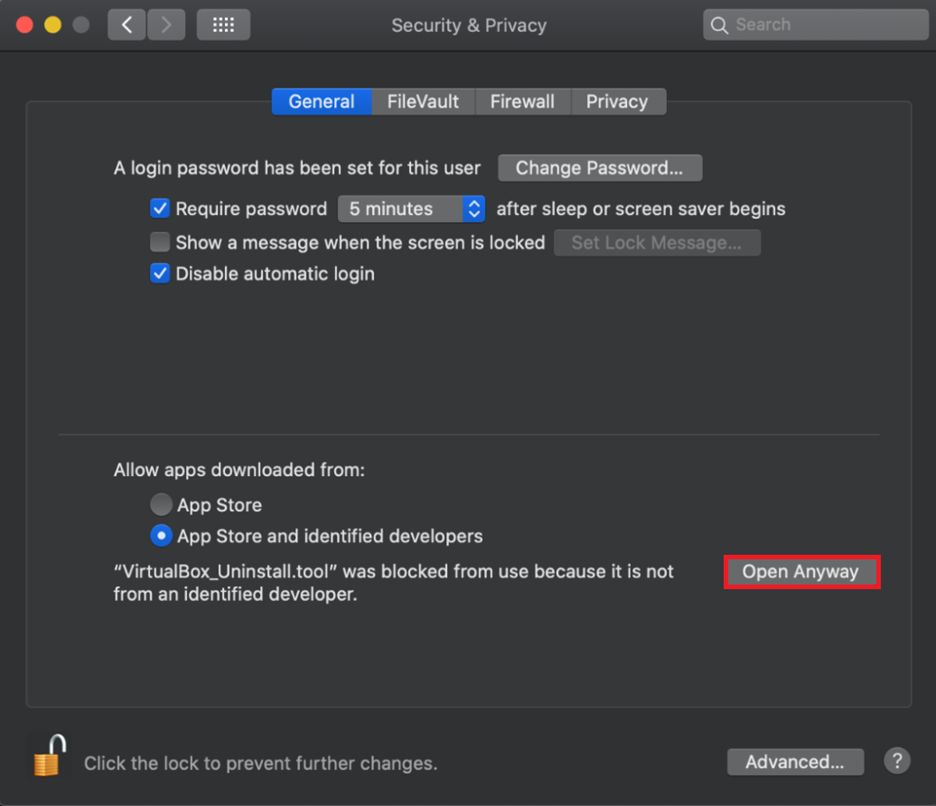
After unlocking the “Security and Privacy” preferences, click on the “Open Anyway” button to allow the VirtualBox_Uninstall.tool to run the uninstallation process:
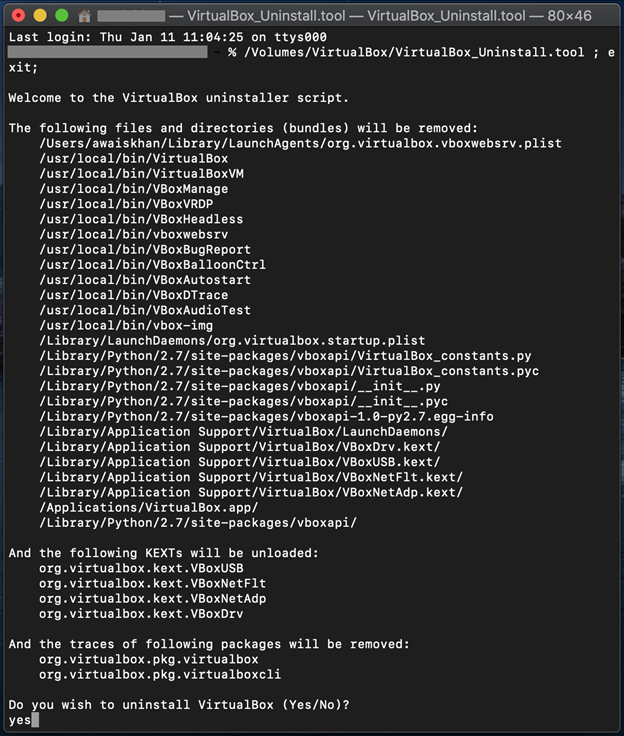
Step 4: Uninstall VirtualBox
Within a moment, it will open a terminal and ask for permission to delete the files related to VirtualBox:
Type “Yes” and hit the “Return” key. Along with the permission to uninstall VirtualBox, it will also ask for uninstalling the FUSE. So, type “yes” as well:
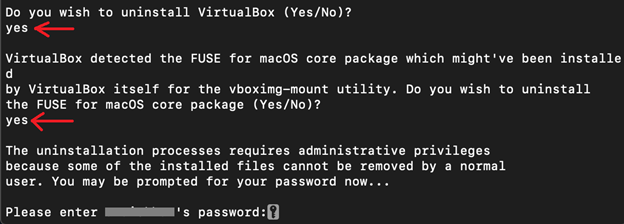
Lastly, type the system password to complete the VirtualBox uninstallation process:
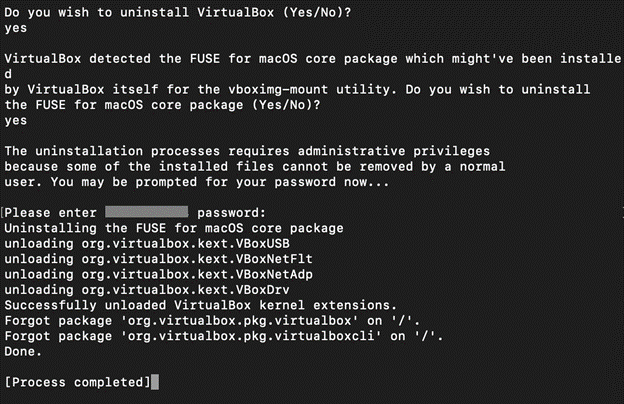
After typing in the Password, it will uninstall the VirtualBox from Mac and show the “[Process completed]” message.
Method 2: How to Uninstall VirtualBox From Mac Manually Using Finder?
In Mac, applications and files are managed through Finder. The Finder in Mac is a graphical file and app manager tool. To uninstall the VirtualBox from Mac using Finder, go through the following procedure.
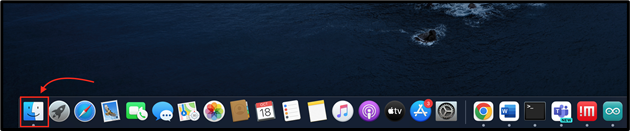
Step 1: Launch Finder
First, launch the Macbook Finder by clicking on the below-highlighted icon:
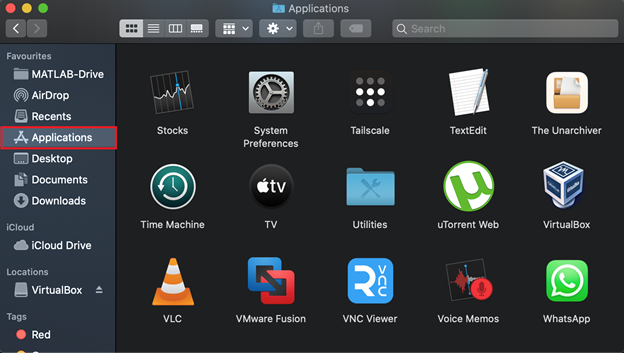
Step 2: Open the “Applications” Directory
Open up the “Applications” directory from Finder:
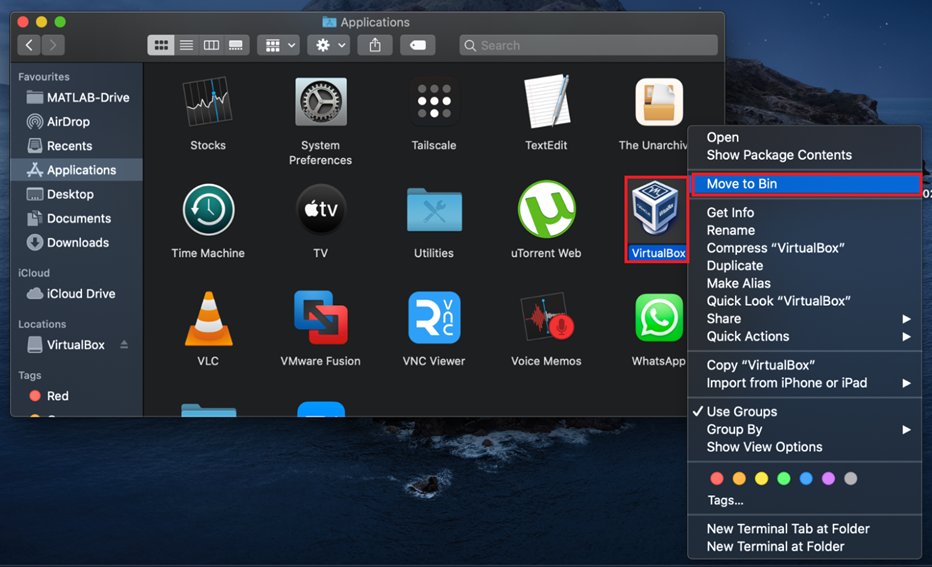
Step 3: Remove the VirtualBox Tool
Locate the “VirtualBox” application, right-click on it, and click “Move to Bin”:
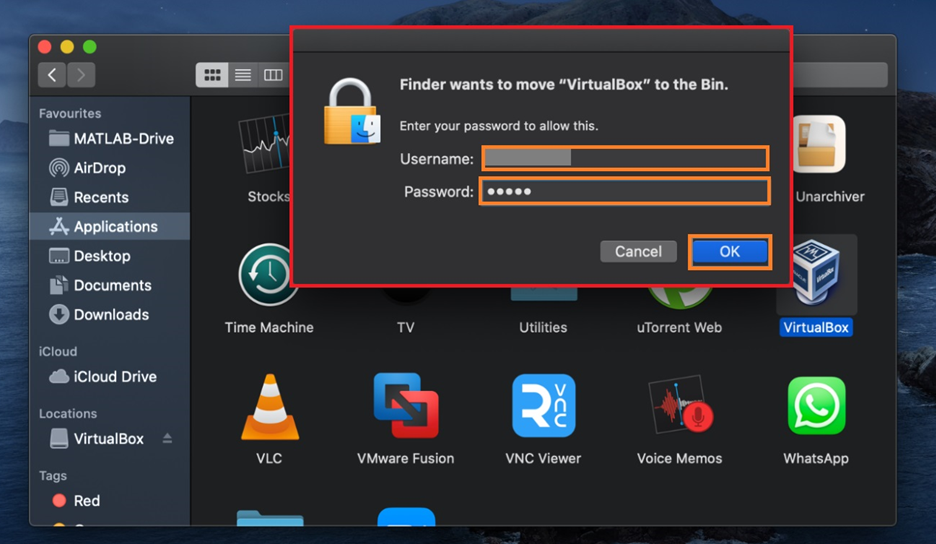
This action will require user authentication. Type in the user password(if asked) to continue the deletion process and press the “OK”:
Step 4: Remove VirtualBox-related Files
To completely remove VirtualBox along with all files, open up the terminal and execute the below command:
~/Library/Preferences/org.VirtualBox.app.VirtualBox.plist
~/Library/Saved Application State/org.VirtualBox.app.VirtualBox.SavedState
~/Library/LaunchAgents/org.virtualbox.vboxwebsrv.plist
~/Library/Saved Application State/org.VirtualBox.app.VirtualBox.SavedState

How to Delete Virtual Machines(created by VirtualBox) Completely From Mac?
While removing the VirtualBox, users are required to remove the Virtual Machines manually as these are still residing in the system and taking up space. To remove the Virtual Machines from Mac, take a look at the procedure given below:
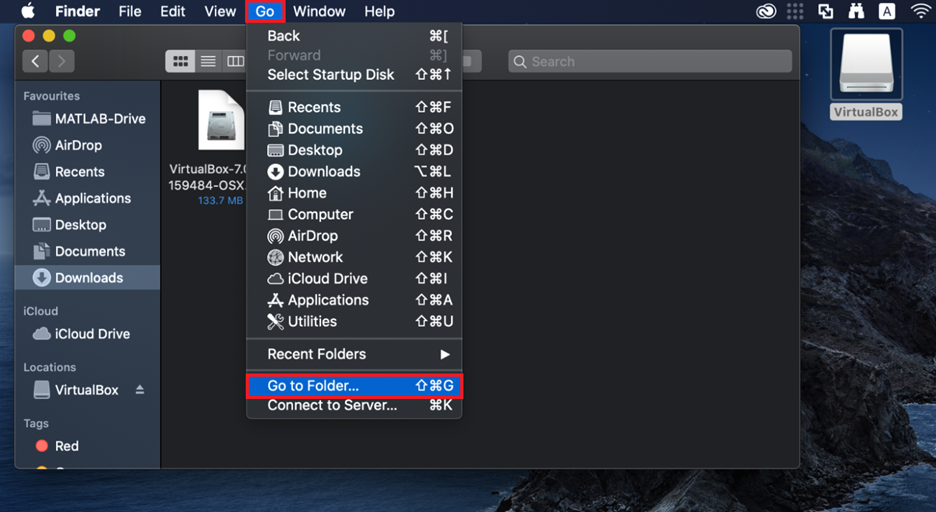
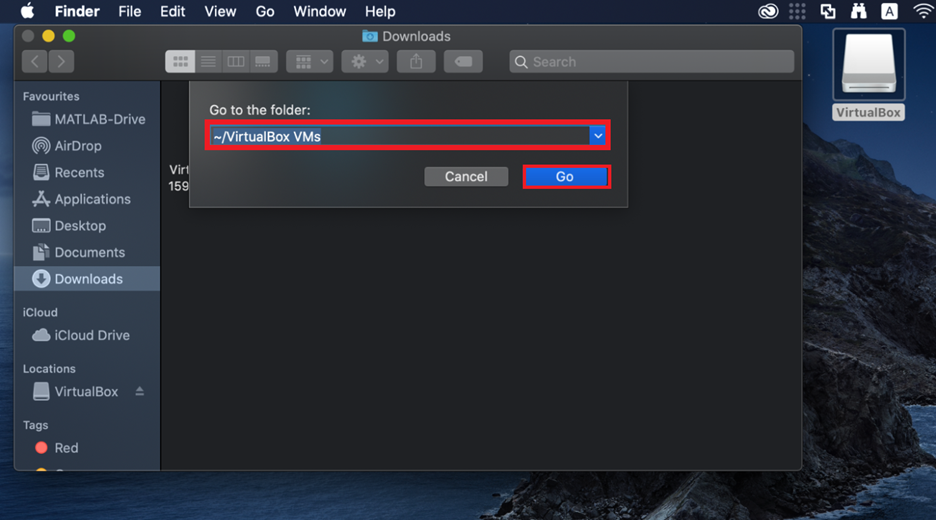
Step 1: Open the “~/VirtualBox VMs” Directory
To open the “~/VirtualBox VMs” directory, open the “Go” Context menu from the Finder menu, and click on the “Go to Folder” option:
Type in the “~/VirtualBox VMs” in the text box that appeared and click on the blue-colored “Go” button:
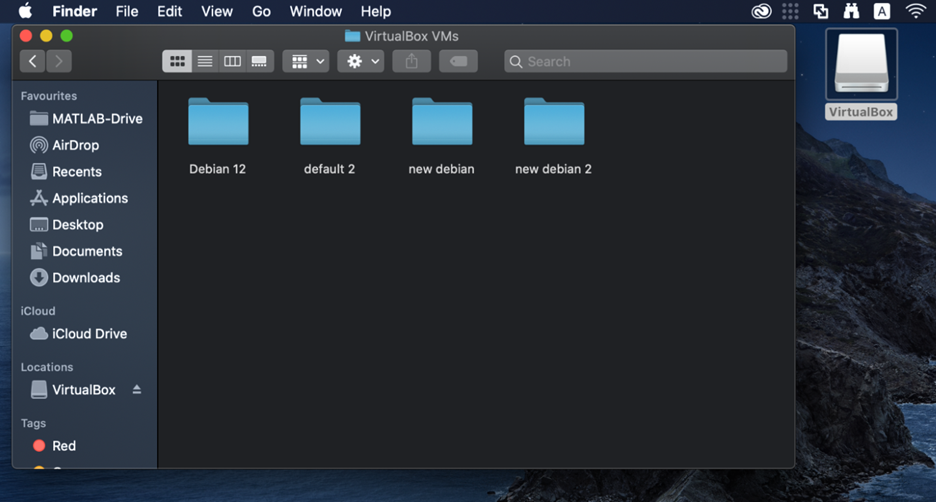
All the Virtual Machines folders will be visible in the “~/VirtualBox VMs” directory”:
Step 2: Remove Virtual Machines
To remove the Virtual Machine, right-click on the machine you want to delete and press the “Move to Bin” option:
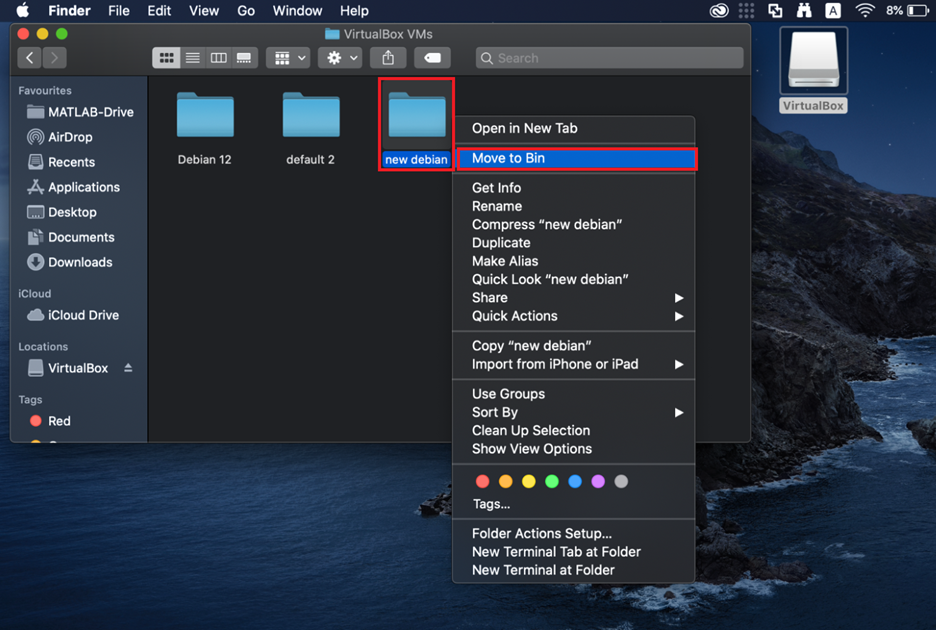
This will remove the Virtual machines from the system.
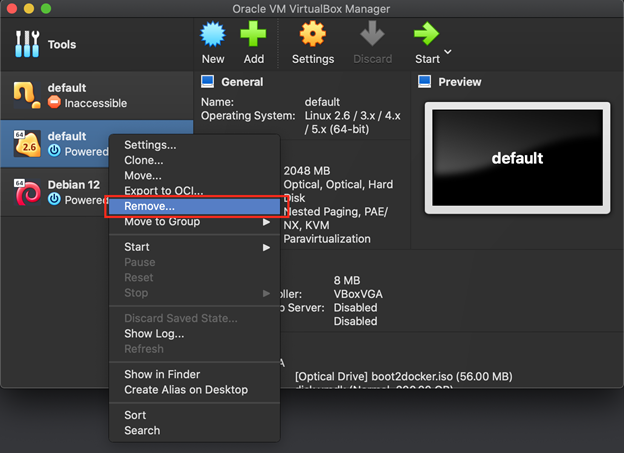
Remove Virtual Machine From VirtualBox
If you have not uninstalled VirtualBox and you want to delete Virtual Machines, first, launch VirtualBox.
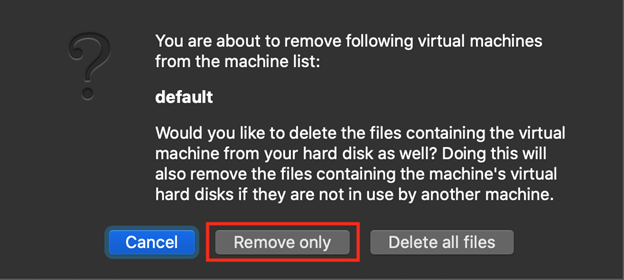
Then, right-click on the machine to which you want to delete, and click on the “Remove” option:
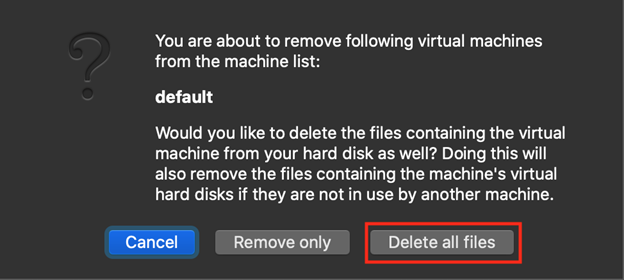
You will be prompted with a dialogue box to ask whether you want to delete the machine only or delete all files as well related to that machine. To delete the machine only, click on the “Remove only” button:
Otherwise, to delete all files as well related to the machine, click on the “Delete all files” button:
We have covered the methods to uninstall VirtualBox from Mac.
Conclusion
To uninstall VirtualBox from Mac, the user can either remove it by using the VirtualBox installer or manually from Finder. In the first approach, simply run the installer, and open the “VirtualBox_Uninstall.tool” file. In the second approach, move the “VirtualBox” tool to the bin from the Applications directory and delete all VirtualBox-related files and directories. This post has covered the methods to uninstall VirtualBox and how to remove Virtual machines from Mac.
Source: linuxhint.com