How to Uninstall Kubectl
As we know, during the installation of kubectl in our Linux operating system, we allow the administrative privileges to uninstall the kubectl again from our operating system. This article is related to uninstalling the kubectl process and we will explain every step with the help of examples and screenshots for your convenience.
What Is Uninstall Kubectl in Kubernetes?
Sometimes, we need to uninstall the kubectl just to upgrade the Kubernetes system or remove the impurities from a system that disturb its working and slow down the whole system of Kubernetes. First, we start our Kubernetes application by opening the Windows terminal and running the command on the terminal that is related to uninstalling the kubectl from the Kubernetes system.
We know that the kubectl installation is done through different packages like apt and yum. Now, we will run the command again to change or uninstall the package of installation of kubectl from the system.
Step 1: Launch a Minikube of Kubernetes
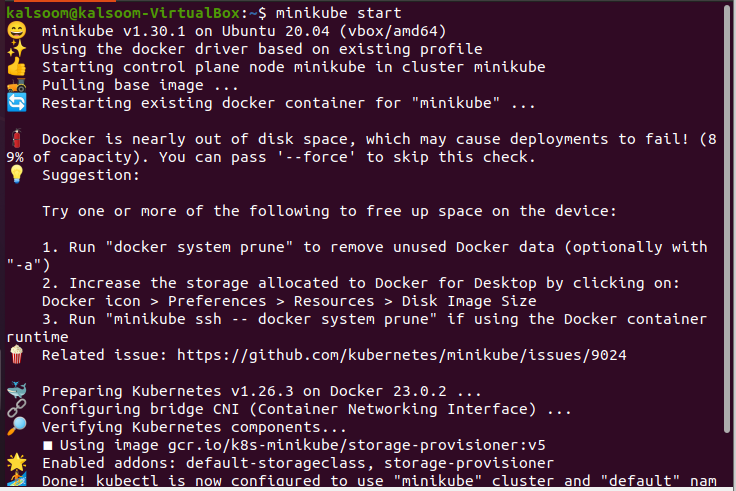
In the very first step, we start our Linux operating system terminal. Then, we run the following command to start a Minikube to manage the dashboard of Kubernetes:
After the command’s execution, we get the following output. Now, a new cluster is created in our Kubernetes system:
Step 2: Run the Update Command in Linux
This command is not the same as in the Kubernetes container. We update the system packages by running the following command. Make sure that you are logged in with the root user and passed the password of this user in your command prompt:
Press “Enter” and the command gives the result on your terminal. The output of this command according to our system is attached in the following:
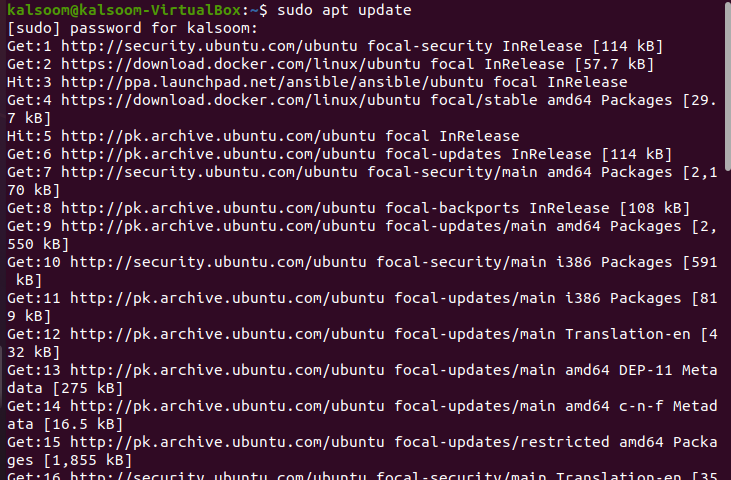
Here, we can see that our system updated the packages that are related to Kubernetes, has no bugs to fix, and it keeps our Kubernetes environment in good form.
Step 3: Install the Package in Your System
In this step, we will learn how we can install the new packages or repositories in our Linux system which are related to Kubernetes. We run the following command to install the new packages:
> apt-transport-https \
> curl
The output is attached in the following:
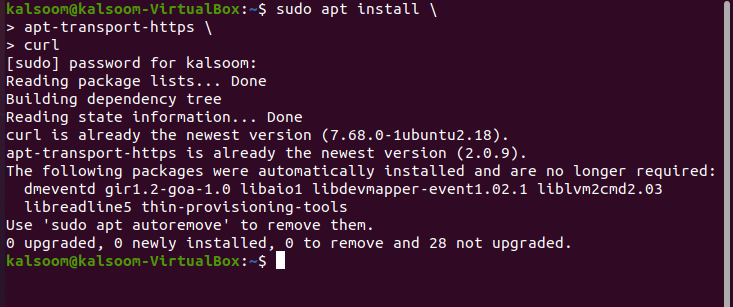
Here, the curl version is updated and all the packages are successfully updated as well as newly installed.
Step 4: Fetch the Data from APIs
In this step, we’ll discover how to use the CURL command to retrieve the data from several APIs. We run the following command in our system terminal to fetch the information that is related to the Kubernetes release in Google.
This command returns the whole data that is related to the latest release of Kubernetes as you can see in the following:

Step 5: Assign the Executable Permission to Kubectl
In this step, we will learn how we can assign the executable permission to the kubectl of Kubernetes. The kubectl is in a binary file; remember that currently. We run the following command in our system terminal:
![]()
When this command is executed, the binary file of kubectl is now executed and in running condition.
Step 6: Move the Kubectl File into the Kubernetes Environment
In this command, we will learn how we can easily move the kubectl executable file in the Kubernetes environment. We run the following command for this purpose:
After this command is executed, the kubectl file is moved to the executed kubectl file with the help of the “sudo mv” command parameters into the desired mentioned directory. We need the password of the user to authenticate the sudo command that is entered in the prompt command.
Step 7: Check the Version of the Kubectl Client
Here, we will learn how we can check the version of the kubectl that runs in the client-side Kubernetes environment. We run the following command in our terminal:
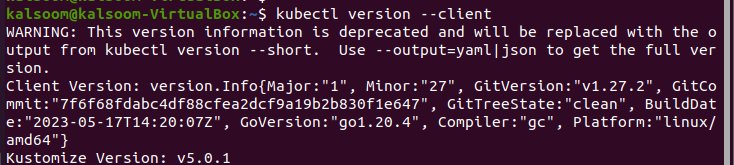
The output is attached in the previous screenshot that we got after the command execution. Please look at the details that are shown in the screenshot very carefully. This screenshot confirms that the kubectl package is running in our system at this time.
Step 8: Forcefully Remove the Kubectl File from the Kubernetes Environment
In this step, we will learn the method through which we can forcefully delete the kubectl binary file from our Kubernetes environment system with the permission of the administration. We run the following command on our Linux terminal:
Run the command. The password of the user is again required to access the administration permission to delete the desired kubectl file directly and forcefully. Here, the “-f” flag is used for forceful implementation. The output is attached here:
![]()
Step 9: Remove the File and Directory from the Kubernetes Environment
In this step, after getting permission from the administration of kubectl forcefully, we delete the directory and file of kubectl from our Kubernetes clusters environment by running the following command:
When this command is executed, the kubectl file and directory are deleted from our Linux system. In this command, we use the “-rf” flag to delete the file and directory both from the system. The command screenshot is also attached in the following for your help:
![]()
Step 10: Check the Version of Kubectl Again in the Client System
In the last step, we run the command to check the version of kubectl again. We check if kubectl is uninstalled successfully or not. Run the following command in your system terminal:

The command is executed, and the output is shown in the terminal that is attached in the previous screenshot. As you can see in the screenshot, it displays the “kubectl not found” message. You can install it through the command.
Conclusion
We conclude that we can easily uninstall the kubectl from our system by running different types of commands. Uninstalling kubectl is sometimes much needed and good for system performance. Hopefully, this article is helpful for you. You can practice these examples to uninstall your kubectl package from your Kubernetes environment.
Source: linuxhint.com